Amusing writing.
There’s an amusing piece by Anthony Lane on the cult of Leica in the September 2007 issue of The New Yorker, a magazine renowned for using three words where one would do.
Click the picture to read.

Amusing writing.
There’s an amusing piece by Anthony Lane on the cult of Leica in the September 2007 issue of The New Yorker, a magazine renowned for using three words where one would do.
Click the picture to read.
The new Leica M?
Call me dated. Say I am out of touch. Ridicule my love of the mechanical age.
I have no problem with any of those accusations as all are true.
So when I wrote a while back, not a little intrigued, of the Panasonic G1, it was for no other reason than that this photographer’s schnozzer sensed a possibility in the making.
Revolution? Why, yes. A modern Leica M for the digital set because, whether you like it or not, we are all members. Meaning small, fast, quiet and with large aperture lenses for low light work.
And we all know who designs the lenses for the best Panny designs, don’t we? Can you say Leica?
These thoughts were brought to the fore when DP Review published its analysis of the Panasonic G1. To cut to the chase, it’s not ready for prime time any more than the L1 (which at least looked like a Leica M) was. But you have to respect where Panny is going with this.
Meaning they are inching closer to the Leica ideal – small, quiet, fast, unobtrusive.
Now all they need to do is throw the design book out of the window and …. take a hard look at the form factor of the Leica M – but 33% smaller this time. And it wouldn’t hurt to have a viewfinder that works in something less than California sunshine.
Some surprising results.
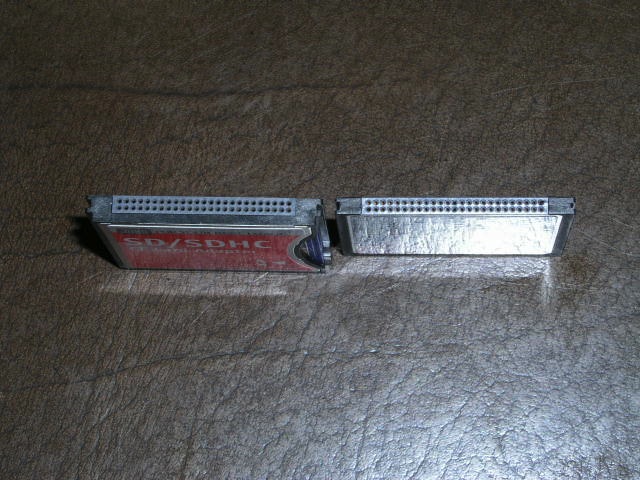
SDHC cards are, let’s face it, the happening thing. With capacities up to 32gB and multiples of that in the offing in a postage stamp-sized medium, CF cards are not going anywhere. Add the fact that one vendor even offers an SDHC card with wireless transmission capability (though it does not support RAW files at the time of writing) and there’s reason to think that the greater bulk and inferior contact mechanism of the CF card (which depends on mating fragile pins with the card as opposed to the SDHC’s far more robust broad wipers) are headed for the technology waste bin. Finally, the burgoening netbook and flash memory markets are not about to use CF cards whereas every netbook and more devices have built-in SD card slots.
So, just for fun, I procured an inexpensive CF-SDHC card adapter ($25) and a bottom-of-the-line Kingston 8gB SDHC card ($18) and tried it in the 5D.
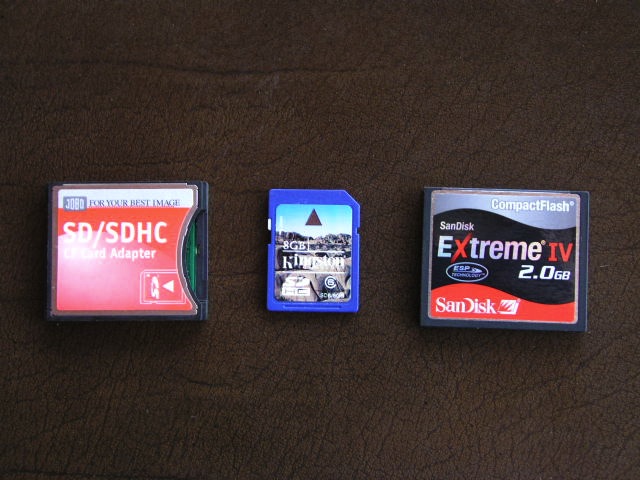
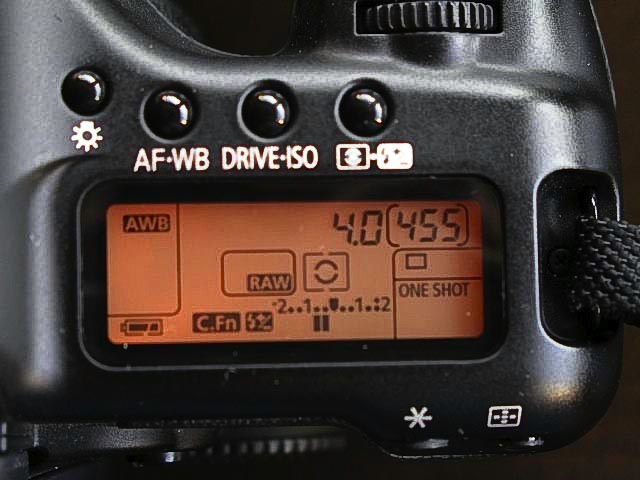
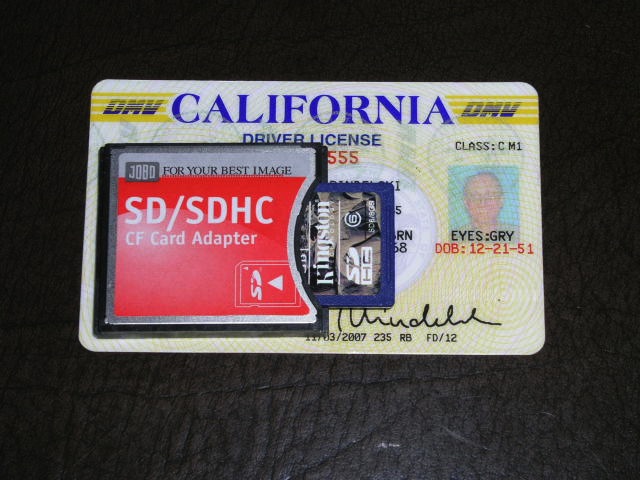
The comparison, for timings, was a top-of-the-line Sandisk Extreme IV. I expected write times to be much faster with the Extreme IV, and they were. Taking 10 snaps in rapid succession in RAW on the 5D, the red light (indicating write status) on the rear of the camera remained on 16 seconds with the Sandisk compared with 39 seconds for the SDHC+adapter combination after taking the last picture. So if serial shooting in vast quantities is your thing, look elsewhere – the 5D has a 17 image RAW buffer so rapid shooters will find themselves bumping up against this – and slowing snap to snap times – with slower cards.
However, when it came to importing the images into Lightroom 2 (I used a Firewire CF card reader for the Sandisk and a cheap Transcend USB reader for the Kingston), import timings were 28 seconds and 26 seconds respectively. The SDHC card was faster! By contrast placing the SDHC card in the CF adapter and using the Firewire reader took 34 seconds – slower still. So SDHC import using an SDHC USB reader beats CF in Firewire!
Why bother? Because I like to use a netbook (with its SDHC slot) on the road and the built in SDHC card reader is a joy to use – no card adapter to forget. And because fast write times mean little to me, I am quite happy to have 450+ pictures available on one card which also fits a broad gamut of other devices in the home. And, maybe one day, Eye-Fi will produce an SDHC card with wifi built-in which supports RAW files. You won’t be seeing that in the CF format any time soon.
My only niggle is that it would have been nice had the adapter been end- rather than side-loading as the design requires removal of the adapter from the 5D to permit removal of the card. But overall, this is a fine value and I would guess the slower write speed in the camera would be made up for by the use of faster cards, if that matters to you. For me, it’s not an issue.
No contest.
It’s not so much ‘Lens of the Year’ as it is ‘Outfit of the Year’ and the choice will surprise none who have been visiting here recently.
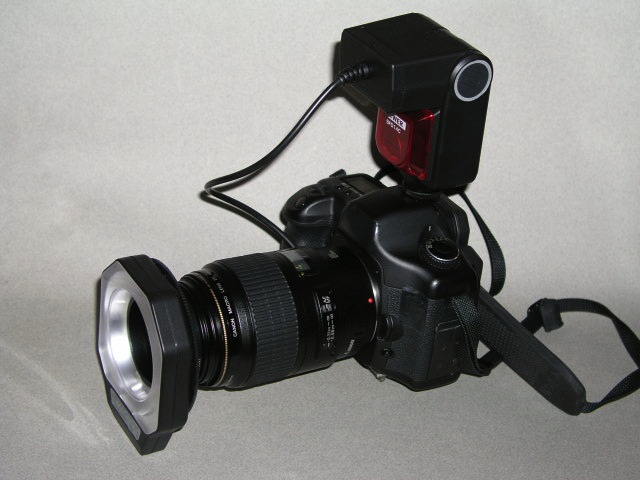
While none of this gear is ‘new’ – the 100mm macro has been around for ages, the 5D is no spring chicken and ring flashes are as old as politicians’ lies – what is so very special about this outfit is how simple the technical side becomes. Back when, in the bad old film days, you used a lens head on a bellows, constantly messed with focus and depth of field, tried to remember the right exposure compensation when the bellows were racked out and then suffered agonies trying to light your subject. Then, when you snapped the picture, you realized that you had forgotten to stop the lens down and were five stops over-exposed.
But Canon obsoleted all of that with a few strokes of genius, doubtless available from other makers also. First, they made the lens fixed length. It does not change in size as you focus. Second, the focus range is continuous from infinity to life size on a full frame sensor body. Third, focus is automatic and blisteringly fast. And, finally, E-TTL makes sure that all those arcane calculations are a thing of the past, computing the optimal blend of natural and flash light on the fly. A nice 100mm length also allows the photographer to step back from the subject, leaving more working room, and throw in the Software of the Year and you have the most perfect macro kit yet.
Thanks to all this magic 100% of your attention can be devoted to the subject and the technology takes care of the back end. This compares well with the automatic gearbox in cars which leaves more brain cycles available for the job of driving rather than shifting gears. Sure, there are people who like to use a clutch. (None of them drive in Formula One, by the way). There are also people who will tell you that film beats digital and good sound ended with the LP era. Have pity on them, while they do their calculations and make incantations to the analog gods of yore. The world will always have its technophobes, most so over-invested in yesterday that they have to defend antiquity.
And it’s not like this wonder lens is wildly expensive, compared to the mess of adapters, bellows, racks etc. in olden days. The lens retails for under $500 and works every bit as well on Canon’s cropped sensor bodies as it does on full frame. The optical and mechanical quality is right up there with Canon’s exalted ‘L’ offerings – I know as I own some. In fact, there’s not a sharper lens in my kit. So add an inexpensive digital Rebel body, splash out another $150 on the ring flash (no need to get Canon’s costly version), and you have the best macro kit out there for under $1,000. What’s that, you say? You want the ability to switch off one side of the ring flash tube for better modeling effects like the Canon one does? Well, dear reader, I have two words for you. Black tape. You stick it over one half of the flash tube in the same way you stick it on your camera to obliterate all those gauche manufacturer’s markings. Now that’s what I call a bargain.
The Canon EF 100mm f/2.8 USM Macro autofocus lens is the Lens of the Year.
Still waiting.
Modern DSLRs are superbly competent, have great lens choices, come in a variety of sensor formats and enjoy minimal shutter and focus lag. They come from any number of manufacturers and share two bad features – they are bulky and noisy. The Mark II and Mark III variants do nothing to fix this and are very much in the land of diminishing returns, but it’s nice to see that Canon now has two full frame manufacturers to compete with – Nikon and Sony/Minolta. Best of all, by introducing the 5D Mark II, Canon has done a real number on the resale value of the Mark I and I expect you will be able to find lightly used Mark I bodies in 2009 for under $1,000.
Street and advanced casual snappers want something small, fast and quiet in their pocket when not hauling around the DSLR and they want a decent sized sensor, not one of those ridiculous fingernail sized things found in nearly every compact digital. They want instant on, couldn’t care less about the LCD screen, want an optical viewfinder and auto focus. They want a proper buffer so that snap-to-snap times are very short and they want a semi-wide angle non-zoom lens which suffices for most of the work the camera will be expected to do.
In other words, they want a digital Leica without the antiquated feature set, bulk, dated manual focusing and overpriced lenses of the Leica M8.
Well, we are not much closer to getting that in 2008 than we were in 2007.
Sure, the Sigma DP-1 is a compact with a large APS-C sensor capable of big, noise free enlargements. But everything else about it is wrong. The fixed focus length lens extends and retracts (why, for goodness sake?) making start-up times ridiculous and the whole thing sports what must be one of the worst user interfaces ever. The lens is also ridiculously slow for what you get.
The Panasonic G1 has some promise, dropping the SLR mirror, adding a competent electronic viewfinder for through-the-lens viewing, but pointlessly retaining the SLR form.
And that’s about it. The Panasonic LX-1, now in its third iteration, does some things right (so-so shutter lag, quiet, small, Leica optics) but has a lousy, small sensor and the lens extends and retracts. At least they now include an accessory shoe in the LX-3, meaning you no longer have to glue on your viewfinder the way I did.
Here’s what mystifies me. Given the sheer number of DSLR users, each wanting something small, simple and fast for fun use, why can none of the world’s camera makers get it right and put out a minimally featured digital point-and-shot with a fast 35mm f/2 non-retractable fixed focus lens, a big sensor and no shutter lag. How hard is that? They could sell these for $500 all day long.
So the Camera of the Year award goes to …. no one. The big manufacturers continue to refine their DSLRs to ridiculous extremes and continue to miss a vast, unserved sector – the very users of those DSLRs who no longer need to upgrade to 10 frames per second or 600mm f/2.8 lenses with IS.
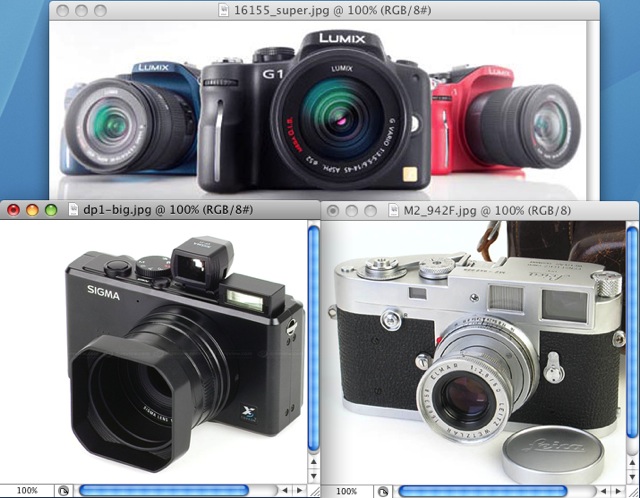
Take the lens and lack of shutter lag from the Leica, the electronic viewfinder and mirrorless/prismless design of the G1 and add the Sigma’s big sensor and you have a winner. Come to think of it, make two versions – one with a 35mm f/2 and the other with a 75mm f/2 lens. The size should be somewhere between the Leica M (too bulky) and the LX-1 (too small). Forget about Live View, face detection, wifi, interchangeable lenses, IS and all that other nonsense, sell them stripped and bare and photographers will make a line at your door.