Category Archives: Hardware

Stuff

Nikon D700 Guide by Thom Hogan

The book the factory never published.

I wrote earlier about the poorly thought out Nikon factory manual which comes with the D700. So when esteemed New York photographer Joseph O. Holmes recommended the one written by Thom Hogan, I paid attention. Joe’s life is all about making pictures, not collecting gear, so that opinion meant a lot. On his blog, Joe writes:

A bit of checking on the author disclosed he is a long time Nikon expert, so I ponied up the $80 for the book and PDF version. Hogan does not sell a downloadable PDF, probably to control theft, so you have to wait on the USPS to do its thing. Now that the Apple iBookstore is up and running, hopefully he will offer the upcoming book for the D800 through that distribution medium, where DRM protection should prevent illegal copying far better, and where shipping and packaging costs are zero. The offset is the 30% distribution fee charged by Apple.
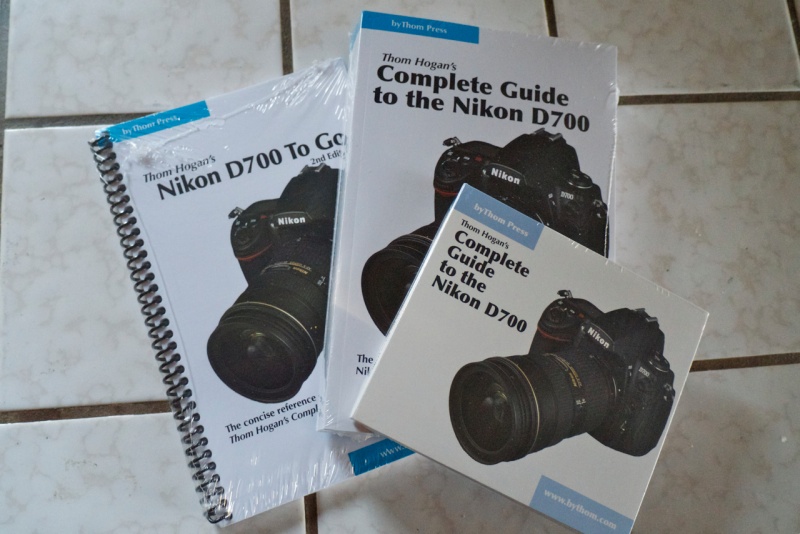
As shipped.

While you can get just the PDF on CD with the spiral bound pocket guide, I opted for the version which also adds the 800 page (!) paperback, all for $80. In retrospect that was wrong. The $47 CD version is the best choice if you have an iPad. I moved the PDF to my iPad 1 and it’s a far better reading experience, using GoodReader. In addition to all the quick search and find, bookmarking and annotation functions offered by GoodReader in the iPad version, the definition in photographs is far better – and in color – than that offered by the mass market printing adopted for the book, an understandable economy. Let’s also hope that the D800 version has dynamic links in the index, so that the reader will simply be able to touch a page number to go there. Finally, the next book should also include the handy ‘To Go’ 120 page summary in electronic format, for use on an iPad. In the one I received the ‘To Go’ booklet is available in spiral bound, printed form only.

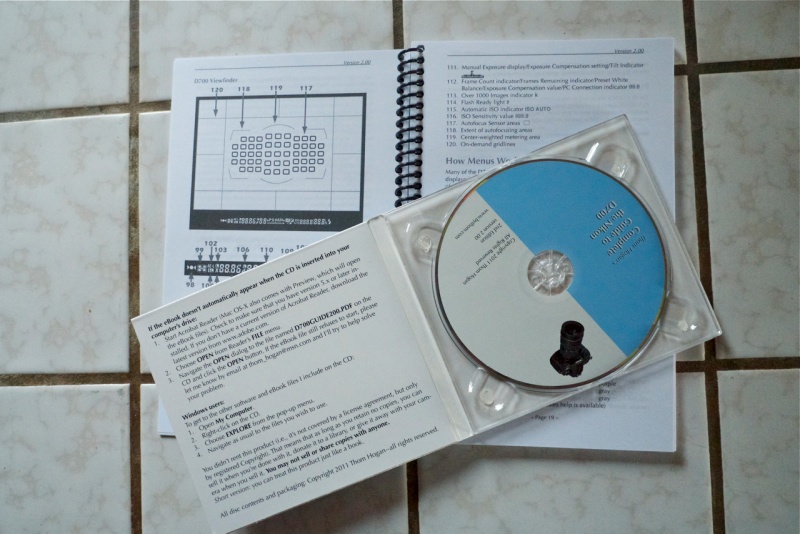
The CD and the To Go spiral bound summary guide.

Neither the DRM Apple distribution channel (or Kindle for that matter) or easy dynamic linking were available when this PDF was put together some four years ago, so it’s not so much a criticism as a request. Excluding shipping the CD sells for $40, so sell it for $56 through the Apple Bookstore and you still net $40. Would I pay $56 for this download? You bet. The book is excellent. For a $2,000+ camera body, and additional $50 or so to get the best out of the hardware is a modest sum.

Thom writes in response to the above:

“I don’t sell downloads because downloads aren’t actually sales, they’re rentals covered by a license agreement. The way I sell my ebook means that people can treat it just like a regular book. In other words, it has value, and can be sold when you’re done with it (assuming you don’t keep copies). Try that with a DRM book. I’m considering making a change in the future, however, that will also means drastic changes in what you can and can’t do with my books, which is a shame.”

An 800 page manual is overwhelming at first, but once you learn to take it in small installments, camera to hand, you quickly realize just how expert Thom Hogan is and how well he writes. It was no surprise to learn that he was the software architect behind the wonderful Osborne One computer, my first, which I bought in 1981. That machine taught me Wordstar, Supercalc and dBase II, all of which came packaged with Gary Kildall’s superb CP/M operating system and gave me a massive jump on the competition when it came to computer competence – the word processing, spreadsheet and database skills readily transferred to the fabulous IBM PC when that machine was announced. Thom Hogan’s skill with software design transitions easily to his technical writing, which is of a high standard.

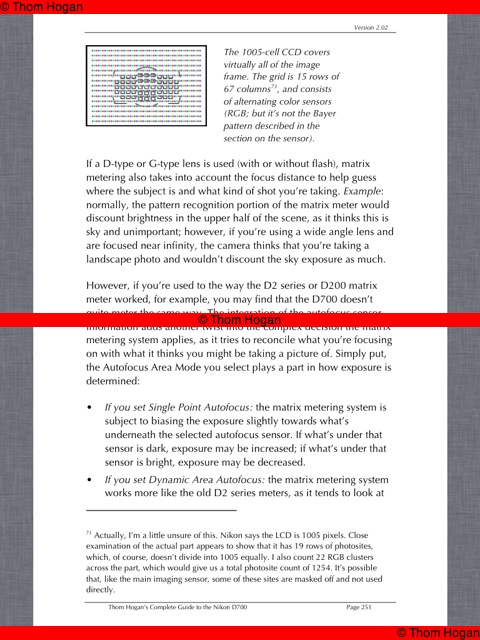
As an example, take a look at this extract where he explains the vagaries of matrix metering in the D700:

“Wow! I didn’t know that!” is a recurring reaction when reading this manual.

Here’s a case in point. Try as I might, I simply could not get exposure bracketing to work using the factory manual. The D700’s capabilities in this regard, along with the time lapse intervalometer which is built into the body are extraordinarily flexible …. and complex. I didn’t even know there was an intervalometer! Thom Hogan’s manual made it easy to understand how to set up auto-bracketing and how to avoid the need to have to count how many exposures in the bracketing sequence have been made. As the D700 can bracket up to nine (!) exposures that’s a non-trivial capability. The benefits of bracketing in conferrring massive 11-12 stop dynamic range with minimal noise are exceptional and the Hogan guide makes it all clear. And I thought my (second hand) D700 was faulty until I learned better! Worth the price of the manual alone.

Another example. Did you know the camera can be set to take multiple exposures – up to 10 – merging these into one file? Another lesson learned.

If you are prepared to take the time to digest this book you will come away far better informed and superbly equipped to really wring the very best performance out of the D700, or for that matter, any Nikon for which you buy one of Thom Hogan’s guides. I would expect his D4 and D800/D800E versions to be hot sellers, based on this. Highly recommended. This is the user guide the factory never published.

A cheap wireless remote

RF is the way to go.

The Oppilas wireless remote uses radio waves at 2.4gHz, in preferences to Infra Red beams. This means line-of-sight between trigger and camera is not required and also results in an enormous range. I gave up counting at 50 feet and 100 feet is claimed. The camera end goes in the hot shoe, where it can be locked down, and the Nikon bodies using the provided ten pin connector are listed above.

On the D700. The ten pin connector can also be secured using the chrome ring.

The trigger, just under four inches long and very lightweight, has four settings in addition to the on-off and firing buttons. They are single frame, continuous, Bulb and a very handy self-timer. To get Bulb to work the camera’s Mode has to be on ‘M’ and the shutter speed set to ‘Bulb’. Thereafter a first pressure on the remote’s button opens the shutter, a second one closes it. The self timer delay is some 5 seconds. Its use is not so much to allow you to rush into the picture – with a 100 foot trigger range you just take the transmitter with you, of course – but to let vibrations die down in the camera when on a tripod. Use the mirror lock-up feature to further help things and you can get away with shutter speeds in the critical 1/15-1/60th range where mirror slap tends to make for a significant definition robbing effect.

The trigger.

I bought mine from eFraud in the US for all of $22.90 shipped. One of the best features, in contrast to similar remotes I have bought for my 5D and G1/G3, is that neither receiver or transmitter uses exotic, costly batteries. Each makes do with two AAA cells, and four such batteries are provided with the device, along with the usual comical Chinglish instructions. The maker claims a 300 hour standy-by life for the receiver batteries, and 3 years for those in the transmitter! In practice, the receiver is switched off when not in use, and it’s hard to forget as it blinks a red diode when on, so the practical receiver battery life is likely many times that stated.

The only anomaly I have encountered so far is that when the receiver is plugged in to the D700’s ten pin socket, the LCD on the rear of the camera goes dead. Neither menus nor image preview can be invoked. You can fix this by using the receiver with a 2.5mm cable connected to a GPS receiver inserted in the nine pin socket – see the Comments below for details.

A friend in the UK bought one from eFraudUK for a Canon 40D – only the connecting cable differs, and has had like success with it. This device is highly recommended.

I cannot find a Nikon branded device with like specs, but if it exists prepare to have your wallet emptied.

Converting old MF Nikkors

Bringing classics back to life.

Nikon’s Nikkor lenses, made through the early 1970s, were strangers to plastic. Brass and alloys were the order of the day, right down to that gorgeous scalloped metal focusing collar. These come with the meter coupling prong used on the old Photomic metering heads on the Nikon F and Nikkormat bodies of the era, redundant on modern digital bodies. But, while Nikon made their later lenses ‘AI’ (Auto aperture Indexing), these old masters will not fit a modern DSLR. A sector has to be milled from the rear of the aperture ring to permit fitting and to index the lenses’ maximum aperture if the metering system is to work correctly.

You can get a sense of what I’m talking about by simply feasting your eyes on my latest acquisition, a 200mm f/4 Nikkor-Q lens, made in 1971. Simply gorgeous to handle and behold, with optical quality to match. Markings are engraved and paint-filled, and of very high quality. The whole thing is a beautiful, thoroughly engineered tool.

They simply do not make them like that any more. The lens hood is built-in.

Here’s the rear of a Nikkor of that era before AI conversion:


Arrow denotes lip.

As you can see, the small lip protruding from the rear of the aperture ring does so all the way around. It prevents the lens from mounting on a modern DSLR body.

And here’s a Nikkor which has had the AI conversion done:


The arrows show the limits of the milled arc.

I own two such classic Nikkors, a 50mm f/2 and the 200mm f/4 above, and had both converted to AI specifications by John White of Ann Arbor, Michigan, a highly regarded source for such work.


Click the picture to go to John White’s site.

The turnaround time is about a week, and the cost $33 including shipping. Mr. White is polite, answers emails promptly and is a pleasure to deal with. After conversion, lenses work perfectly on my Nikon D700 body, though you have to remember to dial in the right ‘non-CPU lens’ setting if you want correct EXIF data stored with the image file.

And the cost of that mint 200mm gem? Would you believe $29? Yes, twenty nine dollars. With conversion and shipping the total cost came to $75.

1972 50mm lens on a 2012 body.

It’s not easy to describe the sensual pleasure of using these old lenses. The best I can do by way of analogy is to say that, after using their modern equivalents, it’s comparable to the difference in telling time on a mechanical watch compared to a digital timepiece. Both serve identical purposes but there’s only one you return to with eager anticipation and that silent thrill that has you thinking “Wow! Do I really own this?” Form and function are one.

These classics are abundantly available and, if you can live without VR and autofocus, worthy of serious consideration. You can be sure of two things. They will outlive you and they go for the price of a sushi dinner.

Obligatory snap of the long suffering Bert, at f/5.6.

Some people use a brick wall to test lenses. Chez Pindelski the test chart is none other than Bertram, the Border Terrier.

For more snaps taken with the 50mm Nikkor lens, click here.

For DIY instructions on AI conversion of old Nikkors, click here.

Cheap, not nasty

A few from the 75-150mm Series E lens.

The trade offs with these older, inexpensive Nikon lenses are simple. You give up AF and VR and save on cost, weight and bulk. It means that everything is slower in practice and only the user can decide if that matters.

But the one thing you most certainly do not sacrifice, based on my early experience with the budget 75-150mm Series E Nikon zoom, is definition. It’s superb.

Statuesque. D700, ISO 800.

Nap. Same data.

Cell call. Same data.

Window detail – 1895. Same data.

Burlingame station – 1895. At 150mm. Same data.

Station detail – in heavy shadow. At 100mm. Same data.

Enlarged section of the above. Taken at f/5.6. Definition
is the same across the frame. Flare is handled well.

Nikkor Series E 75-150 mm f/3.5 MF zoom lens

An absolute sweetheart.

Our son Winston does karate in a down-on-its-luck area whose great redeeming quality is the presence of Kaufmann’s Cameras, one of the few remaining camera stores in these parts, 57 years in business, the last 21 at the same location on West 25th Avenue in San Mateo.

They have half a dozen consignment cases full of old film gear, languishing sadly (they keep a 30% commission).

I swung by when Winnie was doing yet another of his never ending belt tests yesterday (it’s their annuity income stream) and spotted one of the bargain label Nikon-E optics, the 75-150mm f/3.5 for sale, in mint condition. Small, 52mm filter, trombone zoom, MF of course and a fixed f/3.5 maximum aperture. A quick check on the iPad disclosed it’s a highly regarded optic, all metal, and the one Kaufmann’s had on consignment was mint, complete with UV filter and rear cap.

As generally seems to be the case the zoom trombone will move with gravity; two minutes with electrician’s black vinyl tape saw a strip applied underneath and the problem was solved.


Series E 75-150mm Nikon lens.

Definition is super, with the merest hint of red fringing at 75mm, with slight vignetting at 150mm, both easily remedied in LR3. There’s no air pumping as you operate the trombone as the rear element is fixed – nice! That means no blast of airborne dirt in the direction of the camera’s innards as you zoom. The aperture ring is really close to the flange and takes some getting used to. Full click stops only with a fine solid feel. Zooming does not change the length, focus does, with a 3/4″ extension and a 200 degree rotation. It focuses to a very close 3 feet. At 150mm that’s pretty close. Both zooming and focus are wonderfully smooth and perfectly damped. Out of focus areas are nicely rendered. Both the front and rear glass elements are pretty much exposed, so a filter/rear cap make sense.

As there is no CPU in the lens to communicate focal length the D700 has to be told manually which length is in use if you want correct EXIF data. Up to nine various settings are allowed. The ‘Non CPU lens’ setting on the D700 does not have zoom options, so I set it at 86mm and f/3.5 and exposure automation is fine, with the usual focus confirmation. 86mm? It’s one of the strange options available and not likely to be confused with anything else when looking at EXIF data! Balance on the D700 is just so. Comfortable. All the markings on the lens are engraved and paint filled. Like they used to make them. No screen printing. I like that.

Cost? Would you believe $85 with filter and rear cap for a lightweight, high quality zoom with a fixed and fast f/3.5 maximum aperture? What’s not to like? It may have been Nikon’s ‘bargain’ line but there are no signs of cost cutting in either execution or performance. A wonderful adjunct to the 16-35mm ultra-wide zoom – similar length, much smaller diameter, similar weight. As I have no intention of carrying around a 70-200mm f/2.8 autofocus VR zoom weighing in at 3.3lbs and measuring 8.1″ in length (against 1.5 lbs and 5.2″ for the 75-150) I am happy to sacrifice AF, VR, the long end, the weight and the bulk. And did I mention this little sweetheart is some $2,300 less?


Brooding Bert, 75-150mm Nikkor Series E @ 150mm, f/4 at closest focus.

Higly recommended if you are OK with manual focus and a perfect companion to an ultrawide zoom as part of a ‘do (almost) everything’ outfit.


Someone needs to lose weight ….

The Nikkor 75-150 budget zoom is an absolute sweetheart and costs a lot less than any sweetheart ever will. And while you are spending wildly on one of these gems, throw in a new Nikon HR-1 collapsible rubber screw-in lens hood for all of $15, which makes sense given the flare-prone, exposed front element. The original metal 52mm screw-in hood, HN-21, is hard to find.

You can download my custom lens correction profile for this lens, best used once a CPU has been installed in the lens, here.

CPU installation:

My lens is s/n 1814651, early all black design, (Sept. 1980) and permits a simple glue-on installation of the CPU. However, after correspondence with a reader it became clear that somewhere in the first run of these lenses, the all black ones like mine, s/n 1790801-1860019, Nikon changed the design and started using a much thicker baffle in the area where the CPU has to be installed. This means that the baffle will have to be removed and an arc machined out to accommodate the CPU. I do not know exactly where the change in design occurred, but the lens already used the thicker baffle at s/n 1837859. If any other readers are converting this lens, please drop me a line with your s/n so that I can narrow down the change point, for future reference. The later version with the chrome ring, s/n 1890001 and up appears to use the thicker baffle.