Category Archives: Hardware

Stuff

Nikkor-HC Auto 50mm f/2 lens

An ancient lens made even better.

I wrote about the excellent standard 50mm Nikkor lens for film SLRs years ago here. That lens first saw the light of day on the Nikon F in 1964 and Nikon made hundreds of thousands of them, a fair reflection of this optic’s outstanding performance, small size and toughness.

The last version made in the classic scalloped, metal focus collar style came to market in late 1972 and was optically identical with the happy addition of multicoating for better performance when bright light sources were in the image.

I had given away my 50mm f/2 H to a friend when the 50mm f/1.4 came along, that lens’s greater bulk balancing far better on the large DSLR bodies.

The f/2 continued to be made in later mounts with rubberized focus collars through 1979, though the optical formula remained unchanged.

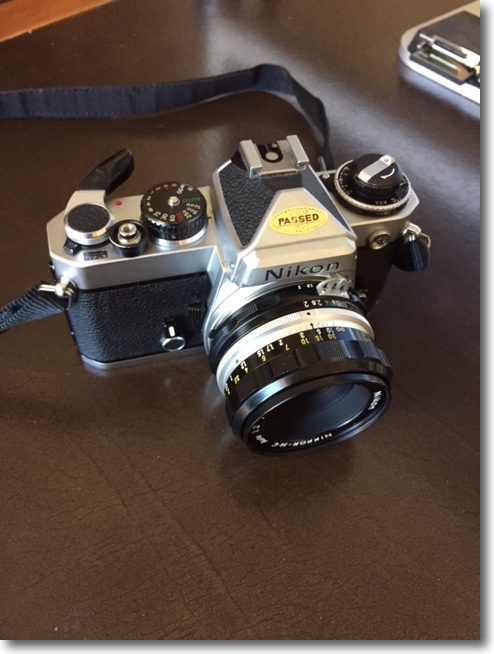
When I recently added a film era Nikon FE to my little hardware collection I found I was hankering for the original 50mm f/2 as its small size would perfectly complement the compact FE body, and managed to snap up a mint HC, factory converted to Ai no less, for all of $70. Yes, I could have bought a beater for half that but why would you want to save $35 and suffer mental anguish every time you looked at the scarred black anodized finish which is as ugly as it gets? Here it is, mounted on the FE, the satin black front ring denoting multicoating, replacing the silver one on single coated lenses:

The factory Ai ring adds a second row of aperture digits which is read by the small mirrored assembly in the base of the camera’s prism and reflected into the viewfinder. Nice – you can see shutter speed and aperture through the eyepiece.

Nikon has a remarkably honest assessment of this optic’s performance on its site here and their statement about performance accords exactly with my experience:

The very minor vignetting at full aperture along with mild barrel distortion are both easily corrected using my lens correction profile in PS or LR and, if you install a CPU in the lens then that profile can be invoked automatically when you load your images into LR. CPU installation is very easy as no machining is required and the ‘Dandelion’ CPU can be found from commie vendors on eBay – just search for ‘Dandelion chip’, all of $20. My link in this paragraph includes my installation (Part I) and programming instructions (Part II) and you will not find any better. I have installed around thirty of these and they continue working fine after many years.

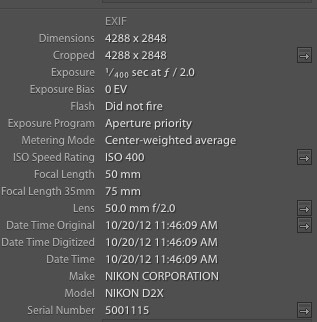
Here’s how the lens’s data appear – automatically – in Lightroom, for images made with a digital camera:

I find lens EXIF data extremely useful in the image catalog for, when searching for some long forgotten image, I tend to remember the lens used more than anything else. In the example above the image was snapped on the D2x with its 1.5x crop factor.

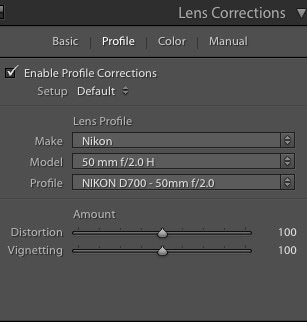
Here’s the data on the lens correction profile – while the image was snapped on the D2x, the profile was created on the D700 and that’s what I put in the file name for the profile:

The 50mm f/2 Nikkor is recommended without reservation and can be found in any condition you like for very little. You get Leica Summicron performance for 5% of the outlay and if you drop it, heck, buy another. Plus, it’s better made than the Leica lens.


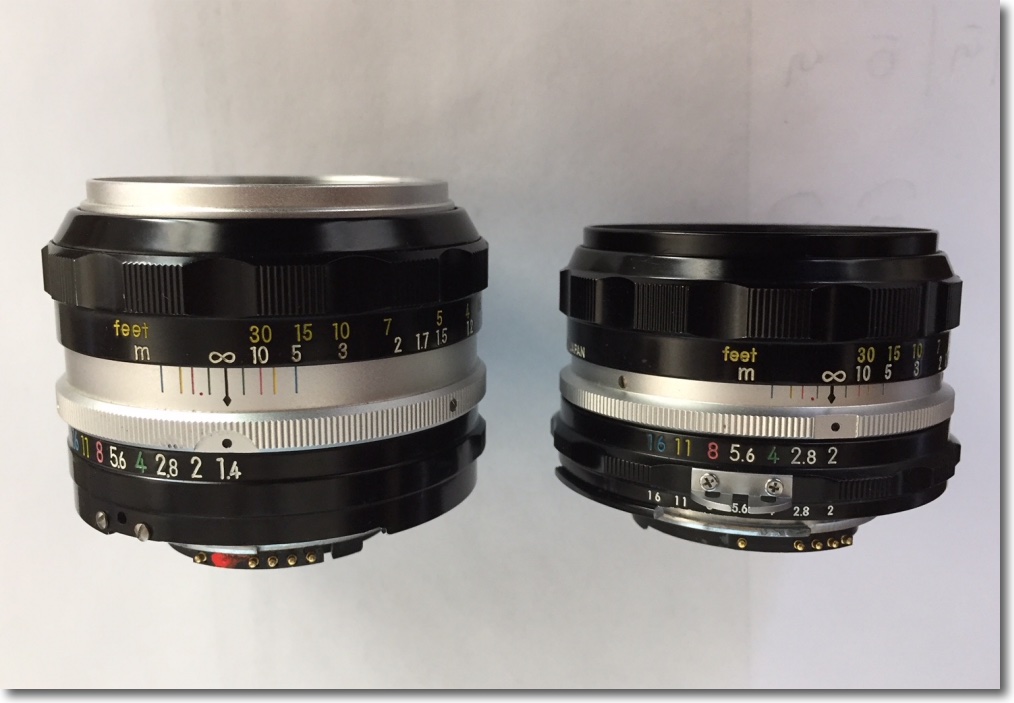
The f/1.4 is larger and heavier. The epoxy is still drying on the f/2’s CPU!


An old friend. Nikon D2x, 50mm Nikkor H at f/2.

And while I’m at it, if you want a truly unbreakable DSLR in APS-C format for well under $500, you can do a lot worse than the Nikon D2x, which is backward compatible with almost every Nikkor ever made. At 12mp it’s no pixel monster but that’s fine for up to 40″ x 60″ prints and, of course, you make those all the time, right?

Field tests:

You can judge the extent to which the lens vignettes from the sky in these two images:


At f/2, straight out of camera.


At f/2, using my lens correction profile.


Center and edge definition – note the EXIF data from Lightroom in these screenshots, conferred by the newly installed CPU:


Center definition at f/2, 48″ x 72″ print. Note the gentle rendering out-of-focus areas.


Center definition at f/4, 48″ x 72″ print.


Extreme edge definition at f/4.


Like I said, Leica Summicron optics at a fraction of the price. Comparing performance in the extreme corners with that of the 50mm f/1.4 Nikkor of like vintage, the f/2 optic shows no noticeable flare compared with the f/1.4 (probably thanks to the multi-coating in the f/2) and is one stop sharper, meaning that the f/2 is as good at f/2 as the f/1.4 is at f/2.8. That said, either lens will make fine large prints at full aperture, sharp enough to please all but the meanest pixel peepers.

The cardinal returns

This time I was ready.

The bird is very shy, and wary of the rapacious quail and doves which dominate the feeder. If doves are the ornithological world’s idea of timidity then I fancy I would rather keep the company of vultures. An early attempt appears here.

The cardinal is impossible to miss. One’s peripheral vision immediately catches the flash of bright red, like an electric shock to the system.

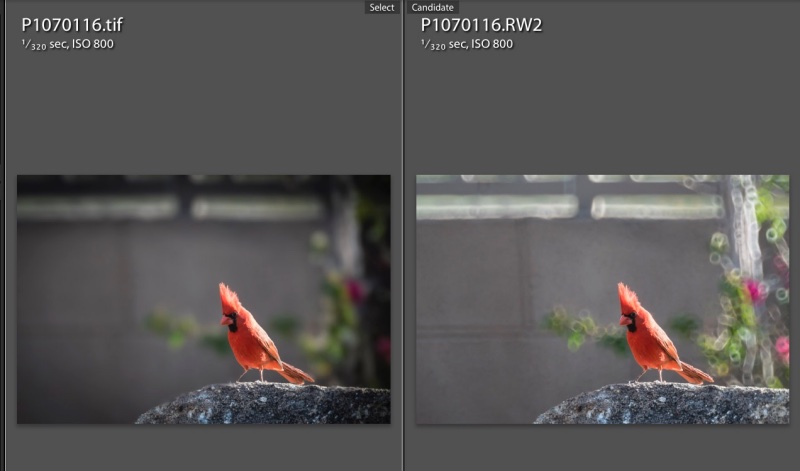
This time I was better prepared, the 500mm Reflex Nikkor attached to the Panny GX7 set at ISO800 which delivered 1/320 second. This at the lens’s fixed f/8 aperture. While hand-held, that’s poor technique as a 1,000mm FFE optic really needs a solid support. I got lucky, aided by the critical focus option in the Panny which permits enlargement of a selected area for proper focus. Of the twenty snaps the first (go figure!) was the only one usable. I would guess that depth of field at 30 feet distant is no more than a couple of inches. The image is from the full frame. I passed the file through PS to remove the out-of-focus ‘donuts’ typical with catadioptric lenses, and often quite distracting. More on that technique appears in the link in this paragraph.

In lieu of the use of Mirror Lock Up which I advocate with a conventional DSLR to cut vibration, I use the GX7’s silent and vibration-free electronic shutter. A Panasonic MFT body is superior in every way to a conventional mirrored DSLR with this lens if you need 1,000mm FFE. You get a vibrationless electronic shutter, a very light rig which can be easily carried slung over the shoulder all day, Panny’s superior magnified focus aid and, best of all, a bright finder image as the electronics automatically adjust for the small f/8 aperture. And to get 1,000mm FFE with the full frame DSLR you have to cut out a large part of the image in processing, rendering your DSLR’s sensor effective pixel count the same as the lower spec of the MFT’s sensor.

Here are the ‘after’ and ‘before’ images:

The Reflex is a special lens, small, light with delightfully smooth focus action, but easy to use it is not. Add a small, nervous subject and you have your work cut out for you.

To learn more of the design history of Nikkor’s reflex optics under Teruyoshi Tsunashima click here.


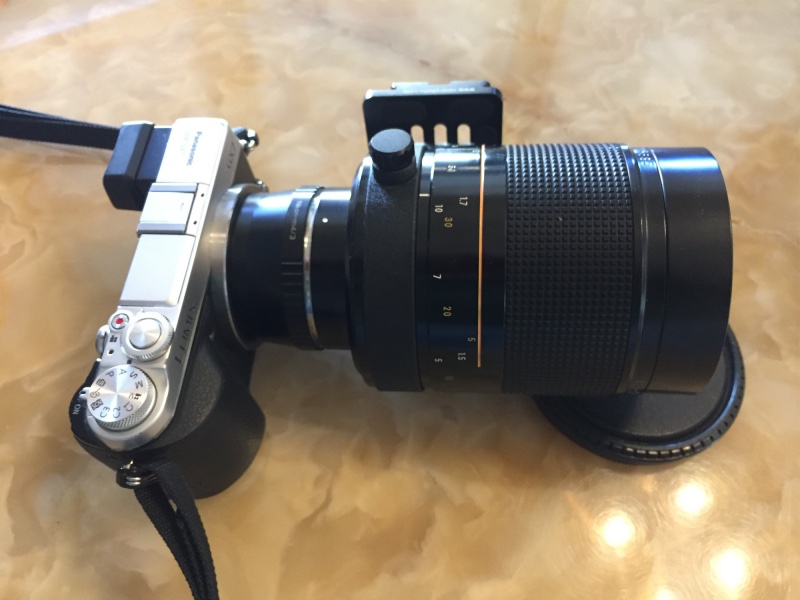
GX7 with the adapted 500mm Reflex Nikkor. Arca-style QR plate fitted.

Apple. Con.

Don’t be fooled.

Many have accused Tim Cook, Apple’s CEO, of being nothing more than a number cruncher, a man untroubled by original thoughts.

The dearth of inventions since Steve Jobs died certainly adds credence to that opinion, and Cook’s financial engineering skills are testified to by the latest iPad campaign. This campaign, as I will show, is nothing more than a confidence trick in pricing.


$329 gets you very little.

Apple targeted the education market early on with its Apple II and Macintosh computers and did well. With the Mac’s introduction in 1984, students finally saw on the screen what they could print and the desktop computing world would never be the same. Then, around the fall of 2001 when the first iPod was introduced, Apple’s focus on the education market started to blur, to a point where now few in schools use Apple hardware. The iMac is ridiculously overpriced for what it delivers and the iPad is useless.

But that does not deter Mr. Green Eyeshades from trying to revitalize what is increasingly a failed product line – the iPad. His teaser offer to schools, a whopping $30 off to students, puts the device in your child’s hands, where it is waiting to be dropped, for $299.

But Wait! There’s More!

The stock memory of 16Gb (sixteen Gb!) is a straight forward cheat for what is a memory hungry device. Evert tried using a 16Gb iPad. I have. Useless once you have an app or two running. Thus you need the upgraded memory model, so add $100. The keyboard in the iPad is useless for extended typing, the sort of thing students have to do when cranking out those pieces on Richard III and his many depredations. So add a wireless keyboard (forget trying to use a wired one) and Apple has your number for a mere $93. Want to use that Apple Pencil to draw on the screen? $90 more. (Wow! $90 for a pencil ….) Then you have to support the tablet at 45 degrees to make it remotely usable at a desk and, hey, there goes another $20 and say hasta la vista to the iPad’s vaunted portability. And you don’t want little Johnny scratching that screen now, do you, so throw in $15 for a wallet/pouch. Let’s see, that’s $617. Plus tax.

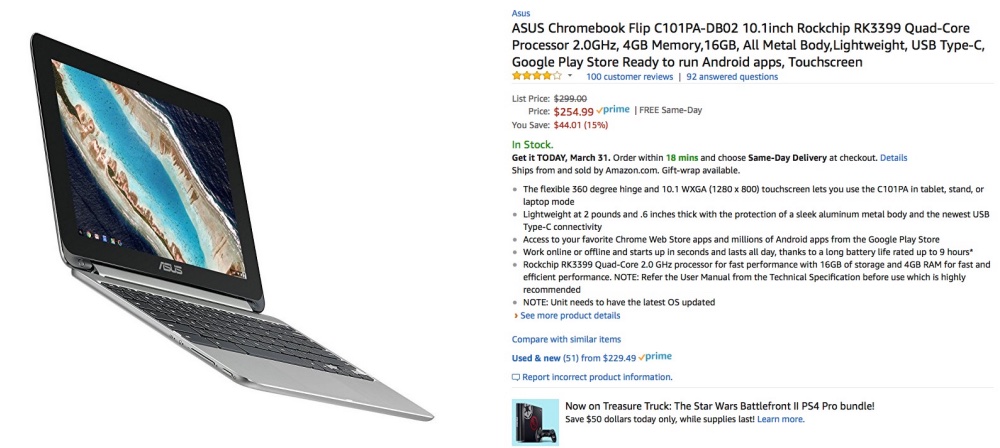
Now let’s see what the sensible parent is buying. It’s called a Chromebook, comes with a folding screen like any laptop, no case needed, has a trackpad for drawing and all you need add is a mouse. Maybe not even that. Amazon lists some 500 of these little hummers for under $500. For the most part it’s hard to spend $250. Memory use is smart so you do not need much. Oh! and don’t forget too add $10 for a mouse. The laptop comes with the Google suite of apps (spreadsheet, word processor, calendar) and why, all 650 students and 120 faculty at my son’s prep school use those apps and no one is complaining.

Apple. Con.


A typical Chromebook. Touchscreen and tablet functionality included.

Big small storage

2.5″ spinning hard drives.


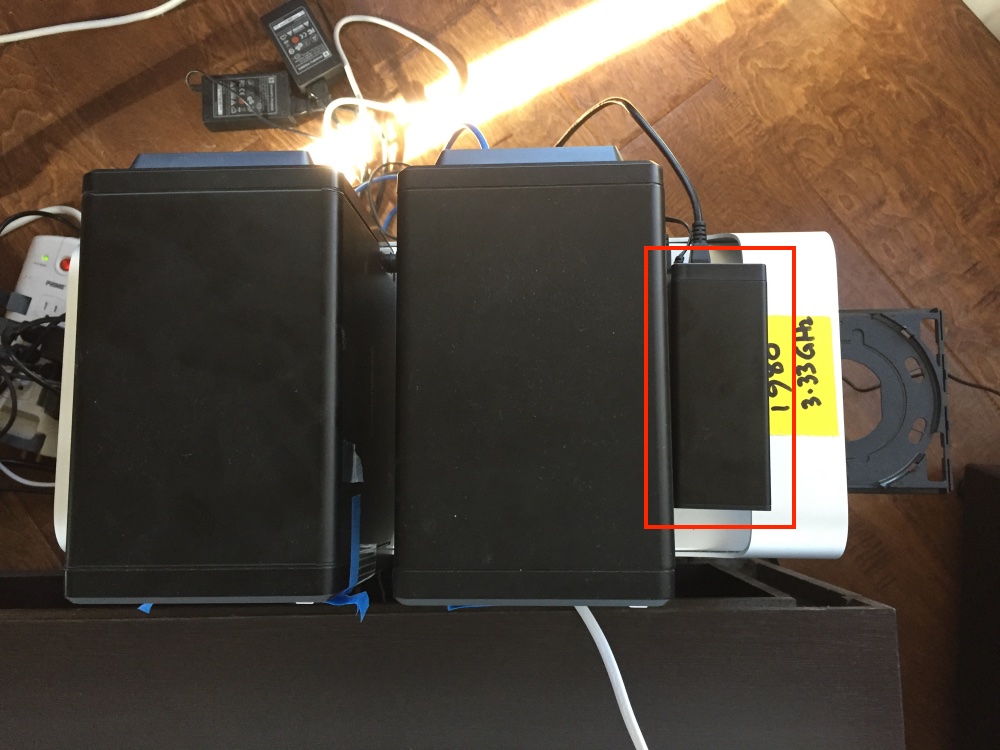
Dual 2.5″ drive enclosure compared to 4 bay 3.5″ behemoths. As the yellow label discloses, this Mac Pro runs a speedy 3.33GHz CPU.

As my movie collection grows, not helped by the 25GB size of ripped BluRay discs (compared with but 4GB for regular DVDs), so does the need for storage space.

Heretofore I have used Mediasonic 4-bay 3.5″ drive enclosures at $100 for the 4-bay version, and they have performed flawlessly for over 5 years now, loaded with Western Digital Red 4TB hard drives. The drives now retail for $135, which is a lot more than I paid years ago. The blue tape on these which you can just make out in the picture is to blank off the obnoxiously bright flashing LEDs on the fascia.

With traditional spinning disk technology refusing to die, and SSD prices still far too high for bulk storage, the much more compact 2.5″ hard drives have made huge leaps. 4TB capacities are now readily available in the smaller drive size. Seagate makes 4TB 15mm thick drives for $130 and two of these fit an inexpensive $40 enclosure. There are many versions available; just make sure the one you order will accommodate 15mm drives, which are a good deal thicker than the typical notebook drive. So the cost per 4TB of 2.5″ storage figures to $150, compared with $160 for the older tech 3.5″ drives, with great savings in space and, as importantly, far lower power draw. The enclosure of choice used here supports USB3 (though USB2 is perfectly adequate for movies) and comes with both USB2 and USB3 cables, as well as a power supply. I have added USB3 – having run out of USB2 sockets – using an Inateck USB3 PCIe card; the Mac Pro comes with USB2 native ports only and I happened to have a spare card lying around. USB3 is not a requirement here. The price of this card appears to have more than doubled since I bought mine.

A 4TB drive (the second drive is a back-up clone) will store some 160 BluRay disks, so this big little addition should see me happy for another year or two. The cost of storage per movie, along with the backup clone, figures at just $1.88.

LG Electronics OLED65C7P 65-Inch 4K Ultra HD Smart OLED TV

The state of the art.

Update October 14, 2024: The sound became intermittent in the LG OLED TV, necessitating replacement of the motherboard, a process I illustrate here.

Five years ago I updated my 42″ Vizio LCD TV to a 55″ model, and the saga appeared here.

At the conclusion of that piece, after two years’ use, I wrote:

Technology has moved on and since that $700 LCD TV of yore we have seen the introduction of LED panels – thinner and lighter – and the more recent development of OLED displays, one also found in the much hyped iPhone X. And 4K, meaning 2160 pixels to the inch compared with 1080 for regular HD, is now mainstream.

From Wikipedia:

“An organic light-emitting diode (OLED) is a light-emitting diode (LED) in which the emissive electroluminescent layer is a film of organic compound that emits light in response to an electric current. This layer of organic semiconductor is situated between two electrodes; typically, at least one of these electrodes is transparent. OLEDs are used to create digital displays in devices such as television screens, computer monitors, portable systems such as mobile phones, handheld game consoles and PDAs. A major area of research is the development of white OLED devices for use in solid-state lighting applications.”

The bottom line is a picture with pitch black blacks and a very high dynamic range; quite literally like nothing seen before in flat panel technology.

Now this gain does not come cheap. I decided to up the panel size to 65″ diagonal, having more room in my Scottsdale home than in the Bay Area apartment of yore. That’s a 40% increase in display area (the ratio of the squares of the diagonals) yet the increase in TV width is but four inches. Here’s why:
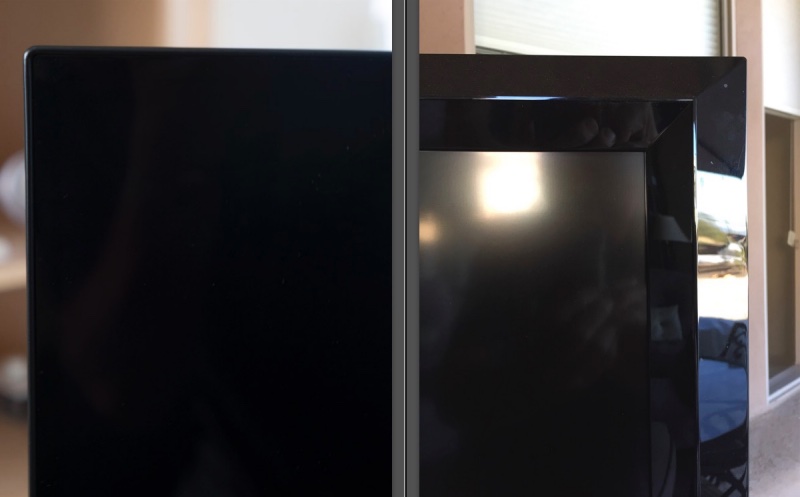

The LG bezel at left, Vizio at right.

LG has worked miracles with this display, for the bezel is almost non-existent, compared with the 1.5″ one on the Vizio. So that’s an immediate width reduction of almost 3″ in the LG, offsetting the larger screen dimensions.

But it gets better. I’m not sure that display thickness means anything, unless you are hanging the set on the wall, I suppose, but it’s fair to say that the thinness of the LG’s display defies belief:
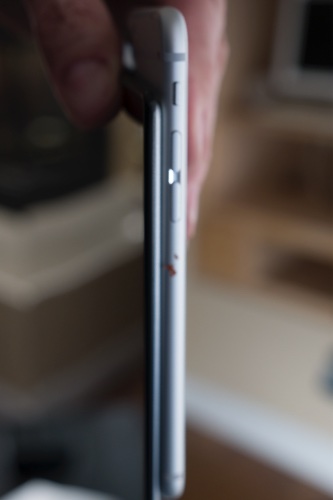

The thickness of the LG panel compared with an iPhone6.

The iPhone 6 is one of the slimmest smartphones on the market with a thickness of just 0.27″. Wait for it …. the LG comes in at 0.16″. Almost half the thickness. Stunning. So thin is the LG panel that extra care in handling has to be used when unpacking the set, to avoid damage. LG’s instructions specifically address the right way to do this. That said, the LG 65″ TV weighs in at a scant 54.5 lbs, something my son and I could easily manhandle into place. The full specs are here; a 55″ version is also available for smaller rooms.

The oft quoted rule that you should buy a TV right before Brain Damage Sunday (aka The Superbowl) may not apply here. It is very difficult to make fault-free large OLED panels – as far as I know the only manufacturers are LG, Samsung and Sony – and 4K displays have four times the pixel density of regular 1080p HD ones. I calculate the 65″ OLED display to have over 4.9 billion pixels. Just one bad pixel and the panel is a goner. I would hate to be in the 4K panel manufacturing business …. Here’s the price trend – after the usual big post-introduction drop the price has actually risen from my purchase date:
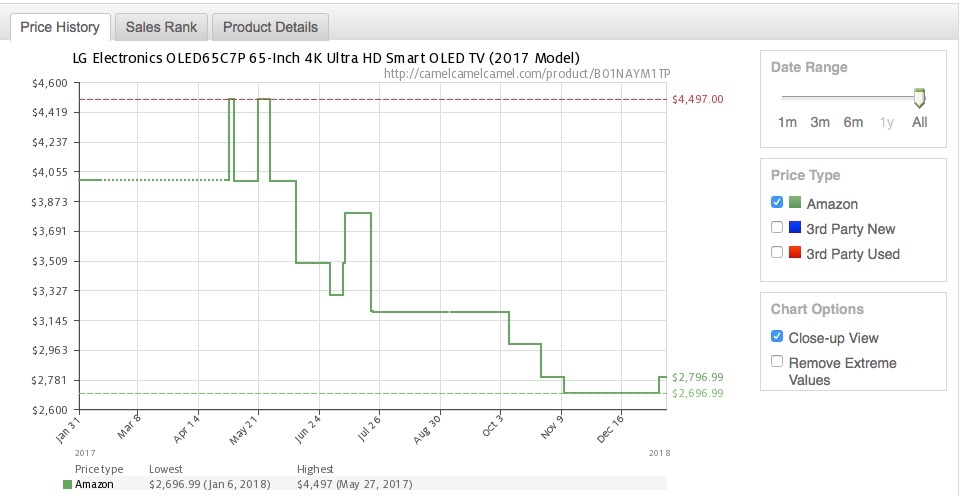

65″ 2017 LG price trend. Click the image.

The rear base of the panel is thicker to accommodate electronics and speakers, though with a display of this quality it really does not do to go with the internal speakers, which are simply too small to do the set justice.

The Market God having been good to me lately I splashed out on a pair of Martin Logan ESLs, an electrostatic design which makes for exceptional transparency while making a dramatic design statement. These suspend a thin transparent film (think Saran wrap) between two highly charged panels; alter the current delivered and the thin film membrane moves, just like a loudspeaker’s cone, but many times lighter, so more responsive. Indeed, the design means that the speakers are literally transparent, the charged plates either side of the membrane being heavily perforated. The trade off is that these present a very low impedance (2 ohms, compared with the 4-8 ohms of regular cone speakers) but very high capacitance load to the amplifier, so not just any amp will work in a stable manner at high current loads. Simply stated, if the amplifier manufacturer does not quote RMS power delivery into sub-4 ohm loads you should look elsewhere.

There is a lot of overpriced trash in the high end speaker sector. Martin Logan has been around for ever and appears financially stable.
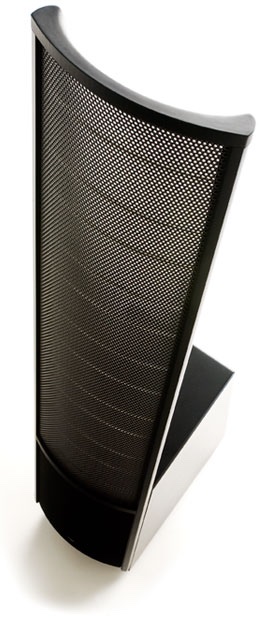

A very special loudspeaker – the Martin Logan ESL.

Other makers I would look at include the British Bowers & Wilkins and the no less British Quad Electroacoustics. You can bet most of the megabuck manufacturers out there will be so much Chapter XI dross a year or two hence after the next financial meltdown. Bread on the table tends to beat high-priced speakers in the corner. These three are survivors; indeed, Peter Walker of Quad fame brought the first full range electrostatic speaker to market in 1955. All three of the manufacturers I mention have been around for decades, and my 40 year old pair of B&W DM3 bookshelf speakers remains as good today as it did in 1977 when first purchased.
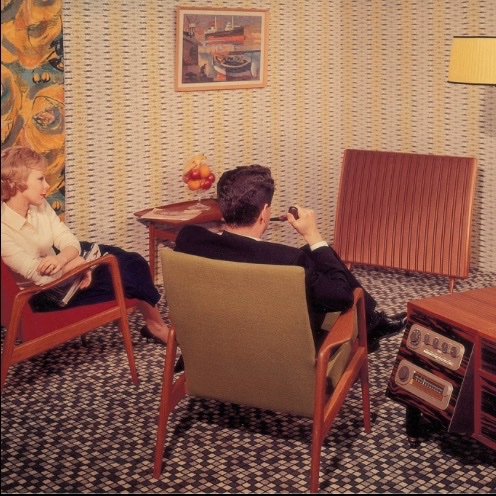

Flashback to 1955. Monaural sound, a pipe,
the Quad ESL, ghastly furniture and an
obedient spouse. Quad tube electronics at right.

Further, look for an amplifier which delivers high current to the speakers; as a rule of thumb, that means an amplifier which weighs a lot – 18 lbs or more. That may sound like a strange metric, but high current amplifiers need large transformers, and large transformers weigh more than small ones! With such fine speakers as the Martin Logan electrostatics it was time to upgrade the (excellent) Onkyo TX-8160 which delivers 80 watts RMS into 8 ohms and happily increases that to 140 watts into 2 ohms. Yes, it’s a high current device.

Another issue with electrostatic speakers – in addition to needing a constant power supply to energize the panels – is that they are not very good at delivering the bone-crunching bass power common in modern movies. Martin Logan partially addresses this by crossing over to a traditional cone woofer at 500Hz but the speaker still runs out of grunt in the 20-100Hz range. Down to about 100 Hz they are fine but that’s about all she wrote at the lower end. So to fill in the bottom octaves I have added a Martin Logan Dynamo 700 powered subwoofer which packs 700 watts of power and goes handily down to 20Hz or so. Again, not for rock freaks, for this is an intensely musical device which renders the deep notes just so, without exaggeration. Try the opening 32Hz organ note on the Solti/Chicago Symphony recording of Mahler’s Eight Symphony. That is how a pipe organ sounds.
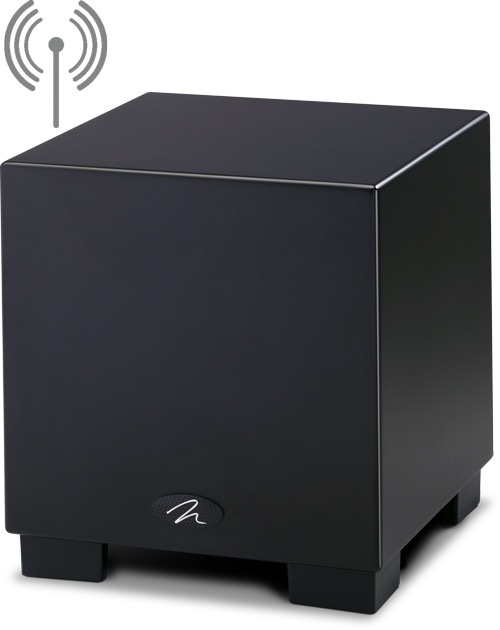

The Martin Logan Dynamo 700 subwoofer. Low notes are rendered correctly.

While ML offers a wireless module for the Dynamo 700 (and you can get 1000 and even 1500 watt versions) I used cables as wireless is just one more interference source in a world crowded with wireless waveforms. You can’t beat copper wires.

How about 4K content? The best repository of streaming 4K content is to be found in iTunes and you will need the AppleTV 4K streaming device to deliver it, as well as a high bandwidth broadband connection. Historically Apple’s movies have been overpriced but they have smartened up. Not only is all 4K content still priced at $6 a rental, any existing movies you may have already purchased will be upgraded to 4K free if that format is available. There are other streaming devices, like the Roku, but none compares for user interface and 4K movie choice to Apple’s offering. The only drawback is that Disney movies (meaning Disney, Pixar and the pap that is Star Wars) and YouTube content are not available in 4K on the AppleTV which I would regard as a feature not a drawback. Indeed Star Wars may well lay claim to having fomented more brain damage in America’s youth than American football.

One of the nicest features of the AppleTV 4K is the remote control which can be easily programmed to control your receiver’s volume as well as powering the AppleTV and your OLED TV on and off with the press of any button. The touchpad takes a bit of getting used to, but practice makes perfect. Best of all, the Siri voice activated feature works perfectly, unlike in any iOS device I have used.
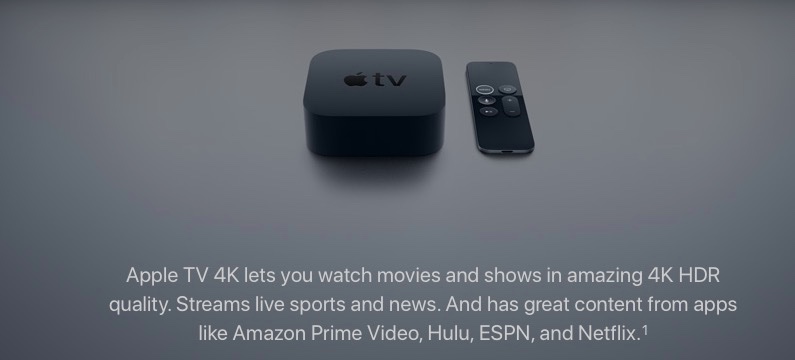

Click the image.

The icing on the cake is that Apple has just added Amazon Prime (free and paid) movies to the AppleTV interface (it even pops up in older 3rd generation 1080p AppleTVs), and while Amazon’s UI is indistinguishable from a bilge pump (both suck), free is good. One day the egos at Disney and Apple will effect a compromise and you will be able to watch all the Star Wars garbage on your spanking new OLED TV in revolting 4K detail. Yecch!

Setting up:

TV setup is potentially a daunting prospect, for the sheer number of user adjustable variables in the LG OLED TV is overwhelming. However, there are people out there who do this sort of thing for a living and one of the best guides I have found is here. The only setting I disagree with is ‘OLED light’ which they have at 16; 50 works better in my environment. Also, it bears repeating what these folks say – be sure to turn off ‘Energy Saver’ or you will think your new OLED TV is broken. The Saver delivers impossibly muddy results.

Setup of the speakers is far easier. Shine a flashlight at the panels from your listening position so that the reflection is one third of the way in from the inside vertical edge. Then fit the spikes to tilt the speakers back and you are done. Martin Logan has a truly exceptional set of instructions, written in clear, idiomatic English; these go into far more detail and include a fascinating history of the design of electrostatic speakers, with due credit given to the great Peter Walker and his original Quad ESL. The folks at ML are a class act. (‘QUAD’ stands for ‘Quality Unit Amplifier, Domestic’ and refers to the company’s pioneering tube amplifier and its first commercial product, a later variant of which I used for decades).

Setting up the subwoofer is trivial. Dial in a crossover point around 100Hz using the back panel controls and adjust the volume to suit.

Worth it? If you aspire to a Rolls Royce, then you do not ask the price of entry.
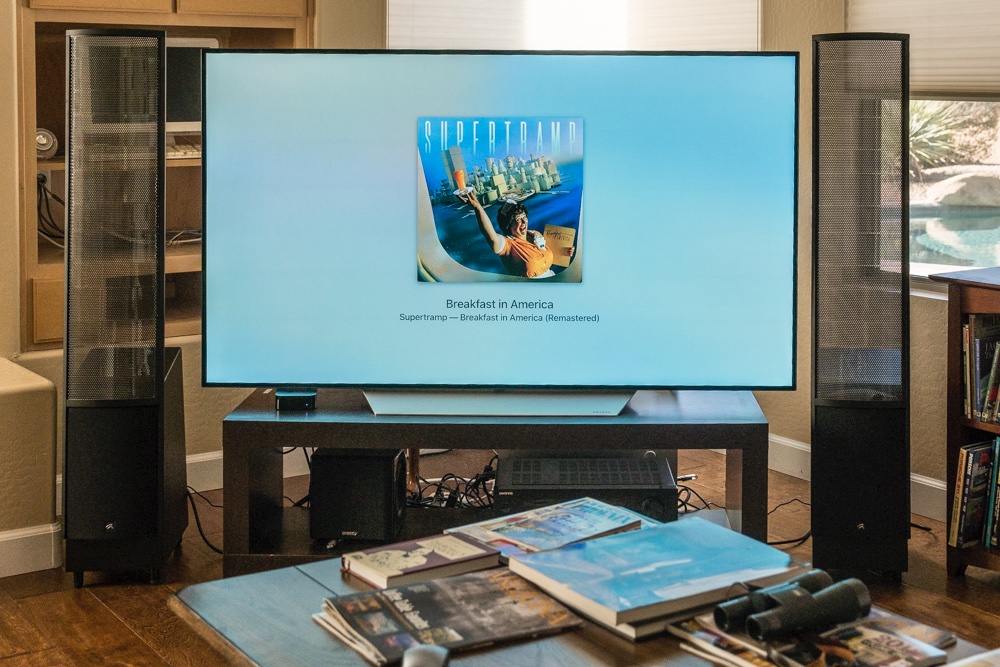

“Could we have kippers for breakfast?”

What of that old 55″ Vizio? Why, it’s doing sterling duty on the patio:
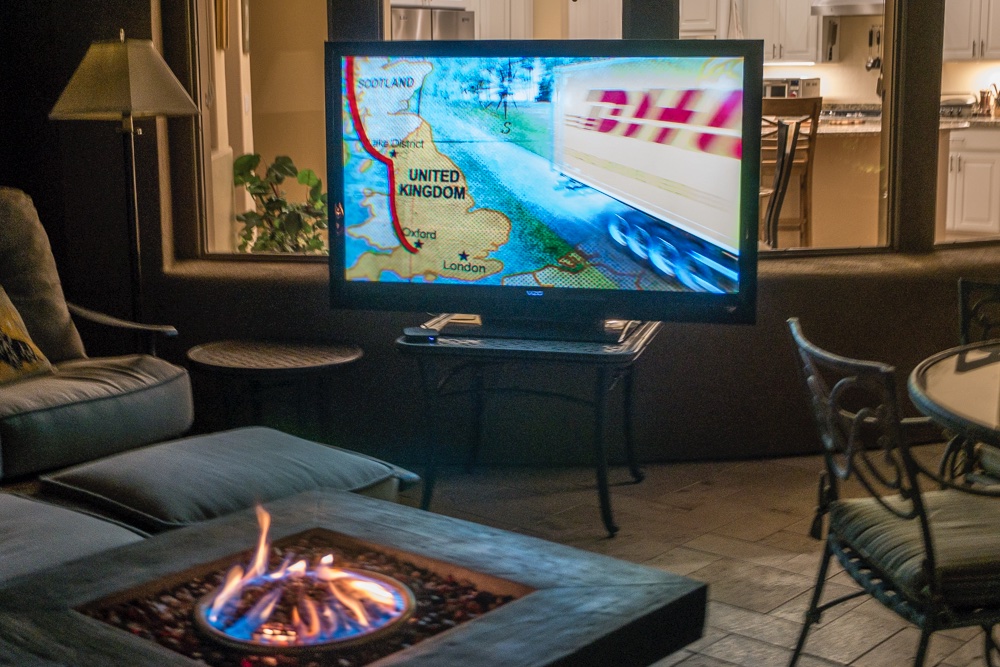

1080p Vizio TV with matching 1080p Gen3 AppleTV.