A trouble-free device.
For a company which prides itself on design, past mouse offerings from Apple have been pretty poor.
In the last decade we have had the clear plastic case single-click wired mouse which came with iMacs through maybe 2005. Then along came the Mighty Mouse with that neat little scroll sphere in the top and finally supporting left and right clicks. That one came in wired and wireless designs and after three of each I finally threw up my hands and gave up on the Apple Mouse. You see, the Magic Mouse worked fine until the scroll sphere would fail owing to the ingress of dirt and grease. While you could vigorously run the little ball around a bit on a piece of paper with the mouse held upside down, after about two or three attempts at this the scrolling feature would fail completely, and given that the mouse was sealed – except for the space around the ball – there was no realistic way of dismantling it to clean the innards. I even tried blasting contact cleaner into the small space around the ball and the thing would fail soon afterwards, shortly after my eyesight recovered from the backwash of toxic spray.
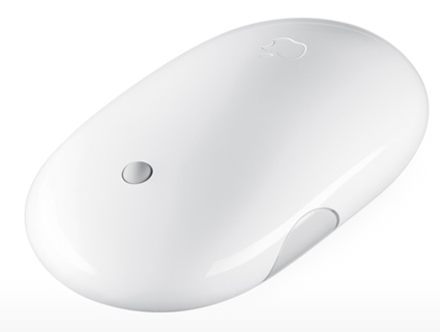
The Apple Mighty Mouse with the poorly designed scroll wheel.
One really nice feature of the Mighty Mouse was that when you squeezed the sides you could get enhanced actions; I had mine set to display the desktop. You could also program a push on the scroll ball to perform other actions and mine was set to display Dashboard widgets. Still, I thought no more of all these mouse failures until a MacMini came along to drive the home TV; Apple, squeezing the margins as usual, did not ship a mouse with the MacMini so I though, what the heck, I’ll give the new Magic Mouse a shot.
Like the Mighty Mouse the Magic Mouse uses a sensor for tracking. I wasn’t too impressed with the specifications on paper as all that multi-touch technology seemed counterintuitive on a mouse, but came to like the Magic Mouse when used on the sofa with the MacMini.
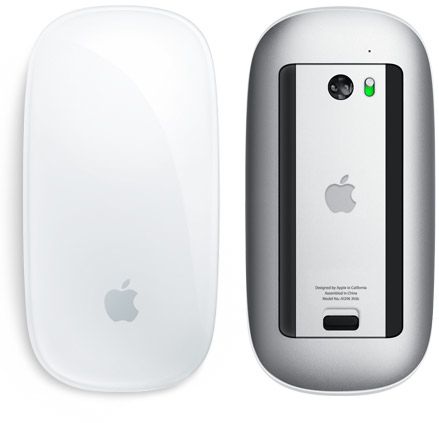
Apple Magic Mouse. No scroll wheel, no side buttons.
Scrolling with the MagicMouse is accomplished by dragging one finger vertically on the surface; side scrolling by swiping the same finger laterally. Only one finger is needed though Apple’s System Preferences ->Mouse pane shows two being used for sideways scrolling. When you are using a mouse to control a MacMini whose primary purpose is to play DVDs and Netflix, you don’t need to access features like the Desktop or the Dashboard with its widgets. On a desktop work computer these are very nice to have. Needless to add, curiosity got the better of me and I decided to try the Magic Mouse with my desktop HackPro – the desktop computer for the rest of us. At first, System Preferences->Mouse simply refused to recognize the Magic Mouse, even though System Profiler confirms that the minuscule IoGear Bluetooth adapter I have installed in one of the HackPro’s dozen USB ports enables Bluetooth. The HackPro runs OS Snow Leopard 10.6.6 and you need at least 10.6.4 for the Mighty Mouse.
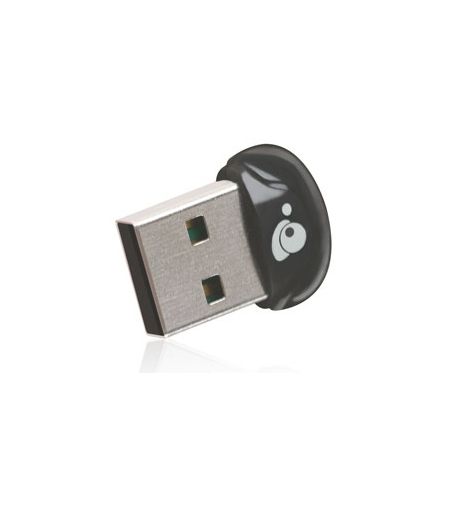
IoGear Bluetooth adapter – smaller than a fingernail.
So I resorted to that repository of all that is Apple OS hacking, InsanelyMac, and one suggested solution was to install the SteerMouse utility; this I duly did, rebooted as instructed and, lo and behold, the MagicMouse was now recognized as a Bluetooth device, even though I did not even enable the SteerMouse utility, which appears in the Systems Preferences pane. So now I had a working MagicMouse but still no easy way of accessing the desktop or Dashboard using the mouse, as the side buttons of the old Mighty Mouse were no longer available to do this. Well, I had never used the ‘Active Screen Corners’ function of OS X, found in System Preferences->Exposé & Spaces->Exposé. It takes seconds to do and you get many choices for what each screen corner does.
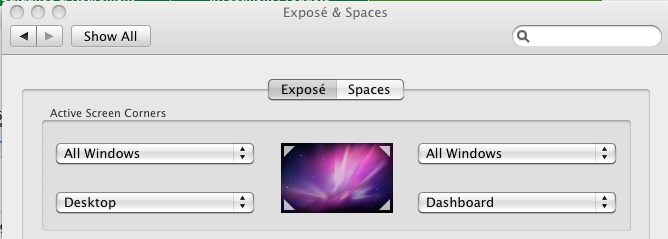
Active screen corners in OS X
Now when I drag the mouse cursor over one of the screen corners the related action is invoked. Lower left gets me the Desktop and so on. I use a three display installation with the HackPro so ‘corner’ means the outside corners of the left- and right-handmost displays. It works well, but takes a bit of getting used to. I’m getting the hang of it.
Why use the MagicMouse in preference to the excellent RF Microsoft Mouse I have been using for well over a year now? (Yes, I know, ‘excellent’ as an adjective for a Microsoft product is not something you see that often). Mostly because the cursor action is smoother and because you don’t get the occasional bout of wild behavior which has the cursor become very jerky. This seems to occur when Time Machine is running one of its incremental backups, suggesting some sort of interference with CPU or GPU cycles. The MagicMouse does not display this erratic behavior.
The MagicMouse comes with new iMacs and only you can decide whether its shape and workings are right for your hands. One thing you can be sure of – there’s no scroll wheel to go wrong.
MagicPrefs: If you want a whole order of magnitude more programmability for your MagicMouse, download and install MagicPrefs. This utility installs in the System Preferences pane and gives you more options than you can shake a stick at. How is this possible? Well, the MagicMouse is really a touchpad, like the one on your laptop. It senses touch electrostatically, meaning that every square millimeter of its surface has an ‘address’ whose actions can be tailored. Using MagicPrefs, first you can crank up the cursor speed beyond the poky maximum Apple give you. If you use two or more displays, it’s worth it. Second, you can program gestures to access functions. For example, I have the middle click (where the scroll ball used to be) set to show the desktop and a single tap just above the Apple logo to display the Dashboard. The programmability is vast and there’s something for everyone. Do it right and you will no longer miss the side buttons of the older Mighty Mouse.
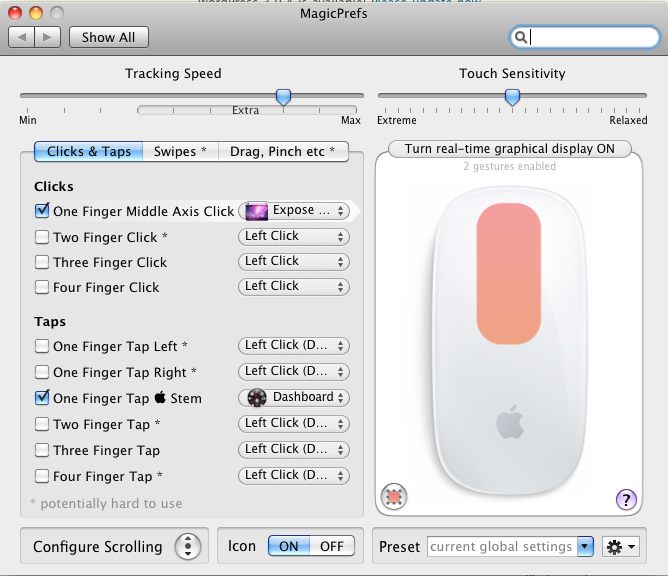
MagicPrefs at work.
In other MagicPrefs panes you can even define the location of scroll zones, meaning that left handed users can program scroll and touch zones to suit their dominant hand, as well as reversing left and right clicks. There is also a host of Drag, Pinch and Swipe motions. Extraordinary and free.
Disclosure: Long AAPL call options.