RAW offers a vast range of adjustments without destroying image quality
Here’s a case in point where RAW originals really make sense.
I was traipsing along through the charming side streets of Burlingame in the Bay Area of San Francisco when this neat wall sconce presented itself. Now I did have Bertram the Border Terrier straining at the leash in the other hand, so I did a pretty lousy job of holding the camera level. Add the high contrast of the scene and I knew some post processing would be de rigeur.
Here’s the original – if this was a film scan it would be pretty much past saving, the highlights comprehesively blown out (not hard to do with digital!), the perspective badly in need of repair, everything tilted.
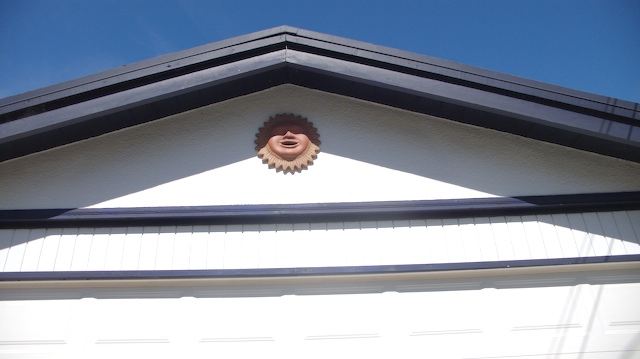
Wall sconce. Lumix LX1, RAW, 16:9 format
Rather than recount the adjustments made in Aperture at length, here’s a snapshot of what I did:
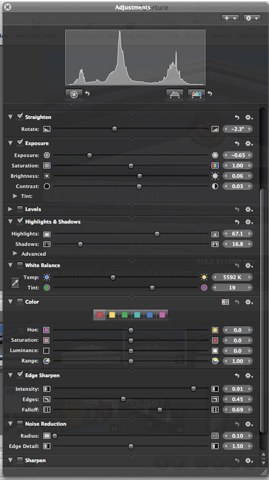
I also had to roundtrip the file from Aperture through Photoshop, where I fixed the lens distortion and perspective, tilting the top of the picture towards the viewer to correct for the low angle from which the picture was made; Aperture does not (yet) provide these adjustments.
And here is the result:

Cropped for 4:3 format
The highlight details (look at the textured stucco wall finish) have been nicely recovered with a combination of the Exposure and Highlights sliders. While Aperture does not support Lumix LX1 RAW, I used the workaround explained here to give me the full range of RAW adjustments.
The ‘repaired’ version will scale nicely to an 18″x24″ print, something you would not dream of doing with the original.