A better mousetrap.
For an index of all Leica-related articles click here.
I wrote about adding EXIF data to scanned images here. While effective that tool is rather clunky in use, even if the price is right, as in free.
But there’s something better to be had for the modest sum of $17 or so, and it’s named Capture Time to EXIF. While originally intended to change capture times in EXIF data it’s a good deal more versatile than that and makes it easy to change lens data, ISO, camera serial # and a host of other variable, thus:
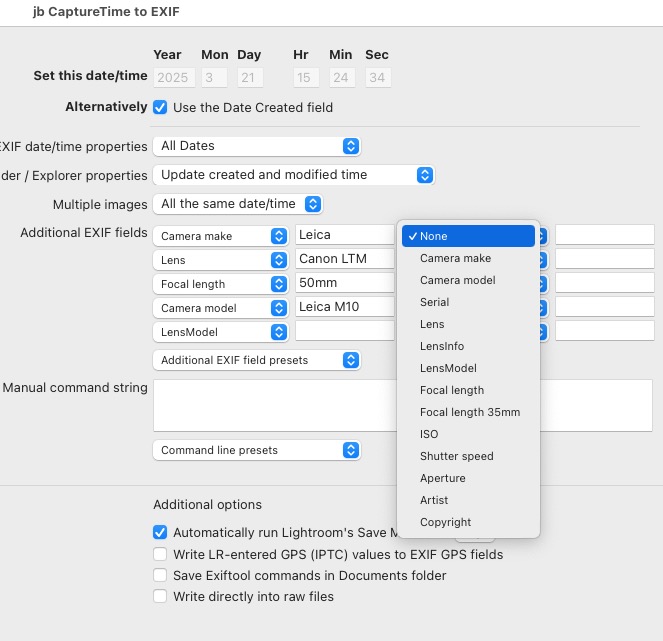
The variables which can be changed.
In practice this tool is not restricted to film scans. I use it on Leica M10 files where the lens name, derived from 6-bit coding, is incorrect. The camera only stores Leica lens names (duh!) whereas I use Voigtländer and Canon LTM lenses on my M10 body. Because I tend to remember images by the lens used, having the right lens name in EXIF data helps greatly when retrieving images in Lightroom Classic. After download move the plugin to this directory on a Mac, replacing ‘Tigger’ with your username:

The plugin location.
The plugin permits saving of your favorite lens data sets and that’s important because if you mess up on the wording even one tiny bit you will see two lenses where there should be one. For example ’35mm Canon LTM f/2.0′ and ’35mm Canon LTM f/2′ will be shown in the LRc Metadata panel as two different lenses. But if you save your preferred setting then the name used will always be the same. Here are the ones I have saved so far:
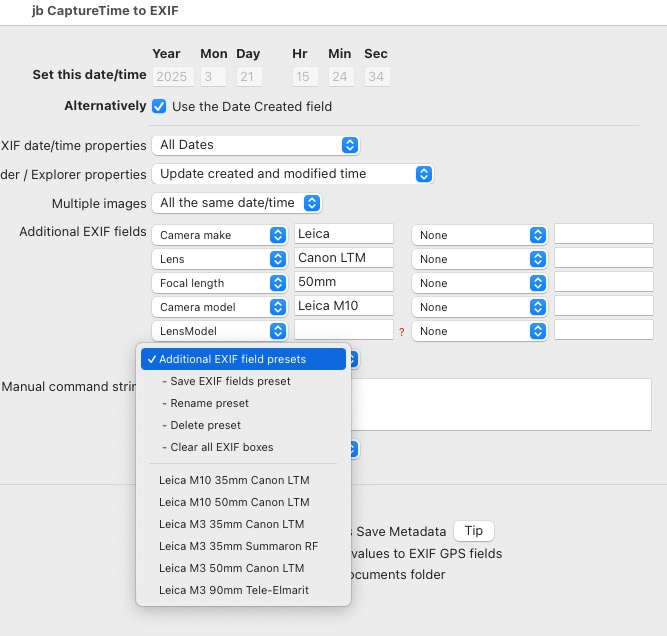
Saved files.
Note that in the above example I am leaving the files’ Date and Time unchanged (‘Use the Date Created field’ at the top).
In use you highlight the files where you wish to make changes then invoke the plugin in LRc->Library->Plug-in Extras->Save capture time. A recent outing during which I took 37 pictures on the M10 is instructive. Of my three 6-bit coded lenses, one is made by Leitz, the 90mm Tele-Elmarit, so no changes are necessary. The two Canons, coded as a 35mm Summicron and 50mm Summilux respectively, need the lens’ names changed. Here’s the Metadata panel with the file first loaded in LRc:
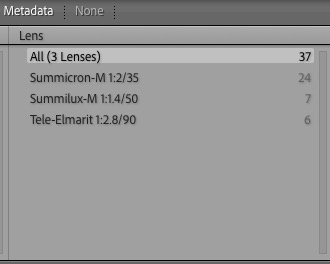
Metadata as downloaded from the camera.
After selecting the 35mm Summicron files in the Metadata panel, I invoke the plugin and load my saved Canon 35mm profile in ‘Save capture time’:
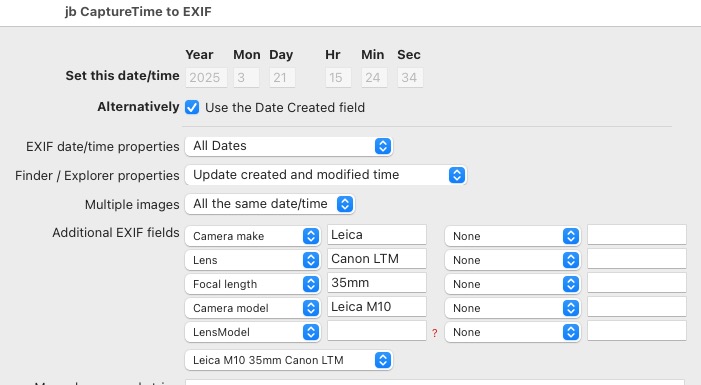
The 35mm Canon saved data file has been chosen.
The full lens description is ‘Canon LTM 1:2/35′, partly hidden in this screenshot but consistent with the Leica lens naming methodology. When you run the plugin there’s no need to save Metadata to XMP files. It’s automatic. The file write takes around one second per image.
I then repeat the process for the 50mm Canon LTM lens, running the plugin after selecting all the ’50mm Summilux’ images in the metadata panel. And here is the happy result after reloading the Metadata panel:
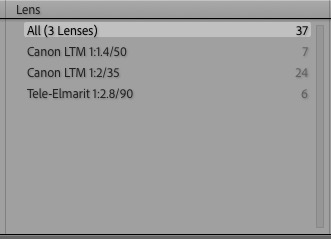
EXIF data corrected.
Simple and effective, the plugin represents a good return on a modest outlay.