From today’s iPhone4 roll out
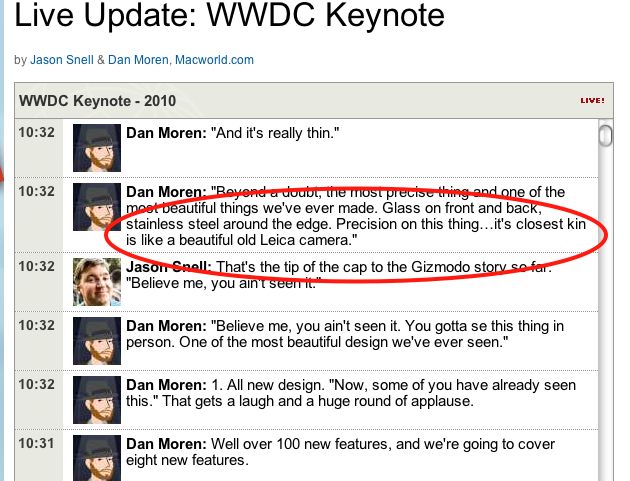
Though Steve Jobs forgot to add “…. and a heck of a lot more reliable”.
From today’s iPhone4 roll out
Though Steve Jobs forgot to add “…. and a heck of a lot more reliable”.
A front end for the home theater.
Much as I am trying to simplify life with one remote, and the L5 Remote for the iPhone makes a huge step forward in fulfilling that goal, I have long been experimenting with a like approach to consolidate the front end for use of my TV.
If, like me, you rip your DVDs to external hard disk drives, then I’m afraid AppleTV or a MacMini running FrontRow do not work. For whatever arcane licensing issues that are involved, neither technology supports the TS/VOB file format resident on a DVD and I’m not about to spend half of my remaining years converting all my movies to a format Apple’s software supports. Further, I like the idea of storing movies in their native format as everything else is a compromise and, who knows, one day maybe 100″ LCD screens will become affordable and that original format will look great, whereas an iPad/ATV version will not. Plus storage is cheap, so I’m not about to start compressing my movies to save on a few bytes of space.
Having tried various front end applications which attempt to deliver all your content through one common interface, I have returned to Plex, one of the few which is written specifically – and only – for the Mac. The app is free and I have it running on my MacMini, attached to the TV. Before explain what Plex can do it is important to point out that it cannot accept encrypted cable company feeds delivered through a set top box, meaning you still have to switch to that input to watch TV. Also, it cannot access the iTunes Store for purchase of movies though there is an app for the Amazon Video On Demand store which is in alpha release. I have tried it and it works well, so it’s a good workaround for those occasions you want to rent or buy a movie rather than wait for Netflix.
Plex’s appearance can be varied using any number of downloadable ‘skins’, and I have opted for the ‘Alaska’ variant in the following snap of the home screen (literally a screenshot as I cannot figure out how to do this otherwise, OS X’s screenshot capability being rendered inoperative by Plex, so pardon the mediocre quality):
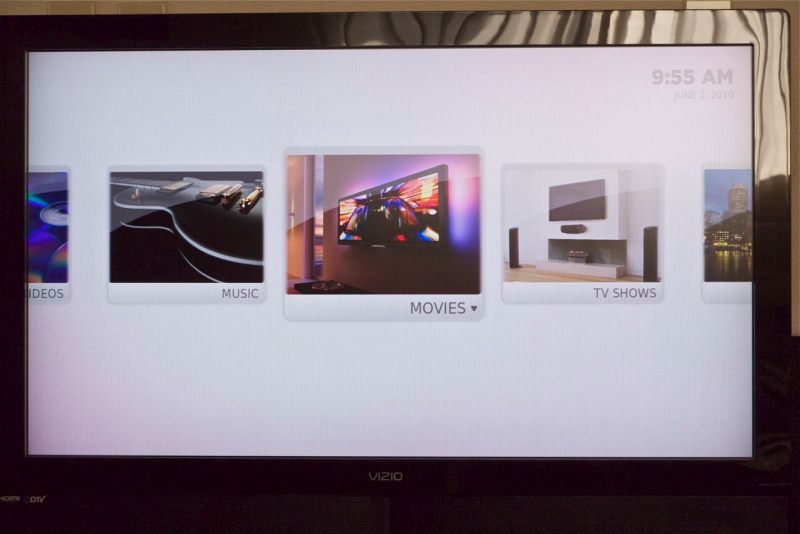
The Plex home screen.
While the L5 Remote folks figure out how to get the Apple Remote’s functions transferred to my iPhone (I have had no luck so far), I am using a downloaded Plex driver for the Apple remote (current aluminum model) which works well with the application. You can also use a wireless mouse which works even better, but neither approach obviates the need for yet one more control device.
My movies are all stored on a bunch of external servers and it is a moment’s work to tell Plex where to find these, using the built in Browse function. Thereafter, Plex can be asked to download movie cover art and synopses, which takes about thirty minutes per hundred movies and is about 80% correct – I had to manually change the remaining 20% as Plex looked up the wrong data. It’s a function of how accurately your movies are named, Plex suggesting that you shoud append the movie’s date in parenteses in the title. The approach I adopted is faster – download and fix the bad ones.

The Movies screen with clickable thumbnails.
Click and hold the Menu button on the Apple Remote and you have the option of looking at the synopsis:
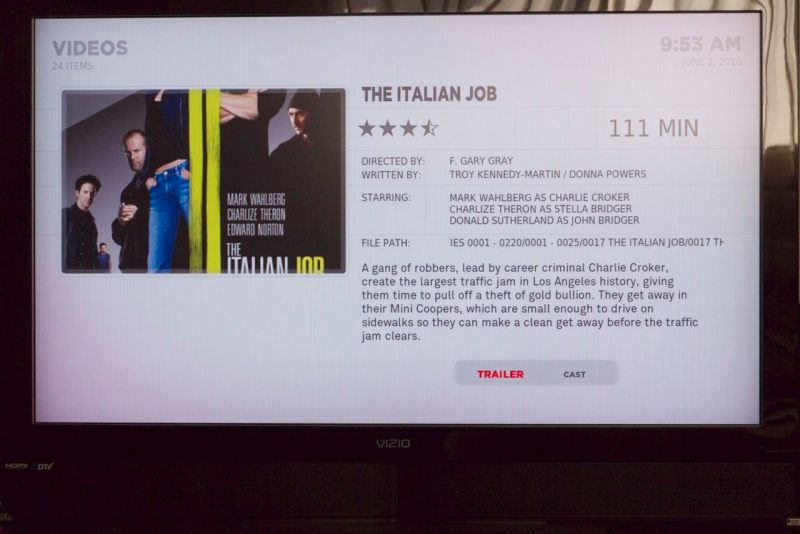
Plot synopsis for a movie.
Movie quality delivered by Plex from locally stored movies is identical to the usual way of playing the movie in VLC or your app of choice.
Switch over to Videos and you can see some of the apps I have downloaded:
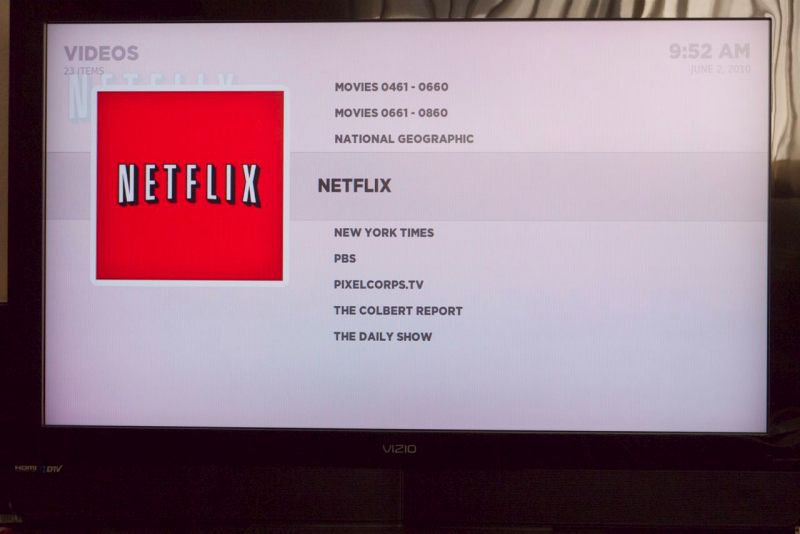
The Netflix streaming movie app is highlighted, two of my local movie file servers appear above.
The Netflix interface is far superior to that delivered by the OS X Netflix app – easier to navigate and easier to use.
Go to Pictures on the Home page and there are several photoblog apps from well known photographers and news media, downloadable through the Plex App Store, all waiting to be displayed in glorious color on your big screen TV:
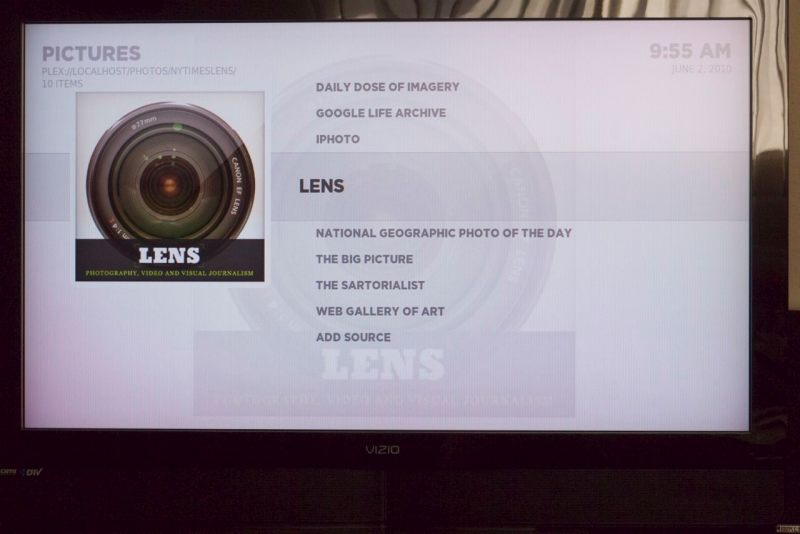
The NYT’s excellent ‘Lens’ app is highlighted.
What’s so exciting about this product is that all content – movies, iTunes, iPhoto, photoblogs, etc. – is delivered through a common interface which is both very responsive and needs the simplest of remotes. The Apple Remote runs all of $19. If you don’t like the look of the interface there are lots of choices out there, including one which emulates AppleTV/Frontrow. I don’t much care for that one but you can almost certainly find something that works.
If you use a Mac to deliver content from multiple local and remote sources to your TV I recommend you take a hard look at Plex. The price is right, as in ‘free’. If your friends use Plex you can even access their libraries using Plex media Server though I have not yet tried that. The next thing I need to do is send a donation to the hard working programming team at Plex, which proves the power of distributed programming, if any proof were needed.
Update on the Apple Remote:
Plex works beautifully with the Apple Remote – either the original white plastic one or the current aluminum version.
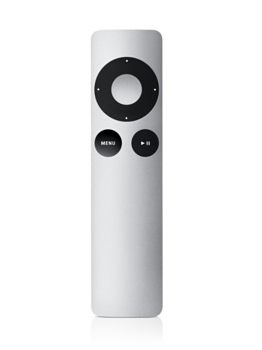
The $19 Apple Remote.
This is a quite extraordinary feat of industrial design. While the down button is too close to the Menu and Pause buttons for those with large hands, the amazing thing about this device is that there is not a seam in sight, the only openings being the battery cover (CR2023) and the plastic cover for the IR emitter. It reminds me of Dr. Who’s spaceship the Tardis, which is famously bigger on the inside than on the outside! How did they get the components in there?
With the downloadable Plex driver the Apple Remote works beautifully with Plex but it argues with my core principle which is to have one remote do everything. So I tried programming the L5 Remote using the Apple Remote but so far without luck. Then it struck me that a Rube Goldberg approach might work so I programmed my RCA Universal Remote in ‘learning’ mode using the Apple Remote, then used the RCA to ‘teach’ the L5 Remote. Success!
I have corresponded with the L5 Remote folks on this (they stated that they have no such problem with the earlier white plastic Apple Remote) and they are looking into the issue once they have their hands on the new aluminum Apple Remote. Clearly it’s unrealistic to expect them to have tried each of the thousands of remotes out there, but the Apple Remote is a special case owing to its likely ownership by a significant percentage of Mac users. I’ll provide details when I have them and meanwhile want to add that my enthusiasm for the L5 Remote remains undimmed, especially given how responsive the manufacturer has been.
Meanwhile I am down to just one remote for everything – the L5!
The best remote yet.
Those of you who, like me, are visually oriented, will likely be using your big screen TV for viewing pictures, as do I. Mine fronts as a display device for a Mac Mini, an AT&T Uverse cable box with a DVR, and for a BluRay DVD player. The latter adds BluRay which is not supported by Mac OS X.
With all those inputs the result is the usual mess of remote controls, each seemingly designed by someone who never actually tried using it. It is one of the worst areas of ergonomic nightmares in the home.
So it’s no surprise when I relate that I have long been searching for the perfect universal remote. Well, I’m getting closer. I started seven years ago with a mid-range infra-red Harmony which was OK, but still too many buttons. Then I migrated to the very costly infra-red Harmony 1000 with its small color touchscreen (‘push screen’ is more like it) which I upgraded to radio to avoid the line-of-sight frustration experienced with IR sensors. This was OK for a while but I got royally irritated with Harmony’s truly inept Mac software which constantly locked-up and with their device code database which is riddled with errors and requires much manual tinkering to get things working. So I sold the Harmony and went back to an inexpensive RCA IR remote, the RCA RCRP05B for under $20. You can see my review on the linked Amazon site. The appeal of this inexpensive device was its extreme programmability and before long I had it singing and dancing. My primary test is that our eight year old can use it with no help and I am at a point where Winston no longer asks for help. Getting there was far harder than that sounds!
To obviate the line-of-sight problem I added an IR blaster to amplify the remote’s signal regardless of how it is pointed and it’s such a significant enhancement that I recommend a like device unreservedly.
But, the RCA, capable as it is, still has lots of little buttons, none are illuminated making use in the dark very difficult, and most of the buttons are redundant at any one time. What I really wanted was a touchscreen remote like the AMX of old. That had three drawbacks. It could only be programmed by the vendor, it burned through its battery daily and it was clunky as all get up, but it did have a half decent touchscreen. Last I looked, 8 years ago, these ran upward of $5,000 …. and woe betide you if you change hardware.
Well, there’s a new kid on the block and it is very impressive indeed, fixing all of these drawbacks.
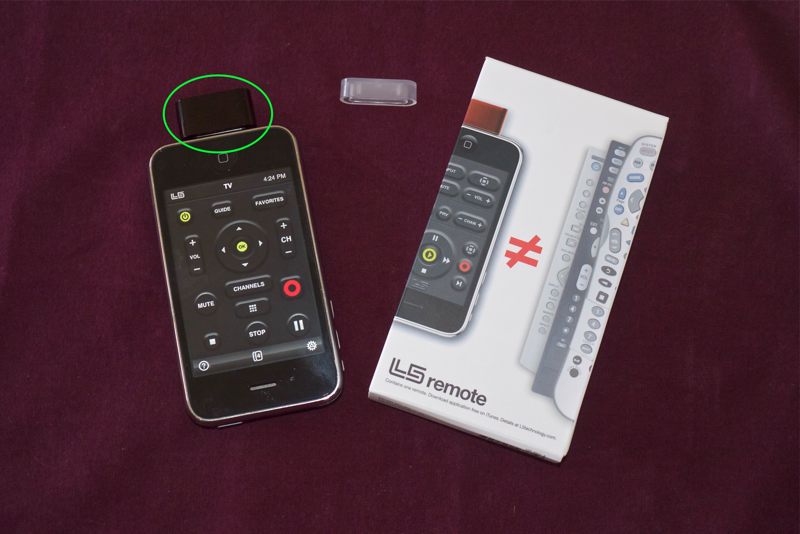
The L5 Remote attachment (circled) for the iPhone, iPod Touch and iPad
In the photograph you can see the L5 dongle attached to my iPhone (any model works as well as iPod Touches and iPads), displaying one of the screens I have programmed. When the dongle is first attached it downloads the related software from the iTunes store. You can program any number of screens to make the device activity based – one for Watch TV, one for Watch DVD, one for Listen to Music and so on. The icons are dragged and dropped into place and programmed by using your existing remote to ‘teach’ the L5, so if you have lost the original you are out of luck for now. L5 has promised to add a downloadable code database but that may take a while. I would also like the ability to directly input 5 digit JP1 codes to any key of choice, as is possible with the RCA.
Macros (command sequences) are easily created – just program individual (temporary) icons with the commands required then drop them onto a macro key. Once the Macro key sequence is assigned using your individual keys, the latter can be erased – the information is not lost. Very cleverly done and it really permits you to eradicate all clutter. In the following example which is for Watch TV, the On, Off and Favorites keys are all macros with embedded command sequences. The Channels icon utilizes another clever feature of the L5. Touching it opens a drawer below the main screen where I have inserted favorite Channels for direct touchscreen access. The icon with the small rectangles drops down a numerical keyboard for those (very) rare occasions when you want to key in a channel number.
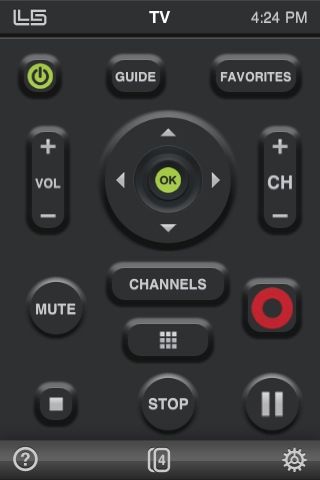
The TV screen. Note the red Record button for saving to the AT&T Uverse DVR.
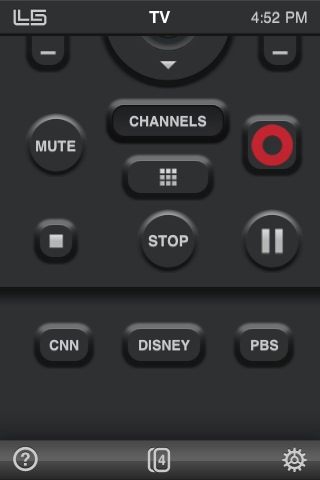
The Channels drawer has been opened here, showing three favorite channels.
Most importantly, the Macro key assignment function provides for variable delays, of the user’s choice, between the execution of key strokes. This is vital in practice as most televisions are very slow to start up and to respond to commands. My three years old 42″ Vizio needs some five seconds before it will respond to input switching commands and does not like to be rushed between input selection changes. Adding these delays, a matter of trial and error, is trivial with the L5 software.
A couple more screens:

The BluRay DVD player screen – I still need to add a Volume toggle.
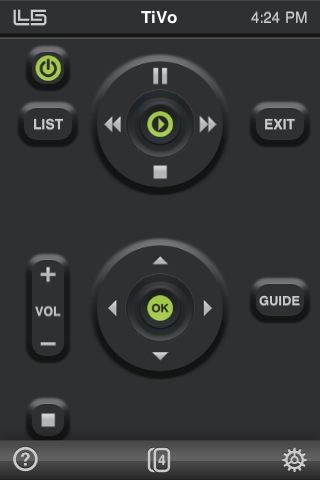
The DVR/TiVo playback screen
When the dongle is attached to the iPhone all other functions remain usable at a touch of the Home button. The software rotates the screen image 180 degrees so that the dongle is pointing away from you in use, but if you use an IR blaster as I mention above, this is not necessary, but not something that can currently be switched off.
The quickest way to switch between activity screens is to simply flick them with a finger. It would be nice if L5 could add the ability to sort the order in which the screens appear.
If you are new to Macros, there’s lots of hard ways of setting them up and one foolproof easy way. Using your original remotes, go through the sequence of events required for an activity, making a written note of each keystroke. For example, if I want to watch TV the sequence is something like this:
Now, following your notations, program each keystroke you had to make to a discrete button, add these to your Macro key in the right order, add inter-step delays as necessary if your macro misbehaves, test then delete the temporary keys you just created, keeping only the macro key which you can name anything you want. You can also choose from a range of logo/icons for any key you create.
L5 say that they are working on iPad-specific software though the existing app will run fine on the iPad. They have also promised to add the ability to transfer your settings from one iDevice to another. Yes, please! I actually like the small size of the iPhone’s screen for this application and expect to dedicate my 3G iPhone to the dongle full time when I shortly upgrade to the 4G iPhone to be announced on June 7, 2010.
Bugs? I have only encountered one. When designing a new screen after dragging and dropping the required buttons onto the display area, you hit ‘Assign’ to program these using your original remotes. On a few occasions the software showed a blank screen instead of one with the buttons on display and available for selection. Simply repeating the process generally fixed the issue which is only seen at the design stage. In operation the software and hardware have been flawless. Even hard to program remotes like the one which came with my Insignia DVD player proved easy to set up; where the L5 did not recognize the IR code on a first pass, it would ask for three or four passes and would invariably get there with ease.
The L5 Remote is highly recommended, costs $50 and comes from L5 Remote. To really get the best out of it I also recommend spending an additional $70 on an IR blaster.
Here’s what’s to come …. or not.
With the iPad staging its international debut today, from London to Tokyo – don’t bother, they’re all sold out – it seems like a good moment at which to speculate on what the next model might bring.
Here’s my wish list:
Hardware:
Software:
Content:

Though we will have to wait until Murdoch is buried for the WSJ’s content to improve.
Not a big list for so revolutionary a device, which is already close to perfect out of the box.
Disclosure: No AAPL position.
Tough luck, Steve.
Following up on my April Fools’ Day prediction, yesterday’s news brought the not unexpected fact that Apple’s market capitalization now exceeds that of its old nemesis Microsoft. Given that the fruit company has a great CEO and the other one has a clown in the corner office, that’s not all that surprising. What is amazing is that Microsoft’s shareholders have stood idly by for over a decade of this buffoon’s rule, a period which has seen Microsoft’s market capitalization more than halve from a peak well in excess of $500 billion.
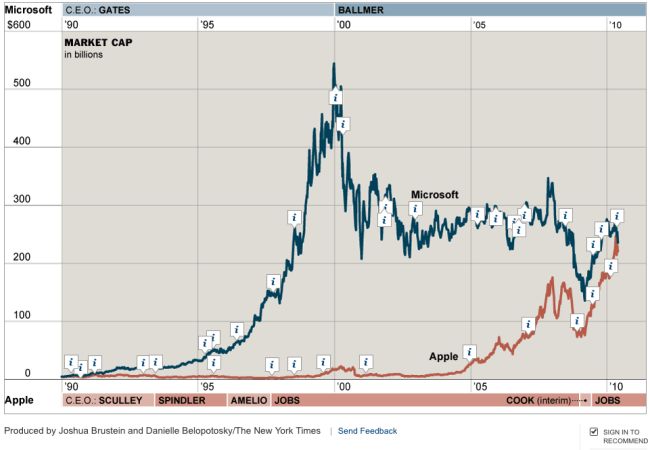
Ten years of Ballmer and Jobs
Certainly, innovation never darkened Microsoft’s doors, and its insistence on purportedly open systems (open to what? phishing? viruses? security holes?) has much to do with its demise, clown CEO apart.
So it’s intriguing to watch the public spat between Apple and another poorly run company, Adobe, over the use of Adobe’s Flash (which Adobe claims is ‘open’) on Apple’s mobile devices. That, per El Jobso, is strictly verboten. Now Apple’s claims that Flash is slow and full of security holes and chews up battery life may well be true. But it’s also not lost on me that Apple’s ban of Flash allows it to maintain strict control over its mobile devices and, last I checked, the profit motive is alive and well at 1 Infinite Loop in Cupertino.
So make of it what you will but don’t expect to see Flash sites on your iPad.
Until now.
Check yesterday’s journal and you will see that I am now running the LogMeIn remote desktop on my iPad and it allows me to view Flash sites just fine via my desktop HackPro. As an example, here’s what you get if you dial in the estimable Jill Greenberg‘s site on the iPad’s Mobile Safari:
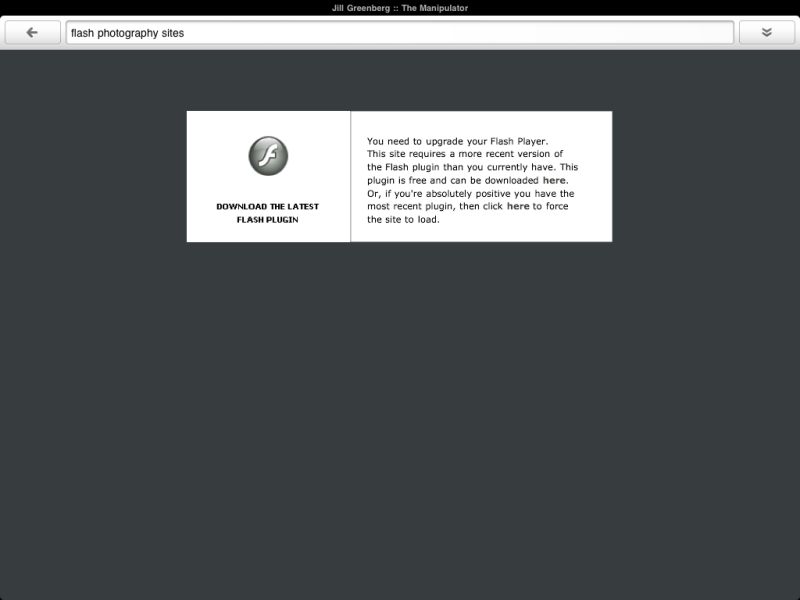
Flash No Go from El Jobso on the iPad
Now dial up the site using LogMeIn and all is sweetness and light:

Flash on the iPad
And you get the best of both worlds. The remote Flash site cannot infect your iPad and you can see it just fine.
By the way, the stock chart, above, from Yahoo Interactive charts, is rendered using Flash. So yet more power to this iPad toting investor.
A note on desktop settings for LogMeIn:
Here’s how I have Energy Saver set on my Hackpro desktop:
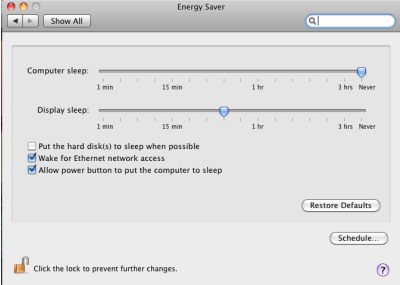
This switches off the displays after a period of no use, but never allows the computer to sleep, thus allowing remote access at any time from anywhere.