Handy.
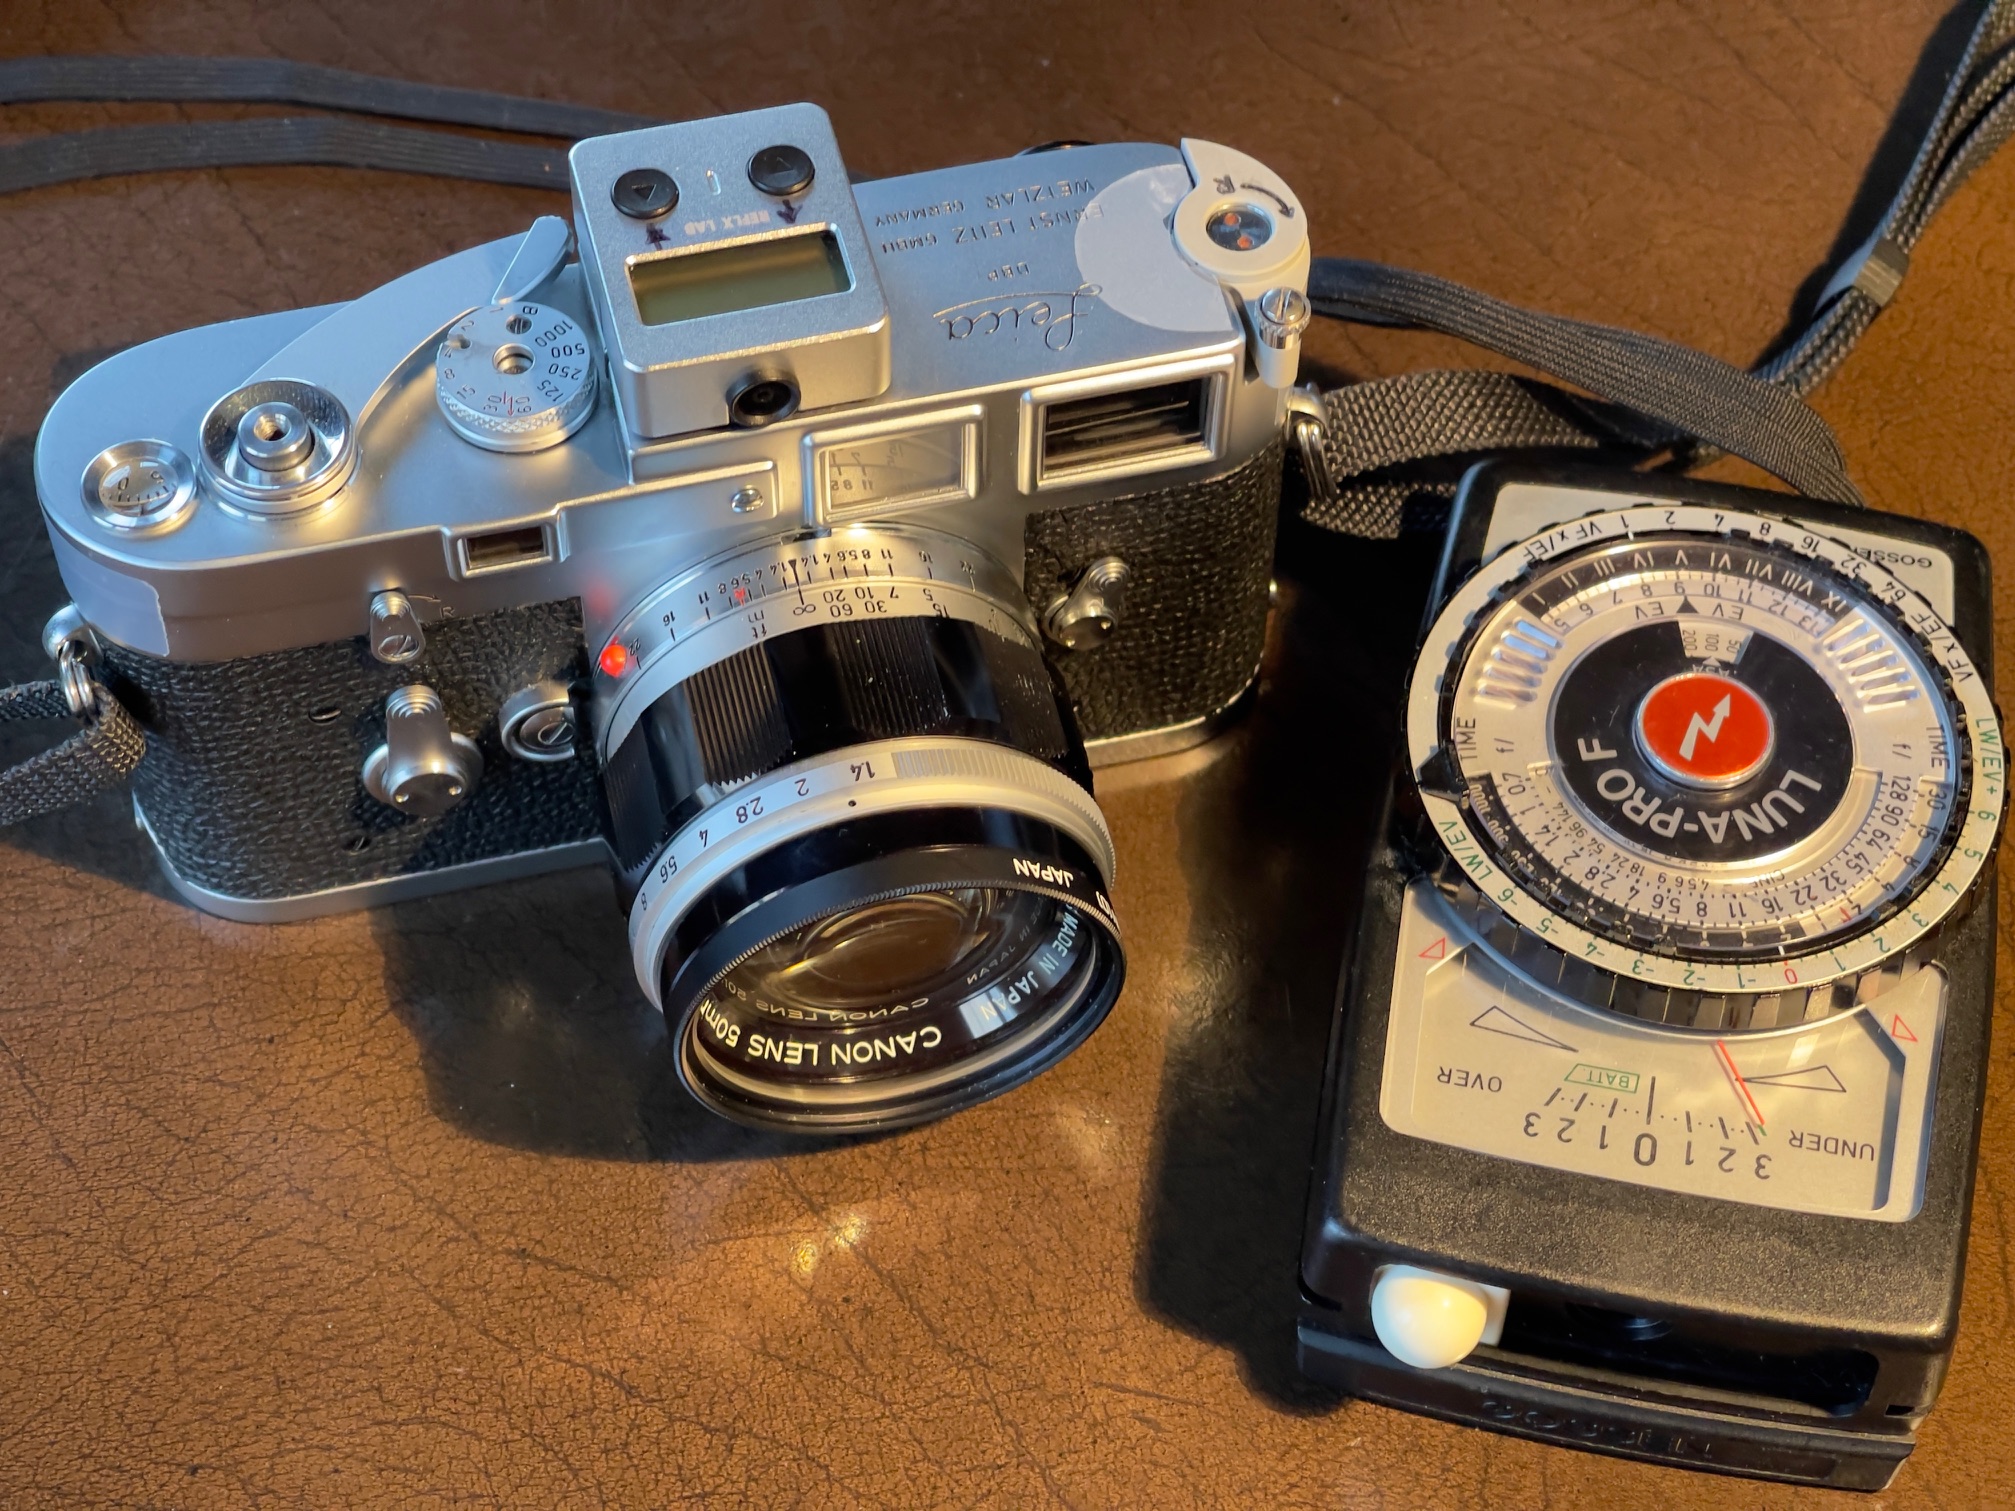
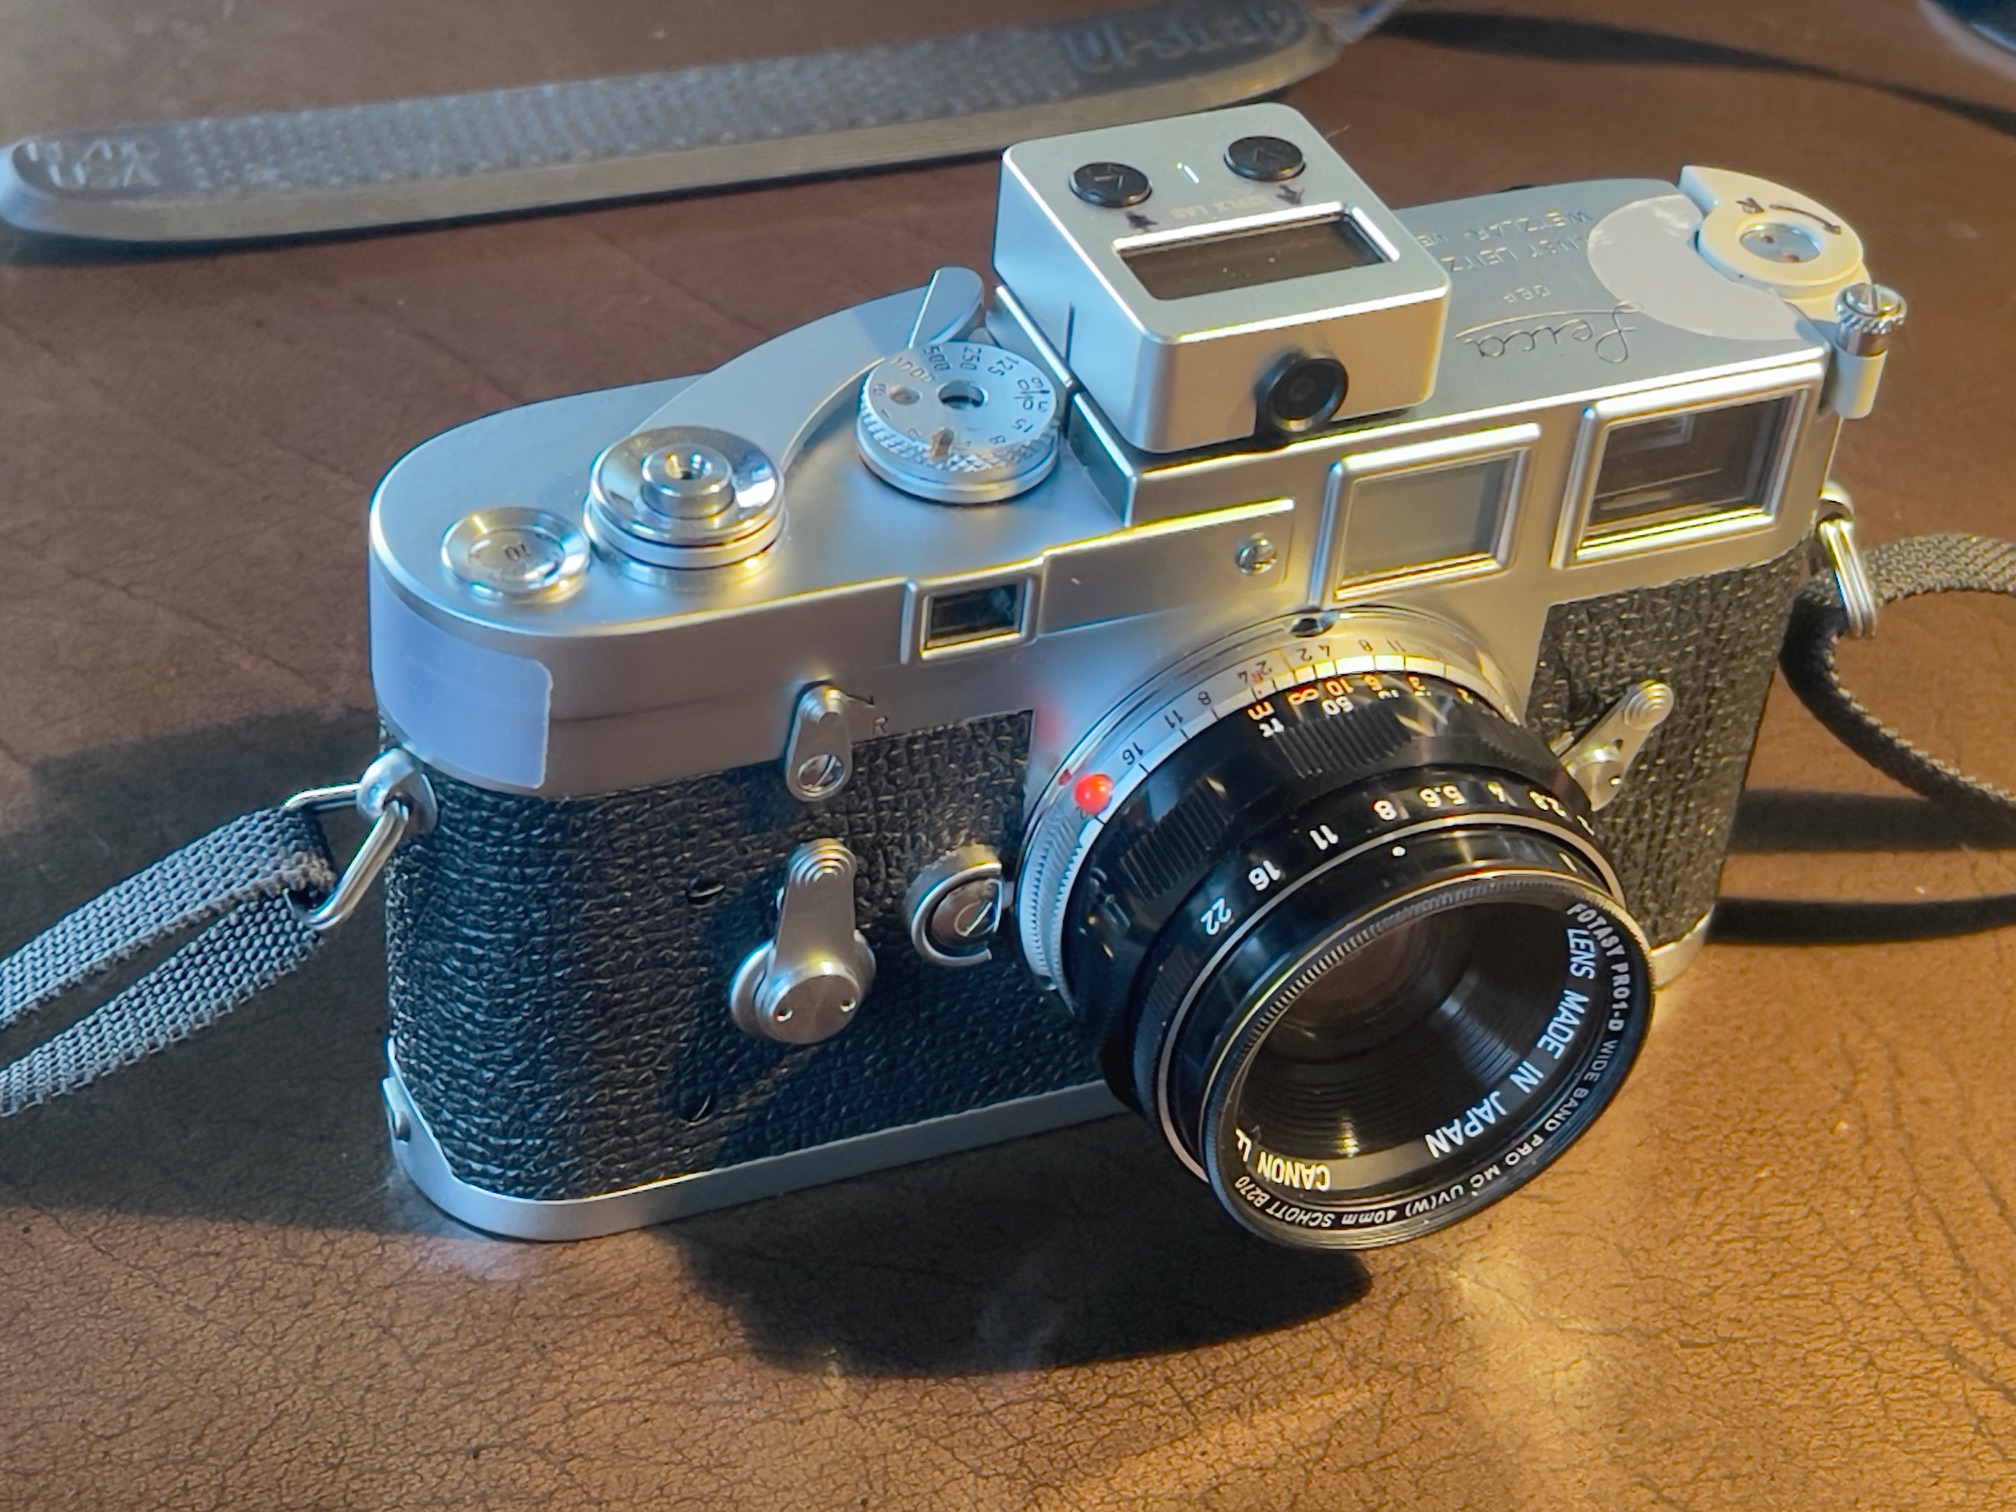
Small it is not. Compare with the
Reflx meter in the camera’s accessory shoe.
Go to B&H and you will find no fewer than 51 hand held Gossen exposure meters listed. Gossen has been making light meters since 1932. Its major West German competitor was Metrawatt which made the various Leicameters and was absorbed by Gossen in 1992. You can view the full history here. And to this day you can blow upward of $2,000 on a fancy Gossen spot meter.
But there’s no need to spend that sort of money if all you need is a reliable, hand held workhorse.
My Gossen Luna-Pro F ran me all of $56 shipped, and arrived in mint condition. No case, but you really do not want one. It’s just one more time delay factor in the field.
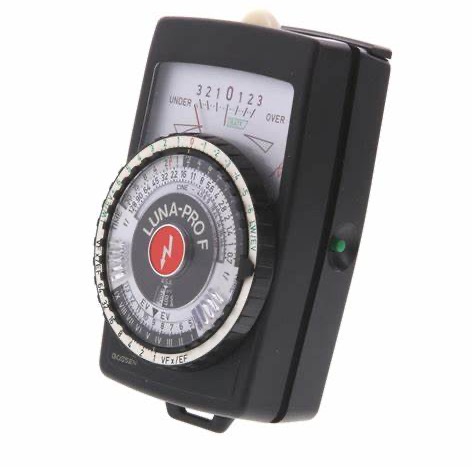
The Luna-Pro F.
The green button is for checking the battery.
The meter was first sold in 1981 and is the last mechanical pointer meter made by Gößen, along with the SBC (scroll to the end). Now that’s retro.
You can download the user manual here and it’s an education in light measurement and beautifully written. I highly recommend reading this manual as the Luna-Pro F is a sophisticated, relatively complex instrument and repays a thorough understanding. Unlike its famed predecessor, the ultra sensitive Lunasix, the Luna-Pro F uses a regular 9 volt battery, not the discontinued dual 1.35 volt mercury cells used by the Lunasix. (The above Leicameter link will tell you all there is to know about the use of modern cells in meters which require 1.35 volts). Not that the sensitivity of the Luna-Pro F is poor, as it goes down to -8EV, which is ‘black cat in a coal cellar’ territory. -8EV is 16 minutes at f/2 with ISO100 film! Further the light sensor is a Silicon Blue cell, not the Cadmium Sulphide one used formerly. That mean that the CdS cell’s over sensitivity to the red spectrum is gone with a color response similar to that of the human eye. And of film.
Before inserting the battery take a look at the position of the meter needle. It should be centered over the small mark just to the right of the word ‘Under’ in the meter’s window. If it is not use a jeweler’s screwdriver on the screw in the back to adjust it. The battery must be disconnected. Connect it and the reading will change.
The battery compartment is well insulated from the internals of the meter so in the event of a battery leak there should be no damage to electrical components. The battery is a tight fit, so dress the two wires at the side of the battery, not underneath, to ease replacement of the sliding cover.
To test the battery, depress the large red meter reading button at left then depress the small green one at right. Mine needs a committed push. With a fresh cell the meter’s needle will move well past the right of the ‘Batt.’ inscription in the meter’s window.
Measuring 4.75″x1.75″x2.75″ the Luna-Pro F weighs 8.6oz/245grams with battery and lanyard. It will also measure flash exposures when the small mode selector switch at left is in the raised position. The coverage angle is 30 degrees for reflected light readings which is like a 90mm lens on the camera. Slide the white cone in front of the cell and the acceptance angle becomes 180 degrees for incident light measurement. The large red switch at left is depressed to take a light reading. Depress and turn it clockwise and the meter goes into continuous reading mode, switching off after 30 seconds to conserve the battery. Mine turns off exactly 30 seconds after taking a reading – there’s that famous German sense of humor at work for you.
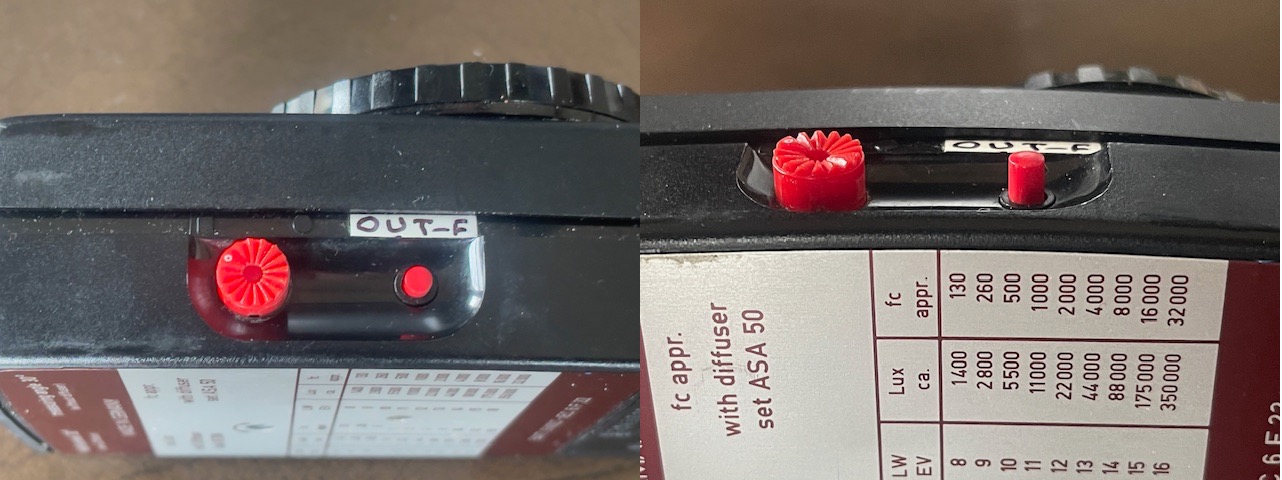
The factory label was AWOL in mine, so I added an explanation.
When the smaller button is ‘out’ (right image) the meter will measure flash.
If you are seriously off your rocker you can even procure a tele attachment with a viewfinder which narrows the measuring angle to 15 or 7.5 degrees:
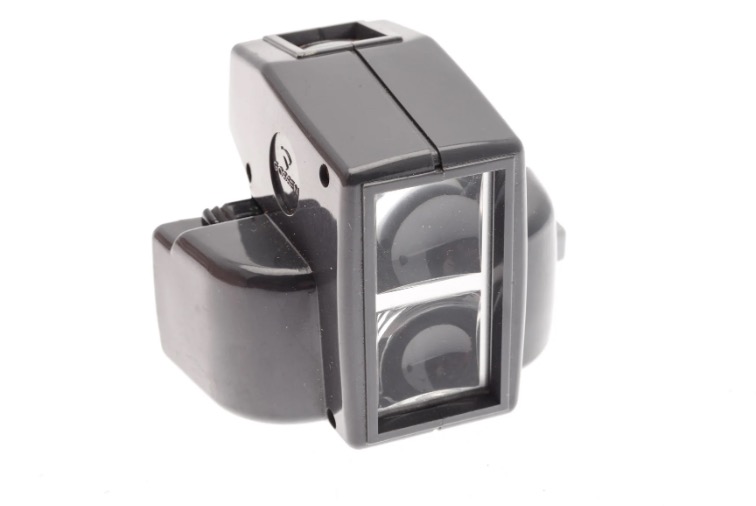
The Gossen Variable Angle attachment.
There’s a host of other attachments – one for microscopes, one with a fiber optics probe, one for copying and finally, for the seriously deranged, an Enlarging Attachment if you are seeking to emulate that darkroom doper and serial over-processor Ansel Adams. Funny cigarettes are extra. Come to think of it, AA would have benefitted from that attachment. Naturally Gossen thought of everything and has included Zone System settings for all the Zonies out there.
You see, those humorless Germans decided that this light meter would be a system not some poncy toy for poseurs.
Putting aside this insanity the core instrument is a delight to use. Unlike most meters which indicate a reading from the galvanometer needle, the Luna-Pro F uses a ‘null reading’ design. After taking the light measurement you rotate the large dial until the needle is centered, and all the resulting shutter speed/aperture combinations are easily seen. Want to overexpose a stop? Or two? Or three? Simply rotate that dial until the needle points to +1, +2 or +3. It’s the same for underexposure, with the needle the other side of the ‘0’ mark. (There are small 1/3rd stop dots between the major intervals for obsessives).
Simple, elegant, uncluttered, with nothing left to chance. How a machine should be.
And that rotating dial is big and bold, leaving no doubt as to the result. While there are scales for ciné and all sorts of funky corrections, these are about as useful as the markings on the rotating dial on your overpriced sports watch. No one understands them and even fewer use them. These are yours to disregard.
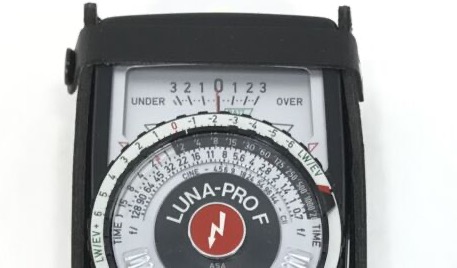
A null reading. What could be simpler?
One beauty of the null reading design is that once you have established a mid-tone reading you can point the meter at the lightest and darkest areas of your subject, take light readings of both and immediately see what the exposure range is based on the +/- reading of the needle. With slide film, for example, where over-exposure is a killer, you may want to elect to under-expose, based on what those readings tell you, recovering shadows in post processing.
Battery life? I have no idea but suspect it’s huge. Those 9 volt cells pack a punch. And there’s a battery check function to tell you how it’s doing. And you can probably even find this battery in sub-Saharan Africa. It’s the same one used in your home’s fire alarm.
The Gossen Luna-Pro F is the last hand held meter you will buy, with mint used versions under $60 representing one of the great photography bargains. While listings for the predecessor Lunasix are much more numerous there really is no need to go there with all the related battery problems. Some patience and a Luna-Pro F will turn up. (The meter is known as the Lunasix F outside the U.S.). Later digital versions? Oy! Digital schmigital. Humans are analog beasts. This analog device pairs nicely with your retro film camera whose meter died long ago.
Don’t get caught out: There’s an Exposure Factor adjuster (for things like filters) on the dial’s outer periphery:
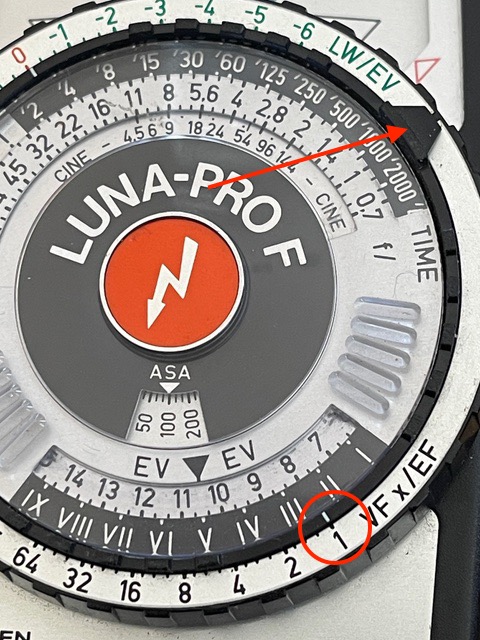
The hidden EF adjustment – the setting is circled.
You want this set at ‘1’, doing so by rotating the adjustment using the arrowed tab. It has a detent you can feel. Set this at anything other than ‘1’ and your exposures will be shot in the worst way – overexposed – unless you really are using a filter. With the adjustments available in LRc who needs a filter?
The Lunasix Pro F is not only a competent daylight meter. It can also measure flash, and I recommend reading the manual about how to do that. The speedy response of the silicon blue cell permits this function and the meter can measure either reflected or incident light. Try that with your fancy DSLR! I have tested the meter in my flash equipped studio and can confirm it’s accurate.
An alternative: Recognizing that not everyone needed flash measurement, Gossen released the Lunasix Pro SBC. It’s far easier to find on eBay than the F model and except for the deletion of the flash measurement capability is identical, using the same Silicon Blue Cell and a 9 volt battery. It uses the same wonderful ’null’ method of metering and includes the incident light sphere. The operating manual can be found here. Excellent examples can be found for under $50.