Recommended, with reservations.
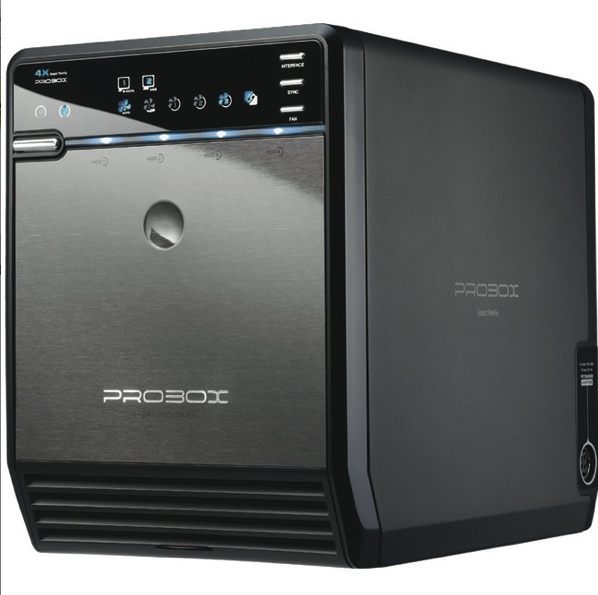
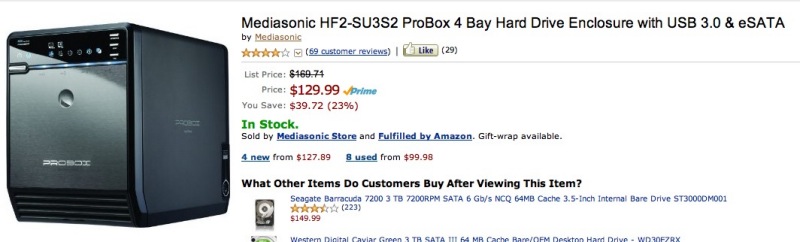
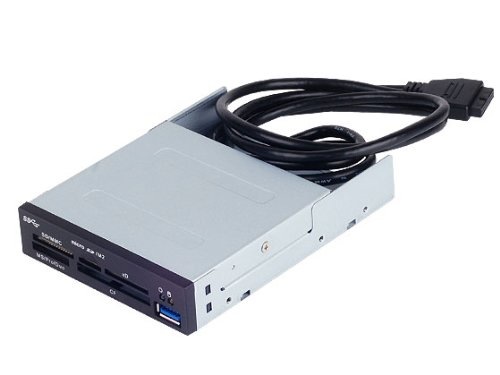
I wrote of my intention to move all my movies from half a dozen external enclosures to one in yesterday’s piece, opting for the Mediasonic HF2-SU3S2 (Amazon – $130). What follows is as relevant to storing photo files as it is to video. Having taken delivery and transferred my movies to 3Tb drives in the enclosure, here are some observations.
- Very well made and well packed for transit.
- Near useless ‘Chinglish’ instructions.
- Front flap opens easily and door can be removed.
- More flashing LEDs than you can shake a stick at.
- Auto power-up must be switched off (two presses on top right front panel ‘Sync’ button) or the case shuts down with OS 10.7.4 Lion. This is purportedly a function which works with Windows, something I will never explore.
- Once the front door is removed a two catchpress retaining plate is removed to gain drive access
- Drives slide in and need a bit of wiggling to locate the power and SATA connectors. No big deal but side rails would have made this easier.
- Attachable drive handles are provided to make it easier to remove drives; these attach with screws and a screwdriver is provided. I have found you do not have to use these. If you do not use them, drive installation needs no tools.
- The box is compact, some 9″ deep x 6″ tall x 5″ wide.
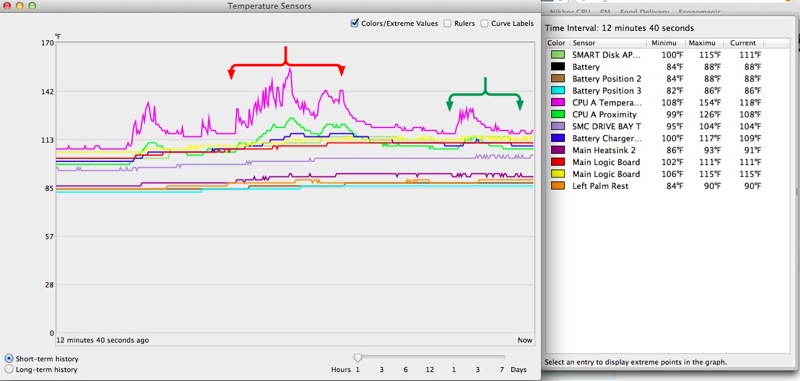
- The three position fan switch has Auto, Low and High settings. The latter roars, the Auto, which is thermostatically controlled, remains very quiet in practice. Inaudible at 6 feet.
- The power cable socket is at the side which makes it impossible to abut these enclosures next to one another if you have more than one. Inept design.
- As shipped it’s set to USB; to switch to eSATA a front panel button must be held for 4 seconds. For eSATA connectivity, see the Update at the end of this piece (Hackintosh only; eSata is not available on Macs).
- When copying files to a drive the bar aligned with the front power switch dances crazily with an LED show. Bizarre, but irrelevant in practice, unless it’s in line of sight.
- Rubber feet provide noise and vibration isolation.
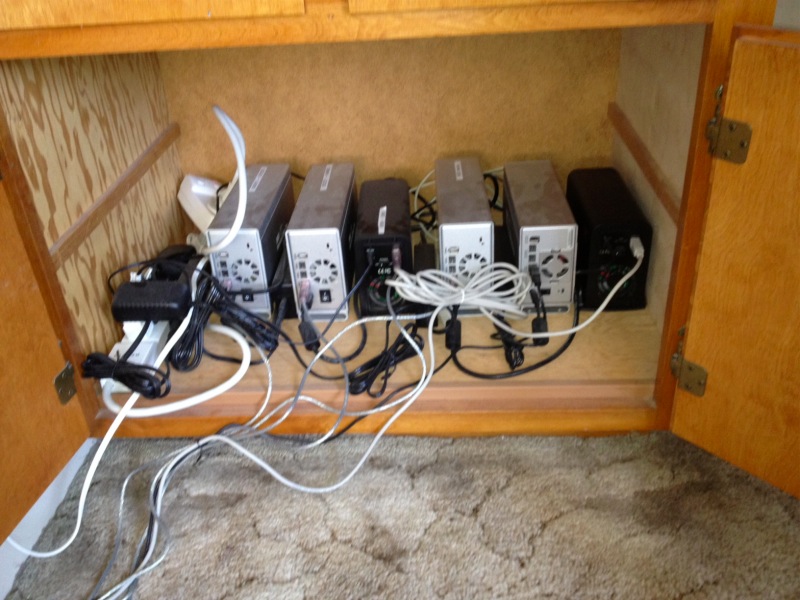
To add USB3 capability to my HackMini I installed a two port Western Digital USB3 card in one of the short slots.
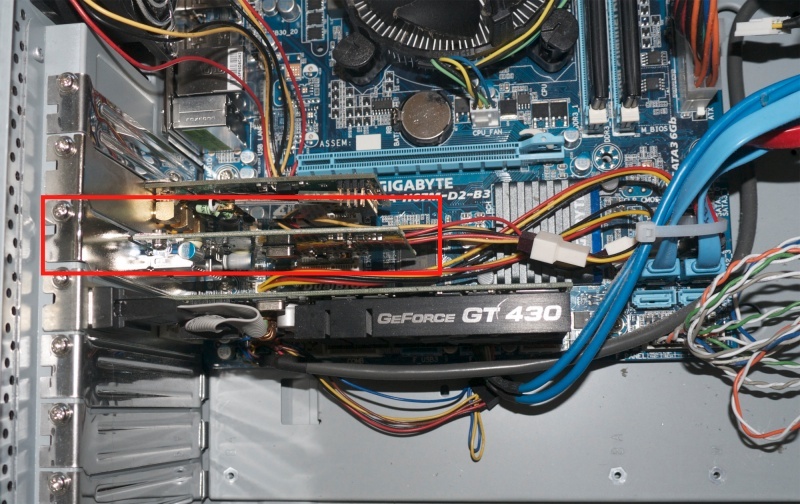
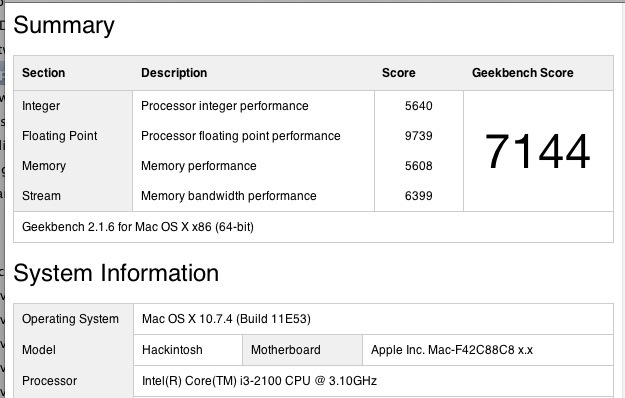
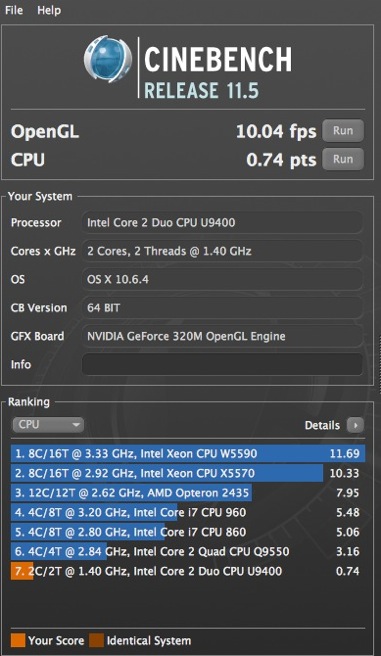
The Mini uses a modest Core i3 Sandy Bridge CPU and an equally modest Gigabyte H67M-D2-B3 motherboard. That’s all that is needed for movie playback, and the motherboard used has no USB3 sockets, hence the add-on card.
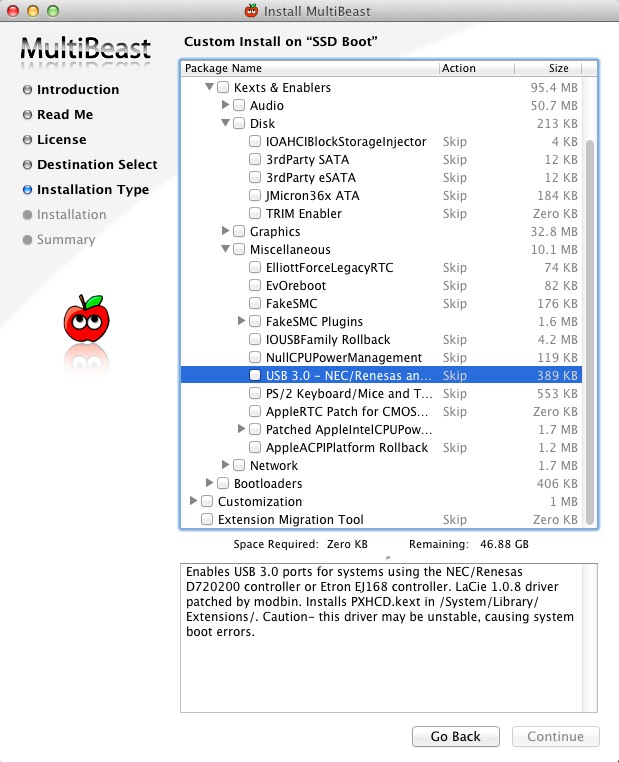
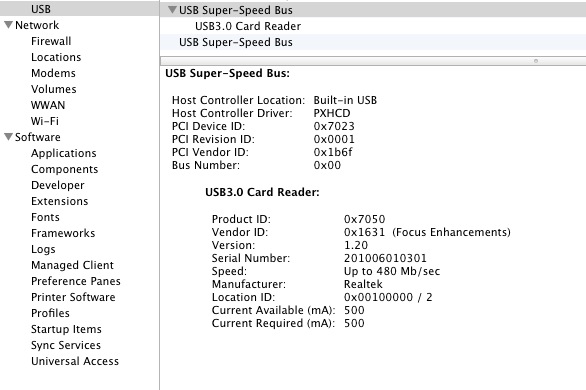
I then installed the NEC/Renesas driver using TonyMac’s Multibeast application and verified that my USB3 card reader was recognized as a USB3 device when connected with a USB3 cable. All was well.
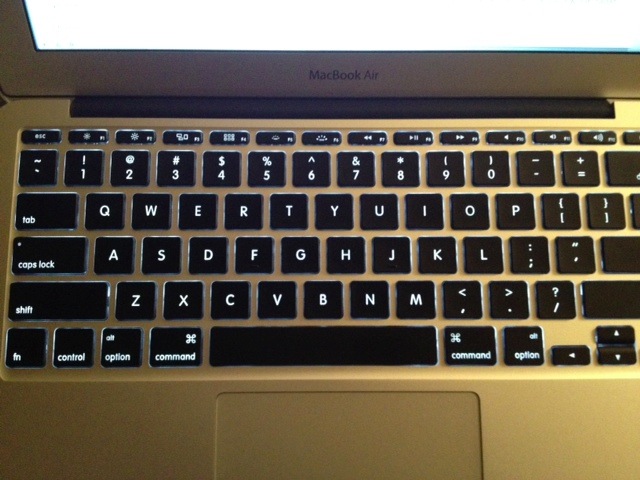
However, neither my HP100 Hackintosh, the 2012 MacBook Air or the HackMini would recognize the enclosure when connected with a USB3 cable. Research disclosed that the maker is aware of this and claims to be working on it but as the issue has persisted since at least the introduction of Lion a year ago, don’t hold your breath. So if you are doing processing of pictures or video and need the high speed connection offered by USB3, this enclosure is not for you – yet. (See the Update at the end of this piece where Hackintosh users can activate the faster eSATA connection).
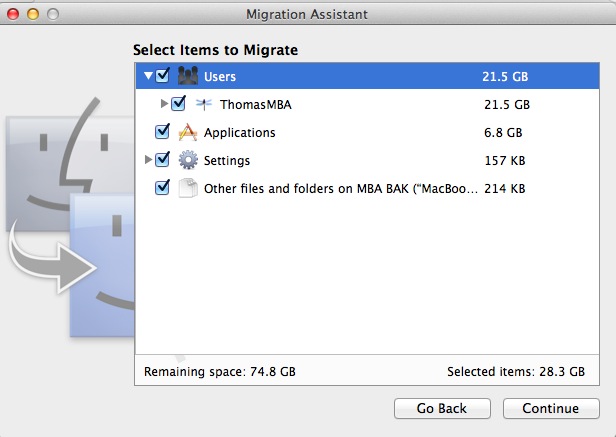
Using a USB2 cable there were no issues. After disabling the auto-power feature the enclosure and drives were immediately recognized and everything was ready to go. I popped successive 1Tb drives into the enclosure copying the movies from these to the 3Tb drives inside. The enclosure can be used with software RAID (included in OS X’s Disk Utility) but for my purposes the regular setting as JBOD (Just a Bunch Of separate Drives) is fine.
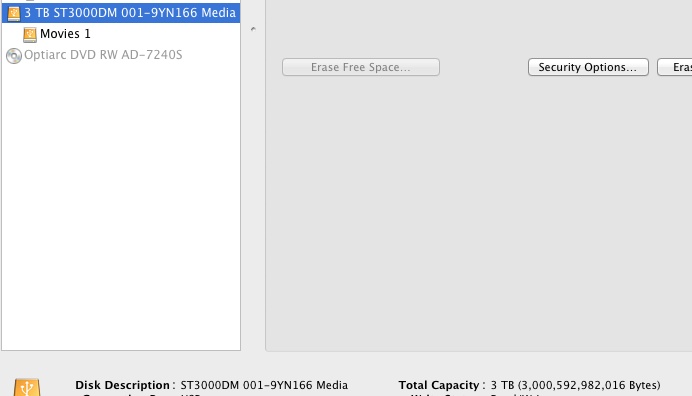
When I tried to format my first 3Tb drive using a USB2 cradle attached to HP100 Disk Utility could only format 801Gb of space. However, once the drive was inserted in the enclosure, the full 3Tb was recognized and formatted, suggesting that the enclosure drive controller is a lot more current than the ancient one in my drive cradle.
Recommended, with the reservations stated above.
Note also that as hard disk drive manufacturers have consolidated, quality control appears to have fallen judging from buyers comments at Newegg and Amazon. Accordingly, to spread the risk I bought two Seagate and two Western Digital Drives. We will see, though my exerience with these machines is similar to that for all machines – they fail when very young and very old. If you can get through the first few months, chances are pretty good that years of troublefree service will follow.
Updating links in a DVDpedia catalog:
Here’s the code provided by Conor at DVDpedia for v5 of the Bruji app; he shows links to six old drives (‘MyOldMovieDriveTB1-1 through 6’) to two new drives (‘MyNewMovieDriveTB3-1 through 2’). Simply cut and paste this into Terminal replacing the names with the names of your drive(s). I have tested this and it works perfectly. Thank you, Conor!
/usr/bin/sqlite3 ~/Library/Application\ Support/DVDpedia/Database.dvdpd
update ZLINK Set ZURL = replace(ZURL, ‘file:///Volumes/MyOldMovieDriveTB1-1’, ‘file:///Volumes/MyNewMovieDriveTB3-1’);
update ZLINK Set ZURL = replace(ZURL, ‘file:///Volumes/MyOldMovieDriveTB1-2’, ‘file:///Volumes/MyNewMovieDriveTB3-1’);
update ZLINK Set ZURL = replace(ZURL, ‘file:///Volumes/MyOldMovieDriveTB1-3’, ‘file:///Volumes/MyNewMovieDriveTB3-1’);
update ZLINK Set ZURL = replace(ZURL, ‘file:///Volumes/MyOldMovieDriveTB1-4’, ‘file:///Volumes/MyNewMovieDriveTB3-2’);
update ZLINK Set ZURL = replace(ZURL, ‘file:///Volumes/MyOldMovieDriveTB1-5’, ‘file:///Volumes/MyNewMovieDriveTB3-2’);
update ZLINK Set ZURL = replace(ZURL, ‘file:///Volumes/MyOldMovieDriveTB1-6’, ‘file:///Volumes/MyNewMovieDriveTB3-2’);
.exit
This updates yesterday’s link to the Bruji chat board where the link shown to sqlite3 is now outdated.
Update – use with eSATA:
Macs do not support eSATA connections but Hackintoshes can be readily adapted. If your motherboard comes with eSATA all you need do is install this driver from Tonymac:
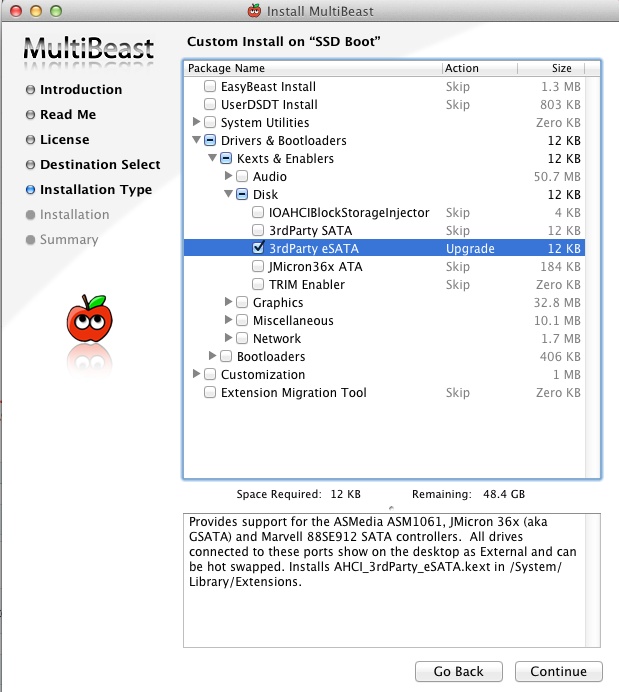
Multibeast eSATA driver.
Once installed and rebooted, System Profiler will show the eSATA ports thus:
eSATA ports on the Hackintosh.
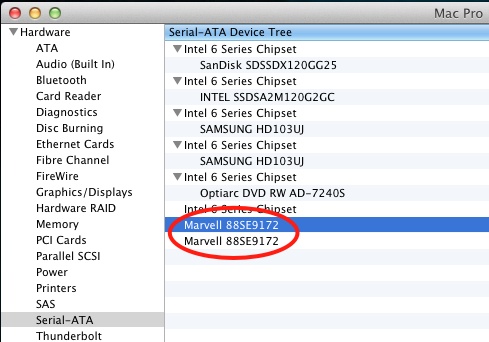
My system shows two ports as there’s one on the card and one on the front of the Antec case I use, connected to a header on the motherboard. However, the Z68X motherboard I use does not support port multiplication, so only the first of the four drives in the enclosure is reported in Finder when using eSATA. Read on for the fix.
If your motherboard does not have eSATA, you can add an inexpensive PCIe card which must have ‘port multiplication’. Absent this feature only the first of your drives will mount. This $23 card is known to work.
You will also need an eSATA cable. Happily the enclosure comes with both USB3.0 and eSATA cables, though neither is very long.
I switched the enclosure to eSATA by holding the top right button (‘Interface’) down for 4 seconds, then connected the enclosure to my Hackintosh.
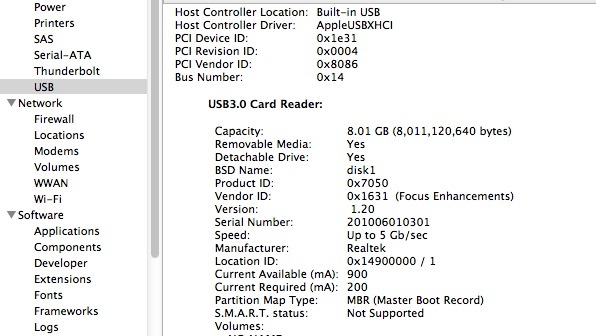
System Profiler now reports the drive:
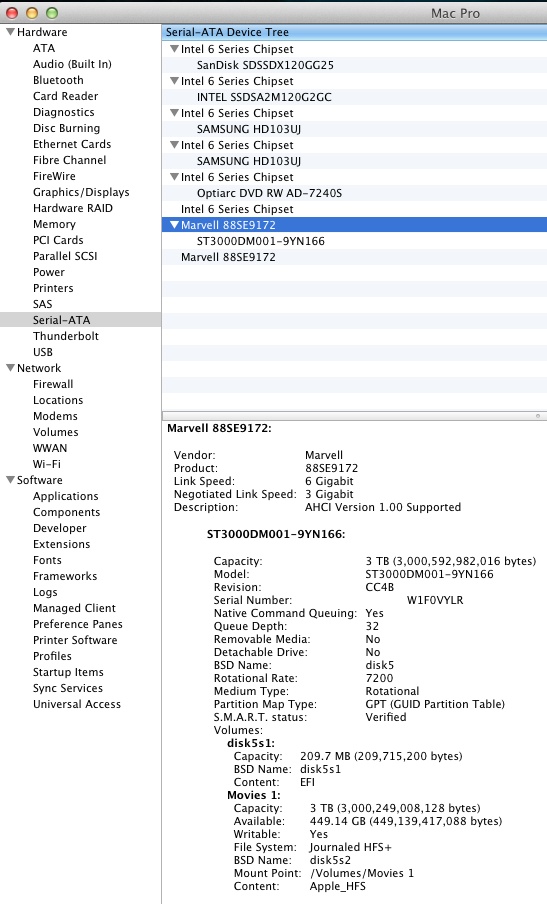
The Mediasonic connected using eSATA.
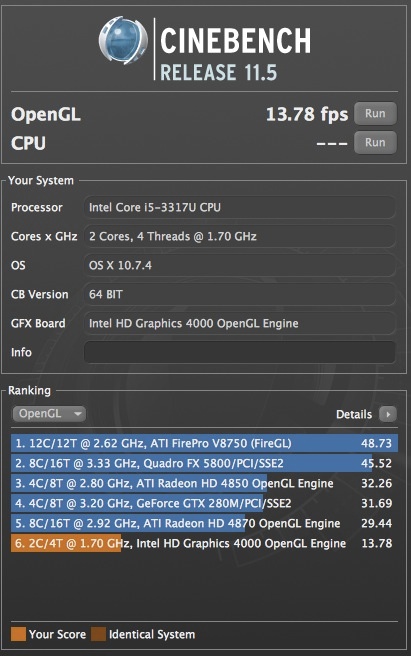
I then ran Xbench tests, comparing USB2 with eSATA.
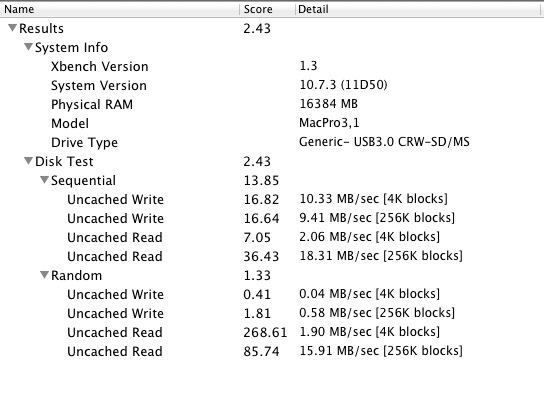
First USB2:
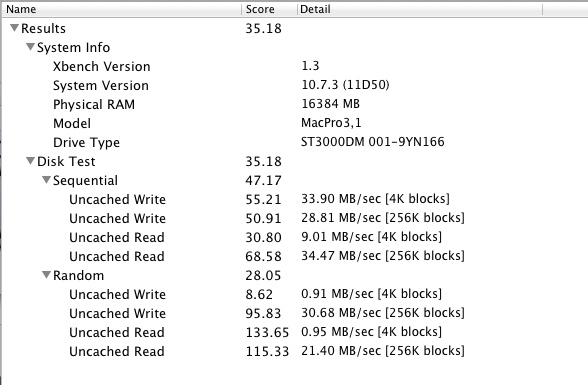
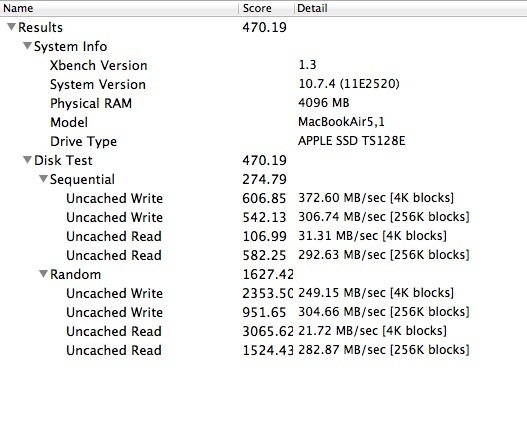
Using USB2 with the SATA3 3TB Seagate drive.
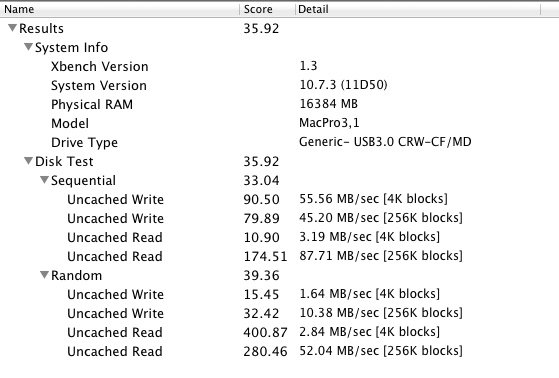
Then eSATA:
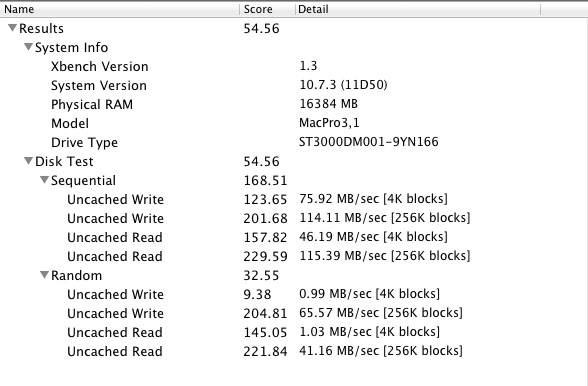
Using eSATA.
So the overall speed increase is 55%. Not stellar but handy when copying large files. Further, the larger the data blocks the greater is the gain, with 256k blocks averaging 3-4x as fast. That’s worthwhile.
Update 9/20/2012 – use with MacBook Air 2012 and USB3:
I dropped Mediasonic an email explaining that the enclosure would not be recognized by the MBA when connected with a USB3 cable. I received a courteous reply stating that they would send me an updated circuit board, and asking I return the original. They followed up with instructions for replacement (these were almost right) which requires that six screws retaining the rear of the unit are removed, the fan is disconnected from the circuit board (you must use two pairs of fine nosed pliers to do this or you will wreck the fragile socket or plug) and the six retaining screws for the board and the connecting ribbon cable (a PATA plug, lots of pins on the board – Ugh!) be removed. You also have to pull your drives which connnect directly to the board. Simply yanking the latter out is a prescription for catastrophe. The whole thing took me twenty minutes – one Philips screwdriver and two pairs of fine nosed pliers. And yes, my Border Terrier was in attendance.
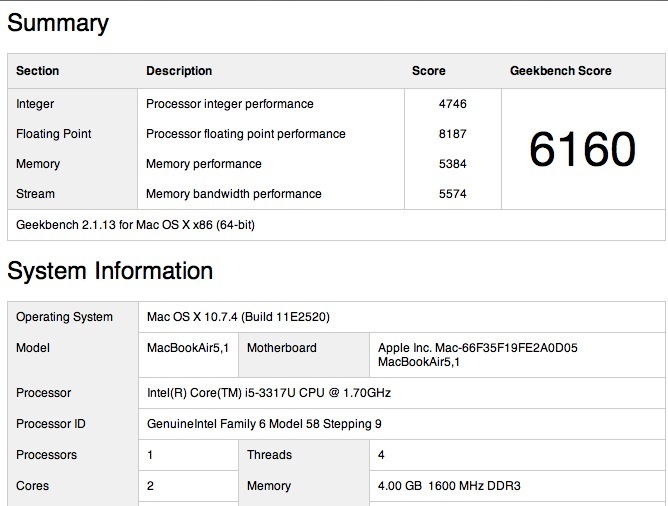
The enclosure was immediately recognized by the MBA, but the speeds, measured with Xbench were disappointing, slightly slower than USB2:
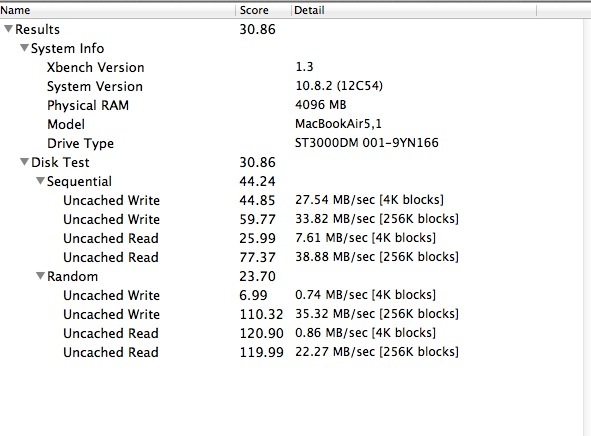
Speeds with USB3 and 2012 MacBook Air.
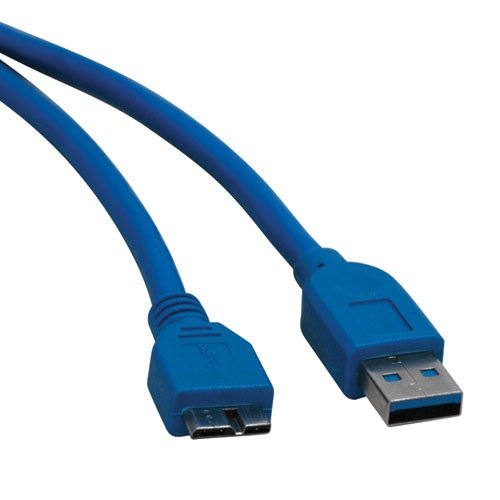
So, a Phyrric victory. It works, but is slower. Still, no complaints about Mediasonic’s customer service. To revert to USB2 simply use a USB2 cable. USB3 cables are blue with blue connector inserts. USB2 cables are all colors with white connector inserts.
Second Update – March, 2013:
I added a second one of these boxes with 2 x 3TB drives. I’ll add two more when needed, as prices keep falling. The price of the box is now down to $120 and one each WD and Seagate drive (Main and Backup) ran $140 each. No issues in setup, and the box, connected with the supplied USB3 cable to a USB3-capable OS X machine was immediately recognized as a USB3 device, suggesting that Mediasonic is fitting the revised board referred to above to new inventory. Nice. Once again, this is not a hardware RAID device for sophisticated backup strategies. It’s simply for use as a simple and effective Main+Backup two HDD (in two pairs if needed) device for mass storage. Ideal for video. If your computer has USB2 only, that will work too, using the supplied cable which is backward-compatible.
Third update – July, 2012:
One year of 24/7 use later and no issues. The box works fine using an Orico USB43 card in my Mac Pro. No fan noise, no HDD failures, no issues.