Category Archives: Hardware

Stuff

ThinkTank Retrospective 10 bag

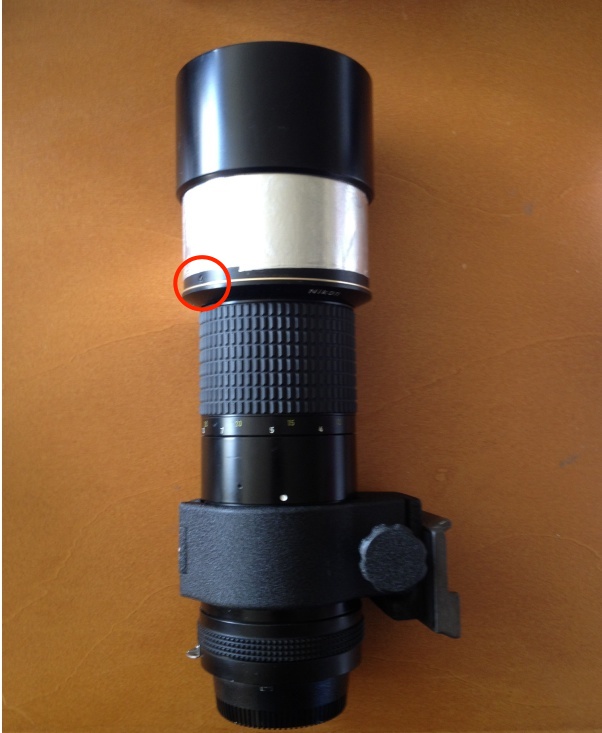
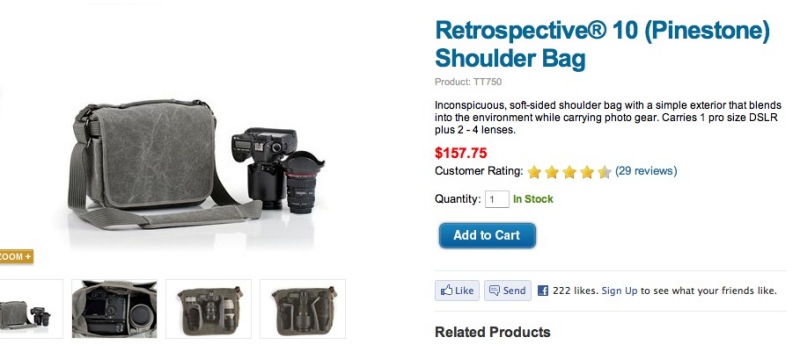
Someone has been thinking here.

If, like me, you are a wimp who feels sorry for himself when carrying weight is involved, give the ThinkTank Retrospective line of camera bags a thought.

Background:

I wanted to be able to carry a reasonably versatile Nikon D700 outfit with a minimum of pain. The idea is that the body with the 16-35mm zoom (no toy, when it comes to size) goes in with the lens pointed vertically downwards, ready to be removed and prepared for action without messing with caps and lens mounting. I looked at all the big name bags – marques like Lowepro and Domke – and found that there really was nothing that recognized that this is the way most itinerant photographers work. You know, those of us who walk or ride a bike with our gear about us.

Click the image for the ThinkTank site.

Then I chanced upon something designed with the modern DSLR user in mind, from a company named ThinkTank. It fulfilled several of my requirements. The camera and lens combination goes in as described, there is room for another four lenses without cramming, it looks nothing like a camera bag, and has a truly broad strap and shoulder pad to spread the load. I did not want closure zippers, and the Retrospective 10 uses a large Velcro flap, with the option of disabling the Velcro for a loose flap and zero noise. It’s at this point that you start to realize that the designers have done some serious thinking.

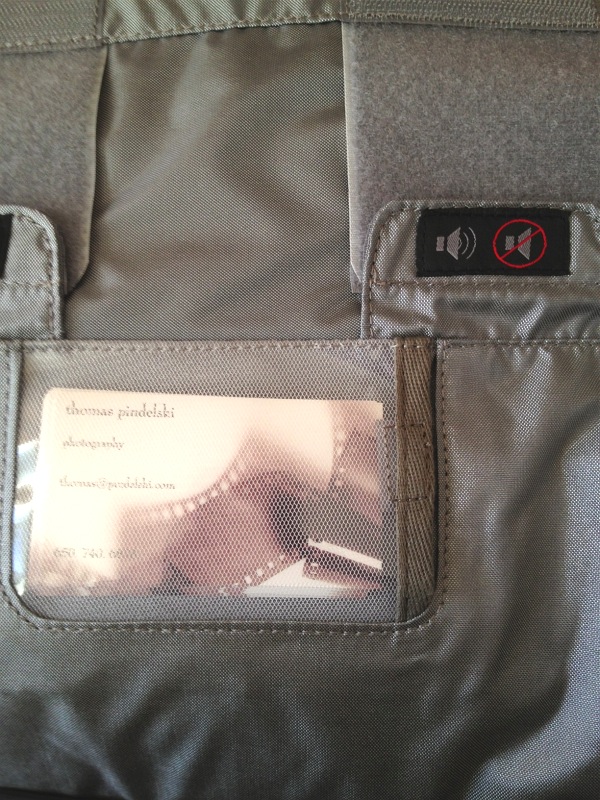
Attention to detail. Velcro disabling flaps and business card holder.

Unexpected benefits include a zippered, interior pocket which will accommodate an iPad and a rain cover which slips on from the front, wrapping around the base then in towards your body, so as not to interfere with the shoulder strap. There’s also a regular handle for carrying like a suitcase. The iPad will fit more easily in either outside pocket – the Velcroed one in front or the zippered one next to your body; it’s a tight fit in the internal one, but will fit and the zipper can be closed. So there are no fewer than three iPad pockets! There is a clear plastic Velcro pocket inside the front flap to hold a handful of business cards.

Border terrier for size. The thinner strap is a small carrying handle.

In use.

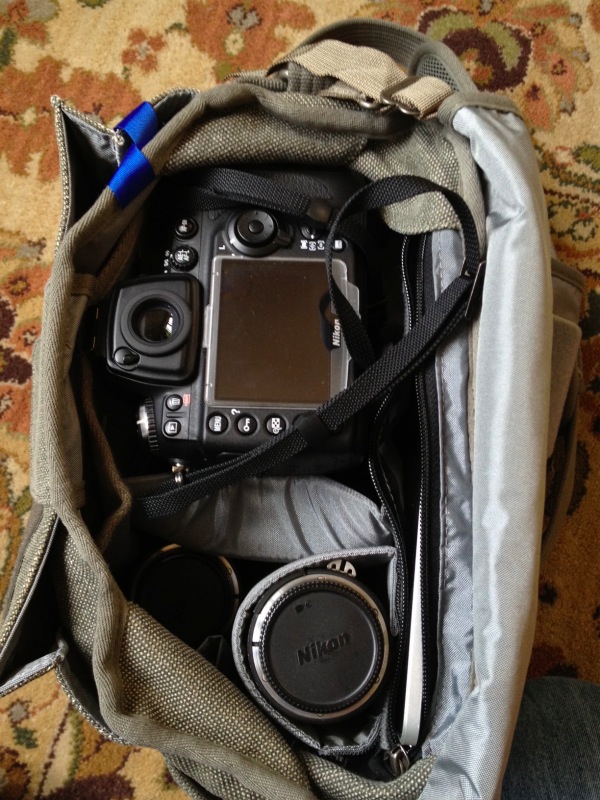
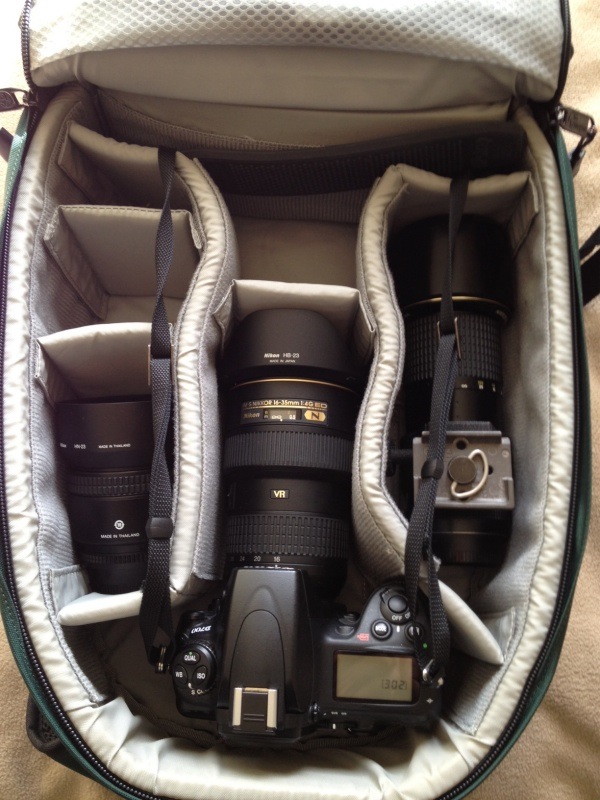
D700 with 16-35mm fitted, 85mm and 300mm below, hidden area under top of D700 for two more lenses. iPad at right in zippered pocket.The blue tape top left retains the compact weatherproof cover.The 16-35mm zoom on the D700 is resting on its mounted lens hood. There’s a small, leather, embossed maker’s label sewn to the outside fabric, but it’s on the body side and invisible in use. Phew!

There are small open flaps top and bottom and a Velcroed one at left on the front. There are no tripod straps, and I doubt the bag would accommodate a full size DSLR like a Nikon D3 or D4/EOS 1D/D700 or 5D with battery grip plus many lenses. There are two larger sizes, the 20 and 30, for those. Indeed, if your idea of a fun time is an 85mm f/1.4 rather than my modest f/1.8, or a 200mm f/2 in lieu of my f/4, or you like huge 70-200 f/2.8 primes or even longer ‘pro’ zooms, then you should look at the larger ThinkTank sizes. And give Charles Atlas my regards when you hump all this weight to the site.

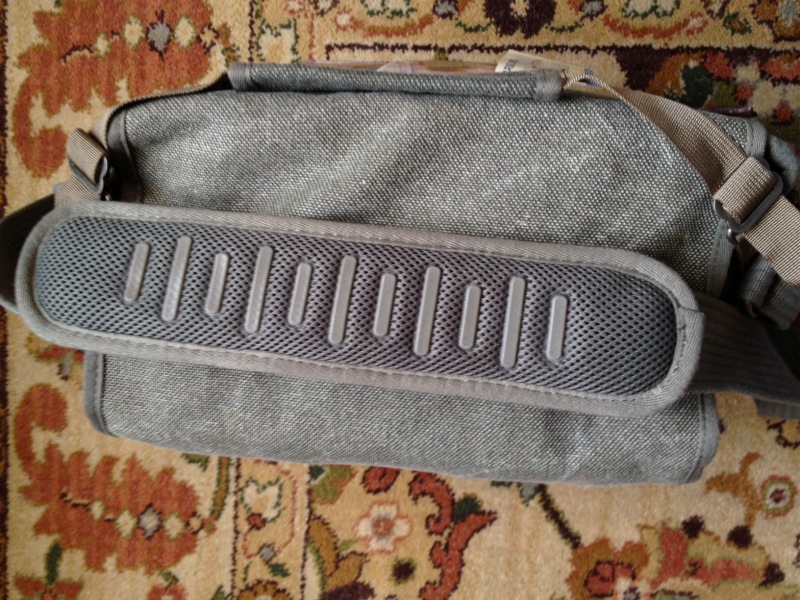
Broad strap and pad spread the weight.

The manufacturer’s site states:

“Think Tank Photo was started in January 2005 by two designers, Doug Murdoch and Mike Sturm, and two photographers, Deanne Fitzmaurice and Kurt Rogers. Deanne Fitzmaurice won the prestigious Pulitzer Prize for photojournalism in 2005.”

It shows. And be sure to check out Deanne Fitzmaurice’s work in the link above.

In use:

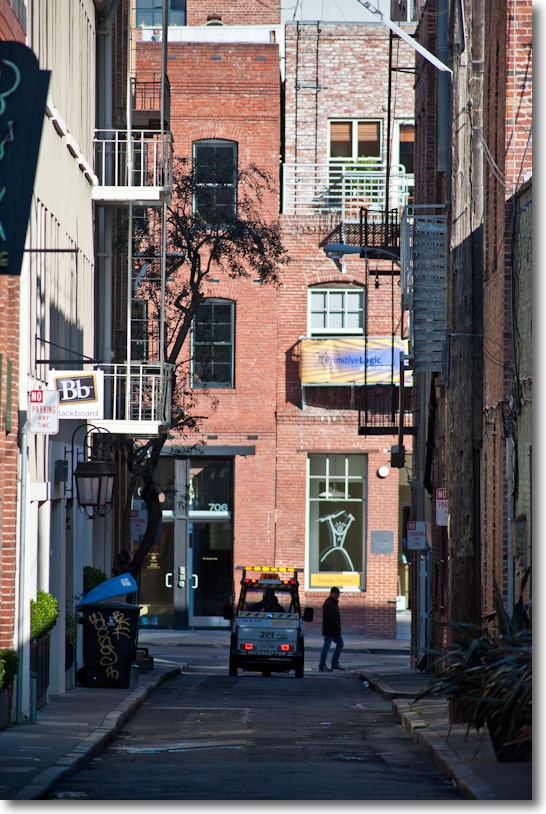
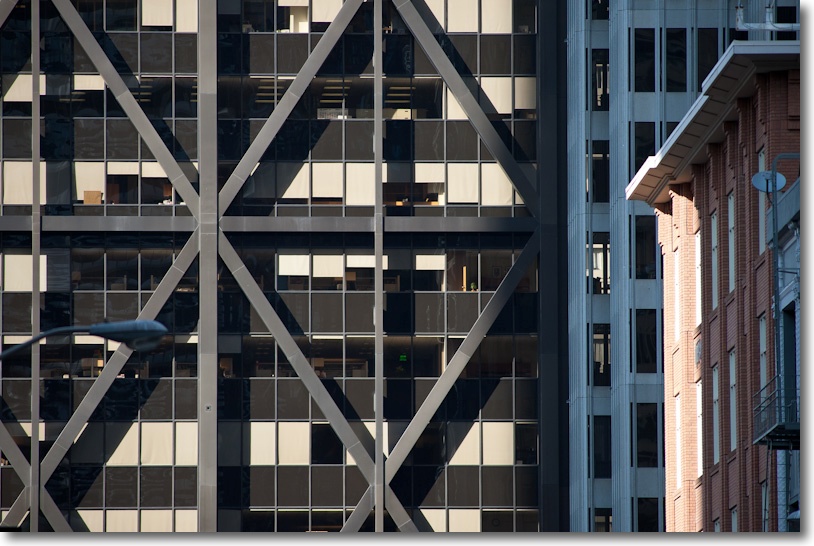
The material and construction quality are excellent, and the bag works well in practice. I took it on a walk around San Francisco yesterday evening, and found that it worked best with the bag slung diagonally across my chest bandolier style, hanging at my left, with the D700 slung over the left shoulder, just above the bag. The Upstrap on the D700 is quite exceptionally resistant to slipping and, should it slip, the camera will land on top of the bag. In this way weight is distributed across both shoulders. Carrying a body/lens combination that heavy and bulky around your neck for any period of time not only invites ridicule, it will also drive up chiropractor bills. The shoulder pad slides on the strap which is much appreciated.

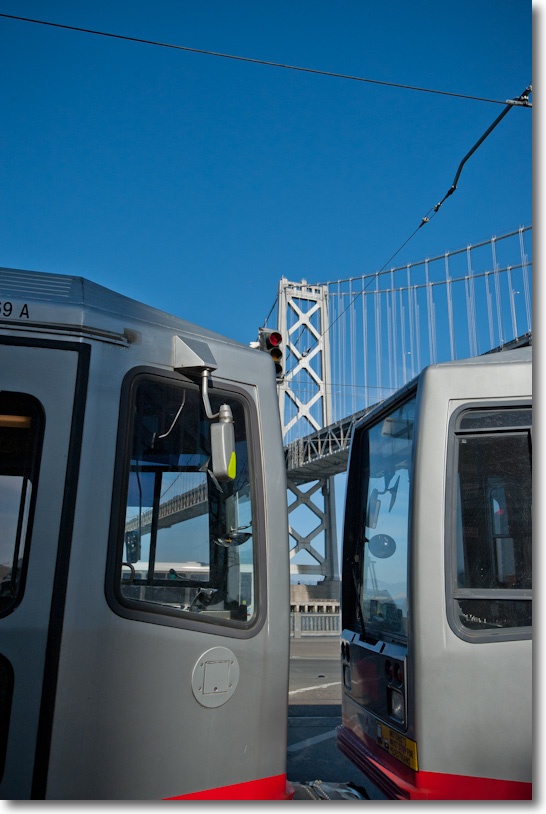
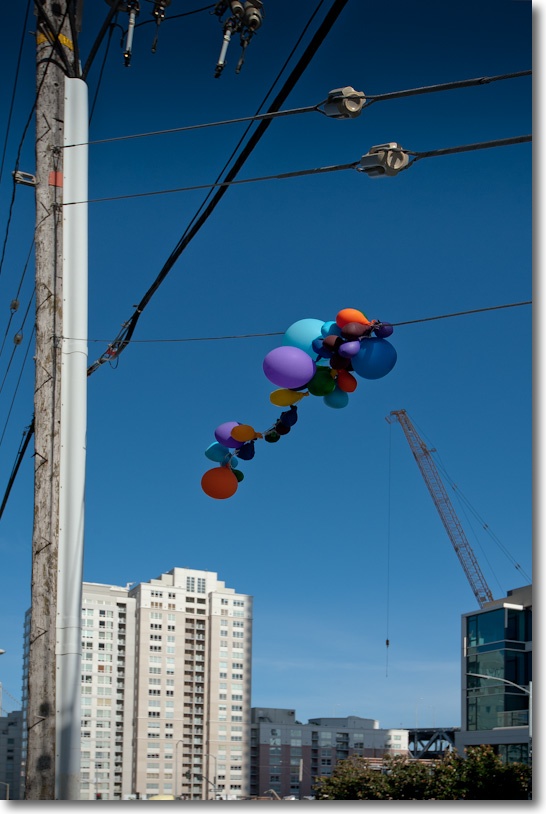
Here’s a couple of late evening snaps from that outing:

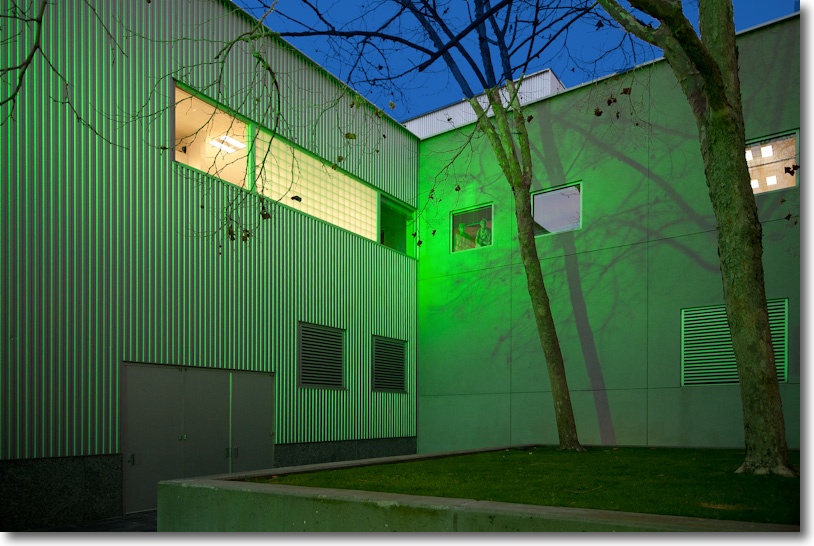
Yuerba Buena at night. D700, 16-35mm @ 24mm, ISO 1600.

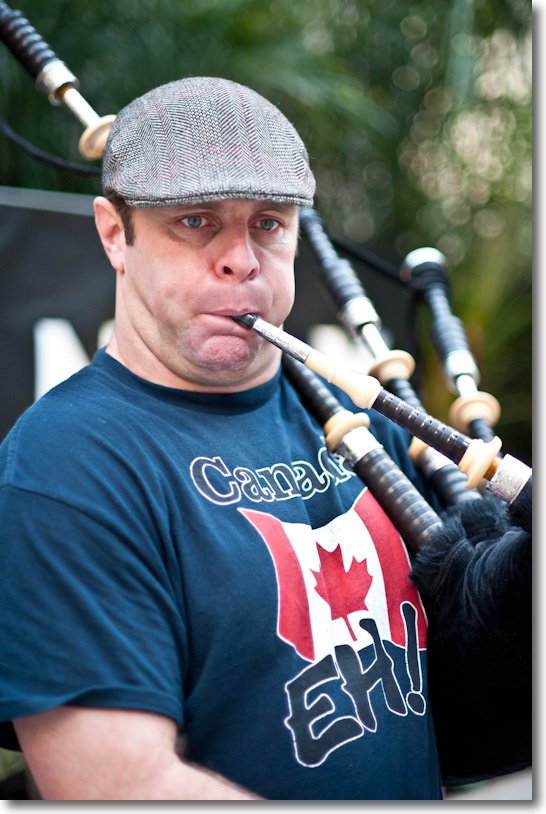
Bagpiper, Pine Street at Sansome. D700, 85mm f/1.8D at f/1.8, ISO 1250.

My ‘standard’ lens is the 16-35 zoom, a range consonant with my brain’s sweet spot. When removed it’s simply dropped in the large, vacant central space and one of the other lenses is mounted on the body. I don’t bother with front lens caps, using only rear ones to protect the vulnerable aperture stop down lever. The side pockets could hold a small flashgun or a couple of granola bars, but are too slim for a bottle of water. That’s where a bike or your local pub comes in handy.

Conclusion:

The color and looks are very discreet, and the bag is recommended. It comes with a no-questions-asked lifetime warranty which was clearly not written by a schmuck. People who take responsibility for their products deserve to succeed.

* * * * *

Were I to return to my hiking days, I would use the Lowepro AW Trekker, which is a backpack design, with sternum strap and tripod holder. It will accommodate more gear than the ThinkTank but at a cost – gear takes far longer to deploy and you really must set the bag down on a flat surface to remove or replace components, otherwise expensive crashing sounds will ensue. It too, is a fine product, well made for long term use, and also comes with a weatherproof cover. It uses two long zippers for the top cover; these are hard to avoid in backpack designs.

The Lowepro AW Trekker.

Nikkor 300mm f/4.5 ED IF AIS MF lens

Alphabet soup.

When I added the 300mm Nikkor manual focus lens to my little D700 outfit, it was with the realization that this relatively little used optic did not justify spending a lot of money. So it was off to KEH.com where I picked up one marked ‘BGN’, meaning something between a beater and a dud. However, having purchased from this business in the past, I knew that they grade conservatively and earlier ‘BGN’ purchases had invariably resulted in fine gear with typical superficial markings from use. And so it turned out this time.

What I received, for less than one quarter the cost of the current f/4 AF optic, was a lens with pristine glass, a beyond smooth focus action and …. a wobbly telescoping hood. The trombone assembly for the latter is attached with three small screws and it was a matter of moments to remove it, disclosing that the cork friction strip inside was worn out. I took the easy way out and wrapped one-and-a-half turns of 3M Flue Tape around the inner cylinder and while the result is not pretty the wobble is no more. This is a thin, metallic tape with strong adhesive, and one $8 roll will do more lenses than you want to think about. I’ll give it a spray coat of high temperature matte black paint, of the kind used on car engines. It’s tough and will hide the tape nicely.

The lens focuses down to 8.2 feet (2.5m), which is like a 50mm lens at 16″. That’s close. It also focuses well past infinity, to compensate for warm days, owing to the expansion of the metal used in its construction.

Contrast is high, identical to that of the other two lenses, putting a well deserved lie to all the claptrap you read about ‘designed for digital’ lenses. This is a film era lens (around 1990s vintage) and works perfectly with the sensor in the D700. ‘Designed for Digital’ is yet another advertising hoax designed to separate the gullible from their money.

300mm MF Nikkor. Flue Tape prevents hood wobble.
Circle denotes one of the three trombone retaining screws.

If following moving action is your thing, this lens is not for you. Auto focus will make life much easier in that case. But my primary use is for architectural details, used as often as not with my Manfrotto monopod fitted with a QR release, so I’m in no hurry. The D700 has a focus confirmation light in the finder, with arrows showing which way to turn the focus collar if you are out of focus. This works really well but is very sensitive. In practice, other than at full aperture, I find that simply focusing on the screen works well, the high f/4.5 focusing aperture making images snap in and out of focus readily. The lens shows a hint of chromatic aberration wide open with high contrast subjects, but otherwise has no bad points. With the removable collar it weighs 2.2 lbs. and balances nicely with the heavy 2 lb. D700 body. I dialed it into the ‘Non-CPU lens’ menu on the D700 so the EXIF data correctly reports that a 300mm lens was used.

EXIF data in LR3.

Unfortunately, Lightroom sorts on the ‘Lens’ field when filtering images, so only the actual EXIF for an image will disclose that a 300mm lens was used. The ‘Focal Length’ and ‘Focal Length 35mm’ fields do not constitute searchable EXIF or IPTC data in LR, as far as I can tell. Good luck getting Adobe to fix that.

By virtue of the Internal Focusing design, operating the focus collar moves a selection of elements internally, not the whole lens barrel, so the length of the lens remains fixed and the action is butter smooth. Just a joy to use. I would describe the rendering of micro-detail as close to that of the very expensive 16-35mm and the bargain 85mm D designs, but not as good through f/5.6. At f/8, however, micro-contrast really kicks in and the definition equals that of the other two. A touch on the Clarity slider in LR3 mostly puts matters to right at f/4.5 and f/5.6, and I am finding that the 86/1.4/50/23 Sharpness settings in my import dialog in LR3 for the other two lenses works well.

The tripod collar, easily removed, is well designed, but not in the class of the one on the 400mm f/5.6 Canon L, adopting a threaded fastener in preference to the superior cam lock used by Canon. There is no Vibration Reduction, which keeps the weight down but that savings is offset by the need to carry a support if slow exposures are contemplated. With the collar removed I find the lens easy to handhold.

Wringing it out yesterday I made a few snaps in San Francisco in late sun, all at 800 ISO and mostly with a monopod. These are almost all straight from the RAW originals, with minimal post-processing, with the usual sharpening on import into LR3. The lens retains Aperture Priority (my choice) or Program exposure automation on the D700, with focus at full aperture:

To get a sense of what the lens can do in huge enlargements, here’s a snap at f/8, 1/50th second, ISO 800 with monopod:

Here’s a section from the top left which would make a 40″ x 60″ print:

Not too shabby – notice the level of detail retained in even low contrast areas.

Adding a CPU:

While many lenses allow simple glueing of a CPU to the rear baffle, the baffle on this lens is too large in diameter to provide the required clearance for the CPU.

I therefore set to machining the baffle on my 300mm f/4.5 ED-IF Ai-S lens. The baffle is retained by three radial, countersunk Philips screws. The fourth, proud, slotted screw is for the stop down lever and is not touched.

After doing some measuring it turned out to be very simple. The full thickness of the baffle has to be removed and the depth of removal is conveniently denoted by a ridge on the baffle, visible once removed.

After marking the position of the CPU with a fine scribe, removing the three screws allows removal of the baffle. It shows traces of threadlocker so it would likely be smarter to use some local heat from a soldering iron on the screws first. I lucked out.

The lens’s tripod collar is removed in these pictures.

Three screws removed, the baffle can be slid out.

The thickness of the CPU body material is identical to that of the baffle’s wall, I used a Dremel cut-off wheel, a metal saw and a fine file to make the slot in the baffle. A milling machine would have been nicer! The CPU is circled in red below.

The CPU in place.

This lens’s baffle is 1.613″ in. outside diameter. The wall is 0.118″ thick, thus the inner diameter is (1.613 – 2 x 0.118) or 1.377″. (It is hard to directly measure the inside diameter owing to various reliefs in the metal). This is right in the range of 1.364″ (75-150mm Series E Nikon zoom) through 1.427 (50mm f/2 Nikkor-H) which allowed a straight glue on of the CPU, so glueing the CPU in place such that it’s base (non-contact side) is plane to the inner diameter of the baffle confers the right contact position.

Lens correction profile:

This lens has some chromatic aberration at full aperture and modest vignetting which disappears by f/8. You can download my custom lens correction profile for use with PS or LR by clicking here.

D700 in use

Competent.

Let me get the grumbling out of the way first. I dislike SUVs. And the D700, with my newly arrived 16-35mm f/4 zoom is an SUV among cameras. It’s large, noisy, crass, threatening, bulky, heavy and few need it. Like an SUV, its owner is likely a poseur. One extols off-road capabilities when he will never leave asphalt. The other boasts of professional gear quality when he would get better results with a point-and-shoot. For most, the D700 fulfills ‘wants’ not ‘needs’. And while the SUV is a pain in the neck when you cannot see past one in traffic, the D700 with a ‘pro’ zoom is quite literally a pain in the neck after you have schlepped it around for a few hours, as I did yesterday.

The newly arrived 16-35mm VR lens is expensive and bulky, though far lighter than you would expect for its volume. Once you remind yourself that it replaces the 16-18mm, 21mm, 24mm, 28mm and 35mm lenses in your kitbag, the 1.5 lb. weight becomes bearable, especially when you throw in the (arguably unnecessary) Vibration Reduction and prime lens quality at all focal lengths and apertures. Construction quality, fit and finish match the optics. Tight, well made, no toy. The lens does not change length when zoomed or focused, which is just as well as it sticks out 6.5″ with the hood attached. Strangely, this confers a certain stealthiness, as observers think you are using a telephoto, not an ultrawide zoom. I detailed my reasoning behind the 16-35mm + 85mm outfit decision earlier, and the 85mm, bought used, has already shown itself to be a sterling performer. For general purpose use, other than sports or wildlife, this is a powerful outfit which keeps bulk and weight down, in as much as that is possible with FF DSLRs.

As a street snapshotter where you want to get really close to people, the D700 is a joke compared to the stealth and agility of my Panasonic G3. The latter focuses faster (yes, faster), is far quieter and its diminutive size makes it extremely stealthy. Keep it dangling from your neck and it’s rarely noticed. Keep the D700 with the zoom around your neck and you will look like the archetypal American tourist so aptly portrayed by Michael Palin in that sketch where the camera protrudes inches from his chest while he debates obscure philosophers in a restaurant.

What you get with full frame, as I am reminded from my days with the Canon 5D, is a tool where technology largely obsoletes technical knowhow, yet still permits huge prints to be made. Anyone can take a good picture with an FF DSLR, pretty much regardless of whether you use Program mode or Manual. There are so many aids, from a monster sensor, great low light capability, infinite choice of ISOs and lenses, VR, auto everything, that even the most inept can take properly exposed snaps capable of high enlargement ratios for prints. And unless you make big prints, you are wasting your money. LCDs and TVs do not need the FF camera’s capabilities to display your pictures. The FF DSLR will not help you make good pictures any more than a Brownie will, but yours will be sharper and finer grained and better-everything in most other respects.

I do miss the EVF of the Panny in the D700. Fit an f/4 lens after an f/1.8 and the finder dims. Go into the dark and the finder image is hard to see. By contrast, when you use an EVF, the finder is always the same brightness regardless of the ambient light level. But I do like the ease with which a button and dial on the D700 can change ISO and the simplicity of locking exposure on your area of choice. All those exposure options – area, matrix, spot, and focus choices ad infinitum, are mostly set-and-forget once you find the ones you like. A waste of knobs and dials. The Panny, by contrast, cannot afford too many knobs and dials as there’s only so much space on the small body. Another much appreciated feature of the D700, at the cost of weight and bulk, is the high battery life. That on the G3 is really not good and I find I always carry a spare. The D700 can bang away all day, and there’s still a lot of juice left. And the truly masochistic can increase framing rates and capacity with an add-on hand grip which will even accommodate AA cells.

The claim of the D700’s sensor is outstanding low noise in low light and with high ISO settings. Comparing my snaps with those from the 5D I would say there is little in it. Maybe one stop better in the worst conditions – not enough to sway you to the Nikon brand. Nikon’s Auto White Balance is noticeably better than Canon’s, but this is such a simple fix in LR2/3 or Photoshop that it’s hard to see it as a decisive issue. The D700 delivers accurate auto exposure, though I often use AE Lock on selected areas of the image to get things just so. I mostly use 21-area matrix metering.

I purchased the D700 for a special project where large prints will be required, even though I was aware that the D800 would obsolete the D700 with a larger sensor. Prints many feet in dimension can be made from a 5D or D700 file. What is intriguing is whether the D700 will now crash in value the way the 5D did after the 5D/II was announced. My 5D, $3,000 when new, sold for $975 five years later and was still in great shape. Today you can buy that 5D, arguably the only classic DSLR yet made, for $800, mint. The argument in favor of the D700 maintaining value – largely made by its owners one imagines – is that the gargantuan file sizes of the D800 will help the D700 retain its appeal. You know, it’s faster, better in low light, quicker to load files for software manipulation and so on. Maybe this is true in the short term, but the person who buys a D800 is, I suspect, just as likely to have the latest Mac or PC with a Core-i7 CPU, fast RAM and lots of storage. It’s not that big a deal if the file is 12, 22 or 36mp. A year or two hence I expect the D700 to be selling for what the 5D commands today. Indeed, were I determined to own a top quality FF DSLR at lowest cost, the 5D would be my first choice every time. I chose Nikon this time just for a change. I have no brand loyalty – a senseless concept.

Why it pays to buy USA imports. Warranty is against manufacturing defects, not user inflicted damage.

In the snaps which follow, I have concentrated on static subjects and experimented with a variety of focal lengths on the 16-35 Nikkor and ISOs from 400 to 1600. Except for noticeable barrel distortion at 16mm, easily corrected with the profile Adobe provides with Lightroom 3, I found that focal length and aperture have no effect on image quality. There is no fuzziness or chromatic aberration to be seen. It’s a top notch optic with extremely low flare even directly into the sun. You pay a premium price for this lens – I bought the last one Amazon had in stock! – and you get premium performance. For something so costly, avoid grey market imports, even from B&H, with their one year warranty. Buy USA imports and get the 5 year Nikon USA factory warranty. The modest premium makes that worthwhile.

16mm, f/5.6, ISO 800.

35mm, f/4, ISO 800.

30mm, f/8, ISO 800.

35mm, f/8, ISO 800.

28mm, f/7.1, ISO 800.

32mm, f/5, ISO 400.

35mm, f/4, ISO 1600, 1/10th second, VR.

16mm, f/4, ISO 800.

35mm, f/7.1, ISO 800, sun in frame.

Legacy Nikon lenses

Jewels for pennies.

When photographers of the caliber of David Douglas Duncan of LIFE first started traveling to Japan in the 1950s they quickly learned that Canon made superb Leica screw mount lenses. These were easily adapted to Leica M bayonet bodies and provided rangefinder coupling as often as not. They spread the word and Canon, in that regard, may have done more to boost the Japanese camera industry than any maker since. Later, of course, Pentax came out with their wonderful SLRs with instant return mirror and Nikon trumped all with the Nikon F SLR. Rangefinders were abandoned, though not before Canon with the 7/7S and Nikon with the S1/S3/SP created two of the great classics of the rangefinder era. These, especially the SP, command collector prices today. The Nikons introduced the titanium curtain focal plane shutter which had a lot to do with the legendary toughness of their successor, maybe the greatest SLR ever made, the Nikon F. The camera that documented Viet Nam.

Nikon SP.

Working as a kid at the Dixons sales counter in London, I had the opportunity to handle many of these as the used market was flooded with owners upgrading to the Nikon F. The feel and sound was similar to the F, meaning robust and solid. But when Nikon went to SLRs, like Canon they realized that the small lens throat of their rangefinder bodies would make design of lenses difficult, especially of the short focal lengths which had to adopt a retrofocus design if the SLR’s flapping mirror was to clear the rear element. So both makers went to larger diameter bayonet mounts, Nikon abandoning the Contax bayonet on the SP and Canon moving on from the Leica 39mm thread mount. Since then, Canon has adopted no fewer than three bayonet mounts for its SLRs. The early Canonflex style, the FD of the ’70s era and then the EF in use today. Nikon, by contrast, has stuck with the original F mount, albeit with adaptations for indexing the maximum aperture on later lenses – the AI and AIS models.

The differences in design philosophy are non-trivial. Forget early Canonflex lenses – too few choices are available and good luck adapting these to anything. Further, for the modern Canon user, FD lenses are mostly a lost cause. The trouble is twofold. First the flange to film/sensor plane distance for the EF mount is 2mm less than for the FD mount. That means that unless your FD-to-EF adapter includes a negative lens element in its design, you will be unable to obtain infinity focus using an adapted FD lens on an EF mount body. Second, as Canon went to an electronic aperture setting mechanism with the EF mount, you will lose automated aperture stop down with FD lenses on an EF body. You focus at maximum aperture then stop down what is now a manual lens to working aperture, the finder screen going dark in the process. Further, even if your adapter has a crappy negative lens to destroy the great definition of your FD lens while reclaiming infinity focus, there is no electronic focus confirmation. You go by what you see on the screen. This is a great shame as it means that, to all practical intents, the magnificent range of FD lenses is not usable on modern Canon bodies.

The contrast with Nikon’s approach could not be greater. With very few exceptions, every Nikkor lens can be used on a current Nikon body, with pre-AI models requiring a $25 machining adaptation to fit and work. The sole exception is mostly early fisheyes which required a mirror lock-up and external finder. No mirror lock-up exists on the modern DSLR Nikons (save for sensor cleaning) so these lenses are not usable. Nikon retains a mechanical control for aperture stop down to this day, so even early Nikon F lenses will retain aperture automation. Auto exposure measurement at full aperture is retained and bodies like the D700/D3 and others provide an electronic rangefinder confirmation of optimum focus, denoted by a green diode in the finder. Out of focus results in one of two arrows pointing in the direction the lens mount has to be rotated.

Why would anyone care? Well, because unless you must have autofocus, these manual focus Nikon lenses are some of the best ever made. In the early days there was only one range – no bargain basement models where design corners had been cut. The mounts were massive, the construction fabulous and the optics outstanding. One of the nicest things about working as a sales clerk at Dixons in the late ’60s was that I was allowed to borrow gear for the weekend (anything except the Leicas!) and I often found myself with a Nikkormat FTN, with the 24mm, 50mm, 105mm and 200mm Nikkors. All these optics were superb in every way. A 16″ x 20″ print was expected, not exceptional. The Nikkormat replaced the bulletproof shutter in the Nikon F with a somewhat fragile shutter (later improved) but came with compact TTL metering on most models and was a sweetheart to use.

Here’s what some of those great lenses sell for today – I have illustrated the scalloped metal focus ring versions which are my absolute favorites for look and feel:

Nikkor 24mm f/2.8 – $150 used.

Nikkor 50mm f/2 – a true competitor to Leica’s Summicron. $50 in mint condition.

Nikkor 105mm f/2.5. $75.

Nikkor 200mm f/4. $40.

So for $315 you get a complete outfit which will do you proud anywhere in the world, provided you don’t mind the absence of autofocus. In the case of these lenses, you can use Aperture priority or Manual exposure measurement. Add $25 per lens if it’s non-AI, to convert it for your DSLR. These lenses have no electronics, but if you want all the bells and whistles offered by matrix metering, want to add Shutter priority and automated EXIF data posting to the picture file, this is done by adding a CPU to the lens and typically runs $80 per lens. A detailed illustration of Nikon lens mounts appears here.

There are some wonderful bargains out there for Nikon users, even if they have bodies which were not even thought possible when these great optics were made.

D700 – in the studio

Winston at ten!

The D700 and 85mm lens arrived just in time for our son’s tenth birthday and the obligatory annual studio portrait, so it was out with the Novatron gear. I decided to shoot tethered to the MacBook Air, connecting the D700’s mini-USB socket with a USB cable. This gives large screen previews of exposure etc. Lightroom 3 makes this easy, yet my first attempt returned an error message saying “No camera detected”. I rummaged in the garage cardboard box where the mess of cables makes its home, and found several with the requisite connectors. The second one worked fine and continued to do so when extended with a further cable. No need for ‘factory authorized’ this or ‘premium priced Nikon’ that.

First I snapped a couple of test shots to see what the D700’s sensor, with its modest pixel count, can deliver. On paper, it should yield prints three times the size of those I get from the 16mp MFT sensor in the Panny G3, which allows for grain-free prints sized 24″ x 16″. That sensor is one quarter the area of the D700’s, so ‘stretch’ those pixels over 4 times the area and you get 4mp effective density. The D700 is some 12mp, or three times the enlargement for the same pixel density, meaning 72″ x 48″.

I tested that on my Dell 2209WA displays and, indeed, the definition held up fine even at 90″ x 60″ effective size. large enough for me, making me wonder who on earth needs the 36mp of the just announced D800? Not to mention a monster file size which takes three times as long to download. Whatever.

A little more tweaking to establish the optimum settings for import sharpening with the 85mm f/1.8D Nikkor yielded the following, required to counter the Anti-Aliasing filter in front of the sensor, there to prevent ‘jaggies’. Using RAW, with 1:1 previews in Lightroom 3, I settled on the following:

D700 LR3 file import sharpening settings.

That’s a bit more aggressive than the Canon 5D needed and may, of course, vary between lenses, but it’s just right, and at the cusp of where sharpening artifacts just start to appear. This is not prescriptive – each to his own. Color rendition seems neutral with default body settings, so no changes there. These were determined using LR3 using the 2010 Process. LR4 introduces yet another Process (will Adobe ever stop this nonsense?) and the Beta version is buggy. As a fellow photographer (and many on the web) report, try converting 2010 process files to 2012 and LR4 crashes, in both Windows and OS X. So I’m sticking with LR3 for now, especially as the changes in LR4 are aimed more at Adobe’s P&L than photographers’ needs.

One unexpected benefit of tethered capture is that the subject can see the results withing a couple of seconds on the laptop’s display. 10 year old boys aren’t exactly renowned for having great attention spans when their pictures are being taken, but this mechanism both kept Winston interested and helped him with posing. Neat.

We took about four dozen snaps and maybe six or so were ‘keepers’. This one stood out.

Winston Howard Hofler, aged ten.
D700, 85mm f/1.8 at f/5.6, ISO100.

The highlights in the hair are from a boom mounted top light, in the style of the great Hollywood photographer of the stars, George Hurrell. In addition to the boom, two other strobe heads, in umbrellas, were used. A related benefit of strobes is that you don’t get the huge retinas that strong incandescent lights cause.