Category Archives: Hardware

Stuff

The New Macs – 2012

A mixed bag.

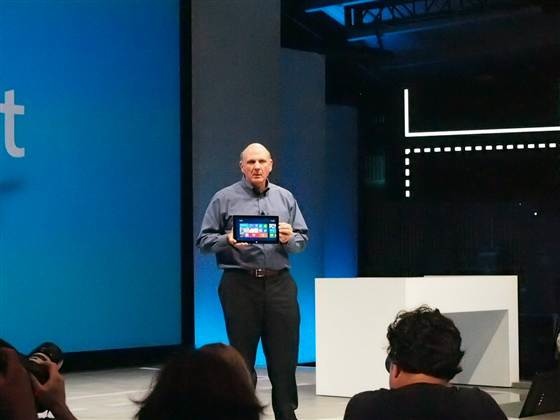
Apple rolled out new MacBook Airs, MacBook Pros and Mac Pros the other day. There is good news and bad news.

Overall: Current MBA, MBP or MP users have little reason to upgrade. Apple is making retrograde steps with regard to user upgradeability and has again started price gouging for extra RAM, like they used to a few years back. As there are no aftermarket solutions they presumably think they can get away with this. What I see is falling profit margins with an attempt to offset these with disingenuous design practice, not to mention a fair leavening of arrogance in the assumption that Windows users will continue to switch, regardless of price. Wrong.

For users with just the one computer, the MBP makes sense, but at a very high price. The MBA is far cheaper, lighter, slower and in the 13″ size will do as a photo-processing tool at a pinch, but I would hate to have to use it exclusively for this purpose.

The MP is for those with access to Other People’s Money only. A high end Hackintosh is a far better machine at 67% off the asking price of the MP.

MacBook Air:

The best news is that all but the $999 11″ base model have dropped $100 in price. All support turbo boost of the CPU from 1.7/1.8gHz to 2.6/2.8gHz, best used when connected to the mains owing to the increased power draw. RAM can be doubled to 8gB for $100, a 300% premium to the aftermarket ($25) and not user replaceable; likewise the SSD is 64/128/256 at purchase and cannot be changed. So get it right when you buy your MBA. For the budget conscious photographer, the optimum price point is the 13″ MBA with the 128gB SSD and 8gB of RAM for $1,299. Use an external 2.5″ notebook HDD for external high volume storage, some $75 for 500gB and another $5-10 for an USB enclosure. RAM is speedy 1600mHz.

The integrated Intel HD 4000 GPU is an excellent choice for still photography editing, the glossy screen does you no favors, the machine has a 7 hour battery life and weighs a scant 3lbs. My 11″ MBA (Oct 2010) has had 18 months’ moderate use and is holding up fine, with no signs of failing. The latest MBA is some three times as fast on CPU throughput.

Finally, the SSDs in the MBA are SATA3 6gb/s variants. That is a good thing.

MacBook Pro:

The big hue and cry, replete with all the usual increasingly tiresome Apple hype, is the Retina Display option. Whoever writes this crap most certainly did not read his adjective-free Hemingway.

More hype than most religions.

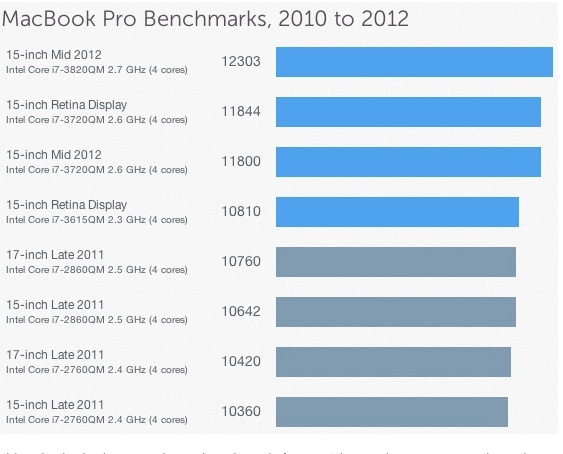
The Retina Display comes at a substantial premium for its 2880 x 1800 pixels – $300 more compared to the similar regular MBP. The photographer who has no other display handy may find this economically feasible, though 15″ is a small screen for long editing sessions. However, the RD’s maximum definition is only supported by two photo editing apps at present – iPhoto and Aperture. If you are a Photoshop or Lightroom maven, then until Adobe updates their apps you will not get the RD’s best definition. Adobe has said PS will take several months to adapt, with no news on LR yet. RD type displays would have to reach broad acceptance for this to make economic sense for Adobe. As there’s no love lost between the two businesses, it looks like a low priority project. If you use Aperture fine. I have found Aperture to impose extreme demands on hardware and abandoned it long ago for the speedy and far more logically designed Lightroom which pokes along just fine even on my slow, 2010 MacBook Air.

The RD MBP gets very costly if you max it out and it’s the only MBP which permits the use of 16gB of RAM. The regular display version only goes to 8gB. If you frequently round-trip from LR to PS and keep multiple PS files opened, you will notice the difference. Further, as the memory and SSD are soldered in, there is no possibility for the user to upgrade, and Apple will rip you off for $200 to go from 8 to 16gB, when comparably priced RAM sells for $50 in the aftermarket. That’s the same 300% premium as in the 4->8gB MBA upgrade. The good news is that RAM is speedy 1600mHz.

While the previous MacBook Pro permitted installation of a second disk drive – HDD or SSD – if the optical drive was removed, the new one offers no such option. The chassis has been slimmed down with the removal of the DVD player so the space for a second drive is no longer available. You will need to use an external drive.

How much? The 16gB RAM model with 768gB of SSD storage will run you $3,750. That’s a huge sum for an elegant portable which screams ‘steal me’. It comes in one size, 15″.

The regular MBP continues with HDD and SSD options. Same limitation on user replacement of the RAM, though the HDD should be possible, if not especially easy. A 15″ with a 1tB HDD and 8gB of RAM costs $2,550. That still seems awfully expensive to me. It should be easy to hack a comparable Dell laptop to run OS X for much less with identical screen definition and operating speed.

Both MBPs offer integrated or discrete GPUs but, once again, the integrated HD4000 is now so good that the separate GPU is really only required for video editing, so if you are a stills-only photographer you are paying for something you do not need. It is not an option.

All MBPs and MBAs boast Thunderbolt connectivity. Judging by the very slow takeup of this technology by peripeherals manufacturers this technology is a bust and the high price of the peripherals – displays and disk drives – will accelerate its demise. Not a selling feature as there’s very little out there using it. Be prepared to buy an adapter for your external display.

Turbo boost on all the MBPs takes stock speeds of 2.5/2.9gHz up to 3.1/3.6, which can be really worthwhile when connected to the mains. Battery life on regular and RD displays is limited to 7 hours, and Apple appears to be building a smaller battery into the regular display version so as not to cannibalize the RD one. The RD is much more power-hungry.

I tried the MBP with the RD at the local Apple Store and was underwhelmed. (The software was incomplete and I could only try the machine on maximum definition – the definition selector was missing). It’s less of an obvious jump in definition than going from iPad1 to iPad3. Mercifully, Apple doubles font sizes to resemble the size of those on a regular screen or else nothing would be readable. The glossy screen remains sub-optimal (the one I tried in the Apple Store had the sunny street behind me and had to be relocated to be useable) and at this time there’s no indication of a matte option. Another blow for photographers. But it’s the only way of getting 16gB of RAM so if this is to be your only machine, the premium may make sense if you are a heavy LR + PS user.

Mac Pro:

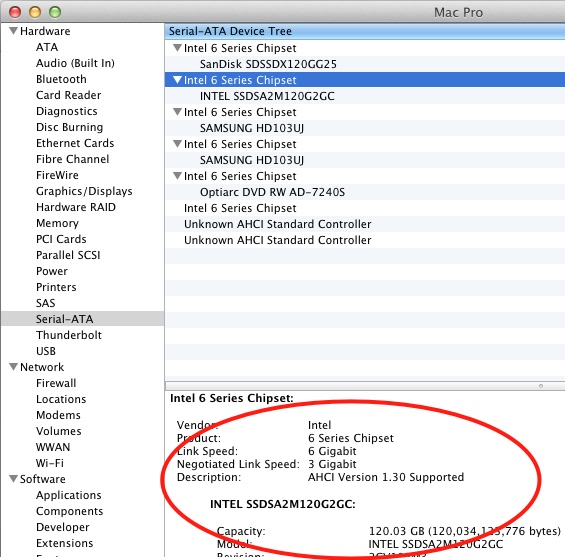
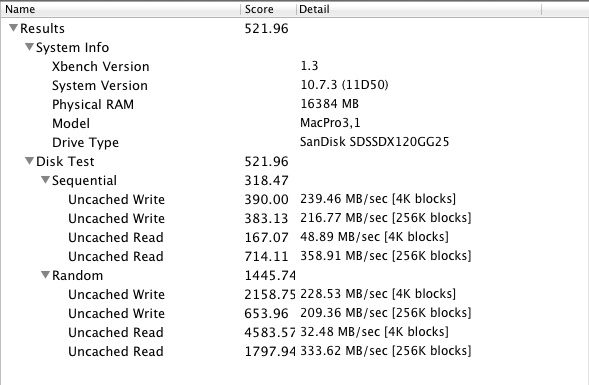
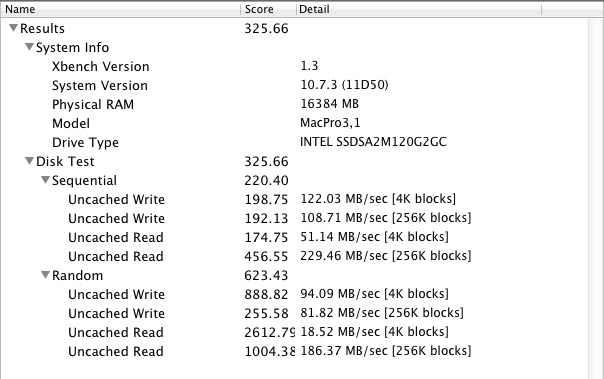
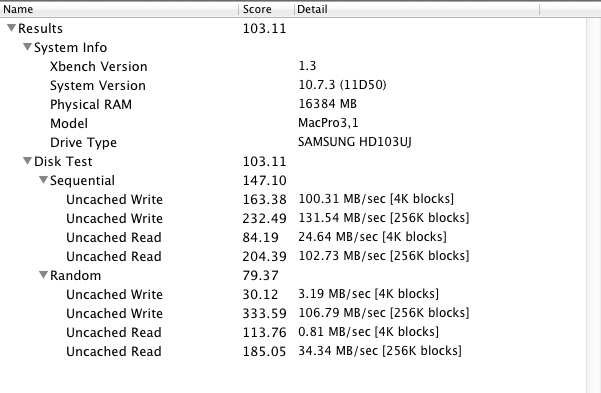
The purported update to this Xeon CPU workhorse is an exercise in cynicism. The machine may have a very capable multi-threading CPU but the rest continues to underwhelm. Maximum memory speed is 1333mHz, or 20% slower than the MBP, and drive connectivity is still SATA2, meaning 3gb/s compared to SATA3 and 6gb/s in the MBP and MBA. For movie makers moving large data files that’s awful. What’s worse is that later Xeon CPUs and disk drive chips supporting these technologies are available, yet Apple chose not to use the newer Xeon. It rather looks like the Mac Pro is finished and at the price asked any half competent geek should be building an Ivy Bridge Hackintosh.

Apple’s CEO has promised an improved MP 18 months hence, by which time every current MP will be a dinosaur. I don’t know that I believe him. Face it, the money for Apple is in iOS.

Conclusion:

The MacBook Airs represent excellent value and performance for the money coupled with light weight. Speeds are now adequate to use the latest MBA at home to drive a large external monitor for heavy photo processing. Memory is limited to 8gB which is a shame.

Apple is getting ahead of itself and building premium priced machines in the MacBook Pro which are answering questions – especially with the Retina Display – with technology no one is asking for and few can afford. Simply stated, it’s more definition than you need or can use. Serious photography users will use a larger external display with a matte screen and one whose gamut is far wider than the MBP’s, further making the Retina Display option pointless. Sadly, this costly display option is the only way to get 16gB of memory.

I would expect the MBA to materially cannibalize sales of the costlier MBP. The cost of upgrade options for both – none are user installable – represents an unwelcome return to Apple’s days of predatory pricing.

The Mac Pro is a waste of money using three-year old CPU, RAM and disk drive technologies. Newer high-end PCs provide a better alternative for those into heavy movie processing. If you are a Final Cut Pro user, a high end Hackintosh is better in every regard. It is, after all, nothing but a PC running OS X, meaning cheap and reliable hardware and software. And the Hack is 67% cheaper than the premium priced and dated MacPro. By comparison, repair costs, if any, are trivial and the user gets bog reliable operation and overnight parts availability at a fraction of the MP’s cost.

Ivy Bridge in the Hackintosh

A modest improvement.

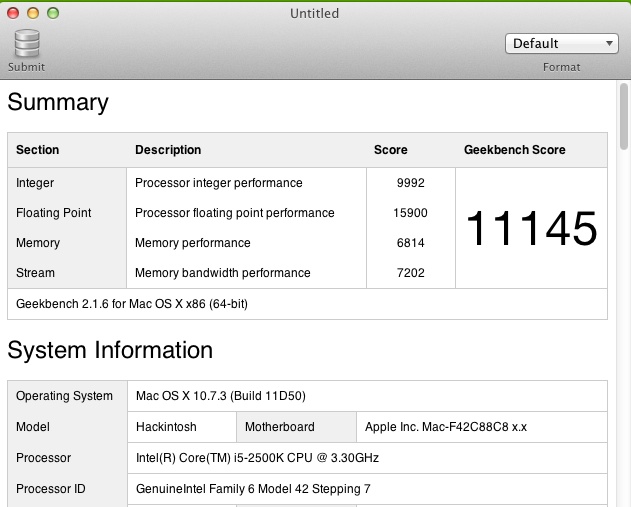
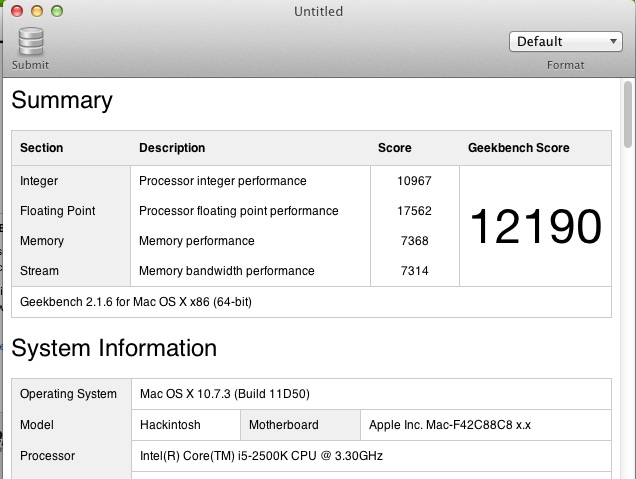
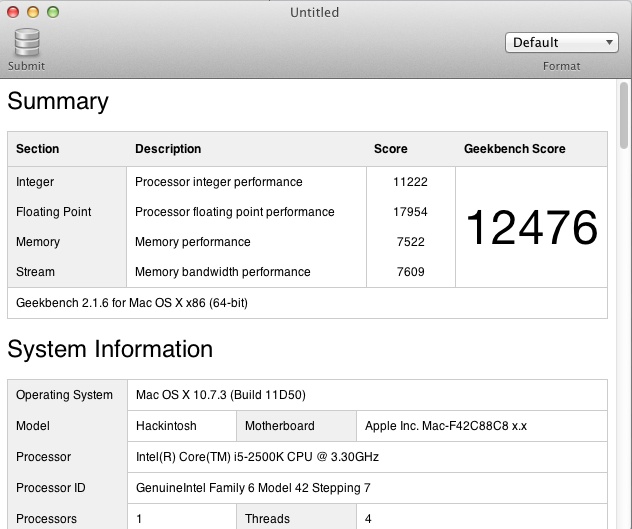
Readers will recall that my desktop Hackintosh was upgraded from a Core2Quad CPU to a Sandy Bridge i5 2500K, with CPU performance gains of the order of 25% and doubled RAM speed, late last year. This required a new motherboard and memory in addition to the CPU, but was a painless experience, substantially ‘future-proofing’ the machine as rates of change in CPUs and RAM have pretty much stalled.

Intel released a modest upgrade to the Sandy Bridge CPU, named Ivy Bridge, last month, and reading the performance data at Anandtech here is my advice to readers contemplating the construction of a new Hackintosh or an ugrade to an older machine.

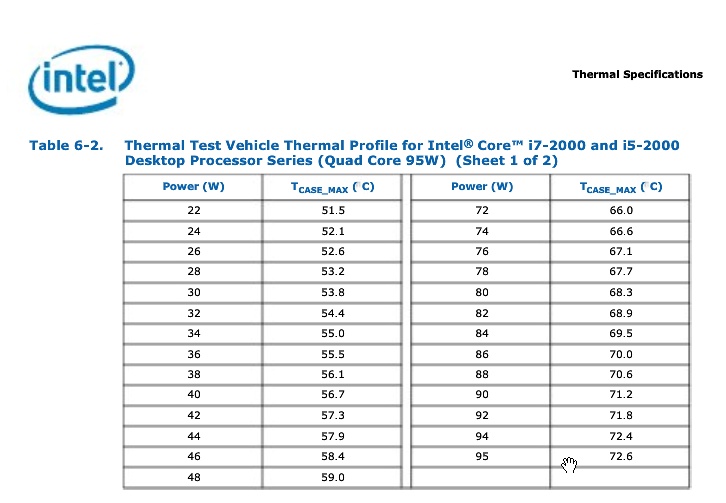
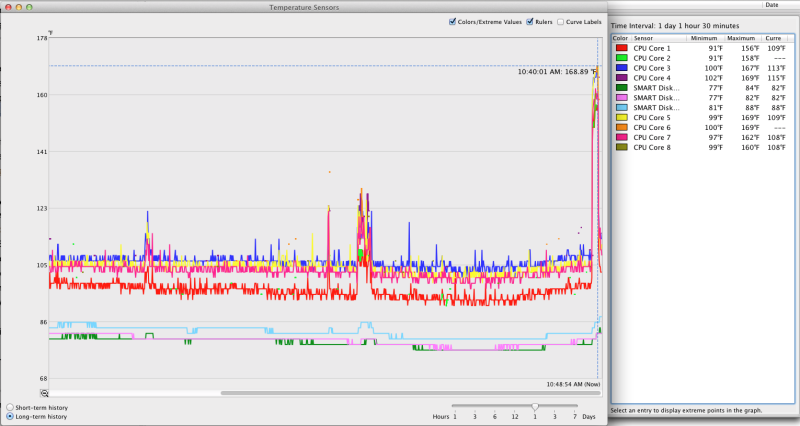
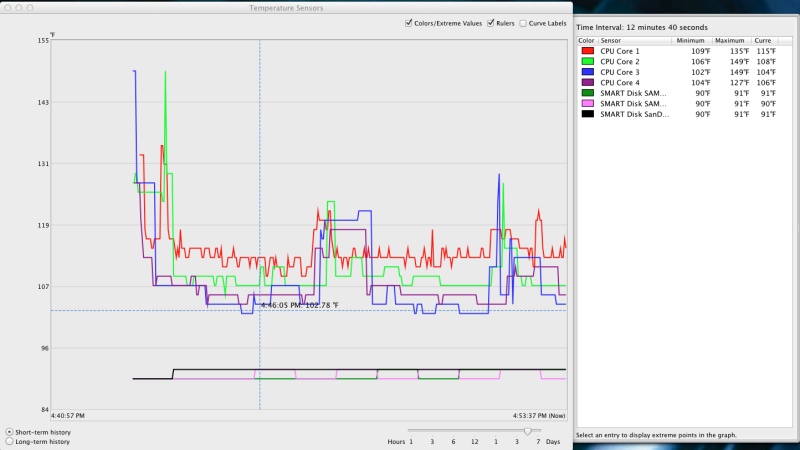
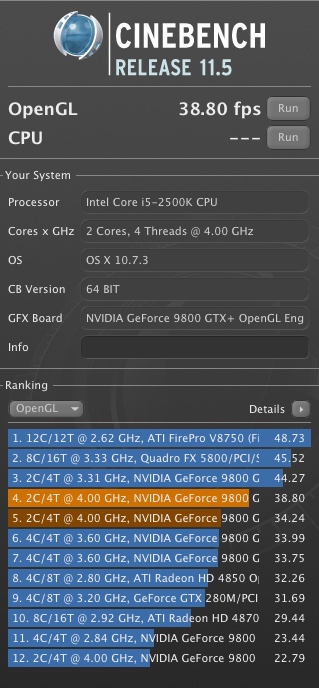
Just a reminder that the goals of this bulky, desktop machine are simple. 90% of the highest performance available (the MacPro) at 30% of the price, with easy upgrades possible using inexpensive parts from the local computer store. In the 8 months since my Hackintosh was upgraded by FU Steve to Sandy Bridge it has been on 7/24 and has not locked up once. It has been restarted a couple of times when OS X Lion upgrades required that. Otherwise it runs all the time and is used hard all day. Thermal properties are outstanding. Except when compressing a large movie file when the CPU temperature rises to 135F, the prevailing temperature, regardless of load, is 108-115F compared with a safe operating limit of 170F. My i5 CPU is overclocked 25% to 4.0 gHz.

Should you build an Ivy Bridge machine?

The answer depends on what you are using now and what your needs are. If you use Photoshop with many files open and simultaneously run Lightroom and maybe a few other applications, a fast machine with a lot of RAM makes sense. Whether it makes sense for you is largely a function of the value of your time. If you like to smell the daisies and plonk along, it probably makes little sense. If, on the other hand, you regard all processing time as time wasted, then it’s worth considering an upgrade.

Cost: The i5 ‘K’ version is the best bet unless you do a lot of video processing, in which case the extra $100 for the i7 is money well spent. ‘K’ designates that the CPU can be overclocked with a few key strokes. Free speed. The i5 is easily and safely overclocked to equal the stills processing capability of the i7. Ivy Bridge 3570K – $240. Sandy Bridge 2500K – $215. No brainer. Use Ivy Bridge. The overall cost of a similarly spec’d Ivy Bridge Hackintosh will be similar to that of one using Sandy Bridge. FU Steve strongly recommends Gigabyte mobos as these are the easiest to hack with no issues. The many variations largely address the number of expansion sockets and rear panel connectors available.

Fit: These use identical LGA1155 sockets, but Sandy Bridge motherboards will need a BIOS update, so make sure you can do that if you are using a Sandy Bridge motherboard. If you are migrating from an LGA775 motherboard (Core2Duo and Core2Quad) simply buy a current Ivy Bridge motherboard.

GPU and RAM: For the first time it’s safe to say that even demanding users can go with the integrated GPU included with the Ivy Bridge CPU. The HD4000 GPU is now a very capable graphics processor, and Anand Tech’s specs confirm it will easily handle the needs of PS and LR. You save $60-200 on a separate GPU card, and can use a smaller motherboard and box. The HD4000 integrated GPU will need some RAM to do video processing, so make sure to max out RAM, which is very inexpensive in 1600MHz spec. Also, use a proper aftermarket cooler – FU Steve recommends the Coolermaster 212 at $26 – as heat kills, and Intel’s stock fan sucks. The 212 needs a big box to accommodate it.

However, if you are using more than one monitor and prefer those with very high pixel counts, then a separate GPU is recommended. For example, users of 27″ monitors with 2560 x 1440 pixel counts would be better off with a separate GPU. Spending more than $120 on a discrete GPU only makes sense if you are a gamer. FU Steve is a big fan of EVGA Nvidia GPU cards as no additional hacking is required for most of these.

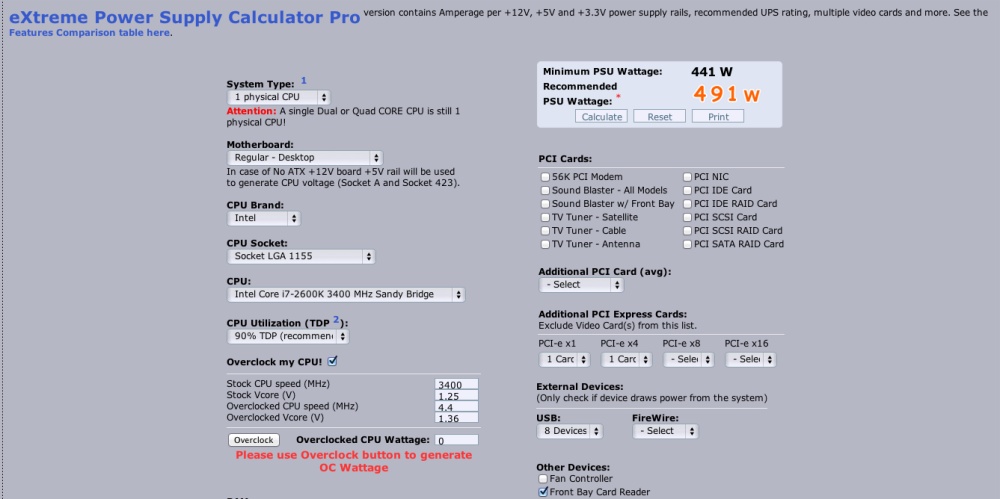
Power needs: Irrelevant for a desktop. The most significant advantage of Ivy Bridge over Sandy Bridge is lower power consumption, of primary interest to laptop users. Ivy Bridge uses less power. Even if your box includes 2 SSDs, 2HDDs, 16gB or RAM and a separate GPU card, as does mine, a decent quality 500 watt power supply will easily cope. FU Steve likes Thermaltake power supplies because they are conservatively specified and reliable.

WiFi: The 802-11n protocol will be replaced by 802-11ac over the next few quarters, offering higher speed and better resistance to interference. It is not available on any aftermarket PCIe card or, for that matter, on any Mac, so it’s a question of ‘wait and see’ for now. The right way to enable 802-11n wi-fi in a Hackintosh with full AirDrop capability is described here. This provides full support for the 5gHz and 2.4gHz spectra. FU Steve built all of my three Hacks with these and they work perfectly, being recognized as native Airport cards by OS Lion.

Everything else: Check the Hackintosh article linked at the beginning of this piece. Everything else works unchanged. 16gB of RAM costs little more than 8gB, 1600Mhz RAM is barely costlier than 1333Mhz for a 20% speed boost, and just about every Ivy Bridge motherboard now supports USB3 and SATA3. SATA3, used with the latest HDDs and SSDs, doubles the rate at which data is read from or saved to disk, and will be especially noticeable for those photographers who splashed out on a Nikon D800/E only to find that they now have to process 75mB files!

Hacking tools: I’m no hacker, but my builder FU Steve (Going rate? One six-pack of imported beer per Hackintosh) says that Tonymac’s tools are fully up to date for both Ivy Bridge and HD4000 use with OS Lion.

iMac?: On paper the specs of the iMac look price competitive. If you want a machine with minimal ability to upgrade, sporting a display which cannot be properly calibrated for photographic use, a long turnaround time for repairs, impossible to dismantle for all but experts with special tools and one guaranteed to overheat in heavy, professional use, the iMac is the machine for you. And it looks nice too, as you contemplate your reflection in its high gloss screen. The Hackintosh is a Mack Truck, the iMac is a daily commuter with Cadillac glitz. For like specs, the iMac will cost you twice as much as the Hackintosh and there’s no alternative to the truly ghastly glossy display.

The proper comparison for the Hackintosh is the MacPro which gives you 10% more performance for three times the price and dictates the use of costly OEM upgrade and repair parts. But even the latest (6/2012) MacPro will not run 1600mHz Ram has no USB3 and will not support SATA3 6gb/s disk drives. Very disappointing for the money asked.

Build sheet: You have to add the wifi card/adapter ($40) and your display(s) of choice to this list which makes a 2 SSD, 2 HDD, 16gB Ivy Bridge machine for $1,300, with state of the art performance for any photographer, using the integrated GPU in the i5 CPU – all disk drives are fast 6gb/s SATA 3:

Ivy Bridge Hackintosh components.

Add a couple of Logitech speakers for $25 if you need sound.

A 1tB HDD will store 13,000 75mB Nikon D800/E files or 80,000 D700 files (you really need a D800?). A 2tB HDD costs $30 more, doubling capacity. SSDs are used for Mac OS and application files; picture files go on the HDDs. Disks are paired for full redundancy. The costliest part, the CPU, is also the most reliable.

FU Steve recommends Dell Ultrasharp monitors. Their 21.5″ 1920×1200 runs some $260 and comes with a matte surface and a three year warranty. It is easily profiled using a colorimeter like the EyeOne and has excellent build quality.

Updating a Sandy Bridge motherboard:

If you use a Sandy Bridge motherboard from Gigabyte, the maker provides a free BIOS update which will enable that board to use the later Ivy Bridge CPU. That’s for the Z68 (F12). H67 (F7) and P67 (F7) boards can also be updated, but no update has been released for the Q67; search for the appropriate page on the Gigabyte site. You may need a PC un-shrink the downloaded BIOS update, extracting the installable file. Read on.

  • Download the BIOS update; it downloads as a DOS .exe file so you will need to use Windows to run the file which uncompresses it. Alternatively, if you refuse to use Windows as I do, download FileJuicer and it will extract what you need from the .exe file.
  • Place the BIOS file on a flash drive (MS-DOS formatted in Apple’s Disk Utility).
  • Enter BIOS at startup.
  • First save your old BIOS to the flash drive, just in case, using the BIOS F8 (‘Q-flash’) function.
  • Make a picture of all the old BIOS screens as you will have to reinput the changes after the BIOS update.
  • Set your motherboard to ‘Optimized Defaults’.
  • Using F8 again, load the new BIOS from the flash drive (it’s some 4mB in size) while still running your Sandy Bridge CPU.
  • Now reload your preferred settings (Turbo, etc.) once done, using the pictures you took earlier.
  • Turn the Hack off, restart, test with Sandy Bridge.
  • Swap the Sandy Bridge for an Ivy Bridge – they use identical LGA1155 sockets – and restart.

The difference between an upgraded Z68 or similar Gigabyte Sandy Bridge Board and the later Z77 Ivy Bridge version is that the Z77 will support PCIe3, whereas the updated Z68 will go to PCIe2 only. New cards coming to market, probably Thunderbolt and others, may well be PCIe3 only. But the BIOS update on a Z68 board will allow use of an Ivy Bridge in every other respect.

I updated the BIOS in my Z68 UD3H from F9 (as shipped) to F12, and I continue to run a Sandy Bridge i5 CPU on it with no performance changes.

HDD storage

An update.

After spiking mightily, with prices doubling owing to the floods in Thailand which took out a sizable chunk of the world’s production facilities, Hard Disk Drive prices are coming down again. While my main Hackintosh uses Solid State Drives for the OS and applications, SSDs still remain prohibitively expensive for high volume data storage. Meanwhile, HDD technology refuses to die and just gets cheaper.

Scanning Amazon US I see 3.5″ indicative prices as follows:

  • 500mB – $70-90
  • 1tB – $100-120
  • 2tB – $120-140
  • 3tB – $140-160

Current Amazon US 1tB HDD listings.

Now there are drives and there are drives. In the various specs you will find 5400rpm, 7200rpm and 10000rpm, 3gb/s SATA II and 6gb/s SATA III, 32mb and 64mb buffers. You will also find hybrid drives with small SSD front ends and traditional high volume spinning discs doing the heavy lifting. The latter only make sense if you access the same apps (though it’s much more effective to simply buy more RAM and keep the apps loaded all the time) or recurring data frequently; otherwise, the price premium does not solve. And, unless you must have the portability afforded by 2.5″ notebook drives, these also make no sense for high volume storage at home where portability is not an issue, but price is. Further, 2.5″ notebook drives do not come in the higher capacities available in the larger 3.5″ clunkers.

Here’s my experience using a Hackintosh with a current motherboard, a machine superior in most regards to the current, and rather dated, MacPro:

  • 6gb/s transfer rates make for the biggest performance increase. I have found that the promise of twice as fast read/write times is largely met in my Hackintosh compared to an older 3gb/s HDD.
  • Bigger buffers – 64mb rather than 32mb – make a difference in streaming video applications where the larger buffer mostly obviates occasional pauses for refilling of the buffer with drives in external enclosures.
  • Rotational speed makes the least difference. The 7200rpm premium is hard to justify in photo processing applications. Save on your power bill and use 5400rpm if possible.
  • 10,000 rpm drives make no sense – costly, noisy, power hungry and with high failure rates.

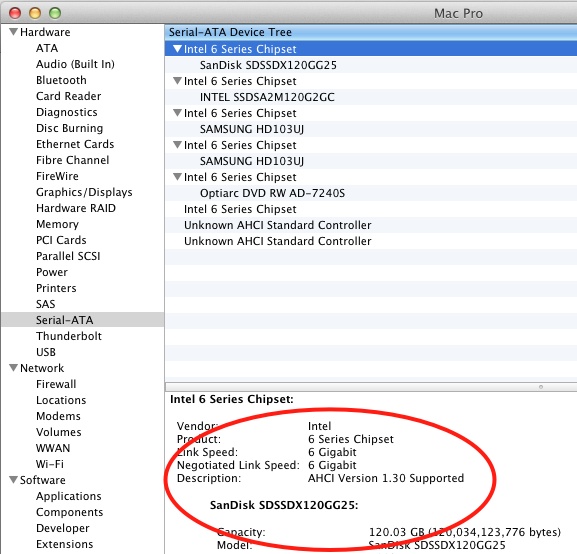
If your PC or Hack’s motherboard supports 6gb/s connections – as the latest motherboards mostly do – then a 6gb/s drive for internal mounting is the best price/performance option. You get a fast, hardwired motherbard connection and no need for an external enclosure. I still use 1tB drives as the areal storage density is low so the technology is fairly remote from the ‘bleeding edge’. However, 2tB drives have been around a while now and while failure rates are slightly higher, they are more cost effective. At this time I am avoiding anything over 2tB. Most external USB enclosures support up to 2 x 2tB HDDs, but not 3tB.

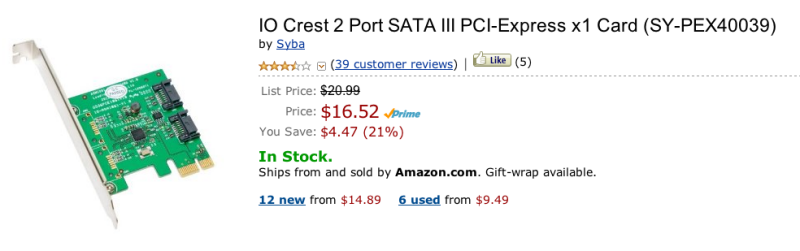
For external storage eSATA is the way to go or use a USB3 external enclosure – not easy to find – which supports 6gb/s drives.

So its’s good to see that HDDs are becoming affordable once more. They remain an attractive option until SSDs start falling in price, something that is happening at a glacial pace.

Finally, for aficionados of Nikon’s latest, the D800, where file sizes can rise to 75mB, that gets you 13,000 files or so per 1tB. So the upgrade to a couple of 2tB drives should likely be part and parcel of your upgrade to a sensor few realistically need, and even fewer can fully exploit.

A few from the 80~200 f/4.5 Nikkor

Not half bad.

I went on about the Zoom-Nikkor 80-~200mm f/4.5 lens the other day and finally had a chance to take it for a spin.

Light and easy to use, you have to be a bit careful with focus at full aperture as f/4.5 is not all that bright, though the viewfinder focus confirmation LED in the D700 works a treat in marginal cases. Fixing any zoom slop with vinyl tape, as I illustrated, is essential. There’s nothing worse than having the zoom ring flop about in use. In the snaps that follow I mostly used f/4.5 and f/5.6. The lens needs no stopping down to sharpen up and renders out of focus areas in a pleasant, smooth manner at larger apertures.

MIB3.

Friends.

Shine.

Go Forth.

On break.

Bay Bridge.

Sky ride.

For about a Benjamin, the lens is a keeper. Many will prefer the 75-150 Series E which, at f/3.5, is a stop faster and much lighter and smaller, but if you need the extra reach, this lens does nicely. And the 80-200mm is a better lens, clearly out-resolving the 75-150mm through f/8, where the smaller lens catches up.

Nikkor 80~200mm f/4.5 Ai lens

Sharp as a tack.

With original box, no less.

Nikon made a lot of these one-touch lenses. They use one ring for focus and trombone-style zoom. Some 180,000 in all, if serial numbers are any guide, starting in 1969 through December, 1981. The smart money – and not much money at that – opts for the last series in which the earlier 15 elements in 10 groups construction was reduced to 12/9, starting in 1977, with an attendant weight reduction of 2.8 ounces to 26.5 ounces. Many claim the optics improved also, but I have no way of confirming that. Mine is a very late 1981 model from the last production run, all of which was in an Ai mount, meaning the lens will fit all modern Nikon DSLRs. It cost me $130, pretty much at the top end of the range for this lens. Excellent examples can be found for less and most have loose zoom rings. Read on for the fix.

The lens has the usual zoom creep, and a couple of strips of black vinyl insulating tape fixed that in a jiffy, also firming up the focus resistance. Neither its length nor the front or rear glasses move longitudinally when the delightfully light collar is operated to either focus or zoom, but the lens does rotate when focused, so it’s less than ideal for fans of polarizing filters.

Strips of tape in place, arrowed, end zoom creep.

CPU installation:

As I install CPUs in all my MF lenses to enhance function, I set about the 80-200mm. The rear baffle is 1.632″ in diameter, so it exceeds the 1.429″ maximum which allows the CPU to be simply glued on. It’s retained by two countersunk and one longer, proud Philips screws. Be sure to mark the location of the long one, then remove all three. The baffle can then be removed, having first marked the location of the ends of the CPU.

An arc is cut out to accommodate the CPU, to the depth of the plane surface in which the rectangular opening appears. Any excess abrasions can be touched up with matte paint. Here you see the CPU installed in the usual way. This is a very easy machining job and if you are nervous about machining your lenses, it’s an excellent lens to start with. In fact, as the baffle metal which must be removed is so thin, the whole job could be done with a hand file, no Dremel cut-off tool needed. The three other lenses I have had to machine in my collection and the related degrees of difficulty are:

  • 28mm f/3.5 pre-Ai. Difficult, as the baffle is sloped and there’s not much for the CPU to adhere to.
  • 50mm f/1.4 pre-Ai. Risky, as the flange and baffle must be removed and absolutely no adhesive must come in contact with the focusing optics.
  • 105mm f/4 Micro-Nikkor. Easy, but the baffle is so thick that a Dremel tool really makes sense, unless you want to spend ages hand filing.
  • 300mm f/4.5 Ai-S ED IF. Easy, but the baffle is so thick that a Dremel tool really makes sense, unless you want to spend ages hand filing.

A comprehensive list of lenses stating whether machining is required appears here. This will aid the purchase decision for those contemplating CPU installation but preferring not to do anything more than simply glueing the CPU in place.

The CPU glued into the baffle.

Here’s the installed CPU – there is no issue with a broad, sound base for the CPU to adhere to. After checking final alignment, I glued the CPU in place with the baffle removed from the lens, to preclude any possibility of getting glue on the lens. As usual I used two-part epoxy, letting the glue cure 24 hours before using the lens. I touched up the abrasion marks on the baffle with some matte black paint from the local hobby shop.

The CPU in place on the lens. Is that a perfect job or what?

Performance:

This is a professional specification lens in every regard. What minor vignetting there is disappears by f/6.3 and even though the lens stops down to a small f/32, there is negligible diffraction when fully stopped down. The seven-sided diaphragm makes for pleasing, soft rendition of out-of-focus areas and the lens balances well on the heavy D700 body. There are absolutely no qualms about using it fully open at any focal length. While multicoated, the exposed front element suggests both a 52mm protective filter and the HN-7 lens hood make sense. The rear element is fairly exposed, so I use a rear cap when the lens is in my bag. There is no tripod collar and none is needed with this relative lightweight.

How does this zoom at 200mm and f/4.5 compare with the 200mm f/4 Nikkor-Q first made in …. 1961? At full aperture these two lenses deliver identical results. At all other apertures there’s nothing to choose, which is a roundabout way of saying that, given the complexity of making a good zoom, this one is just fabulous. After all, the Nikkor-Q is 200mm, and only 200mm. The zoom gives you a choice of 80-200mm at a similar maximum aperture for a 6 ounce (160 gram) increase in weight and identical bulk.

If you can handle manual focus, have no issues with trombone zooms and like the focal length range, this lens is an outstanding bargain. The faster MF 80-200 f/2.8 Ai-S ED is a real monster by comparison, weighing in at 67 ounces (1.9 kilos). Good luck carrying that around. Trust me, I owned one and was happy to see it move on. The smaller and much lighter zoom profiled here poses no such issues, at the expense of a 1.5 stop loss in maximum aperture.

I’ll publish some pictures snapped with this optic on the D700 soon. On APS-C bodies (D300, D7000, etc.) the effective focal length becomes 120-300mm.