Category Archives: Photography

My favorite street snapper

As much fun as it gets.

For an index of all Leica-related articles click here.
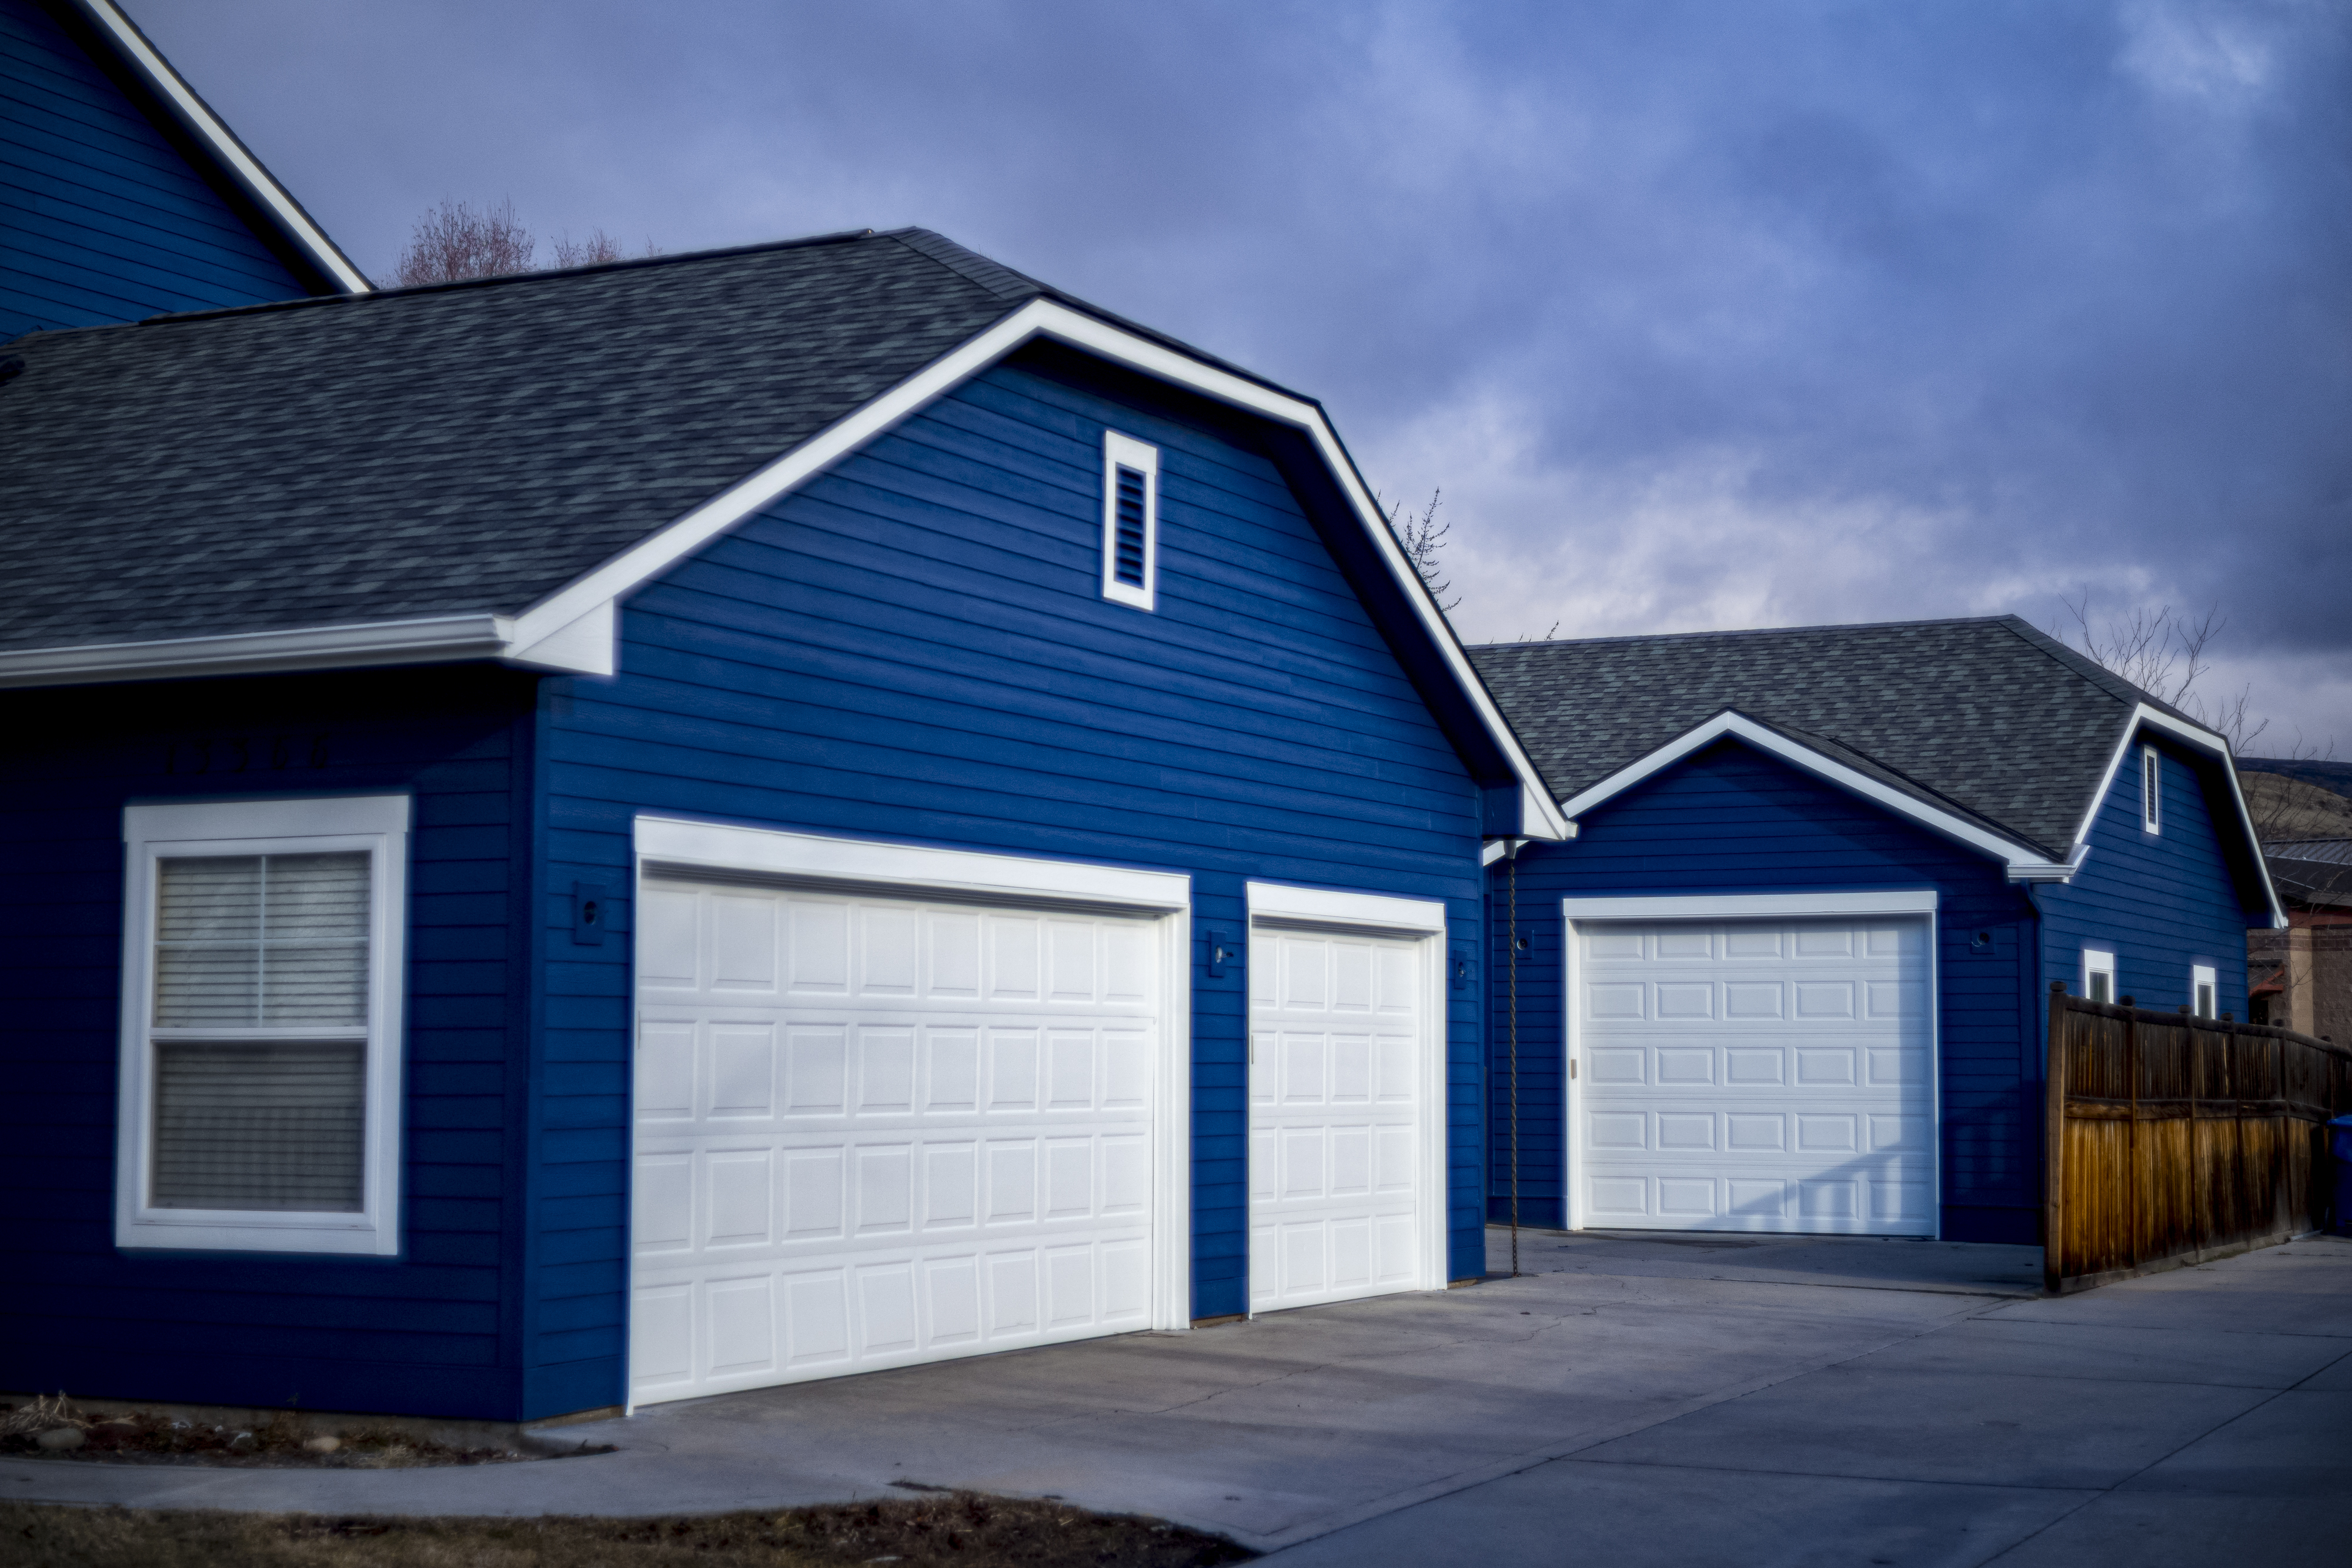

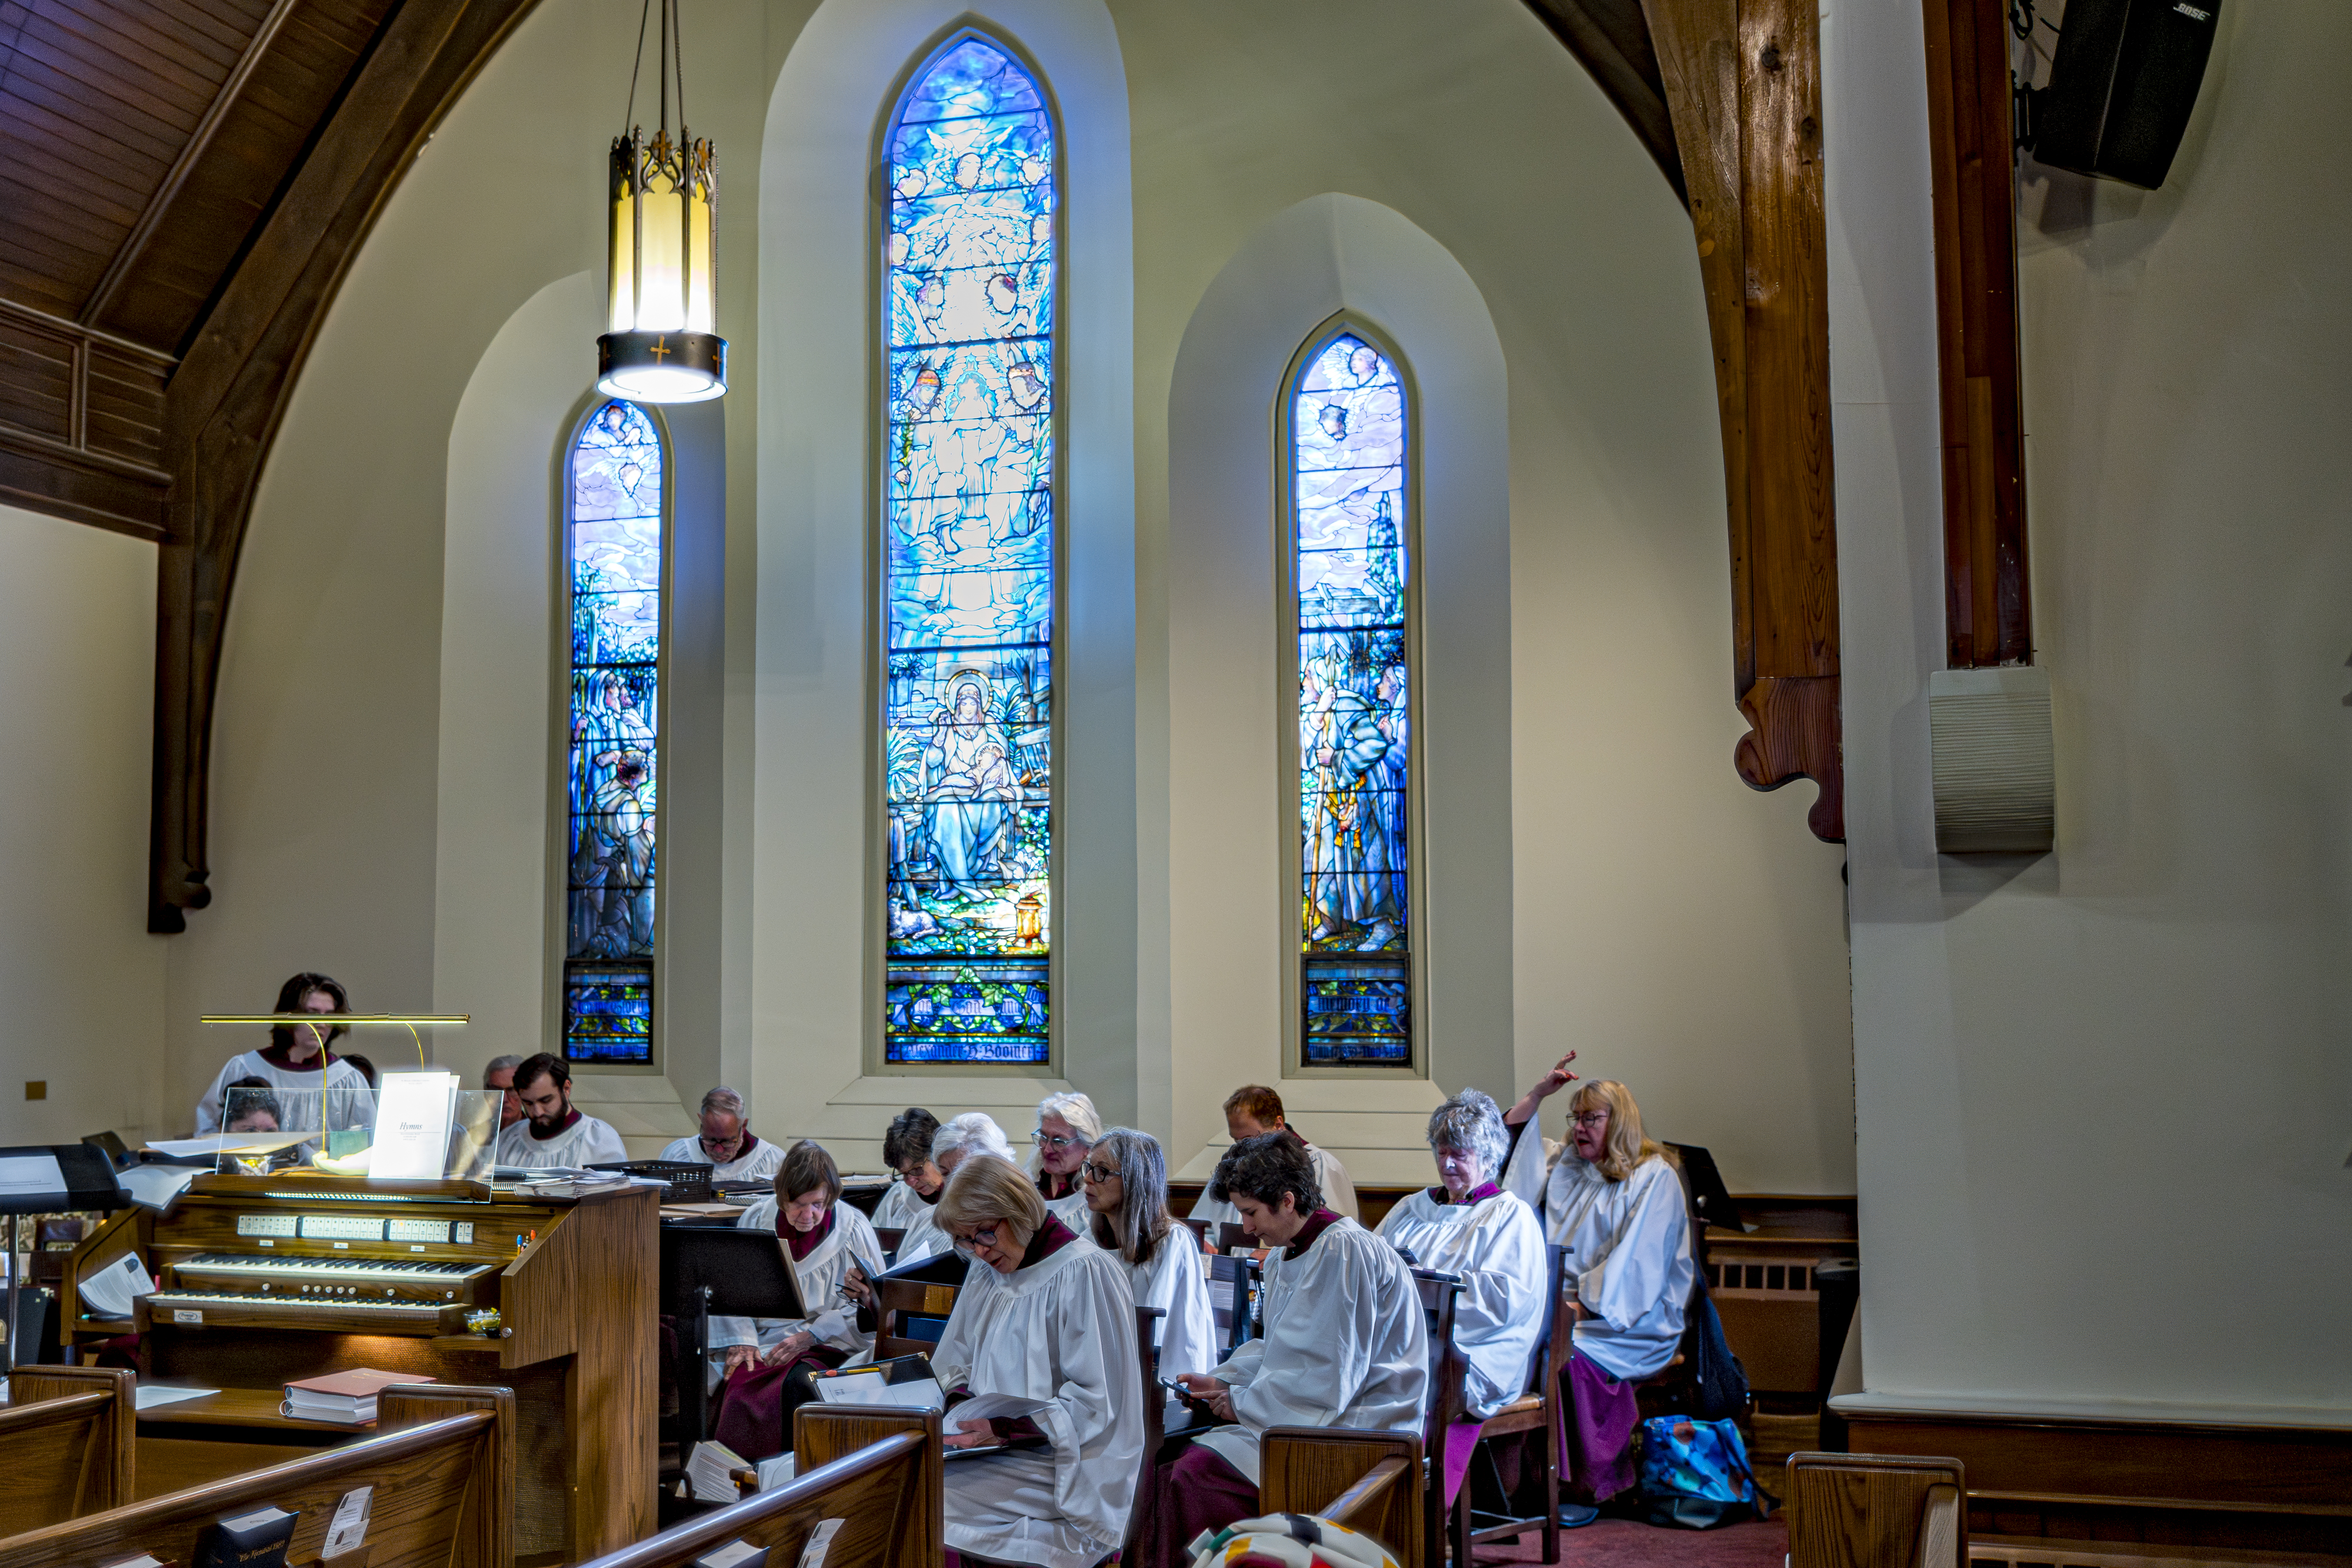
Leica M10, 35mm f/2 Canon LTM and 75mm f/1.9 Voigtländer Ultron.

When I bought my first Leica M3 in 1971 it was about as fast a street snapper as there was. Later autofocus, anti-shake and auto exposure were added to more modern cameras by the great Japanese camera makers and the Leica went from hero to zero when it came to operational speed. Only the stealth factor remained, something I always believed was enhanced by the amateur looking silver finish. For some reason that attracts less attention than the black favored by most camera makers today.

And speaking of stealth, no-one needs the stock red ‘Leica’ dot which screams ‘Steal me now’, so here it has been replaced with a faux silver ‘screw’ – you know, the one Leica charges $1000 more for on the M10-P. ‘P’ for ‘Professional’, you understand.

Yet the M body, now in digital form and, with the M10 and M11, finally identical in size to the film bodies of old, remains a favored street snapper. With the 35mm lens, stopped down a bit, zone focusing is as close as you get to fast autofocus, the shutter is quiet and the whole package is small and unobtrusive. With the 75mm lens, when detail is sought, a more contemplative approach to focusing is called for, especially with the unforgiving nature of the sensors in the M10 and M11. In turn these sensors will ensure you will never use film again. The M10’s sensor is as noise-free at ISO 6400 as Kodak Ektar film is at ISO 100, which is 6 stops faster. As for color rendering, the magicians at Leica have seen to it that colors are rendered every bit as well as that fine Kodak film delivers, but without dust, scratches and interminable processing delays. And film is not film any more. It’s all digitally scanned. Enough with the ‘film look’, already.

For street use I set the aperture priority exposure measurement to Auto and the film speed selector likewise, limiting the slowest shutter speed to 1/4f where ‘f’ is the focal length of the lens. That pretty much ensures an absence of movement blur, even when pixel peeping. Both lenses are 6-bit coded (by me!) which ensures that the correct focal length is communicated to the body, allowing proper determination of that 1/4f factor.

You can read more about the 35mm Canon LTM here with the 75mm Ultron profiled here.

Don’t for one moment think that there is any concept of value with a modern digital Leica M. Even a beater M10 will set you back over $4,000 and only the truly insane – or insanely wealthy – spend the $3,000 and up demanded for a used current Leica lens. The ancient Canon LTM and Leica lenses I use, over 50 years old, and the modern sensor in the Leica body makes these optics sing. Simply stated, those old lenses are better than ever. And Voigtländer fills in the gaps with its modern Leica clones at 21 and 75mm.


TOBEM* lens.

Sure, you can take street snaps with any number of modern, inexpensive digital cameras for a fraction of the cost of that digital M body. So why use the modern Leica? Well, nothing feels quite so perfect in the hand or so satisfies with its fit and finish. The optical finder – which shows details outside the frame – is a sheer delight, now made even better with LED illumination of the finder frames and with a higher eye point for the eyeglass wearer (me!) than the finders found in the film bodies. Further, my history with the Leica M goes back over 50 years and its use is second nature to me. So there are elements of familiarity and nostalgia in my choice. The only thing I had to unlearn when moving from the M3 to the M10 is film winding. There is no film winding lever and, strangely, I rather miss it.

The M10 remains my favorite street snapper and while the M11’s 60mp sensor is tempting, I don’t need that sort of pixel density. Plus I would rather stay solvent. The 24mp sensor in the M10 delivers perfect, noise free prints at 13″x19″ at pretty much any ISO setting, and if you want to print larger the viewer will be forced to step back to take it all in. So if it’s perfect at 13″x19″, it’s perfect at any size you want.

* There’s One Born Every Minute.

Here is a handful of recent street snaps, all taken with the M10 and the 35mm f/2 Canon LTM:


75mm Voigtländer f/1.9 Ultron for the Leica M

A compact and fast medium length lens for the Leica M.

For an index of all Leica-related articles click here.


The multicoated, matte finished version of the Ultron.

A brief history of Leica and Voigtländer 75mm lenses:

Leitz made a super fast 75mm f/0.85 lens in the 1930s. The true speed, in the absence of anti-reflection coatings, was likely a stop less but it was an impressive achievement. How you were meant to focus this accurately at full aperture using the iffy rangefinders of the day remains a mystery.

The Leitz 75mm f/0.85 Summar.
From Theo Scheerer’s ‘The Leica and the Leica System’,
Fountain Press, 1962

In 1980 Leitz introduced its first post war 75mm lens for the M body, the f/1.4 Summilux-M (Version 1 – 17.3oz, version 2 – 21.2oz, neither exactly a lightweight). The f/2 Apo-Summicron-M followed in 2004 (15.2oz), and remains available new, with an economy model f/2.5 Summarit-M introduced in 2007 (11.5oz), rubberized focusing collar and all (ugh!) and now discontinued as Leica prefers to offer only crazy expensive lenses. This was later revised to f/2.4 (12.3oz). Finally a super-fast f/1.25 Noctilux-M (a whopping 36oz) was introduced more recently and you can buy it for the price of a good used Japanese car. All came in a black finish except for the Summarits which came in black or chrome.

Imitating the look and feel of the Leica optics, the Japanese company Voigtländer/Cosina started with a 75mm f/2.5 Color Heliar (a scant 8oz) in 1999 which came in a Leica Thread Mount, easily adapted to the M bayonet body, and available in black or chrome finish. An f/1.8 Heliar version followed in 2010, bayonet mount and black only (15oz – heavy, so likely using a good deal of brass, black only), and a fast f/1.5 Nokton Aspherical (12.4oz) followed in 2019 in black or silver. Like the Noctilux-M this optic’s considerable bulk is anathema to the aesthetic of the Leica M body, and focus at full aperture using the rangefinder is a hit and miss proposition, and finder blocking by the bulky optic is significant. An eyepiece magnifier is probably a good idea.

The latest Voigtländer offering is the improved 75mm f/1.9 Ultron (10.2oz), uses an aluminum alloy body which comes in either multi-coated or single-coated versions, the latter allegedly providing more of a ‘film look’, and likely producing more flare shooting into light sources. The lens has no aspherical surfaces, a design which often gives that clinical, modern rendering. The lens was introduced in 2023. Sadly the scalloped focus ring of the earlier versions was replaced by a tapered, fluted design, reminiscent of the fine Zeiss Ikon lenses for the Contarex. Design consistency and naming conventions are clearly a low priority at Cosina.

Purchase:

It being Christmas and having a hankering for a focal length I have not used on the Leica M10 I found a nice lightly used example of the Ultron at B&H for a reasonable $465. New Voigtländer lenses are no longer the bargains they used to be. For that you probably have to look at the increasing number of Chinese offerings some of which can be had for a good deal less money. While B&H’s listing stated “shows light signs of wear” in practice the lens arrived in absolutely mint condition with front and rear caps, lens hood and lens hood cap, along with the original box. The controls are just so – a nicely click-stopped aperture ring (with half stop clicks – ugh!) and a smooth and light focus collar. The vestigial lens hood does not look like it will make much difference in use, and for protection I use a 49mm multi-coated UV filter for all of $10 – don’t waste money on costlier ones – just see the images below. The center of the front element of the Ultron protrudes significantly, close to the plane of the front ring, so a protective filter is a good idea. The included hood is probably redundant. The lens focuses down to 0.5m but the M10’s rangefinder only works down to 0.7m, so below that distance you would have to use Live View to focus on the rear LCD screen (double ugh!). Feel and operation of the lens are both easily up to Leica standards. I got a bargain.

Disassembly:

Yukosteel has a fine disassembly pictorial here which testifies to the high quality of the design. Well worth perusing, especially if your used example has dust collected inside.

Lens coding:

The M10 provides lens correction profiles for two 75mm Leica lenses – the 75mm f/1.4 Summilux-M and the 75mm f/2 Asph Apo Summicron-M. Snapping a clear blue sky I found that the profile for the Summilux provided the least vignetting though there is very little in it, so I coded the lens 100011 in accordance with this table. The arcana of lens coding are detailed here. The rear flange of the 75mm Ultron has a recess around the mounting surface which neatly accepts coding from a felt tip pen with no abrasion wear when the lens is mounted or removed. You can obtain the coding template shown below by reading this.


The 75mm Ultron is coded 100011 using the coding template and a UniBall fine felt tip pen.

Size:

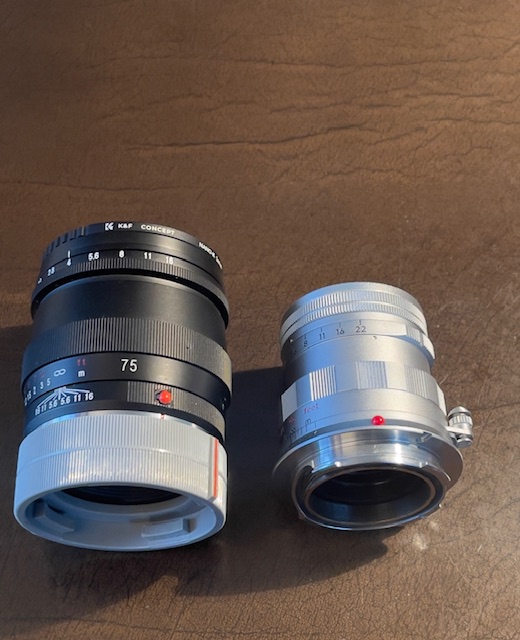
Weighing a few grams more than the wonderful 90mm f/2.8 Tele Elmarit (one of the few affordable used Leica lenses) the size is virtually identical as regards length with the Ultron a tad chubbier. Weights are 10.2oz (Ultron) and 7.9oz (Tele Elmarit):


Size compared with the 90mm f/2.8 Tele Elmarit (last version).
Note the hard to see lens mounting index on the Voigtländer optic.

Mounting index:

As with the 21mm Voigtländer Color-Skopar, the lens indexing red indicator is small and hard to see, so I have drilled the rear ring for a larger red plastic index dome which confers both visual and tactile location information. See the end of this piece.

Import into Lightroom and correct naming:

On importing images to Lightroom follow the process here to automatically invoke the correct lens correction profile. Then rename the lens used to ’75mm Ultron’ using the instructions here. Lightroom does not currently include a profile for the 75mm f/1.9 Ultron so I use the profile for the Leica-M 75mm f/2.5 Summarit. It works well, correcting for a very small amount of pincushion distortion.


The Lightroom Library and Develop module appearances
after applying the changes referred to above.

Why bother with correct lens naming? Because I find I frequently search images by equipment used, so using Lightroom’s Metadata panel in the Library model makes searching for ‘Leica M10 – 75mm Ultron” easy.


The Lightroom Library Metadata panel.

Images:

Here are some images from a first outing – three have click-throughs to the 24mp original files. On a desktop or laptop computer, click again on the big image to get a real whopper. All were taken in poor, overcast light:


At f/2.8. Click the image for a larger version.


Painted window.


At f/1.9. Click the image for a larger version, and read Rangefinder adjustment below.


Farm equipment.


Barn door.


At f/2.8.Click the image for a larger version.

Rendering of out-of-focus areas is pleasant and the lens is sharp wide open – provided you nail focus. I did not use an auxiliary magnifier on the M10 and had little difficulty focusing accurately. By f/2.8 the lens renders images tack sharp all over, and prevails all the way down to f/16. F/1.9 is fully useable – see below. The focus collar throw is some 100 degrees and is just right for speedy focusing. Balance on the M10 (or M3, or M2, etc.) is well night perfect, but note that only later versions of the Leica M film bodies have a built-in 75mm finder frame, so an external finder may be called for when it comes to accurate composition. The lens will invoke the 50mm finder frame on those earlier film bodies. The M4-P was the first film body equipped with the 75mm finder frame. All digital M bodies have it.

Conclusion:

Recommended, if you like the 75mm focus length – an ideal partner to the 35mm for street snapping – and can find one in the market. I see little point in getting the single coated variant – you can always confer ‘glow’ in post processing if your original file is too sharp.


On the M10, dirt cheap MC UV filter and all.

Rangefinder adjustment:

Click on the third image above, the one with the string of light bulbs and red ribbons, and on critical viewing you will see that the focus point is ever so slightly nearer than the central ribbon. A matter of a mere couple of inches, but not correct nonetheless. It is that ribbon I focused on.

When writing about critical adjustment of the M10’s focusing mechanism I explained how to adjust the eccentrically mounted cam roller using the 135mm f/4 Elmar lens at full aperture, aided by an eyepiece magnifier for accurate rangefinder focus. A fairly critical test.

But not critical enough.

Consulting depth-of-field tables it transpires that the DoF for a 135mm f/4 lens at 5′ (its closest focus) is 0.31 feet. By contrast, the DoF for a 75mm lens at f/1.9 at 3′ (much the same magnification) is a scant 0.05 feet. That’s under one inch! So given the more critical focusing cam adjustment for the 75mm lens I set to adjusting the cam roller as illustrated here, making the most minuscule adjustment using the 2mm Allen wrench to move the focus point away from the camera. A ‘bookcase test’ – wherein I photographed a row of book spines at 45 degrees to the camera at the 0.7 meter (2.3 feet) minimum focus distance before and after this adjustment – confirmed that the focus point was, indeed, too near and the small adjustment nailed it. So if you are unhappy about the focus accuracy of your M body at full aperture, consider this simple process.


Make adjustments of no more than 2-3 degrees of arc at a
time and iterate the process until focus is perfect.

Adding the red dome mounting index:

Because the small engraved red line on the mounting ring is barely visible, a red plastic mounting hemisphere is added. This greatly enhances visual location when mounting the lens on the camera and adds tactile recognition for use in very poor light.

My red hemisphere has a diameter of 0.129″ so I used a #30 drill whose diameter is 0.138″, a small amount oversize to permit proper location and space for a minuscule amount of glue squeeze out. I used two part J-B Weld epoxy which takes 24 hours to cure. This is a lifetime fix so avoid quick setting glues which are weaker.

The lens is wrapped in a couple of layers of protective cloth before installation in the vise on the bed of the drill press and everything is aligned and snugged down just so.


Machining and installing the red index.

The area surrounding the drilled recess is masked before applying the epoxy to prevent glue getting in the wrong places and a pair of fine tweezers is used to locate the dome once the glue is in place in the machined recess. Do not try doing this at home unless you are confident in your machining skills. A messed up lens will haunt you forever.

Construction quality:

Yukosteel has a disassembly pictorial here which testifies to the high construction quality of this lens.

Leica M EV1

Curious.

For an index of all Leica-related articles click here.


Odd looking with no finder window.

Introduced in 1954 the Leica M3 brought the best optical viewfinder experience to 35mm photography. Comparing that finder with the one in my digital Leica M10 shows that a good thing can be made better. The greater eye relief of the M10’s finder along with the electrically illuminated finder frames which adjust to the level of ambient light made things even more useable.

But even with digital M bodies – and the sensors in the M10 and M11 are superior to anything film can deliver – the age old limitations of the body’s design remain. That means no autofocus, no in-body vibration reduction and a limited range of finder frames for different focal length lenses. The M10 and M11 display 28, 35, 50, 75, 90 and 135mm frame lines, in pairs. The 28mm is barely visible to eyeglass wearers and focus with fast 90 or long 135mm lenses is a decidedly iffy proposition at larger apertures, necessitating the addition of an eyepiece magnifier. So while the limitations of the M’s optical finder are many the advantages more than compensate for this snapper. That means seeing outside the finder frames for what is about to enter the picture and the wonderful absence of myriad data displays in the finder which detract from the pure picture taking experience. All you see is the shutter speed and a small indicator telling you if exposure compensation has been dialed in. And, of course, that wonderful central focusing rectangle. Perfection.

However, someone at Leica determined that the world needed an M body, with all its svelte appeal, married to an electronic viewfinder. That’s nice as you can use any focal length and get accurate framing, even if you lose the ‘see outside the frame’ function of the optical version. For a premium price, barely discounted from the regular M11, you retain the ability to change lenses but still get no AF or IBIS. Yes, you can dial in finder magnification with the lever located where the frame selector lever normally resides, but it’s unclear whether this springs back when released or clicks in and stays in position. If the former, then it’s poorly designed as you need your left hand under the lens to effect focus operation. None of the reviews I have read indicate how this works.

One possible advantage of the EVF over the optical rangefinder, the latter with its considerable complexity and fragility, is that the EVF should be more resistant to knocks and bumps. The Leica M’s optical finder/rangefinder does not take kindly to being jarred and while adjustment back to the proper setting is easy, this is pretty far from the robustness of, say, a Nikon body. (I show how to adjust the rangefinder here).

The sensor? It’s the same as in the M11, meaning 18/36/60 mp options, as good as it (Sony?) gets, with the addition of microlenses to correct for axial ray aberrations of very wide angle optics.

Options? You can add the electronic Visoflex finder to an M10 or M11 for almost $1000, adding a clunky top plate protrusion but retaining the features of the separate optical finder. Or you can opt for a Leica Q3/Q3 43 which adds IBIS and AF but loses the interchangeable lens feature, meaning you get either a 28mm or 43mm lens. And while the Q3 is not cheap at around $7,000, it’s chump change compared with the $9,000 M EV1 plus $4,000 and up for a lens.

In conclusion, I rather doubt the M EV1 will have much appeal to traditional Leica M snappers but if it carves out a new niche for Leica …. well, good luck to them

Epson ET-8550 – troubleshooting

A period of no use sees issues.

For an index of all articles about the Epson ET8550 printer, click here.

Having upgraded (meaning Adobe forced me to upgrade using a strategy of planned Mac hardware obsolescence) to the subscription version of Lightroom, I went to print a favorite image the other day and everything was wrong. The 13″ x 19″ print shot out in seconds and what little color there was in the printed image was completely wrong.

The problems were twofold.

First, Adobe managed to lose all my preferred printer settings on the upgrade to the latest version of Lightroom. In the print module LR switched to Print Job->Color Management->Managed by Printer. This is exactly wrong. What you want is for Lightroom to manage color, not the Epson printer. This permits use of the right paper profile for the printing paper used. It means you control – through Lightroom – color matching rather than having some unknown profile used by the Epson printer. Here’s what you want to see:


The color profile is the one for Canson Photogloss Premium RC paper.

You can check that LR is using this profile in the Print module by going to Printer->Printer Options->Color Matching, where you will see two options, neither selectable (both are greyed out) with ColorSync being the selected option, thus:


ColorSync is invoked by Lightroom.

Click ‘OK’ NOT ‘Cancel’ to make sure this setting remains undisturbed. Next, click on Print Settings and you should see:


Print Settings after dialing in the correct Paper Source, Media Type
and Print Quality. All three were incorrect.

Now in that same dialog box click on Advanced Color Settings. You should see:


Confirmation that the printer is NOT controlling color.

So now I had LR set up for the right paper, paper source and paper specific profile, but the print quality was still awful.

Going to the touch control panel of the Epson ET-8550 go to Maintenance->Print Head Nozzle check, load some 8.5″ x 11″ plain paper in the second tray, and run the check. Mine came out showing bad clogging of both the Magenta and Grey print heads, disclosed by jagged lines in the print out. After running the Maintenance->Print Head Cleaning process twice, again using the touch screen on the printer, I finally got continuous lines for all six heads, thus:


Six clean ink nozzles, designated by continuous lines in the print.

Finally I checked Settings->Printer Settings->Bidirectional and, sure enough, either dastardly Adobe or dastardly Epson had switched this setting to ‘Bidirectional->On’, which is sub-optimal for best print quality, if faster. I switched Bidirectional ‘Off’ and had at it with LR. A couple of minutes later a pristine 13″ x 19″ print was lying on my desk:


Perfect printing once more. Leica M10, 135mm f/4 Elmar at f/8 – as good as lenses get.

So a conspiracy of errors – Adobe’s poor ‘upgrade’ engineering and the printer’s recent lack of use resulting in clogged ink nozzles – is the sort of thing to expect in that most fragile of hardware devices, the ink jet printer. In conclusion, if your printer has not been used for a few months, run a nozzle check using plain paper before inserting costly photo paper.

Lightroom masking in v15

Extraordinary.

I’m one of the crowd that detests Adobe’s subscription model for its many photography applications, having paid to own Lightroom many years ago only to find that Adobe made sure it refused to work on the Mac Mini M4, forcing me to ‘upgrade’ to the subscription version with its predatory pricing. So much for lifetime ownership.

However, giving credit where it’s due, the masking and highlight recovery capabilities of v15, the latest upgrade, are extraordinary. These are best illustrated by the image I took of Marion Campbell in 1977 in the Outer Hebrides island of Harris, off Scotland’s northwest coast.

Back in 2008 I wrote:

I have been trying to process this snap for thirty years. Every decade it gets better as processing technology improves. Oh! if only I had had a fill in flash with me. Anyway, I now have the burned out highlights largely recovered and some vestige of detail in that wonderful, craggy face.

And that effort was tortuous indeed, requiring much work in Photoshop.

Now, with Lightroom v15, the process has become an order of magnitude easier. A while back I had re-‘scanned’ my early Tri X film images using the Nikon D800 and a Micro Nikkor lens. Definition is as good as you will ever get from a film scan, and far faster than using a flat bed scanner with its mediocre results.

Still, the ‘scanned’ image does not look great. After importing the image into LR and straightening things up, with some added tweaks on the sliders I had a half decent image but one which still has horribly burned out highlights from the window behind Ms. Campbell’s head:


The unprocessed film scan from the D800.

Adobe claims that v15 of Lightroom uses AI – doesn’t everyone claim AI as the magic sauce today? – in helping with masking, so I had a go using the dropdown box which gives several masking options:


Masking options.

I chose ”Select Subject’ and LR did a great job of doing just that, allowing me to add contrast and vibrance to the face. Next I added another mask, this time choosing ‘Select Background’, which LR accurately did, and had at it with the Highlights slider, for a truly exceptional result. A third mask using the ‘Brush’ this time allowed me to paint in her blown out hair with another tweak on the Highlights slider and here is the result which took less time to do than to write about:


The final result.

So finally, 48 years later, I have the displayed image which, until now, has resided in my mind’s eye.

Why, I’m almost feeling good about that Adobe subscription ….