Category Archives: Photography

The new Kindle

A mixed bag and mostly disappointing.

When Amazon announced the latest version of their Kindle monochrome book reader I took the bait. At $139 ($189 with 3G) the cost is low enough to make acquisition an impulse purchase and, indeed, I expect the device to be free in a couple of years with your first purchase of x books from Amazon.
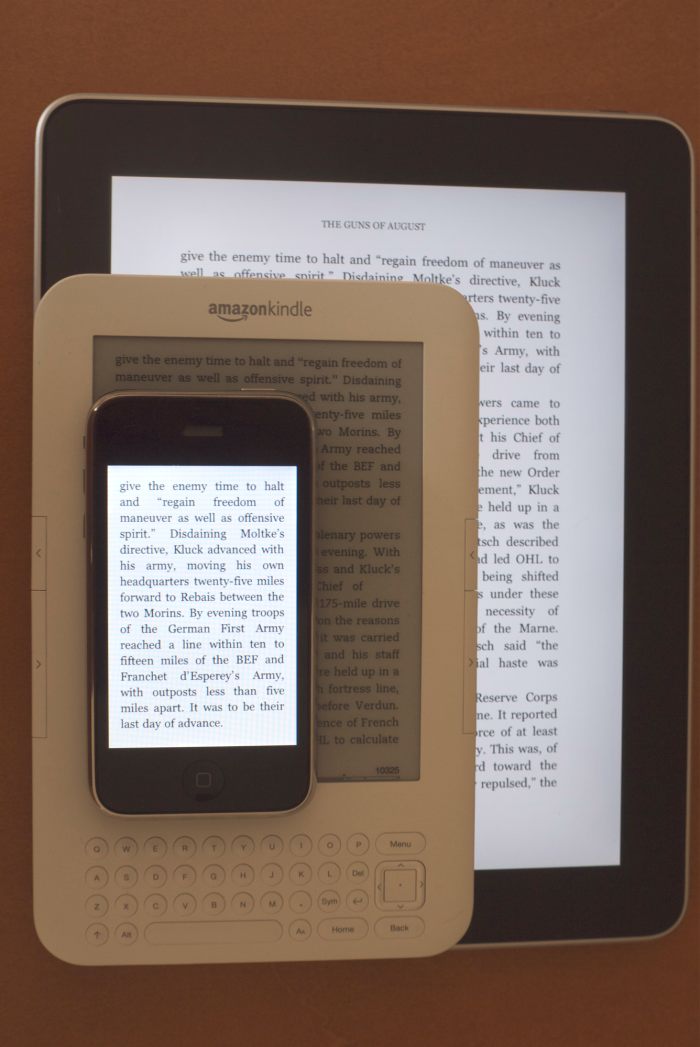
iPhone 3G, Kindle, iPad indoors in indirect natural light.

First, let’s be clear. The Kindle competes with the iPad in only one regard and that is as a single purpose book and periodical/newspaper reader. Its use to photographers is extremely limited as it cannot display color, has a small screen and is mostly useful if you upload your PDF instruction books to it. The bulk of the device is so low and the weight even lower, that it makes sense to take the Kindle with you in preference to the various instruction books for your picture computer, aka the modern digital camera.

Amazon ships the Kindle pre-registered in your name, a nice touch, and adding your wifi network at home is a matter of moments. There’s a nice pre-loaded instruction book (why does Apple make you download that for the iPad?), the recharger is minuscule and a nice long USB/recharger cord is provided to charge the device. Mine came 50% charged and power consumption is so low (the Kindle’s display is always ‘on’ – switching it off merely switches off wifi and the related power drain) – that you can expect days of continuous use on one charge. When ‘off’ the screen displays a portrait of one of any number of famous authors. A nice touch.

So while the Kindle does not compete with the iPad, there’s no denying that it’s hard not to make comparisons and, in a word, the Kindle is plain awful when thus judged.

The feel is ‘throw-away-plastic’ rather than ‘Leica-fixit-when-it-breaks’. The ergonomics are simply foul. Lots of tiny buttons, awful placement of the ‘back’ button right below the five way controller, no touch screen (I kept touching mine, after so many happy hours with the iPad) and, worst of all, the page forward and back buttons – which are duplicated along the long sides – could not be placed worse. Every time I pick the Kindle up I do so by spanning it with my hand to grasp the long sides, thus avoiding actuating any of the keyboard buttons. This immediately causes pages to flip and I lose my place. Horrible – did anyone actually try using this ergonomic horror? Further, every time you change pages you get a disconcerting ‘flash to black’ like with an old fashioned mirrored SLR or DSLR.

The Kindle’s screen technology when used indoors is equally poor. The background is a light gray, the contrast is accordingly low, the screen is small and unless you have direct light shining on the screen it’s an eyestrain to read. Look at the picture above. Awful.

Many make much of the Kindle’s low 8 ounce weight compared to the iPad’s 24 ounces and, frankly, that’s nonsense. The iPad weighs no more than the average book, you do not hold it elevated but rather supported on a lap or in bed (just as you do with a book) and holding the Kindle aloft is simply a pain in the you-know-what, but you find you have to do that to get close enough to the small screen. The iPad’s weight is not an issue. Don’t be told otherwise. Or, if you prefer, return to your 48 oz. netbook or 80 oz. MacBook. That’s weight.

So why would anyone buy a Kindle? You only need look at the next two snaps and you will likely buy one. These show the iPad and Kindle in direct sun.
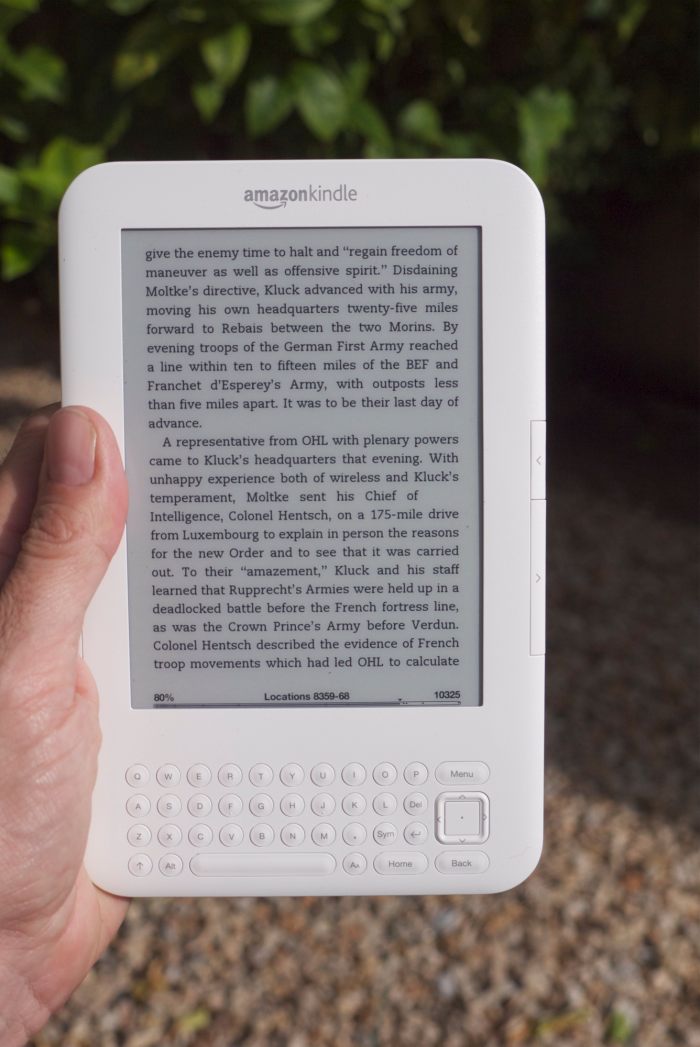
Kindle in direct sun. The grey background does a lot to reduce eye strain in bright light.
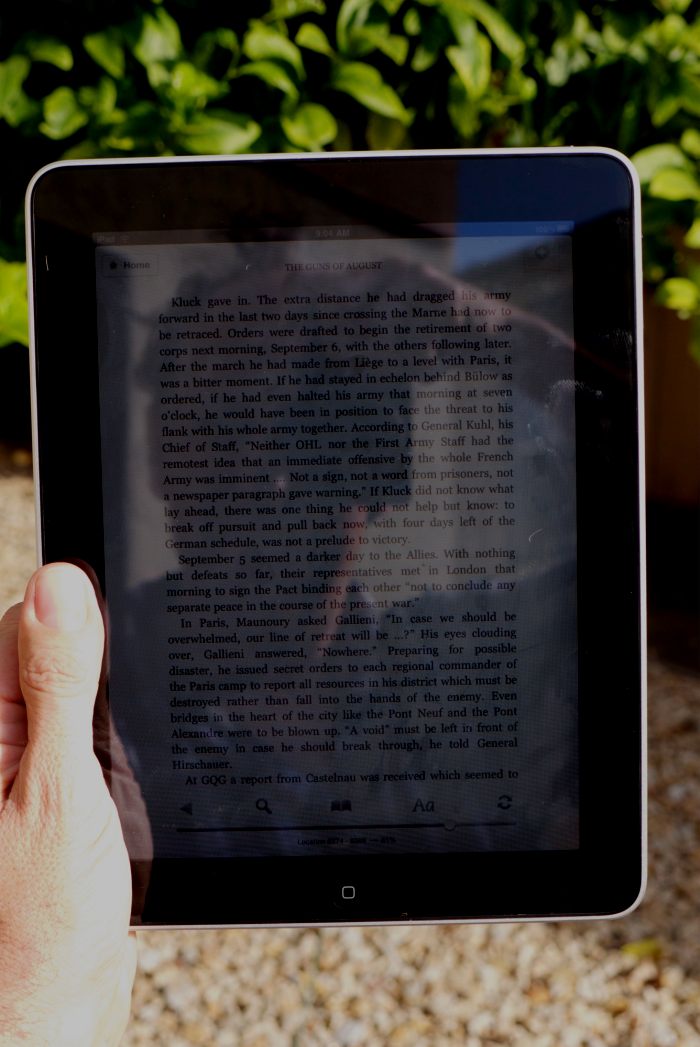
iPad in direct sun. Useless.

Here you can see the two best and worst features of the devices – the Kindle screen just gets better as the light intensity rises and the iPad not only sucks in the sun, it’s made impossible to use by the Chief Fetishist’s insistence on glossy screens only for all Apple’s devices. So at $139 if you live in a place with sun and like reading outside (meaning CA, Florida, southern Spain, France or Italy, I suppose) buy one. The $189 version is a waste of money, though that’s what I got. You simply load up your books at home using wifi. 3G, I thought, would be nice for on the road download of newspapers, but as Amazon and the publishers idiotically insist on charging you yet again even if you already have an iPad or desktop subscription, and because the Kindle version of the WSJ or NYT is severely edited, 3G makes no sense unless you get an urge to buy books from the Kindle Store when in an area without wifi. Worse, while you can access a mere couple of dozen famous blogs, Amazon wants to charge you for that too! Why on earth would I pay for something I can get free on multiple other devices? Mr. Bezos, what have you been smoking?

There is one reason, however, to get the 3G model. For the occasional beach or outdoor reader, 3G allows you to use Whispersync to pick up a book where you left off on your iPad or iPhone or other Kindle device. And as the 3G service has no recurring monthly cost (unlike with the iPad) you can just about convince yourself that it makes sense, if you try hard. Of course, the 3G service is from AT&T so better first decide if your place of contemplated use can get AT&T reception. If not, the Kindle falls back on the even slower EDGE system, which is better than nothing and has good US coverage.

The book shown on the screen, by the way, is Barbara Tuchman’s splendid ‘The Guns of August’ detailing the ‘outbreak’ (meaning unilateral unprovoked German aggression and the usual German atrocities) of WW1, each device at the same page owing to Amazon’s excellent ‘Whispersync’ technology which keeps all books you are reading using the Kindle or a Kindle app in sync. That’s the only other feature to like about the Kindle.

Bottom line? It’s no bargain. $139 if you like to read in the garden on sunny days or at the beach.

Update September 27, 2010:

Thank goodness for Amazon’s 30-day money refund policy. Today is my thirtieth day with the Kindle and after daily use throughout that period I am returning it. It simply got more and more frustrating to use, especially in its inability to allow the user to reset the last page read when trying to reread a book, rendering synchronization between devices inoperable.

You can see my review at Amazon by clicking here. The many ill informed comments – which I refute strongly – show confirmation bias at work. You bought it so you have to like it ….

An awesome viewfinder

The G1 finder shines.

Just how good the electronic viewfinder in the mirrorless Panasonic G1 really is was brought home forcefully to me when I spent a couple of days snapping away on the central California coast earlier this week. I had with me both the Canon 5D and the G1 and was reminded time and again why I prefer the EVF in the G1 to the traditional mirror/prism construction of the 5D.

The EVF in the G1 is not perfect, true. In bright light it will wash out highlights immediately, but no matter how bright the light you will have no difficulty reading the display data – aperture, shutter speed, etc. But things get even better in poor light. In the image below, the light was exceedingly poor – look at the exposure data. Yet the EVF adapted the image to show it in daylight brightness – much as you see it here – and composition was a breeze. In this sort of lighting you can actually read the Canon 5D’s display data, which is nice, but the G1’s is every bit as clear plus you get to see what you are photographing which, for photographers, is a nice feature ….

Inside Mission Carmel, CA. G1, 9-18mm Olympus MFT lens at 18mm, 1/8, f/5.6, ISO 1600.

I was lucky to get away with it at 1/8th second hand held and even at ISO 1600 there is no shortage of detail.

The Mission Carmel was founded June 3, 1770 and includes a working K-8 school. It is about as spectacular an example of California Mission architecture as you will find and quite beautifully maintained. Recommended, regardless of your religious views, or lack thereof.

Virtual reality revisited

Better tools and some thoughts on Flash.

[column width=50% padding=3%]

I have decided to do some new work in Virtual Reality panoramas, having written extensively in these pages about the technique some four years ago. Snow Leopard refuses to let either PTMac – the software used to stitch the constituent images – or CubicConverter – which converts the stitched panorama into Virtual Reality format – work, so my first port of call was to ace panoramic pro UK photographer Rod Edwards. Rod has got this technique down and one of the most stunning examples of VR I have seen is his panorama of the famous Racetrack in California’s Death Valley which can be seen by clicking here.

Following Rod’s advice I settled on PTGui for stitching and Pano2VR for VR generation. Processing VR panoramas is a two step process – first stitch the constituent images into a seamless flat whole, then convert that image into a circular panorama which the viewer can pan at will in all directions, not to mention the ability to zoom in and out.

In the process I learned a couple of things. First, the software is now friendlier than before, though the Panotools engine used by PTGui seems identical to that used by the obsolete PTMac. Second, Pano2VR is an excellent tool making it easy to add sound, navigation controls and copyright data. But, most importantly, I learned how superior Adobe’s Flash is to Apple’s Quicktime. Yes, Pano2VR can generate VR files in either format. The Flash versions are half the size and offer far more control. Panning in Flash panoramas is also much smoother than the jerky alternative in Quicktime. Yes, the very same Flash which greedy piggy Steve Jobs has banned from the iPad. It’s ironical that Quicktime VR is no longer supported by Apple’s own latest version of their media player, QuickTime X, as they appear to be abadoning the VR format. But you don’t expect Apple to tell you that now, do you?

[/column]

[column width=45% padding=2%]

So to play a jerky Quicktime VR pano you have to download the older Quicktime 7 if it’s not on your system. Let’s hope the anti-trust powers stomp on Jobs’s arrogance and force him to open the iPad to Flash. If not, the competition will see to it in any case, and I’ll be first in line for a tablet which plays Flash and has a built in SDXC card reader. What a jerk! Here’s a guy who has a monster ego and a huge vendetta against Adobe for some reason. A little power is a dangerous thing ….

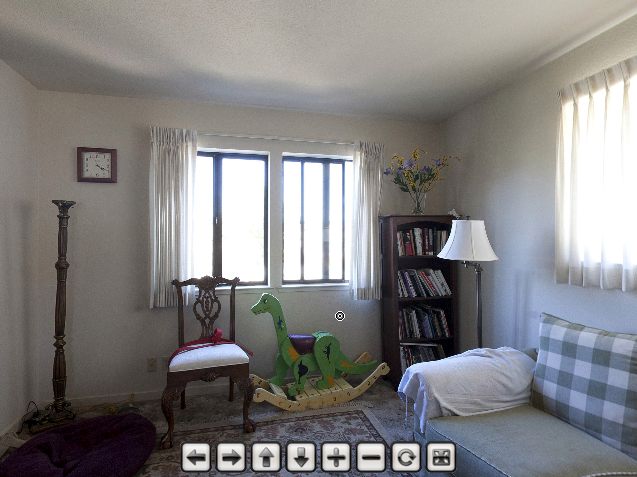
As a quick proof of concept, I snapped six pictures of a loft interior using the Canon 5D and Canon fisheye lens mounted vertically on the King Pano panoramic head. The excellent King Pano remains available and I recommend it. You do not need a fisheye to use it but a fisheye lens is the way to go if you want to do 360 degree Virtual Reality panoramas. Even with regular lenses, the King Pano is immensely useful as it provides the correct nodal point offset for the camera, meaning your efforts to stitch images properly will be speedily rewarded. Determination of the right setting for rotation of your rig about your lens’s nodal point is not that hard, and well explained in many places on the web, including on this site.

As proof of concept, click on the picture below. I have added some Vivaldi to jolly things along and the whole thing takes a minute or so to download. I did not bother using HDR, though that technique is highly recommended in VR work owing to the huge dynamic range frequently encountered – look at the burned out windows as an example. HDR fixes that. Nor did I fill the zenith and nadir holes, concentrating on the core stitching functionality instead. So next week it’s off to Point Lobos to do the real thing. In the image below I used TIFF files for maximum definition and you are looking at the Flash version.

[/column]

[end_columns]

Click to load and play the panorama. Use the mouse to navigate in all directions.
Will NOT play on an iPad.

To view a selection of my earlier panoramas, please click here. These use Quicktime7.

Disclosure: No connection to, or investment in, any of the companies mentioned in this article.

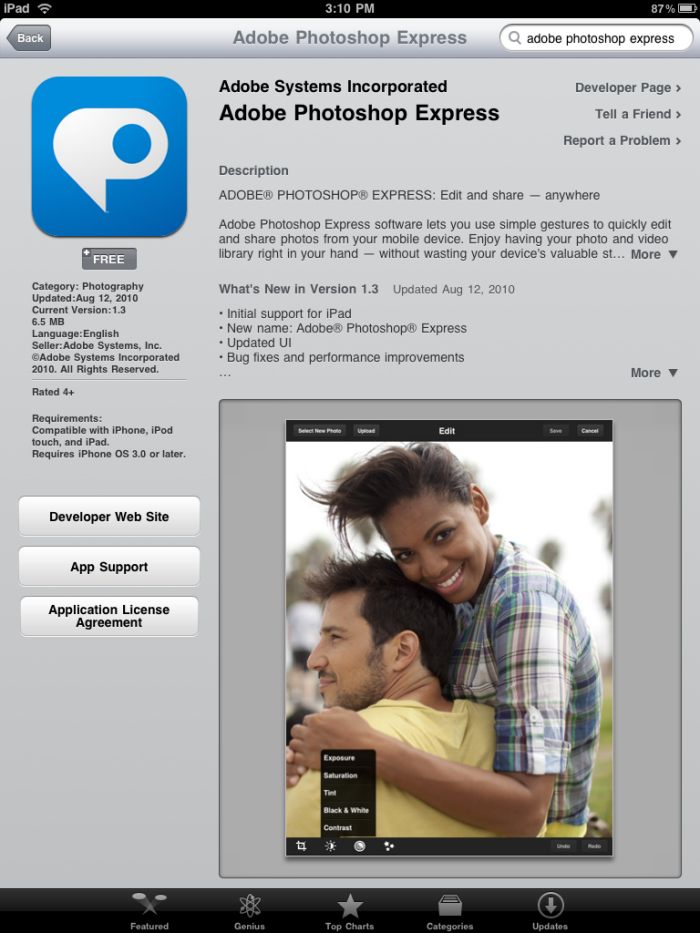
Adobe Photoshop Express

A useful iPad app.

I’m not sure what they are putting in the water coolers at Adobe Labs HQ in San Francisco, but they should definitely stick with the program.

First we got a really value added, fairly priced upgrade to Lightroom 3, many of whose enhancements I have written about here – film grain, superior RAW conversions, outstanding flexibility to remove lens aberrations and distortions – and now, at no cost, an iPad app named Adobe Photoshop Express.

The price is right!

It’s an inspired piece of programming which really ‘gets’ the touchscreen interface and one of the best efforts yet to make the iPad into a photo processing platform. Sure the controls are limited – basic exposure, sharpness, effects, frames, monochrome conversions and so on – but all the ‘sliders’ for the controls dictate that the user merely slides his finger across the screen to change things. Surely this is the future of photo processing? Further, sign up at Adobe and if you can get comfortable with access rights (theirs not yours) to your pictures, then you can sync your snaps to your desktop or laptop via their servers.

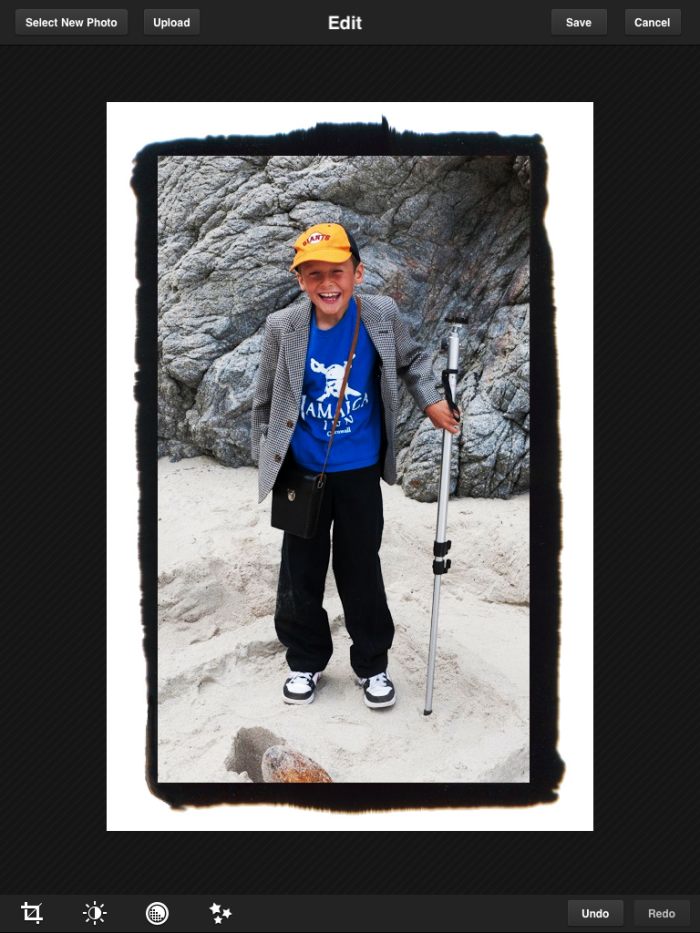
Here’s a simple snap of our son with a neat frame added – this is a screen shot as I do not have an Adobe online storage account:

Winston at Point Lobos. My ‘equipment man’.

Very worth while looking into and it seems some of the earlier bugs have been stomped on as I have had no issues with my version. And what have you got to lose?

More on Adobe lens corrections in Lightroom 3

Very clever indeed.

A friend wrote recently how much he was enjoying using the newly added built-in lens corrections in Lightroom 3 with his ultra-wide Nikon zoom on a pair of Nikon pro bodies, a lens whose profile is included with Lightroom 3.

This got me thinking. How can one-click corrections work when distortion varies so widely over the focal length range of many wide zooms? If the lens is pre-programmed into Lightroom’s database by Adobe you do not get a choice of focal length when applying the profile. It’s strictly a one choice affair, which contrasts with my approach when crafting profiles for the 9-18mm MFT Olympus zoom for my Panasonic G1, where I had to create disparate profiles for each of the four marked focal lengths. The barrel distortion of that lens decreases with increasing focal length, so it’s not possible to make one profile to fit all focal lengths.

Now one of the finer lenses for my full frame Canon 5D is the 24-105mm L zoom. Lightroom 3 includes a built-in profile for this lens unlike with the Olympus 9-18mm where I had to make my own. The Canon has fine resolving power and micro contrast at all focal lengths of its useful zoom range but suffers from the most atrocious barrel distortion at the wide end (the center of peripheral straight lines bows out), changing to mild pincushion distortion (the center bows in) at the long end. How could Adobe’s ‘one click’ approach possibly work with this lens whose distortion characteristics vary widely with focal length?

Note that if you use Canon’s DPP software (I do not) to process your pictures I’m fairly certain that it corrects distortion at all focal lengths. However, the 5D, unlike the G1, has no in-body distortion correction for the manufacturer’s lenses, so processing in LR3 brings in the images in their fully distorted glory just as with the G1/Olympus lens combination. And distortion correction is important to me as I frequently take architectural pictures where I want my straight lines straight.

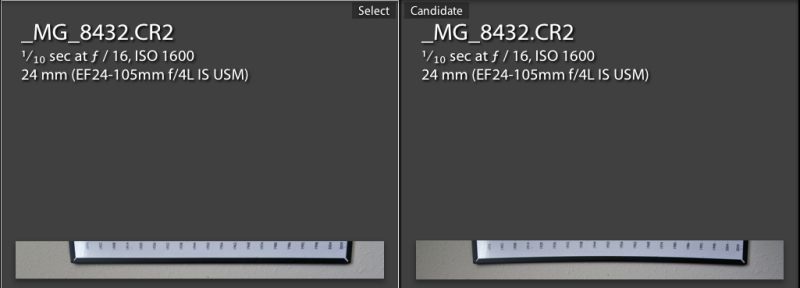
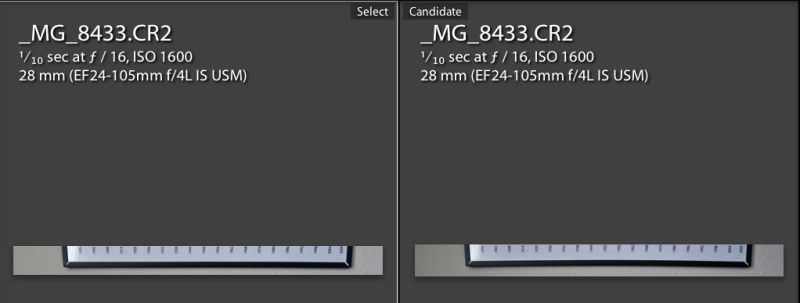
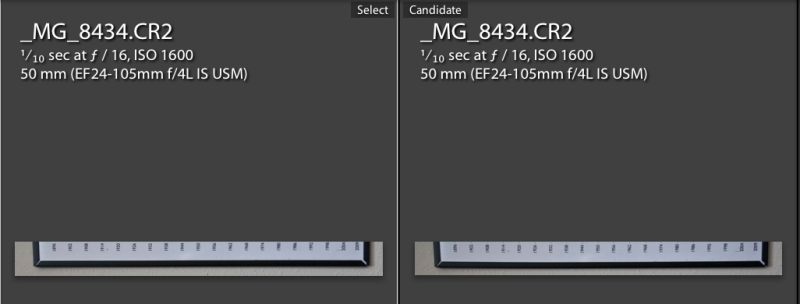
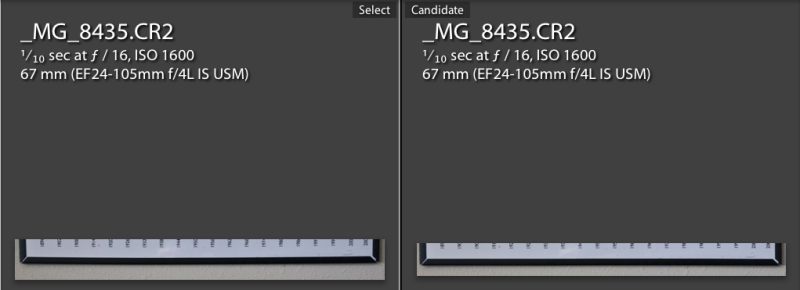
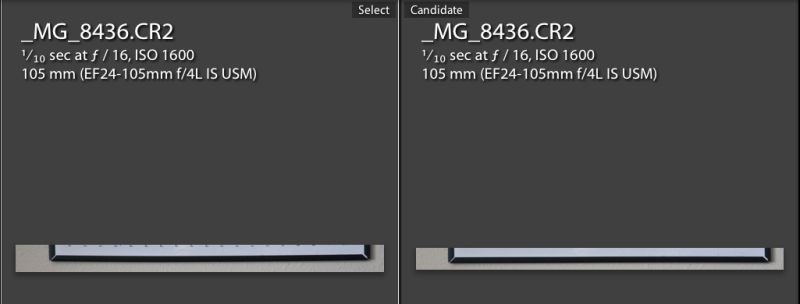
Well, it was but a few moments work to take five snaps, one at each of the marked focal lengths, with a straight edge close to the top of the frame in each. I processed these through Lightroom 3 and, after making virtual copies of each, applied the one-click lens distortion correction to each of the virtual copies, selecting the single profile for Canon’s 24-105mm L lens in each case. The pictures were snapped at 24, 28, 50, 67 and 105mm.

Here are the results – in each case the corrected version is shown first:

At 24mm. Noticeable barrel distortion in the uncorrected image at right.

At 28mm. Mild barrel distortion in the uncorrected image.

At 50mm. Very minor barrel distortion in the uncorrected image.

67mm. Very mild pincushion distortion in the uncorrected image.

105mm. Very mild pincushion distortion in the uncorrected image.

So as the above pictures suggest, the Adobe built-in profile for the Canon 24-105mm lens takes into account the focal length at which the image was made and applies distortion correction appropriately. It may be ‘one-click’ for the user, but it seems there’s much more going on below the surface. In all cases the correction is almost perfect, with only the 67mm and 105mm images slightly overcorrected and showing mild barrel distortion. The correction at the wider focal lengths is especially praiseworthy, as the above pictures show. Very clever and much more sophisticated than the case where you have to make your own lens profiles in those instances where Lightroom 3 does not include these.