Category Archives: Photography

Cropping is just a tool

If someone tells you you should only print the full frame of your negative or digital original – run – don’t walk, away.

You hear this sort of thing a lot from academics and pseudo-intellectuals. The Alfred Rosenbergs of the photography world. Sadly, unlike Rosenberg, they remain alive to propound their mealy mouthed tripe in an earnest attempt to earn what modest living their lack of intellect affords them. It goes something like this:

“No great photographic artist every crops his originals when printing, knowing that true greatness in a photograph can only be attained when the original visualization is rendered truly and uncompromisingly on photographic paper. To crop is to destroy the integrity of the creative process.”

Often this codswallop will be followed by a reference to Cartier-Bresson whose prints are so intellectually honest that they often include the surrounding frame of unexposed film. What art. What genius.

What utter rubbish.

Given that the sole purpose of an art photograph, as opposed to a commercial one, is to provide aesthetic satisfaction for the viewer, it is irrelevant whether the spectator sees all of the frame or just a slice. The only thing that matters is that the photograph works.

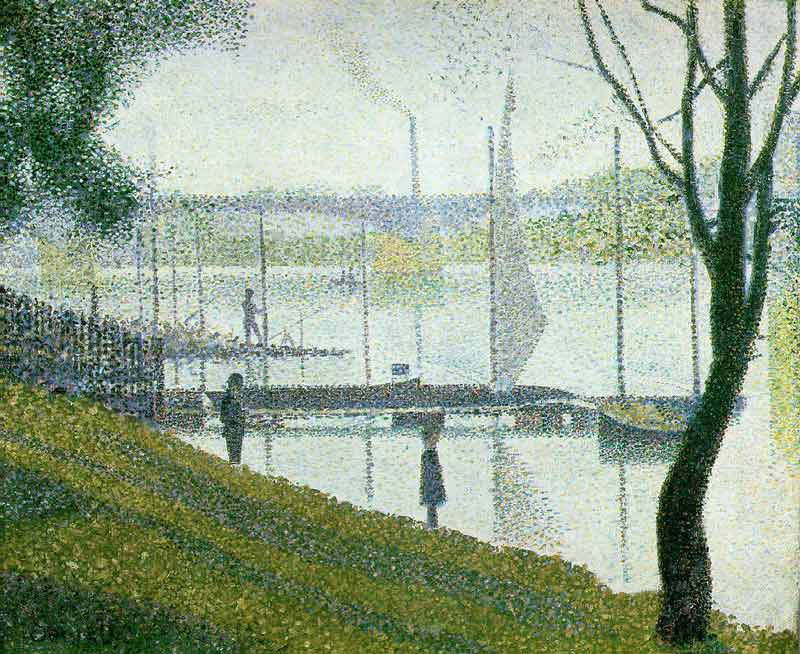
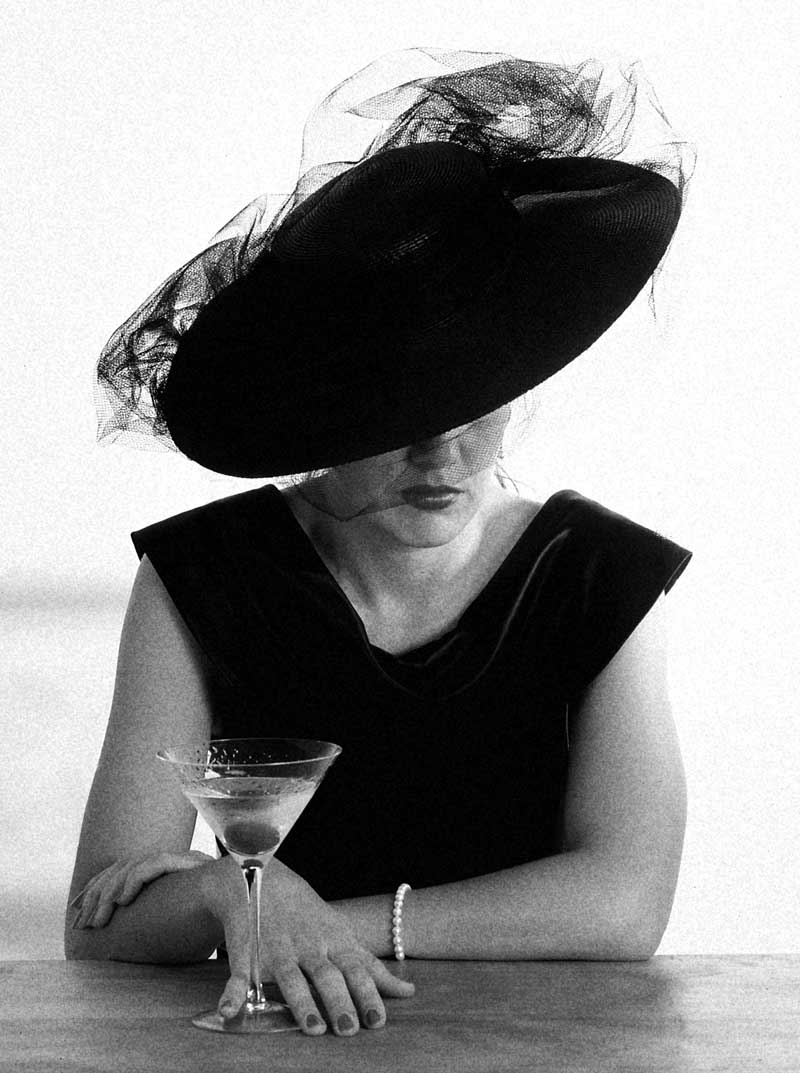
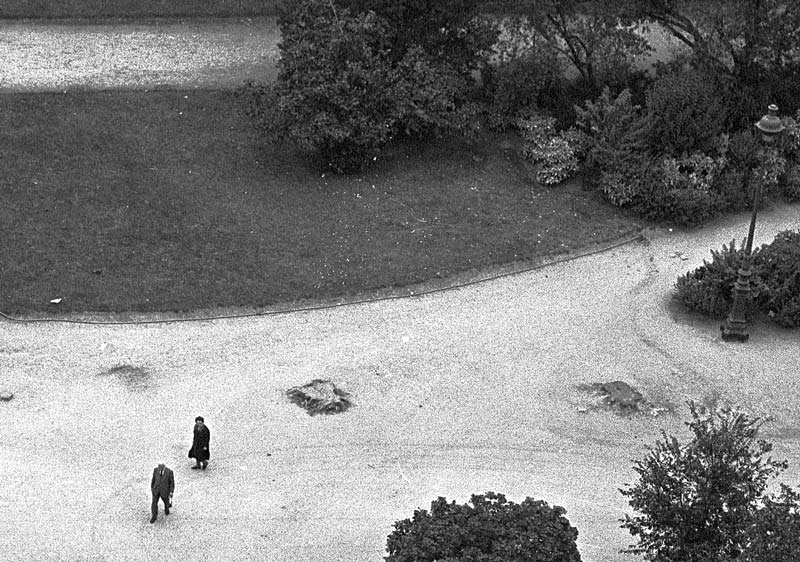
Here’s a snap I took in one of the great public squares of Paris. Yes, you can check the dimensions – all of the original 24mm x 36mm of the negative is faithfully preserved.

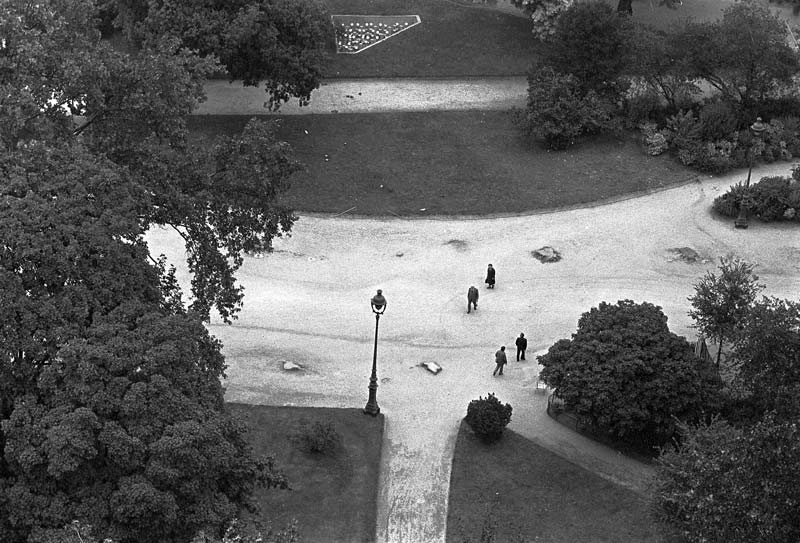
Crossings. Paris 1977. Leica M3, 35mm Summaron. TriX/D76
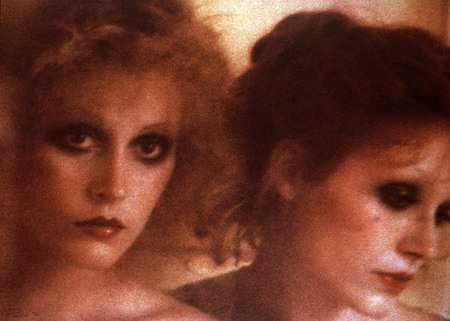
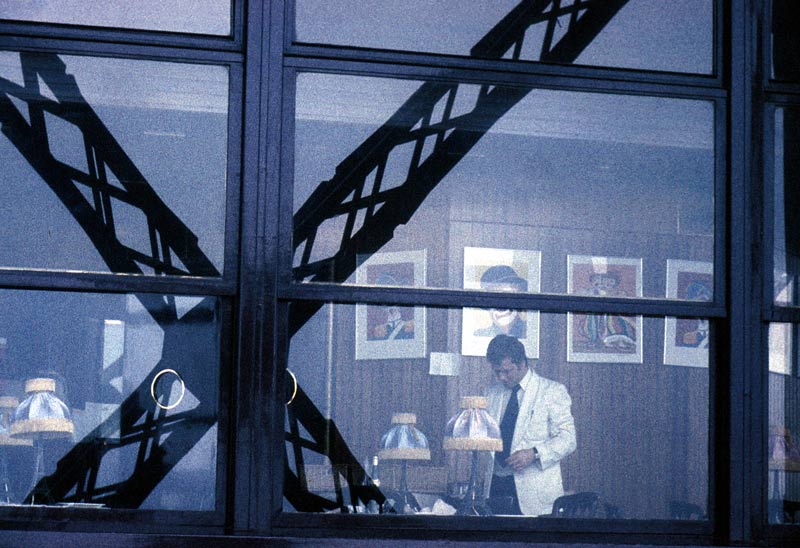
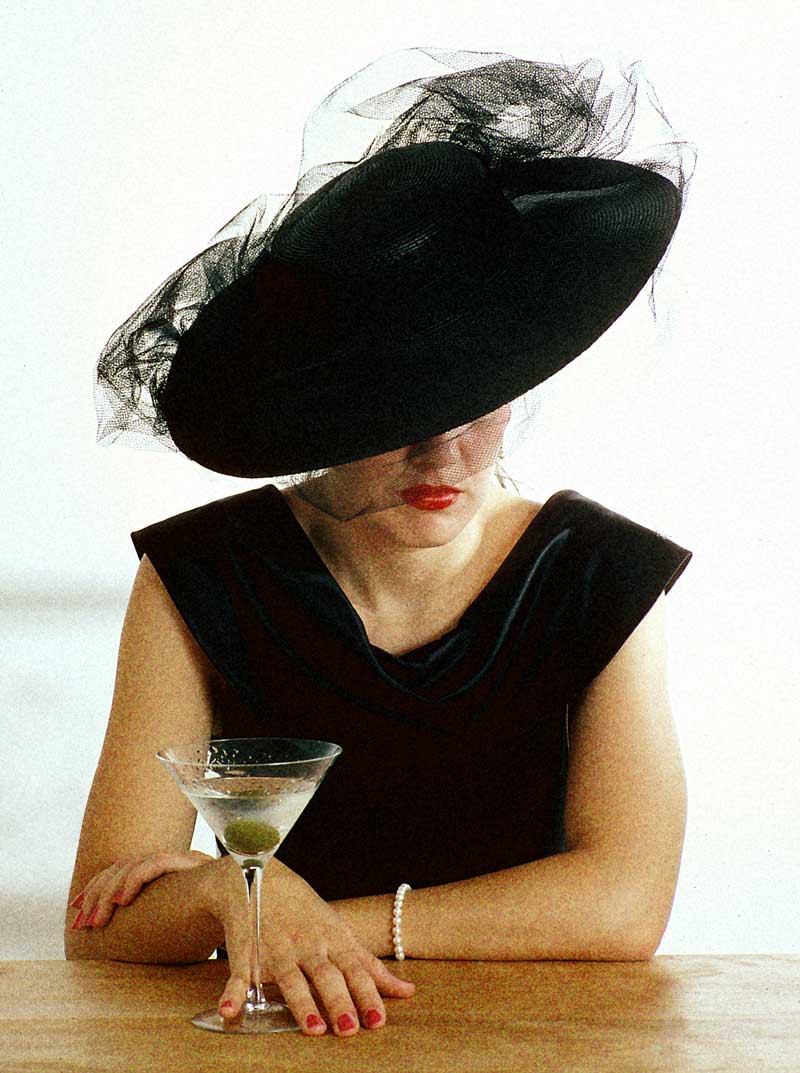
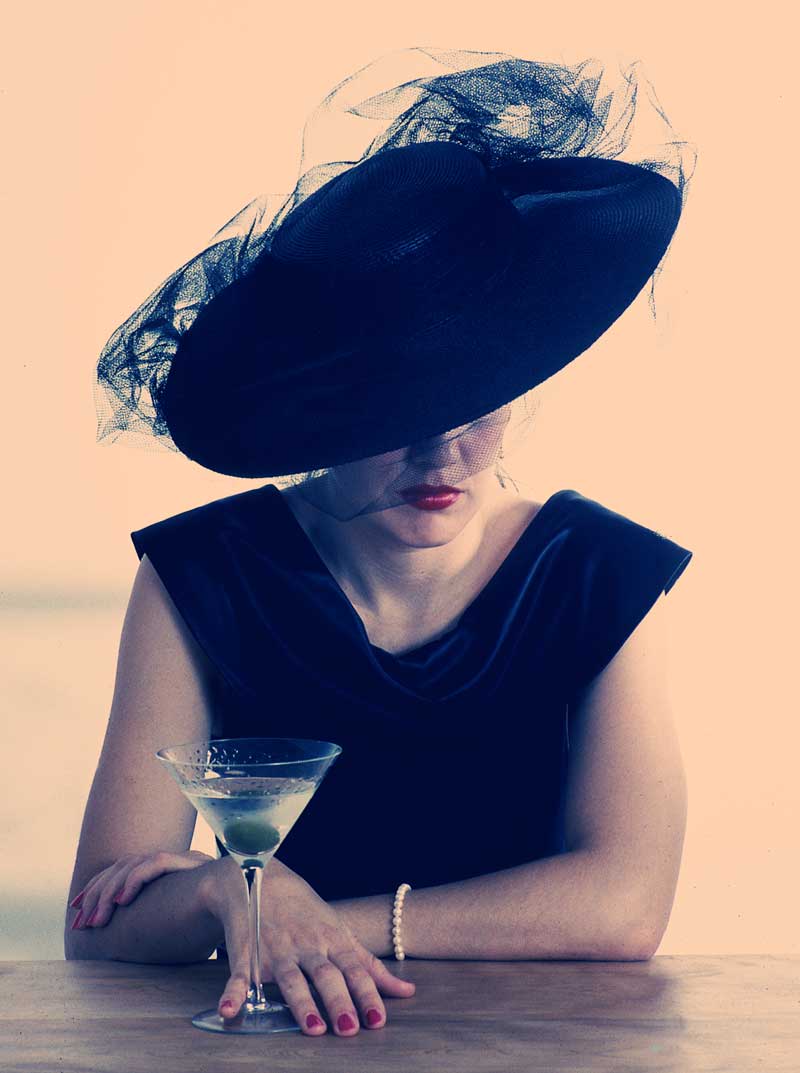
Three crops follow.

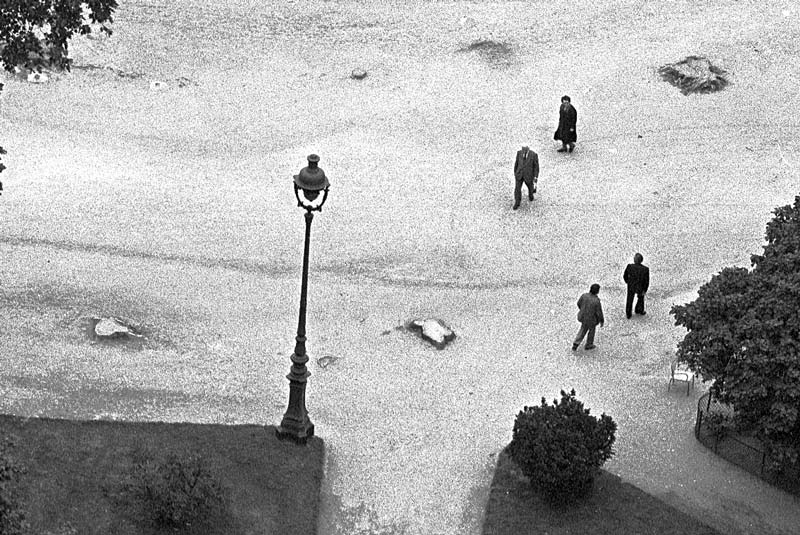
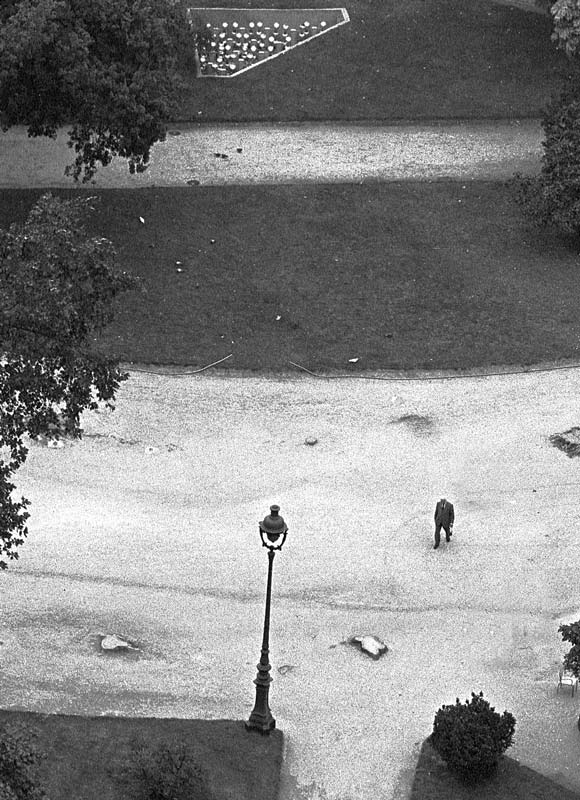
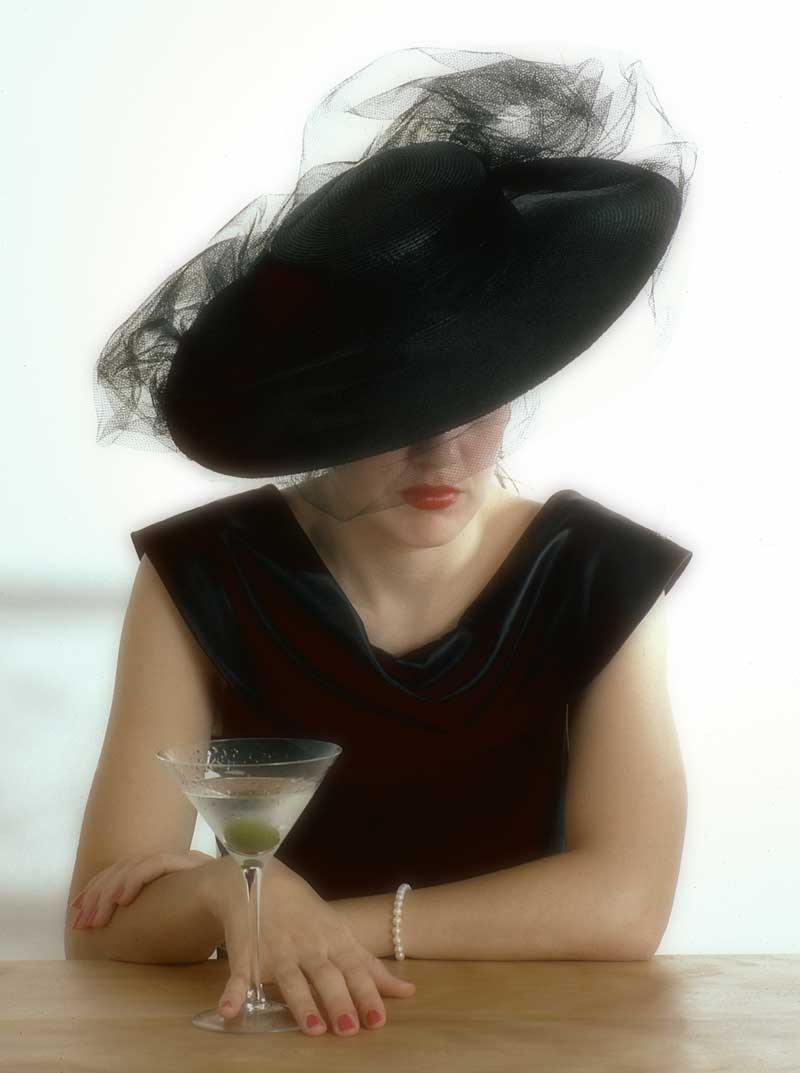
In the third crop I also removed three people in Photoshop. Just didn’t like the way it looked.

Now pretend that you never saw the full frame original. Who is to say that any of the crops is better or worse? The reality, of course, is that the photographer should crop for effect and choose the best possible crop to display his art work.

The academic rule is even dumber when you think that the same effect can be largely accomplished by simply placing a longer lens on the camera. I print it full frame using a 90mm lens on the camera versus cropping from the original taken with a 50mm lens. No difference, maybe except for definition and grain. But the first picture is sacred as it is uncropped, whereas the latter is garbage as I broke a cardinal rule of academia. Doesn’t work, does it?

What with all that burning, dodging and special chemistry he used, you wonder how Ansel Adams ever got past these academics. They probably mistook darkroom technique for great photography. In one respect you can think of Adams as the Greatest Cropper of all. How different is cropping, after all, from selective exposure in the darkroom? Both have as their intent the removal of unwanted features or effects. So, for that mattter, why not remove things, as I did in the third crop above, to make the result better?

All of which goes to confirm that Those Who Can – Crop, whereas Those Who Cannot – Teach.

Crop away. Keep cropping until it looks good or move onto the next original. And if you really want to fool them, why not add a frame depicting the unexposed film, with film manufacturer of choice, in Photoshop. How intellectually dishonest of you.

You will be in good company. The great photographer Brassai thought nothing of using one original to craft two or three pictures.

Hyper-wide candids

When you are that close you become invisible.

Having long been a fan of ultra-wide angle street photography, after many enjoyable years with a 21mm lens on my Leica, it seemed only natural to extend this approach to the realm of the hyper-wide world. That’s the result when using the Canon 15mm full frame fisheye lens on the 5D, augmented by the ImageAlign Photoshop plug-in I have explained in detail before. This plug-in removes objectionable fisheye lens barrel distortion.

The basic premise is that the man in the street has no idea what a fisheye lens does, especially when it come to reducing subject to camera distance if a frame filling picture is required. You can basically be pointing your camera almost directly at the subject and the latter will blithely assume you are photographing something over his shoulder. So proximity confers a level of invisibility unavailable to those using lenses in the 28-50mm range. Use anything longer and you also lose that involved, up close, candid feel.

The small, inconspicuous appearance of the fisheye adds to the stealth factor, an attribute no big honker super-wide zoom can claim. Finally, blanking out all those maker’s advertisements on your camera with some electrical tape makes sure you don’t scream ‘Canon’, or ‘Nikon’ or whatever for the whole world to hear and see.

To illustrate, here are four pictures taken yesterday in one of California’s many beach cities, Pismo Beach. The subjects were mostly within 1-2 feet of the lens.


All images taken on a Canon EOS 5D, 15mm Fisheye, Image Align.

What fun! Certainly the extremely wide view does the young woman’s legs no harm in the last picture.

A plug-in for filmies

Now retro-tech can make your work look like Sarah Moon’s.

First I should explain that ‘filmie’ is a new noun used to describe those poor boobs who mourn the passing of film. They rue the passing of a tired technology, messy chemicals and a medieval production cycle. So if you are a filmie, read on. Indeed, I might be mistaken for one of those twits with all those recent ramblings about Kodachrome.

Back in the Sixties, French photographer Sarah Moon discovered Ansco’s GAF500 color film. Nominally rated at 500 ASA – it was actually a bit slower but the marketers got to it first – it made over-exposed and over-developed TriX look fine grained by comparison. The film was very low contrast so everything looked sort of …. filmy, if you get my drift. Had it been around in Georges Seurat’s day he would have put down his paint brush, shaken off incipient carpal tunnel, and used a camera instead.

Seurat does GAF500. Or was it the other way around?

Sarah Moon does Seurat

Moon was working for Pirelli doing their calendar when she took the above; someone at Pirelli decided mechanics preferred their women blurred and grainy so they retained her to do the photography. I confess I have yet to meet such a mechanic, but maybe they are all French?

GAF500 has been unavailable for decades and the original slides made with it will long since have faded. I took a roll to Paris once and confirmed what Georges and Sarah knew. It was a great film.

Pindelski does Seurat. Eiffel Tower, Leica M3, 35mm Summaron, GAF500

Well, I’m obviously not the only filmie around as a company named Alien Skin (What? Hard to think up a less appealing name) has come up with a product named Exposure which, they say, will allow your digital pictures to look as if they were taken on GAF500. Or Kodachrome. Or lots of other emulsions. Now at $100 I’m not rushing out to buy it, but it’s nice to know that if I ever get another GAF500 urge I can indulge in grain excess using this product. The demo is fully functional for thirty days, by the way.

Pindelski does Moon. Pentax 6×7, Kodachrome, Alien Skin’s GAF500 conversion

And here’s a babe in monochrome:

Pindelski does Bailey. Alien Skin’s TriX conversion

I actually think I like the ‘Cross Processed Agfa Optima’ version:

Pindelski does drugs. Alien Skin’s Agfa Optima conversion

Finally, the glamor lighting version.

Alien Skin’s glamor lighting conversion

Fair’s fair. The AS people (oh! dear) do that one really well.

Canon EOS 5D firmware update

Version 1.1.0 is now available.

You can download it from Canon here.

This fixes the following:

1. Enhancement of direct printing with specific printers.
2. Correction of the communication errors that occurred when shooting with EOS 5D and EOS Capture software after shooting about 138 shots.
3. Correction of the phenomenon (their word; what they mean is ‘error’) in which the flash mode settings are changed from E-TTL to M (Manual) when EOS 5D is used in combination with Speedlite Transmitter ST-E2 and Speedlite 580EX.

Of these #2 is probably of most interest. I wrote about Canon’s Capture software here. I haven’t actually taken 139 shots in a row using Capture – indeed, that’s unlikely to happen any time soon – but it always pays to keep current on these things.

I have installed the upgrade on my 5D and it seems fine.

Some outdoor HDR experiments

It looks like a steady tripod is essential to do things right.

As regards image quality my invariable goal is to secure a level that permits the making of Really Large Prints so with this goal in mind I took the Canon 5D to the local Main Street yesterday, seeing as it was Independence Day, to experiment with High Dynamic Range photography with a view to learning what it takes to preserve image quality.

It bears adding that my goal with HDR has nothing to do with some sort of distorted presentation of reality, with exaggerated colors and tonal ranges. Far from it. Simply stated, all I wish to accomplish is good scene details, from shadow to highlight, where ordinary one shot photography will not do. Typically, this means the use of HDR is germane to high contrast scenes. If you want truly garish HDR results you need go no further than Google. Some of these efforts make Thomas Kincade’s genuinely foul painting look tasteful by comparison.

To try to see if this sort of thing could be done with a hand-held camera I set the 5D to take three exposures, each 2 stops apart, with the camera set on multiple exposure motor drive. Then all it takes is to take a manual reading of a mid-tone area, focus and keep the shutter button depressed. The 5D bangs off three exposures in one second, one correctly exposed, and one each 2 stops over and under. You can do less than 2 stop steps, but 2 seems to be the done thing in the HDR world.

When I got home I had 36 pictures on the CF card, meaning 12 sets of three each. Because of Aperture’s superb engineering, I dropped these RAW files into Apple’s application and seconds later all 36 snaps were on the screen. Then, dialing in Stack->Auto stack, I told the program to stack all images three or fewer seconds apart and, hey presto!, I had 12 stacks with three images each. Seconds later I had exported one of the stacks as high quality JPGs (12 mB each) to a new folder on the hard disk. Opening up Photomatix’s stand alone progam I executed Automate->Batch Process and told the application to ‘Align Images’ before processing, which took some 2 minutes. Photomatix exports the HDR JPG in a new sub-folder where the images reside, and the JPG can then be dropped on Photoshop for final adjustments – meaning the highlight slider in Levels is moved to the left, Smart Sharpen is applied (300/1/0 for the 5D is what Canon redommends) and the file is saved.

Back into Aperture, import the result and add it to your stack as the first image and you are done. It’s nice to keep the original RAW files as doubtless some day a better HDR application will become available, thoguh I find it hard to criticize Photomatix.

Here’s how it looks:

The Aperture screen with the HDR image on left with source images.

And here is a larger view of the result:

The HDR processed result.

As you can see, the very natural looking result preserves a full tonal range despite the extremely harsh midday sunlight. But there is a snag. Look at the car’s wheel rim and you will see that the images are misaligned. I didn’t get this problem when doing indoor tests on a tripod (see the previous columns) and examination of the other HDRs from this outing disclosed the problem in varying degrees in each picture. What appears to be happenning is that I am slightly twisting the camera between pictures, probably reacting to the noise of the motor drive. As a result, whereas the centers of all images are sharp, the peripheries show clearly overlapping images. So for this photographer, at least, it seems a tripod is de rigeur for mulit-image HDR pictures. The indoor shots taken with a tripod disclose no image degredation when compared with the originals.

Here’s one more example of what HDR can do for tonal range:

The Aperture screen with the HDR image top left, with source images.

And here is a larger view of the result:

The HDR processed result.

There’s less edge blurring in this one – I must have been steadier – but when you enlarge the result it’s still there.

It’s no great secret that I think Ansel Adams was a mediocre photographer, at best. What made his pictures jump out at you is his superb darkroom technique. He would think nothing of spending days over a print, messing with chemicals, paper grades and manual dodging and burning. If the poor sap had only waited, he could have snapped up a copy of Photomatix and saved himself a lot of trouble. His example is instructive, though. Good technique cannot make a great print from a poor original.

After these few experiments with HDR I think I understand what good technique means. Now I have to take some good originals!