A superior macro photography outfit.
For an index of all Leica-related articles click here.
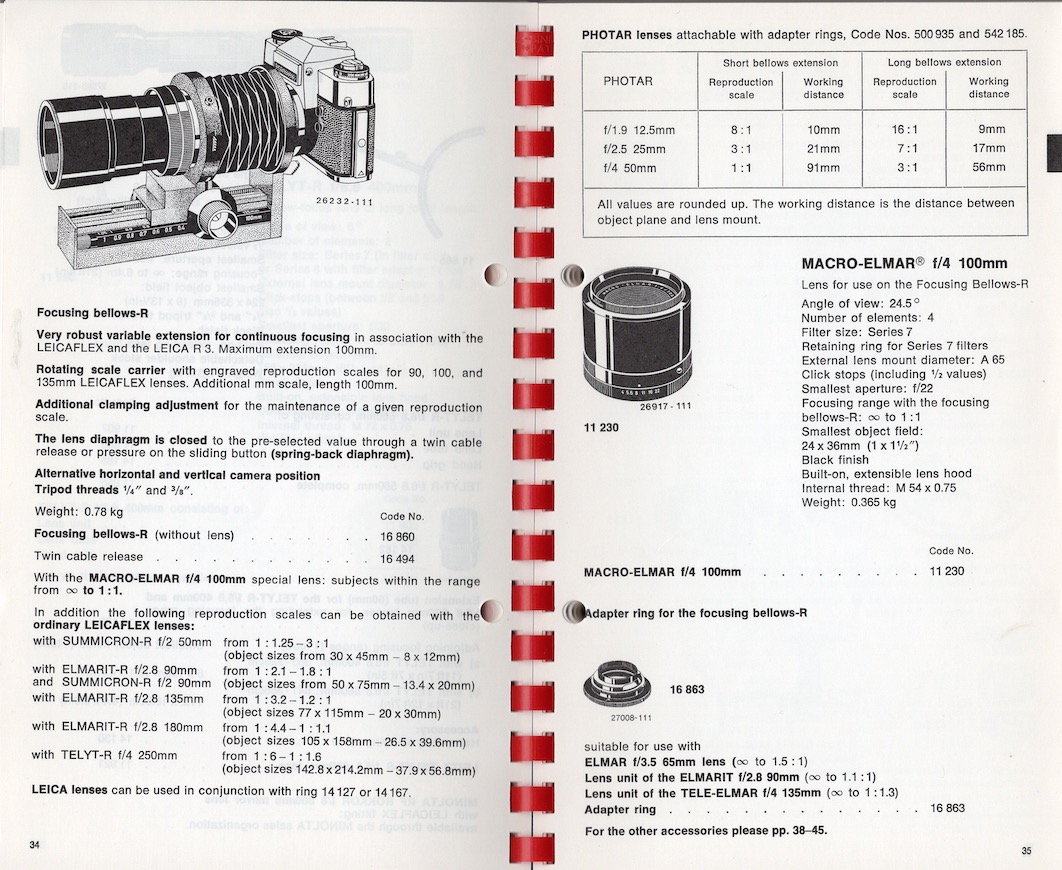
From the October 1976 Leitz General Catalogue.
I wrote about my adapted Leica Focusing Bellows II with the 135mm Elmar lens head for macro work here. While a tad clunky in use it delivers the goods, with the lens excelling in close-up work.
The Bellows-R and adapters:
But there’s always a better mousetrap and it comes in the guise of the later Bellows-R (#16860) fitted with the 100mm Macro-Elmar-R lens head. This lens/bellows combination was made for the Leicaflex and Leica R range of film bodies. An inexpensive Leica R-to-L aftermarket adapter sees the Bellows-R solidly attached to the Leica SL2-S body and when fitted with the Macro-Elmar-R (#11230) providing a focus range from infinity to life size with the bellows, meaning that a 1.5″ x 1″ (36mm x 24mm) object will fill the frame.
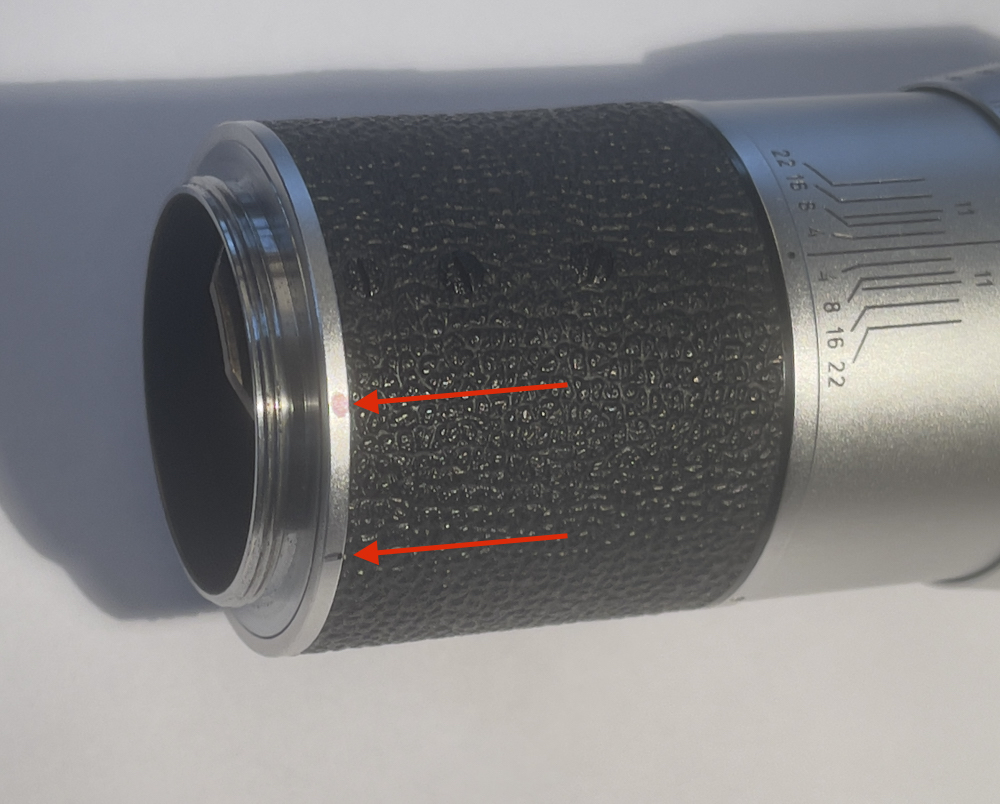
One other adapter ring is required as the lens comes with a Series VII thread for filters and the like. This is an odd sized 54mm thread so a 54mm to 55mm step-up ring ensures that a 55mm UV protective filter fits perfectly. The step-up ring does interfere with extension of the collapsible lens hood. If lens hood deployment is important to you then be sure to buy a lens with serial number greater than 2933350, when the filter thread was changed to a 55mm diameter. That should permit installation of a 55mm filter and still permit deployment of the lens hood.
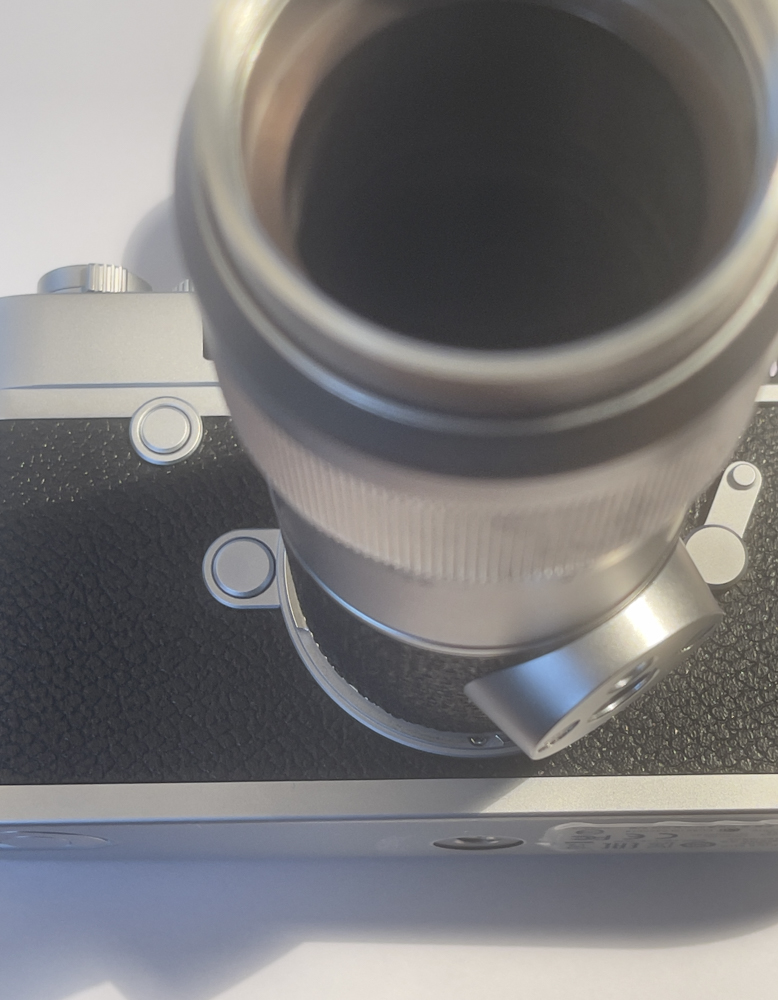
The LED ring light used with the Focusing Bellows II no longer fits as there is insufficient clearance between the lens and the periphery of the light. But scroll down for a fix.
Mine came with ring #14161 which serves to retain a Series VII filter, if that’s your thing. Frankly it’s easier to buy an inexpensive 55mm aftermarket filter for use with the step-up ring. While a drop in Series VII filter should allow extension of the lens hood the LED ring light will prevent that in any case, so why bother?
Variations:
Leica made these lenses both in a helicoid focusing mount with an auto-diaphragm which goes down to 1/2 life-size and in a plain non-focusing mount for use on the Bellows-R, with a manual diaphragm. No auto diaphragm is required with the EVF of the SL2-S, which automatically adjusts brightness in aperture priority auto exposure mode as the lens is stopped down and even at f/8 critical focus is very easy with the EVF magnification feature invoked. If using manual exposure – preferred when focus stacking – simply turn the shutter speed knob (top right) until you can see the image in the EVF, focus, then revert to the preferred shutter speed when taking the photo(s).
Macro-Elmar-Rs through serial number 2933350 (mid-1978) have the dated Series VII filter thread which was later changed to the more common 55mm size. The helicoid and plain versions of the Macro-Elmar-R are optically identical, regardless of the filter size. All told Leitz made 16,254 of the Macro-Elmar-R in its various guises and some 80% of these came in the helical focus mount version. Production ran a long time from 1968 (s/n 2279851) through 1994 (s/n 3655825). Mine has a s/n of 2390272 which dates it to 1970. The Macro-Elmar-R was made by both Leitz, Wetzlar, Germany and Leitz Midland, Ontario, Canada. It’s a very solid hunk of glass, brass and alloys, of a quality you can only dream of in the today’s resin mount era. My copy was made in Wetzlar but my extensive experience with Leitz, Canada optics leaves me in no doubt that quality control was identical both sides of the Atlantic. After all, the chief designer for Leitz Canada was the esteemed German Walter Mandler, and he was not about to compromise on quality. I would not hesitate to buy the Canadian version.
The Macro-Elmar-R has eight diaphragm blades in contrast to the twelve in the 135mm Elmar.
As with the 135mm Elmar, the 100mm Macro-Elmar-R has half-click stops from f/4 to f/22.
Reproduction ratios:
The Focusing Bellows-R fitted with the 100mm Macro-Elmar-R will focus from infinity to life-size. Fitted with the 135mm Elmar lens head in the 16472 adapter (required only on the 135mm Elmar and Hektor lens heads; the 135mm Tele-Elmar lens head does not need it) and the 16863 R adapter will focus from infinity to 3/4 life-size. Add one 16471 extension tube and it will focus from 4 feet down to life-size. Add a second 16471 extension tube and you can get down to 25% larger than life-size. Handy.
Accessories:
The Bellows-R had three accessories:
- A twin cable release (#16494) for stopping down auto-diaphragm lenses
- An adapter (#16863) for the 65mm Elmar, 90mm Elmarit, 90mm Elmar and 135m Tele-Elmar lens heads. (The earlier 135mm Elmar lens head can also be used when fitted with the #16472 adapter, though Leitz does not mention this in contemporary marketing brochures. This will also permit used of the even older 135mm f/4.5 Hektor, also known to be a fine performer in macro work).
- The #14167 adapter which allows fitting of M-mount lenses to the Bellows-R.
Comparison with the Focusing Bellows II:
How does the Bellows-R compare with the earlier Focusing Bellows II?
- Both allow turning of the camera body by 90 degrees for upright images. However, the Focusing Bellows II requires some 26mm of M-to-M extension tubes between the rear of the bellows and the SL2-S to permit unobstructed rotation.
- The minimum extension of the Focusing Bellows II is 63.0mm which includes the M-to-L adapter and 26mm of extension tubes. The minimum extension of the Bellows-R is 47.0mm with the R-to-L adapter adding 27.8mm for a total of 74.8mm.
- Both have lower focusing racks allowing movement of the whole assembly to and fro, 59.4mm on the Focusing Bellows II and 65mm on the Bellows-R – a useful increase. The latter has a four position rotatable scale allowing displays for 0-100mm, and reproduction ratios for 90mm, 100mm and 135mm lens heads.
- One advantage of the Bellows-R is that the rail with the rack and pinion mechanism does not protrude beyond the rear bayonet mount, meaning that no extension tubes are required between the rear of the bellows and the camera body, such tubes on the Focusing Bellows II being required to permit mounting on the SL2-S. While the Focusing Bellows II is exceptionally robust and free from play the Bellows-R is, if anything, more so.
The two control knobs are broader in diameter on the Bellows-R at 25mm compared with 20mm for the Focusing Bellows II, making for greater ease of use.
- Both bellows come with a friction lock for the lower rack, very handy when the camera is inclined, preventing creep.
Ring flash/LED light constraints:
The distance from the upper rack to the optical center of the lens mount on the front of the Bellows-R is 49mm. So if your ring flash or LED light’s diameter its more than 98mm it cannot be mounted on the front of the lens. Most ring lights appear to have a diameter of 125mm which rules them out. For the older Focusing Bellows II the dimension is 45mm, meaning a light over 90mm in diameter will not fit. With the 100mm Macro-Elmar-R, with no extension tube, the range of free movement is limited to bellows extensions which see the front of the lens clearing the front of the rack. Not at all useful. However, not all is lost.
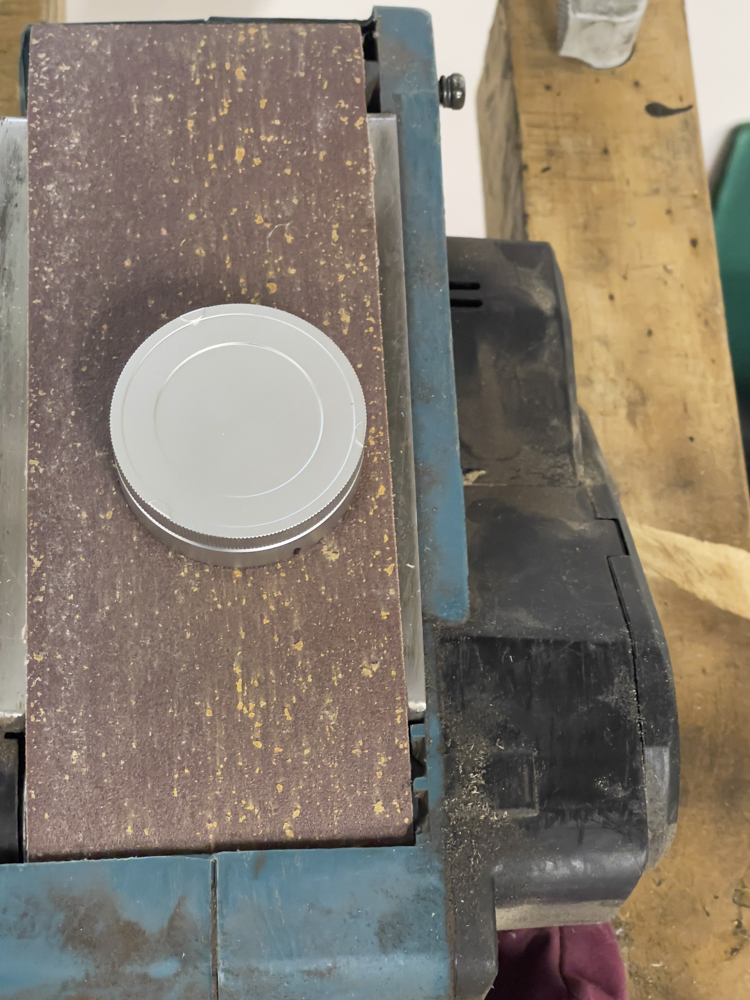
What is called for is a microscope LED light, and after poring over the many models listed on Amazon I came up with one which fits, permitting unimpeded motion of the bellows extension across the whole range available. It’s called the LED-144-ZK Black Adjustable 144 LED Ring Light Illuminator for Stereo Microscope, costs $27, is bright enough with a variable output knob and is retained using three rubber tipped screws. The inner opening of the ring is just too small to slip over the Macro-Elmar-R’s lens hood, which is 65mm in diameter, but the rig ships with a 48mm grooved rind with the groove providing a secure base for the three thumbscrews. This will also avoid the risk of marring the body of your lens with the thumbscrews. I had to resort to a couple of step-up/down rings to get this to fit, owing to the rare 54mm/Series VII filter thread on the Macro-Elmar-R, thus:
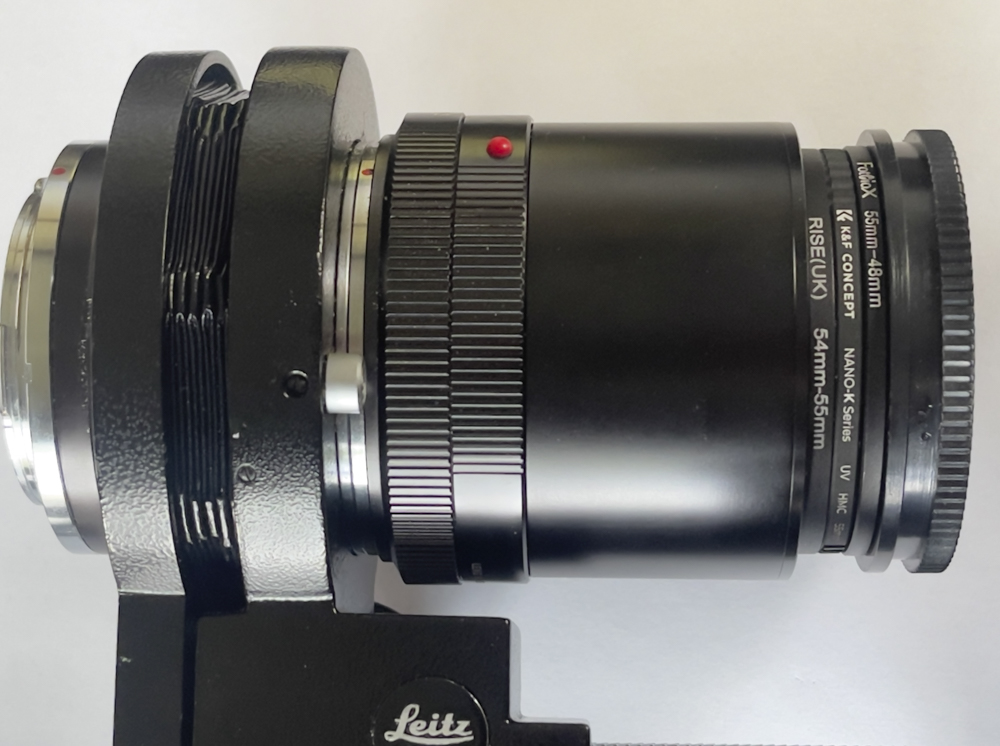
54-55mm step-up ring, 55mm UV filter, 55-48 step-down ring and the grooved 48mm LED light ring.
Ideally I would have used a 54-48mm step down ring and a filter to match but could find no such ring.
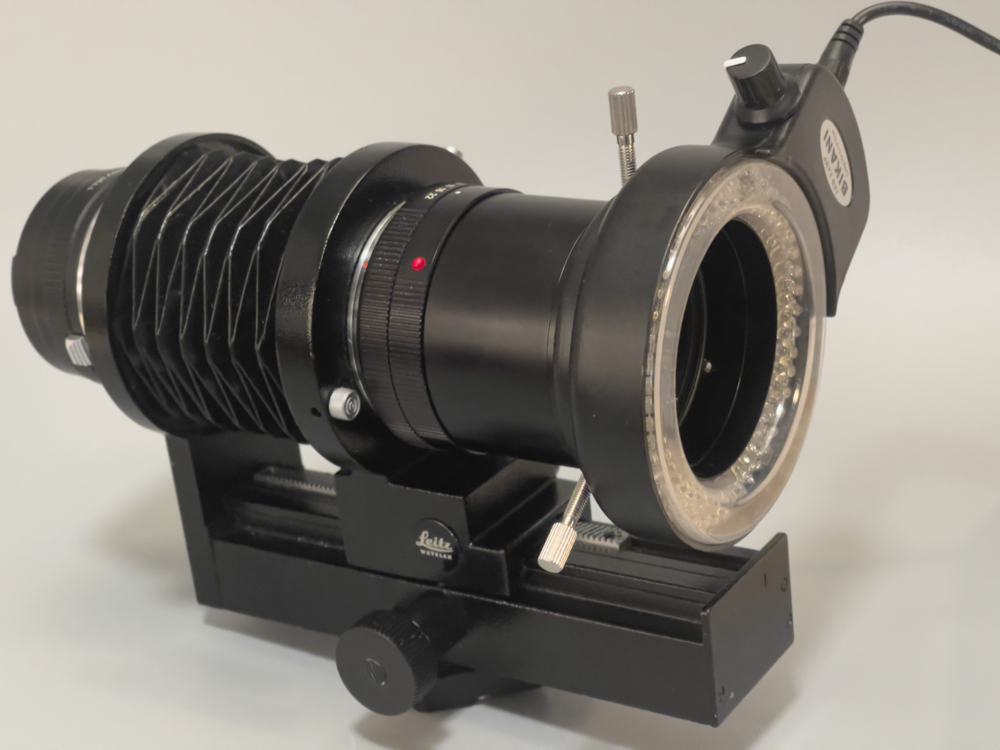
The microscope light attached to the 55mm UV filter on the 100mm Macro-Elmar-R.
The ring light easily clears the bellows’s rail.
This LED light is mains powered and you will need an extension cord as the provided cord is short, but it makes for a fine and cost effective macro lighting solution. My example proved to have an intermittent connection but a quick spray of switch cleaner on the coaxial power socket did the trick.
Invoking IBIS:
Two settings are required for IBIS to work:
- Menu->Page 5->Image Stabilization->On
- Menu->Page 6->Camera Settings->Lens Profiles->R lens->100mm 1:4 Macro-Elmar-R
It’s essential to dial in the correct focal length of the lens (the lens’s name is not important) so that IBIS can properly compensate for camera shake. So if your lens’s name does not appear on any of the many choices, choose a lens of identical focal length and all will be well. The EXIF data can be changed using an LRc plugin such as CaptureTime to EXIF.
Which is better paired with the SL2-S and what is the cost?
The Bellows-R is a more elegant solution than all those adapters and rings needed with the Focusing Bellows II. Plus there’s ease of 90 degree rotation of the camera body with the Bellows-R. I paid $300 for a mint Bellows-R with 100mm Macro-Elmar-R still in the original box. Bought separately the Bellows-R can be found for $100 and the lens for $200. There’s no need to pay more as there are many out there on the used market, and mint examples are common.
If you have a 65mm Elmar, 90mm Elmar or Elmarit, 135mm Tele-Elmar, Elmar or Hektor use the lens head instead with adapter #16863, meaning only the Bellows-R and L-to-R adapter need be purchased, though the Elmar and Hektor optical units require the #16472 adapter in addition. While I have not used the older 135mm Hektor lens head – it’s said that in the rangefinder mount its performance is inferior to that of the 135mm Elmar at normal distances – the Hektor is reputed to be excellent for macro work and many are available for under $100.
Other than the R-to-L adapter between the Bellows-R and the SL2-S’s body no additional extension tubes are required as there are no clearance/interference issues between the rear of the Bellows-R and the camera’s body. Such tubes are required to mount the Focusing Bellows II on the M-to-L adapter fitted to the SL2-S – with a 16mm tube required for mounting an an additional 10mm tube required if the handy 90 degree rotation of the body on the bellows is to be permitted.
Simply stated, for full functionality the Bellows-R needs just the R-to-L adapter ($16), whereas the Focusing Bellows II ($75) requires the M-to-L adapter ($135 Leica original with 6-bit coding, $10 aftermarket with no coding) and two M-to-M extension tubes ($100). Further for life-size reproduction the Bellows R fitted with the Macro-Elmar-R lens head needs no additional extension tubes whereas the Focusing Bellows II requires two 16472 tubes ($35) plus the 16471 adapter ($25) if the 135mm Elmar ($200) or Hektor ($100) lens head is used.
So the Bellows-R + 100mm Macro-Elmar-R is a cost effective solution for a solid macro kit.
Why not simply buy a Leica L mount bellows?
As far as I know there is only one bellows made with the Leica L mount, by Novoflex. As with most Novoflex products it’s crazy priced.
Another lens option – the Apo-Macro-Elmarit-R 100mm f/2.8:
Released in 1987 and sold through 2008 the Apo-Macro-Elmarit-R has a sterling reputation as one of the finest macro lenses made by anyone, and commands used prices of $1100-1500. It came in a helical mount only, focusing down to half life size. Given the excellent performance of my 135mm Elmar and that of the 100mm Macro-Elmar-R I see no need to spend that sort of money.
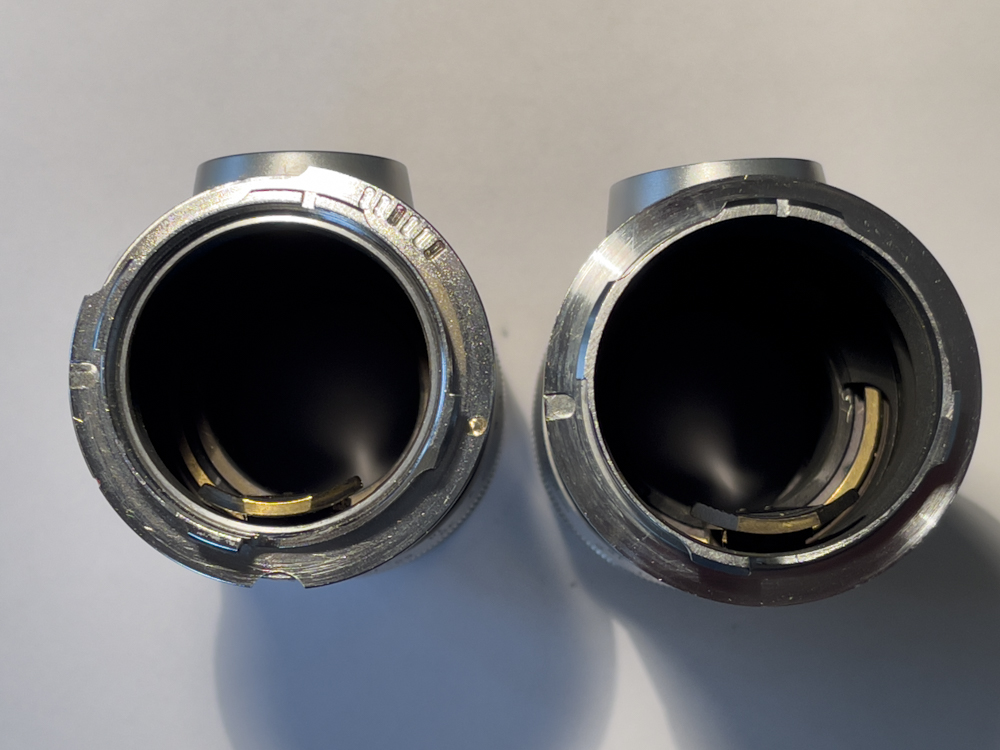
Comparison with the 135mm f/4 Elmar:
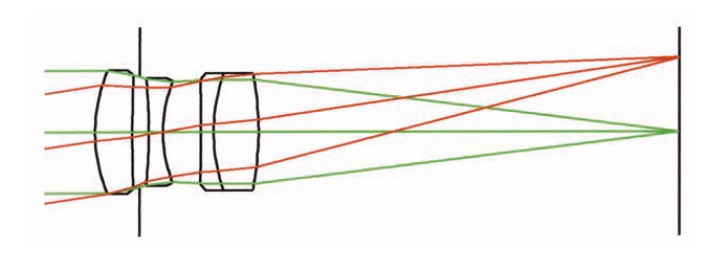
100mm Macro-Elmar-R.

135mm Elmar.
While the same 4 elements in 3 groups layout is used in both, the Macro-Elmar-R moves the doublet to the rear of the optical unit, the design being 7 years newer. The diaphragm is now ahead of the last element whereas in the older lens it’s behind the first one.
In use:
The experience is similar to that with the earlier Focusing Bellows II. The assembled rig is very solid and the movement of the two rack-and-pinion drives is free from slop or backlash. The locking lower rack lever serves as an adjustable tension device to prevent creep of the assembly with the camera inclined. The 90 degree rotation capability for the camera body is most welcome, far superior to turning the whole assembly through 90 degrees using a ball and socket head. Focus accuracy is very easy with the magnification function the SL2-S’s EVF, with the EVF adjusting brightness to a constant setting as the lens is stopped down. F/8 is the sweet spot for best definition, much as it is with the older 135mm Elmar lens head.
In practice when the subject has any depth the best results where overall sharp focus is required are produced using Helicon Focus image stacking software which works fast on my M4 Mac Mini and is reliable. The subject-to-lens distance is slightly less with the 100mm lens than with the 135mm optic, but is still sufficiently large that proper lighting is not an issue. Even a ring light, used too close to the subject, will result in uneven lighting. That is not the case here. As the images below show, the 135mm Elmar lens head is easily adapted to the Bellows-R and at very modest cost. I paid $26 for the R adapter plus $25 for the 16472 lens head adapter.
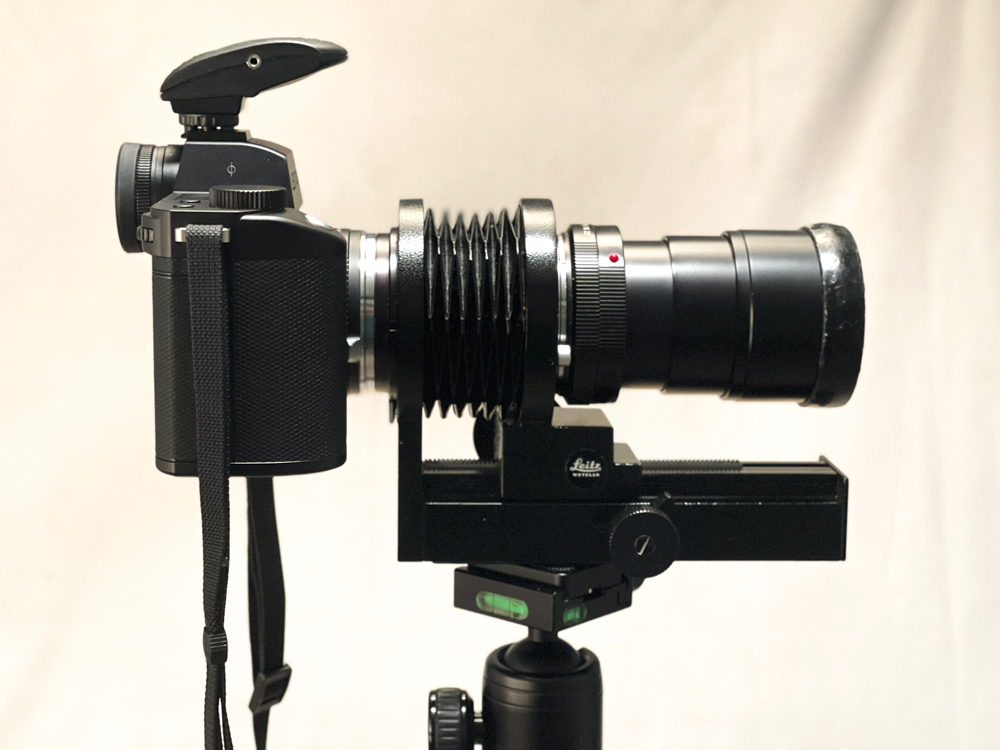
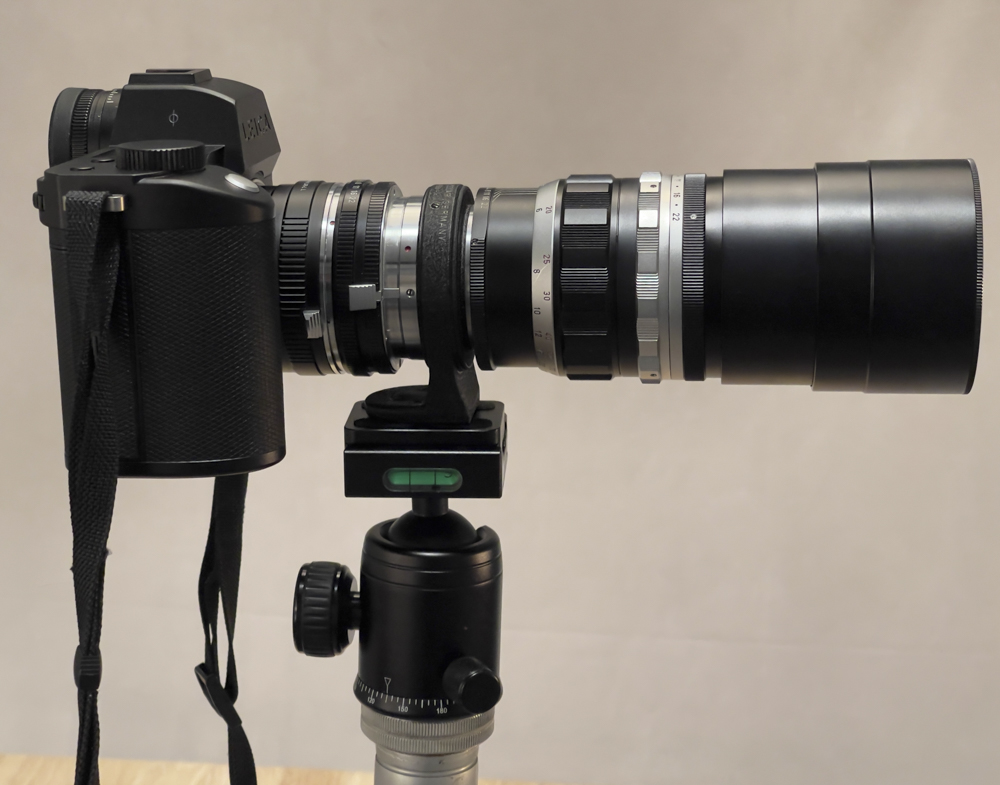
Leica SL2-S, R-to-L adapter, Bellows-R, fitted with the 100mm Macro-Elmar-R.
Later versions of the Bellows-R adopted the gauche red dot, mercifully missing from this one.
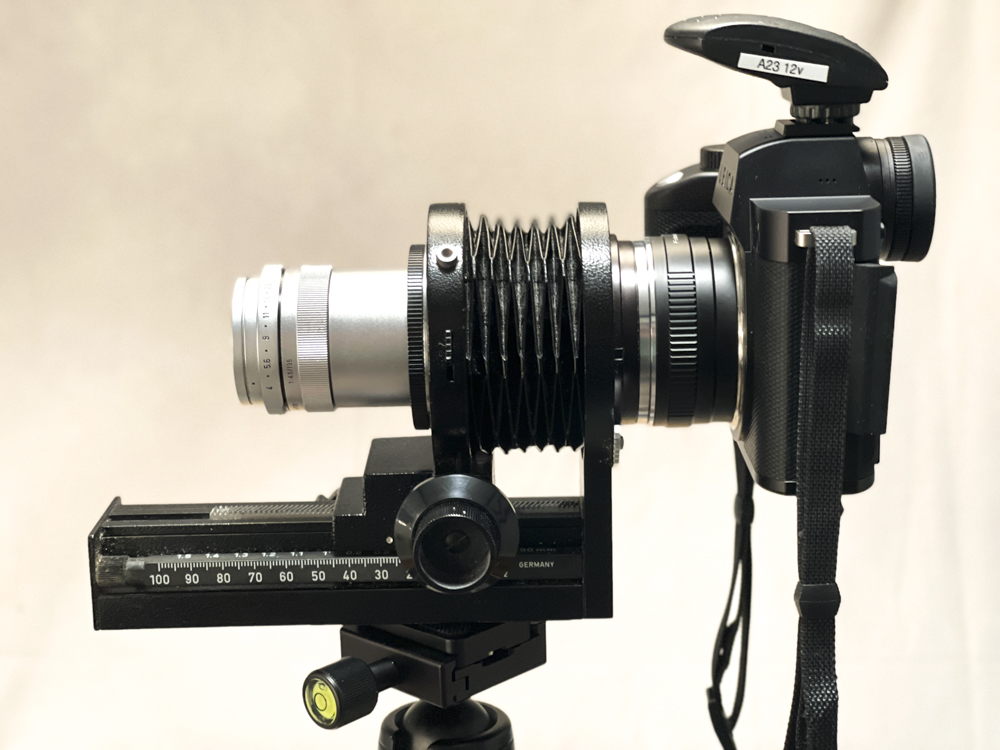
Fitted with the 135mm Elmar in the 16863 + 16472 adapter pair.
The ball head is the excellent Artcise NB36, costing all of $20.
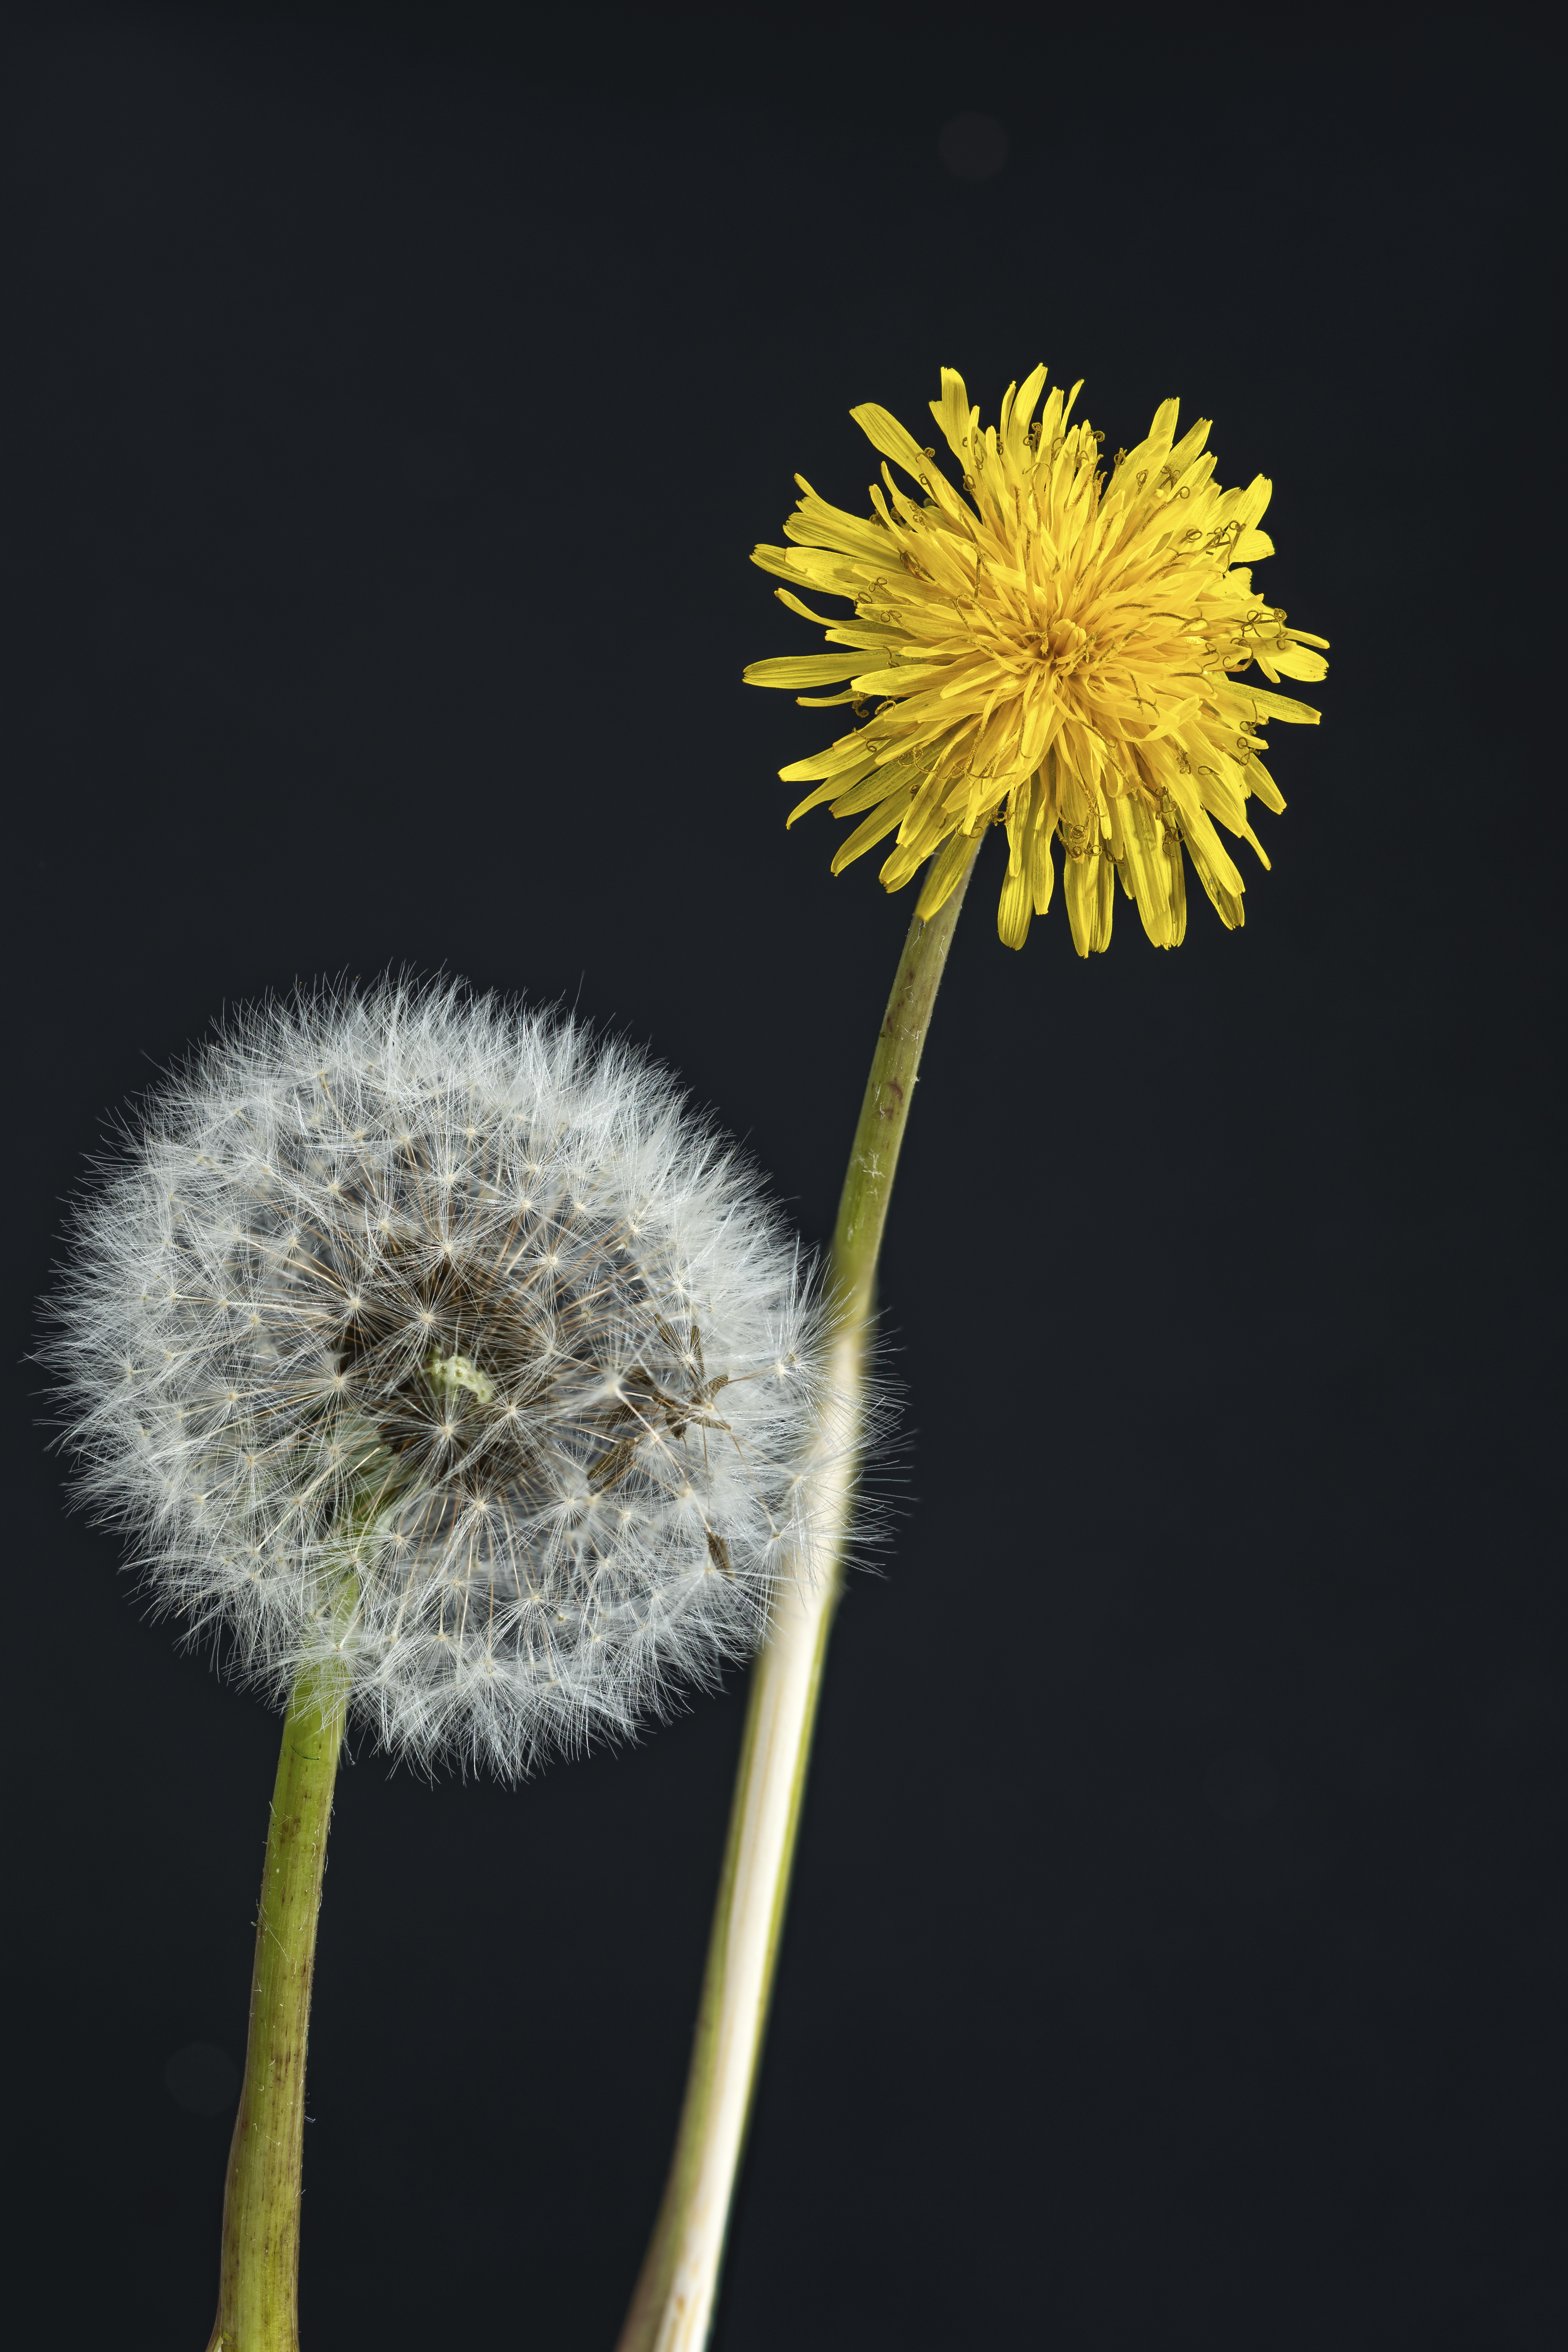
Test images – how does the 100mm Macro-Elmar-R compare with the 135mm Elmar?
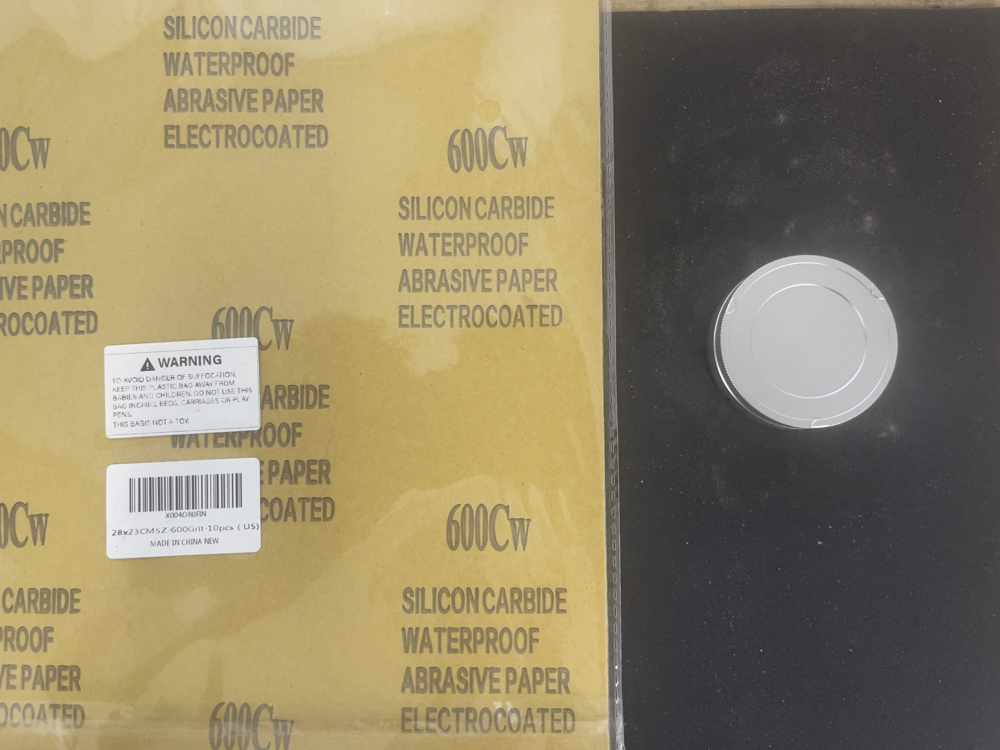
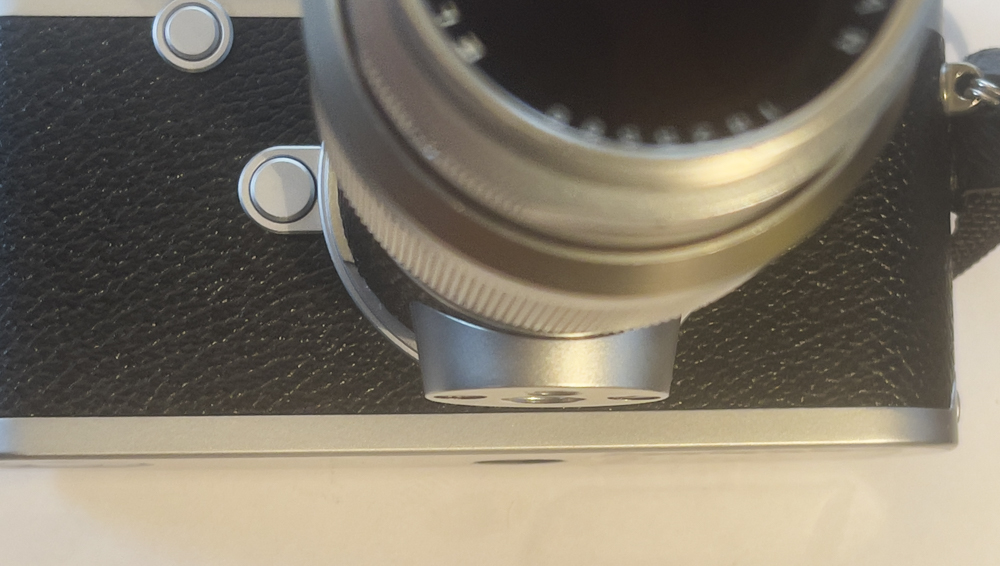
Both images taken at f/8, ISO400, two strobes. Key focus on the focus mark on the base of the lens.
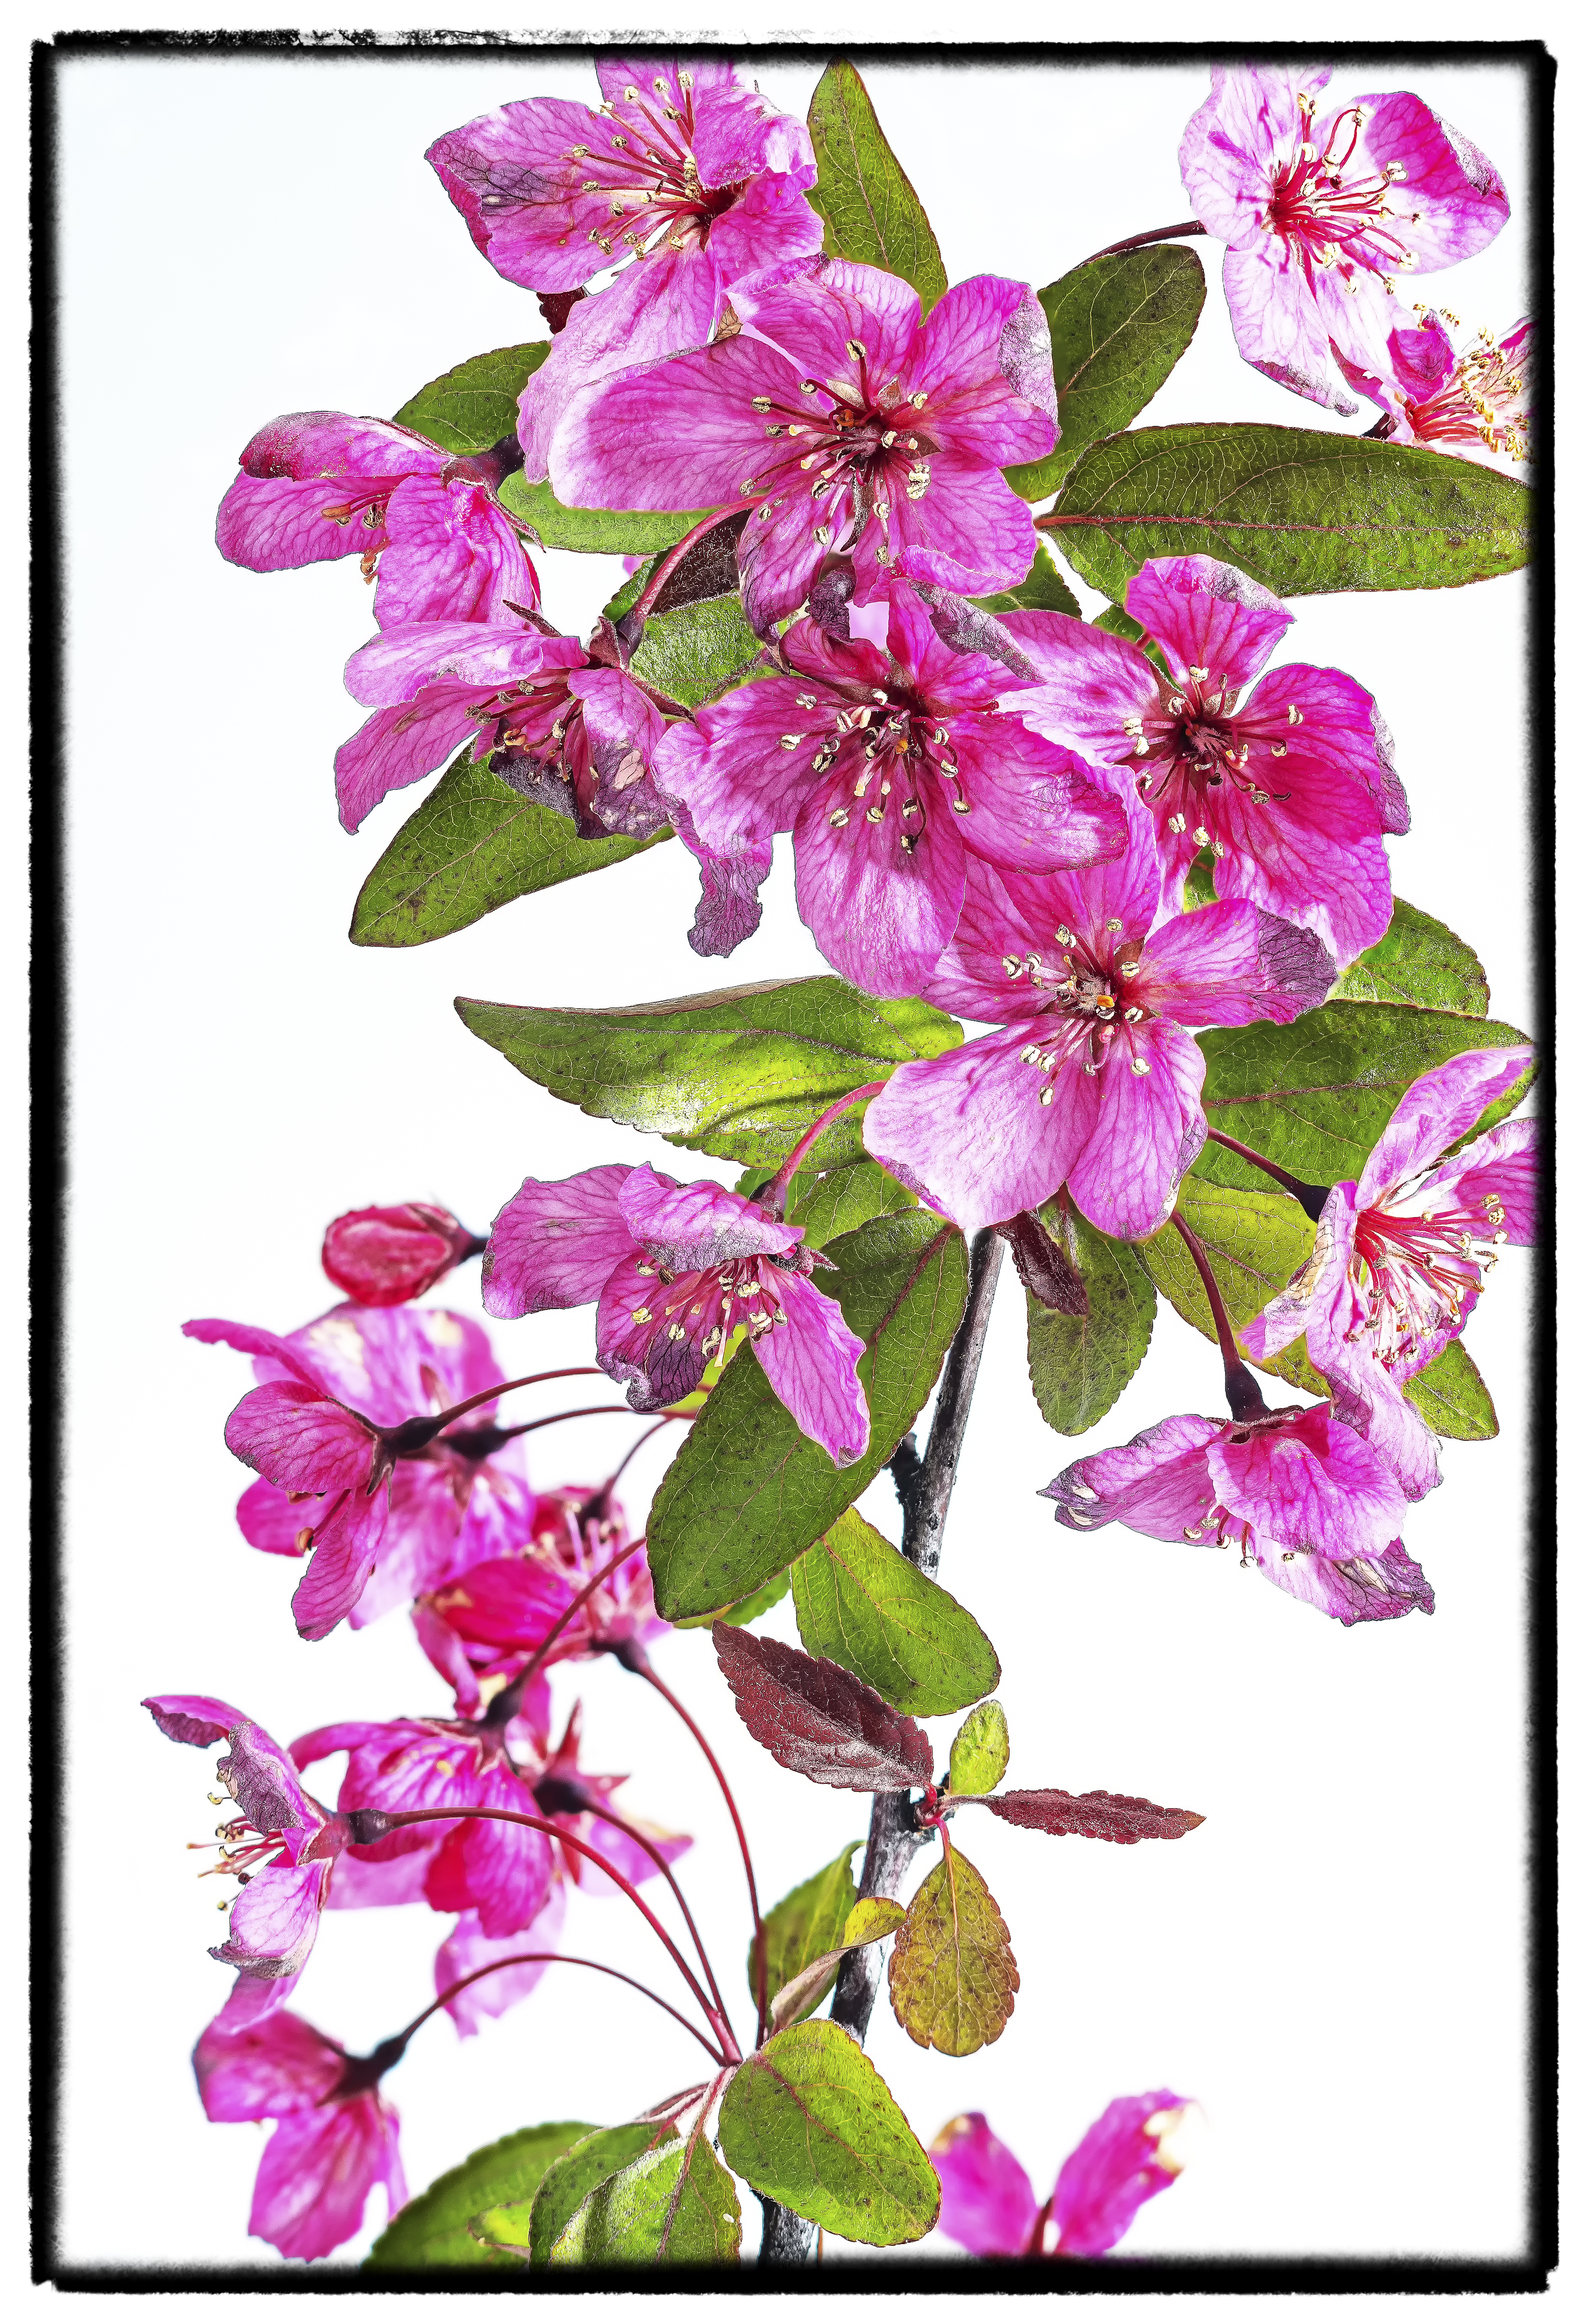
Click the image for a larger version – that’s equivalent to a 72″ wide print viewed
on a 32″ monitor. 10 images focus stacked in Helicon Focus.
Click the image for a larger version.
15 images focus stacked in Helicon Focus.
As you can see, looking at the enlarged images, there’s very little in it. Maybe the Macro-Elmar-R just has the definition edge, but it’s almost impossible to distinguish. I doubt I could reliably tell the difference in a blind test.
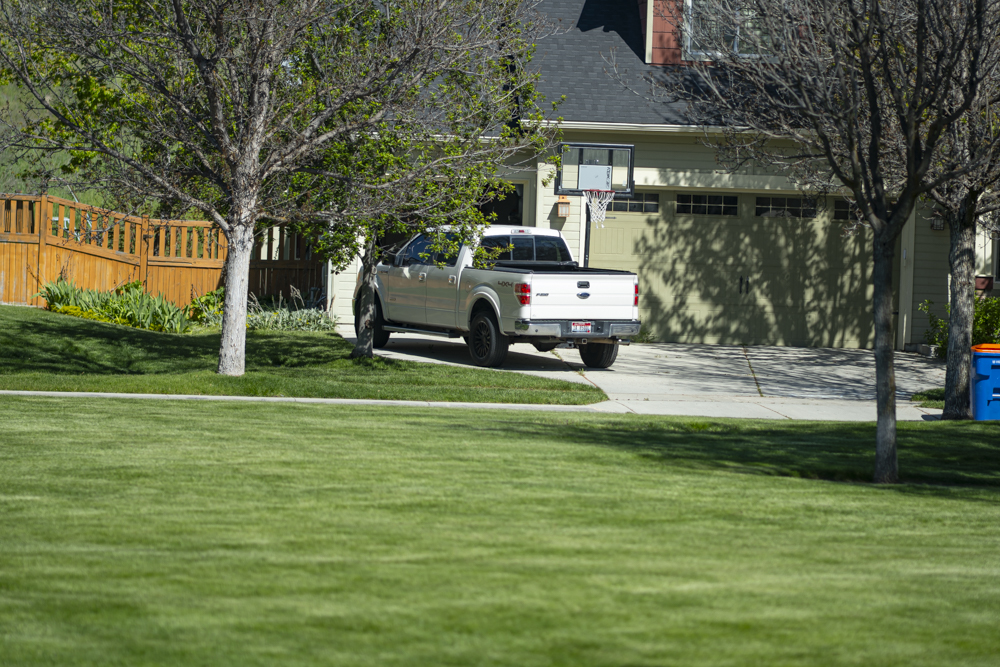
How does the Macro-Elmar-R perform at infinity?
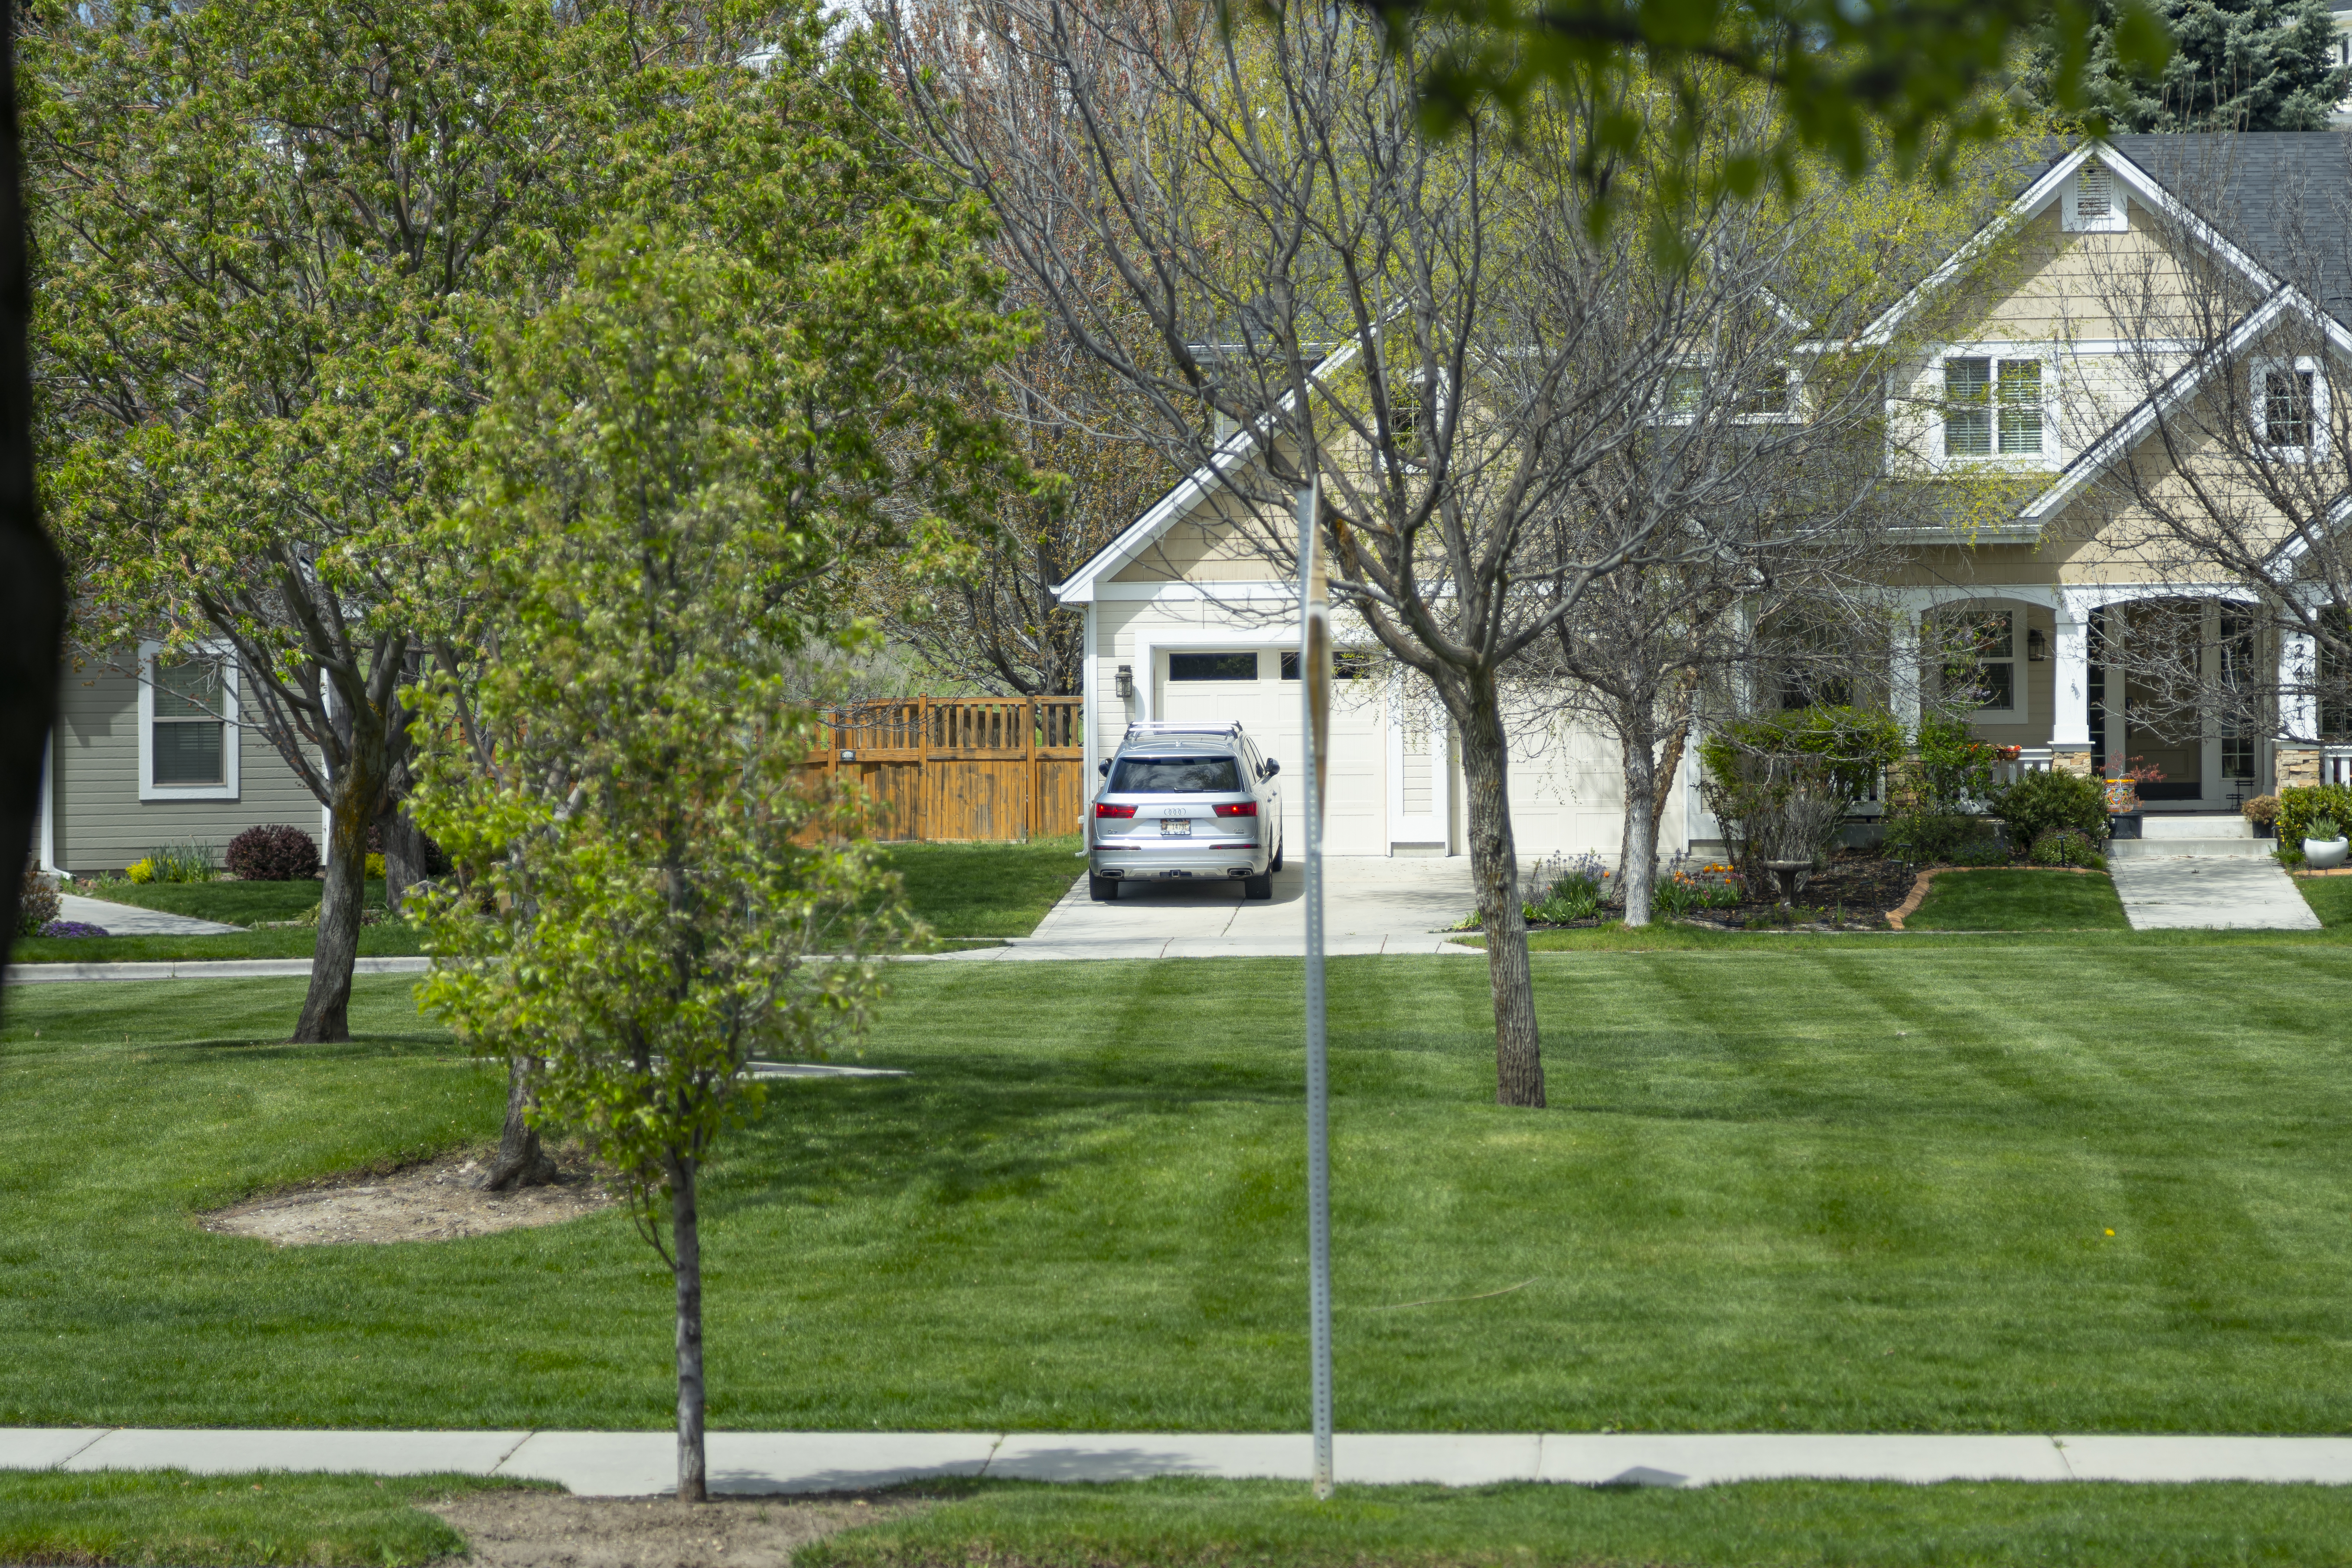
The focus here was on the registration plate at f/4, the full aperture:

Click the image for a larger version.
Quite why anyone would want to use this cumbersome rig to take photographs at infinity remains unclear, but you can, and the results are excellent.
Cost when new:
According to my copy of the Wallace Heaton Blue Book catalogue for 1971, the Macro-Elmar-R + Bellows-R sold for £201.38 in 1971. Adjusting for the exchange rate and inflation that computes to $4,175 today. Not cheap.
Conclusion:
- The SL2-S paired with either the 100mm Macro-Elmar-R or the earlier 135mm Elmar optical unit on the Bellows-R makes for a fine macro rig.
- There’s nothing to choose between the 100mm Macro-Elmar-R and the 135mm Elmar lens head when it comes to definition.
- The Bellows-R is easier to use than the earlier Focusing Bellows II and has the advantage of a slightly longer lower rack for moving the camera to and fro.
- Either rig is a tremendous bargain on the used market – reckon on $300 for lens + bellows, whichever variation you elect. I prefer the Bellows-R to the earlier Focusing Bellows II as it requires fewer adapters and is, if anything, more robust than the already fine Focusing Bellows II, but you will not go wrong with either.
- For the greatest lens-to-subject distance the 135mm lens is the better choice but neither optic interferes with proper lighting.
- The 135mm will have slightly shallower depth of field but with focus stacking software that hardly matters.
These are products from the peak of the mechanical engineering age of Leitz Wetzlar.