Category Archives: Technique

Long thoughts

200mm and 400mm are great focal lengths for landscapes

I have always enjoyed using a lens around 200mm for landscape photography. On the one hand, it’s relatively easy to hold steady hand held or with the aid of a monopod. On the other, it affords the easy opportunity of focusing on the essentials, cutting clutter.

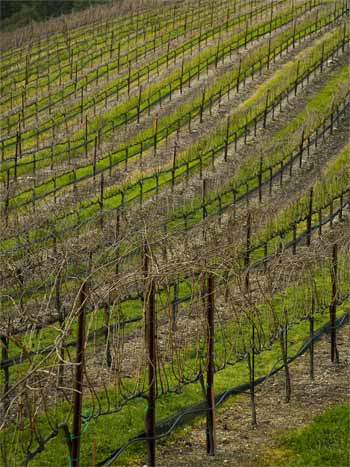
I often find that selecting an elevated viewpoint and then composing to cut out the sky works well. This approach heightens the sense of drama and ‘stacking’ inherent in a lens of this length, such as in this picture taken the other day of some local vines just before spring pruning:

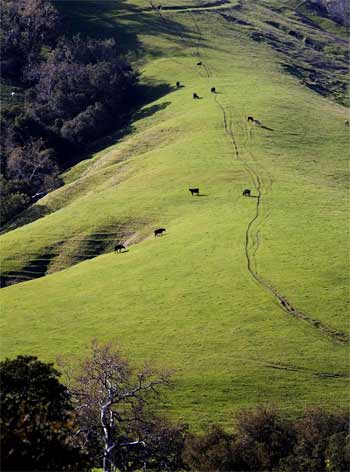
Another example of an elevated viewpoint, looking down into the valley in afternoon light is this one:

And finally, a strongly receding subject like this is only made bolder by the long lens:

Go longer, meaning 400mm in my case, and things get shakier. Literally. There’s more bulk to manhandle and more lens length for the wind to bear upon. It’s not that my 400mm lens is bad – it is not – but I have very rarely managed sharp large prints from it using film as they were nearly always plagued by definition-robbing camera shake. 400mm is long! The new ‘film speed’ opportunities offered by the full frame sensor in the Canon EOS 5D, even at 1600 ISO it’s near noise free, have literally brought my old Leitz 400mm f/6.8 Telyt back to life, once it was suitably adapted for use on the Canon body. This was taken at 1600 ISO and I think the shutter speed the camera selected was 1/1000th. Hand held with no support, the original is wonderfully detailed:

Now while there may be an ‘auto everything’ Canon 200mm L lens in my future, it’s really a pleasure to see these old Leitz 200mm and 400mm warhorses getting a new lease of life.

Breaking up

35mm film just does not cut it for big prints.

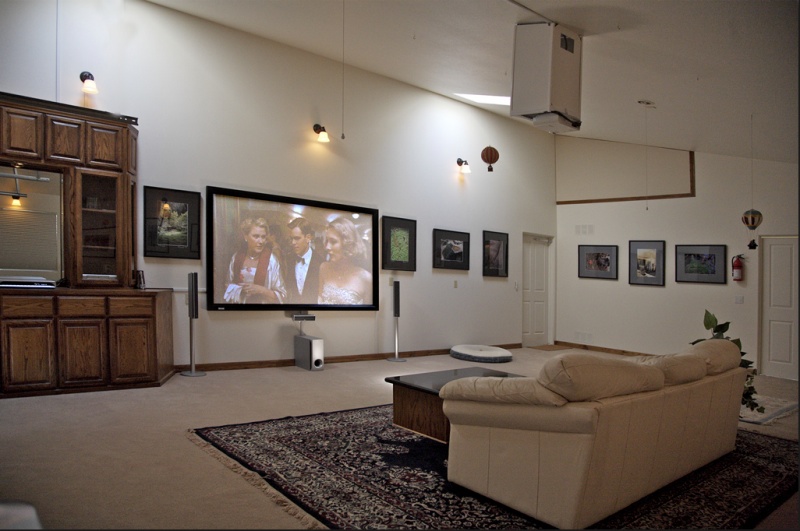
I finally finished framing the last of the fifteen photographs for the walls of the home theater – a converted garage, I should add, lest you think I have hit the jackpot. A large room, some 700 square feet, it offers lots of wall space even after the big screen installation. All of these are 13” x 19” ink jet dye prints made on the fine Espon 1270, with the delays in framing resulting solely from the incompetence of the local art store (Michaels) which stated they could not get me more 22” or 28” frame pieces because it’s a popular size. No kidding. So I finally ordered the remaining ones from Documounts, an estimable business that wanted my money and charged half as much. They also provided all the mats and boards for the pictures and a local glazier cut the glass to fit. All told, a 22” x 28” mounted, matted and framed print, with a nice ebonized ash frame, ran some $60, or one third of the amount charged by the main street framing place.

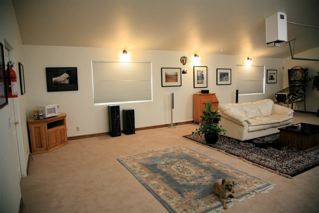
So there I was last night wondering which movie to watch, while debating the day’s events with that vicious guard dog and breed standard, Bert the Border Terrier, seen above. The goal of the picture project, I reminded Bertram, was that all the snaps must have been taken within the last twelve months. No recycled inventory of past successes. Change or die. And, in the event, every last one of these snaps was taken within a few miles of our home in central coastal California. There are traditional landscapes, strange surreal beach scenes, and the occasional peeling old wall sign. Acting as tour guide for Bertie, whose attention was enhanced by the promise of a cookie, I recited the story of each for him.

By the by, I found myself thinking about the equipment used to take these pictures. First, the realization dawned that almost every last piece of ‘front end’ gear used has now been sold, given the compelling advantages of the full frame sensor in the digital Canon EOS 5D at these print sizes. Second, of the fifteen pictures, eight were taken on medium format, six on large format (4” x 5”) and just one on 35mm.

Now it wasn’t planned that way. What ended up on the walls had to have visual merit, but it also had to be critically sharp. The reason is that viewers do not respect the rule book that says you should step back when looking at a large photograph. Not a bit of it. The larger the picture, the closer they seem to want to get. Now each of these film originals had been accorded the highest quality processing. The negatives were correctly exposed, film was developed by a great pro lab in Santa Barbara (one of the few that does not play a game of soccer on the beach with your wet negatives) and the originals had been scanned on the highest quality dedicated scanners at 2400 dpi (large format) to 4000 dpi (medium format and 35mm). No grain or dirt reduction software was used to preserve definition. These technologies may be smart, but there’s a trade off. Post processing was done on my iMac G5 whose screen has been colorimetrically (or whatever you call it) balanced using a Monaco EZ Color Optix thingummyjig. You know, the puck you dangle on your screen to measure colors while mumbling incantations to various deities. Bottom line? Color on the screen matches color on the print.

The result is that you cannot tell the large format prints from the medium format ones, but you most certainly can tell the one done on 35mm. Not that there’s anything wrong with the definition in the latter. Using a well calibrated Leica M2 and a 35mm Asph Summicron, that original had, without a doubt, the benefit of the best performing camera/lens combination ever. The Summicron lens is simply breathtaking in its ability to resolve fine detail with great contrast. No, it’s the film that damns the print. You see, if you adopt the ‘stick your nose in the print’ viewing method, the 35mm original clearly shows the film beginning to break up at this print size. There is a hint of grain and, in landscape pictures with much fine filigree detail, that’s a no-no.

Which leads to the inevitable conclusion that for large prints, which are my goal, abandoning 35mm was the right thing to do. Up to 8” x 10”, decent technique and a top class scanner, meaning a dedicated film scanner not some cheesy flatbed, will get you fine prints from 35mm. Anything larger, forget it. Or, if you like the 35mm format with all its advantages of lens choices and compactness, well, Canon has a digital camera for you. By comparison with 35mm film, the full frame digital prints I have made recently are simply night and day when it comes to resolution and detail, and my technique remains unchanged.

The only way around this issue for ‘35mm film only’ photographers is to make sure you don’t show your work head to head with medium format or full frame digital. If you do, all your protestations about making great big prints from a small negative will be so much dross. If, on the other hand, your goal is display on a computer monitor, well, a Holga will do.

Speaking of which, if you like Holga-sized pictures, you can view the ones in my home theater here.

A ten year digital device

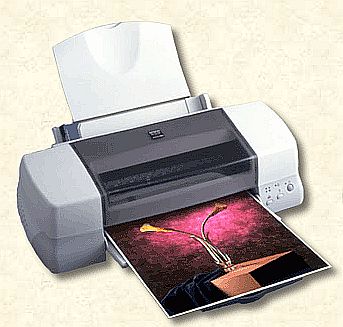
The Epson 1270 printer

When it first appeared on the market six years ago, the Epson 1270 color dye ink jet printer was the first consumer priced printer which could make large – meaning 13” wide and up to 44” long – prints with high quality and repeatability. I bought mine new in March, 2000 for $539.05 and proceeded to produce hundreds of color and monochrome prints with it. First in 8” x 10”, later in 13” x 19” sizes, which makes for a nice 22” x 28” wall sized matted, framed result.

I’m not writing this because the Epson has given up the ghost. Far from it. The only reason that I know exactly when I bought it and how much I paid is that I just resurrected the original shipping box from the attic and found the sales invoice in there. You see, the Epson will soon be making its way east to my nerdy friend whose current printer is limited to 8” x 10”, and he know and loves the quality this machine is capable of, reliably producing at 13” x 19” prints.

Ink remains easily available, even if all the colors are in one cartridge and the Epson’s software is about as good at predicting the ink levels as the Federal Reserve is at predicting inflation. Which is to say it gets it in the ball park but don’t stake your life (or next print) on it. Epson sold a lot of these wonderful printers and given the profit margins on ink sales you can bet fresh ink cartridges will be available for a long time.

Conservatively, I’m guessing that the 1270 has at least another four good years left in it, which makes for a ten year life in a digital age where products are seemingly obsolete days after hitting the market. Epson made the 1270 obsolete soon after I bought mine and eventually switched to pigment based inks with claims of great longevity. Didn’t worry me one bit. I have framed originals which are six years old and they look as fresh as the day they were made. I simply do not display them in full daylight eight hours a day.

One of the great appeals of the Epson 1270 was that its use of dye based inks, despite their reputation for fading, resulted in a color print quality very similar to that obtained with the old Cibachrome process. This was, for most, not something to be undertaken at home, as the temperature margins of the chemicals were narrow to put it mildly and their toxicity comparable to the effluent from Chernobyl. What Cibachrome gave you was a wonderful depth of color albeit at the expense of high contrast, so it matched up nicely with milder emulsions like Kodachrome II and, later, Kodachrome 25 and 64, provided your exposure was spot on. Paired with that old grain hound GAF/Ansco 500, Cibachrome was a dream. It was a strict teacher, but get the exposure right and the dynamic range was there for all to see.

The only reason the 1270 is moving on is that I find I want to make 16” x 20” and 18” x 24” prints more often, and if that does not sound like much of a change the latter size is almost twice the area of 13” x 19”. That’s a lot bigger when it comes to visual impact.

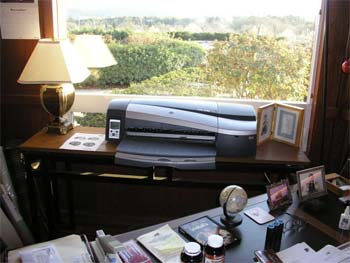
So B&H Photo has an order from me for a Hewlett Packard DesignJet 90 (they are backlogged, suggesting the secret is out) offering dye based inks which, miracle of miracles, are allegedly fade resistant. I toyed with the idea of the Design Jet 130 model which goes up to 24” wide, but concluded that prints that large were pretty much the exception rather than the rule for me, so common sense prevailed over machismo.

Truth be told, I am a tad apprehensive about the new printer. Not that installing the thing worries me – heck, with an Apple iMac it’s just one more ‘Plug and Play’ exercise. No, as a long time user of HP’s 12C calculator (a device now some 25 years old!) my wariness results from my all too great familiarity with HP’s instruction manuals. Hewlett Packard was always an engineer’s company, run by and for engineers, with the brief exception of a disastrous, mercifully brief, time under a chief executive who confused her posterior with her elbow daily, while spending far too much time on the former in the corporate jet. Now that the company has returned as an engineering powerhouse, I’m afraid that the same people who wrote the manual for my 12C calculator will have been involved in the book for the DesignJet. They or their kids.

On the other hand, like all good engineers, they probably believe that instructions are for losers, so the first thing I propose to do when the machine finally arrives is to pitch the instruction book. Worked with the HP 12C and Reverse Polish Notation was never an issue for this Pole. Any descendant of a proud nation that can charge Panzers on horseback needs no instruction book. And it doesn’t hurt that I have an honors degree in Engineering earned before the days of ‘open book’ exams.

Goodbye Epson. You delivered beyond any rational expectations.

A break in the storm

More than just a rainbow

Name any of the world’s great democracies and the chances are that you will find its happy residents indulging in the cocktail hour before dinner. America, Britain, France, German, Australia, Brazil – all favor this pastime which many regard, myself included, as the very touchstone of civilization.

Then look at those dour nations who struggle with the very idea of ‘one man, one vote’; God forbid ‘one woman, one vote’ for many do not even allow women the freedom of the ballot box. The Saudis? They don’t drink. The Russians? They do nothing but drink. The North Koreans? Please….

So after a day of truly wretched weather which saw thunder showers every few minutes interspersed with brief rays of sunshine, the thought of the daily libation was very much on my mind as I made my way to the freezer with its gin every bit as cold as the glass next to the bottle. Just before opening the refrigerator I glanced to my left and there it was. A superb rainbow gracing the old estate – clear sky to its left and threatening clouds on the right. Now you should know I’m pretty much blind without my glasses but that didn’t stop me from rushing to the office to grab the 5D, nearly damaging myself on that insouciant boulevardier Bertie the Border Terrier en route, and exiting stage left at a rate of knots that would have given pause to the staunchest of Olympic competitors.

Forget the old wives’ tale that landscapes are a stationary subject. Not a bit of it. Give the elements five seconds and, likely as not, the effect is gone. So throwing caution to the winds I banged off a couple of snaps even though what I saw through the viewfinder was mostly a ghastly blur, trusting to the gods and the Canon’s automation to get things more or less right.

I rushed back in at scarcely lower a pace and placed the card in the reader. Locating my glasses gave confirmation that all was right with the technology from Canon HQ, but when I loaded the picture into Photoshop and snapped it up to 100% original size (that’s some 30″ x 45″ on a print with the 5D’s full frame sensor) it became clear that the otherwise denuded tree on the right was replete with more birds than you could shake a stick at. The small picture here scarcely does it justice but a few moments later as I sipped the soothing elixir, the magic lighting long gone, I could not but help reflect on this wonderful bit of serendipity.

Fixing distortions

A tweak in Photoshop CS2

I’m finding the definition of the Canon 24-105mm IS L lens to be equal to anything on medium format or from Leica on 35mm. What is not so good, however, is that at 24mm you get noticeable barrel distortion (the sides bow outwards) and darkening in the corners.

Sometimes these aberrations do not matter but if you have strong horizontals or verticals or large smooth tone areas, they can be irritating to put it mildly.

I had thought that the only way to correct these was to take RAW images and make the adjustments in the very nice Adobe Camera Raw (ACR) interface. As I have written earlier, proper exposure technique results in little added benefit with the EOS 5D’s full frame sensor using RAW compared with JPG Fine, at least for this user. Plus I’m getting comfortable with the in-camera processing of JPGs offered through the Picture Styles option. JPGs have the great benefit that file duplication is avoided and, of course, file sizes are smaller meaning import to your computer and loading in image processing software are both much faster.

Stated differently, I’m of the growing opinion that RAW is overrated. I do not see better definition or tonal range in any large prints I care to make. I have no need for an unprocessed original. Once I have processed it I like it as it is and cannot see changing it again. And the thought of having to catalog two images of each picture is complexity in search of confusion.

Well, looking through the myriad menus of Photoshop CS2 the other day, I chanced upon Filter->Distort->Lens Correction which offers the same ability to correct lens aberrations in JPGs as ACR does in RAW.

Here’s how it looks corrected on a screen shot:

Both barrel distrortion and vignetting are quickly corrected.

I’ll experiment some more with RAW but JPG Fine is just, well, fine for me.