Category Archives: Technique

Printing paper for the HP DesignJet 30/90/130 – Part I

Swellable choices.

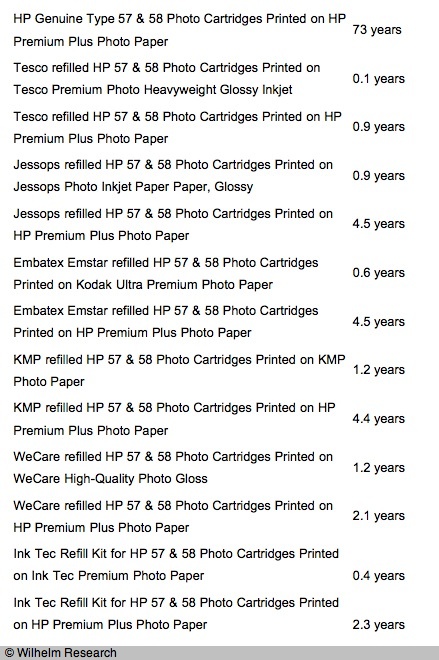
Paper in large cut sheets for the HP DesignJet 30/90/130 dye ink jet printers is becoming increasingly hard to find under the HP brand name. This is hardly surprising, coming from America’s worst run big business. What distinguishes this paper from most current offerings is that the surface swells to absorb the ink dyes used in these printers, in contrast to almost all current ink jet printers which use pigments deposited on the surface. Further, archival life (80 years) is guaranteed with HP’s Vivera dye inks. If you use pigment ink paper with the HP 30/90/130 printers there is no guarantee that the ink will either dry properly or deliver archival life.

As I do not want to buy paper in rolls and have to cut it up manually, a process comparable to a root canal once you get to deal with paper curl, I did some research on large cut sheet supplies from sources other than HP. I write ‘sources’ rather than ‘manufacturers’ as HP never made its printing paper, outsourcing the task like with everything else they ‘make’. The paper boxes state ‘Made in Switzerland’ but I have never been able to determine who the maker is

Moab‘s web site is confused about the meaning of Vivera inks. This has been a trade name which HP has used for both its archival dye and pigment inks. Thus Moab’s statement on its site that ‘Our papers all work with Vivera inks’ is not sufficiently specific to give comfort about use with the DJ 30/90/130 range.

Museo (Crane) specifically states that dye inks are not going to have archival lives used with their papers.

Ilford is hip to dye inks, offering those as a choice in both its regular and commercial sizes. However, the commercial papers come in rolls only and the only one in their regular range which is usable with dye inks is Galerie Prestige Mono Silk which is stated to be for black & white only. I (hardly ever) do black & white, so move on.

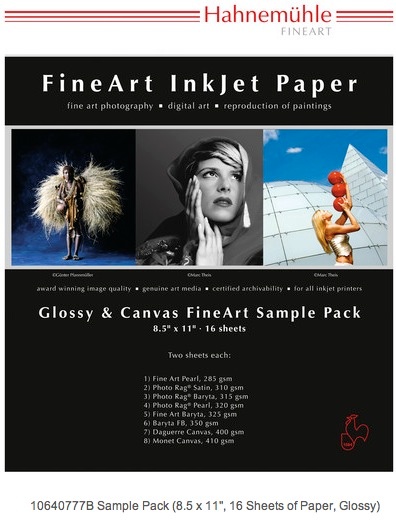
Hahnemühle offers hope. They claim to have been making paper since 1584. Hahnemühle is a German company with subsidiaries in England, France, America and China, so it’s unlikely they are the manufacturer of the HP-branded paper. Their largest cut sheets are 17″ x 22″ – a little under the 18″ x 24″ capacity of my DJ90 – but they specifically state that the following papers are suitable for use with dye inks, selling them in sample packs of eight, either matte or glossy:

Papers in the matte sample pack:

  • Bamboo 290gsm (0,1,2,3)
  • Photo Rag Duo/Book & Album (Sugar Cane) 220gsm – printable on both sides (0,1,2,3)
  • Photo Rag ultra smooth 305gsm (0,1,2,3)
  • Photo Rag 308gsm (also available in 188gsm and 500gsm) ** (0,1,2,3) (188gsm and 308gsm only; 500gsm comes in 24″ x 30″)
  • Photo Rag Bright White 310gsm ** (0,1,2,3)
  • German Etching textured 310gsm ** (0,1,2,3)
  • William Turner textured 310gsm (also available in 190gsm) ** (0,1,2,3)
  • Museum Etching textured 350gsm (0,1,2,3)

Papers in the glossy sample pack:

  • Fine Art Pearl 285 gsm (0,1,2,3)
  • Photo Rag Baryta 325gsm (0,1,2,3)
  • Photo Rag Satin 310gsm ** (0,1,2,3)
  • Photo Rag Pearl 320gsm (0,1,2,3)
  • Fine Art Baryta glossy 325 gsm – for black & white (0,1,2,3)
  • Baryta FB Glossy 350gsm (0,1,2,3)
  • Daguerre Canvas 410gsm (4)
  • Monet Canvas 410gsm (4)

** Denotes that an icc profile is available for download on the Hahnemüle site for the HP DesignJet 30/90/130 printers.

Notes:
0 – Available in 8.5″ x 11″
1 – Available in 11″ x 17″
2 – Available in 13″ x 19″
3 – Available in 17″ x 22″
4 – Available in 11.7″ x 16.5″

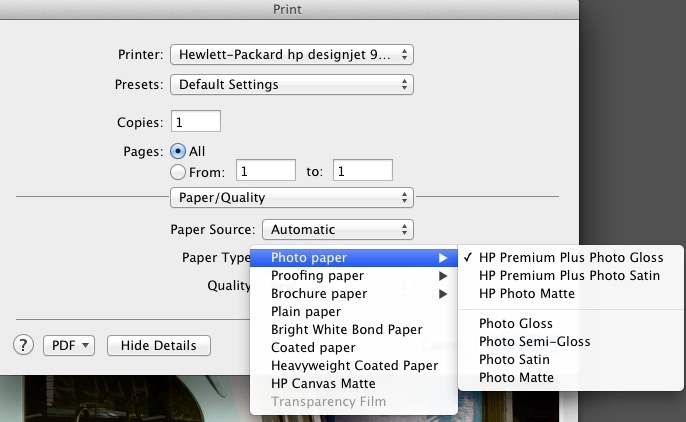
Each of these also comes in a variety of larger roll sizes. Weights are shown above as they are of concern. HP-branded Premium Plus Satin weighs in at 280gsm, Premium Plus Glossy at 286gsm. So there is an issue as to whether the HP will handle heavier papers loke those above, which will be thicker.

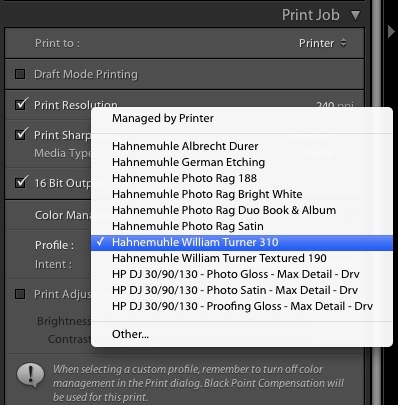
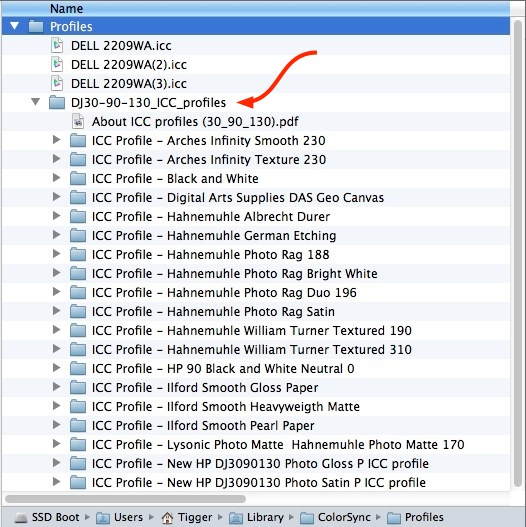
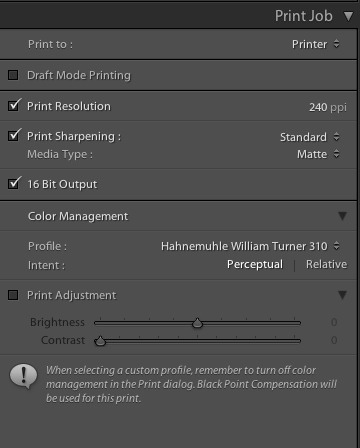
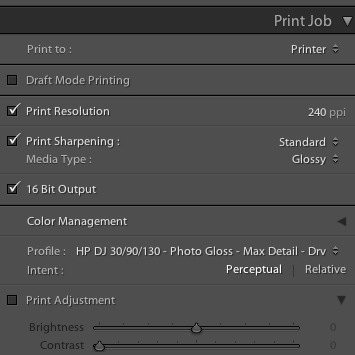
Hahnemühle (“Ha-ne-mule-er”) still offers downloads of paper profiles for use with the HP DJ 30/90/130 printers and I explain how to install these for Lightroom 2 and 3 users in a five-year old piece here written in anticipation of the day when HP-branded dye ink jet paper would no longer be available. That day is close.

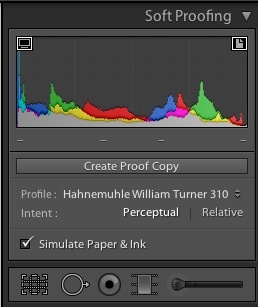
For Lightroom 4 users I will include a downloadable file of paper profiles, in the follow up piece, for a handful of Hahnemühle papers, once I have tested these, together with instructions as to where you need to copy these to so that they show up properly in both the Develop/Soft Proofing and in the Printing modules of Lightroom 4. The enhanced soft proofing (screen preview of the print) capabilities of LR4 really make upgrading a lot of sense if you are still on an older version of LR. The soft proofing in LR4 not only simulates the colors of your finished prints, it also simulates the white color of the paper you tell LR to soft proof to! And the differences are quite easily visible on the display.

Archival HP DJ 30/90/130 profiles appear here on their site. I will include all of these – and more from my archive – in the two follow up articles to this piece.

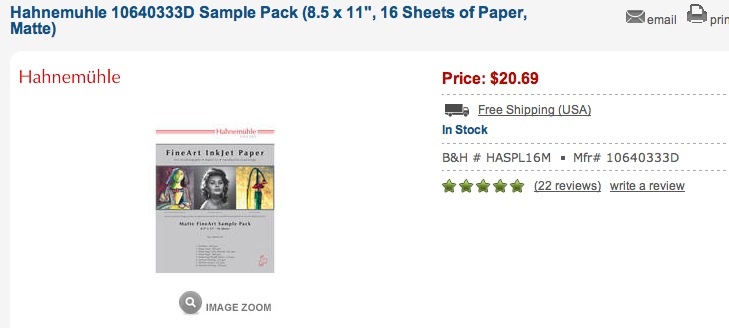
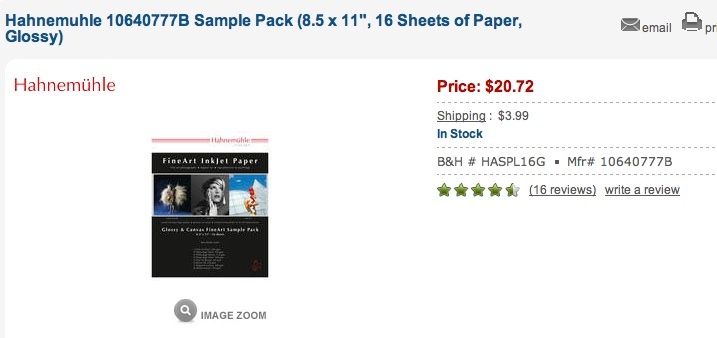
B&H lists a sample pack including all of the above papers for a modest sum and I have one of each of matte and glossy on order:

I’ll report back after having run some tests. There will be two subsequent pieces – the first dealing with Hahnemühle non-glossy paper surfaces (Matte and Textured), which I suspect most readers here use. The second will deal with glossy Hahnemühle papers (Satin and Glossy), glossy being the surface I use most of the time as it delivers the highest dynamic range and detail.

Matte/textured paper tests appear here.

Glossy paper tests appear here.

Fade tests will be published three months hence when I have the results.

Sensor cleaning

Has to be done.

Why bother cleaning your sensor? If you produce more than one picture in a blue moon your choice is simple. You can retouch dust blobs in your images in your favorite photo-processing application, once per image, or you can clean the sensor once and do a minimum of retouching until it is time for another cleaning. Determining whether to clean your sensor manually is a function of how many pictures you publish and of what your time is worth.


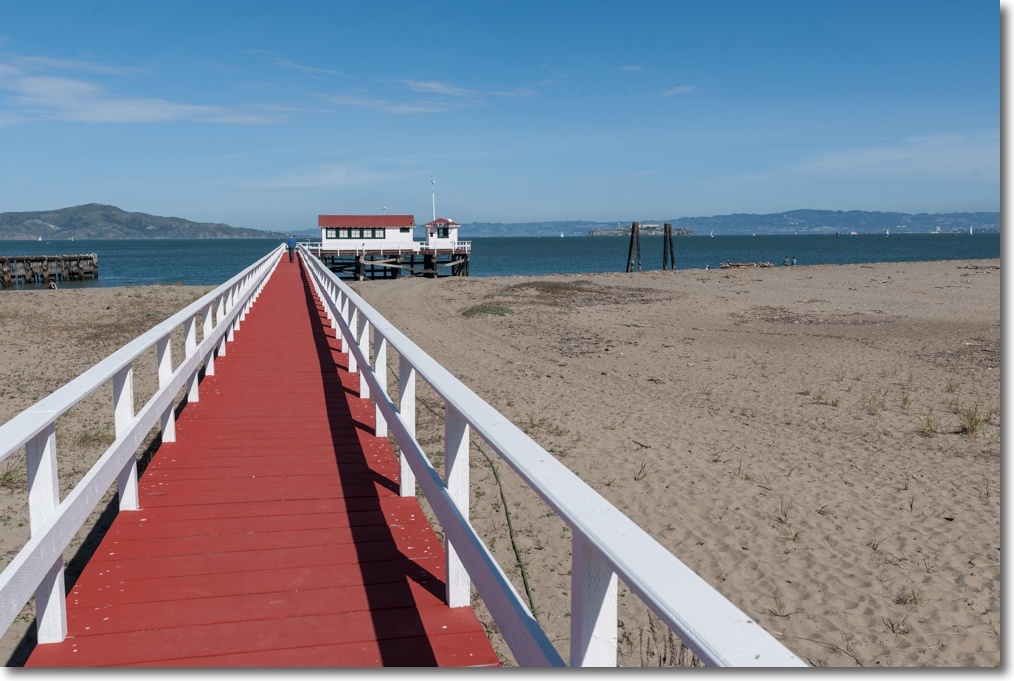
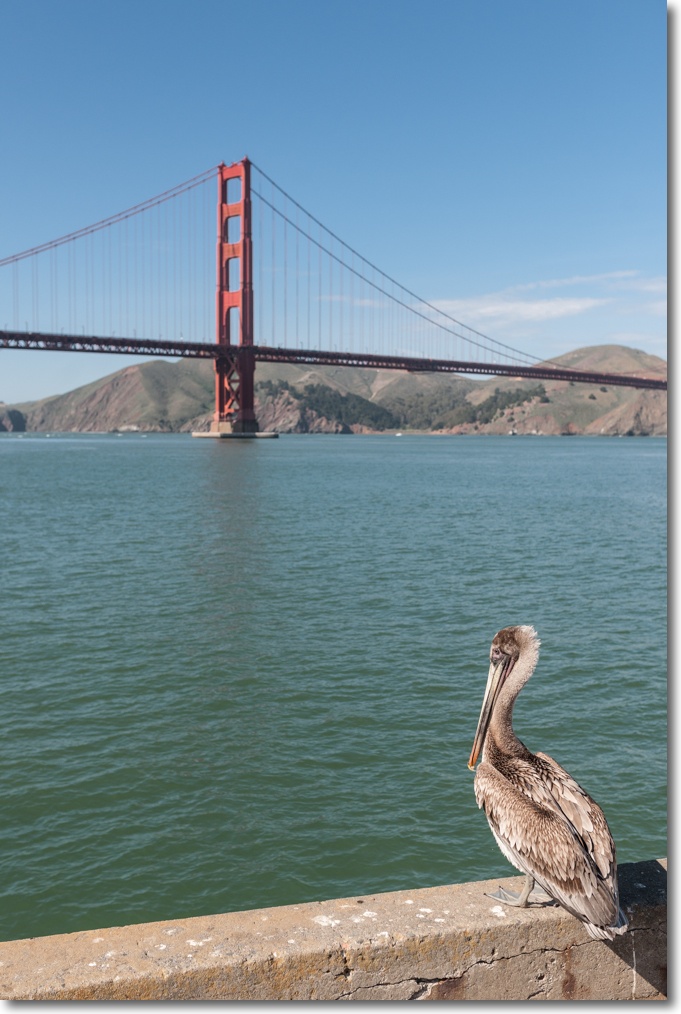
At Crissy field, San Francisco. No blobs in this sky. The benefits of a clean sensor.

While my Nikon D700 had a ‘sensor cleaner’ built in – an ineffectual mechanism which applies ultrasonic waves to the cover glass over the sensor, a process which could not wipe dried snot off a sheet of ice – it really was not much better than the sensors in the D3x and D2x when it comes to keeping them dust free. Neither of those bodies has a sensor cleaner. For a more technical reading check here for confirmation of the general uselessness of in-camera sensor cleaning systems.

Stop the lens down, take a snap and sooner or later you will see blobs in large expanses of continuous tone – skies are especially sensitive to this. And releases of oil from the camera’s internal mechanisms onto the sensor will only be spread with the ultrasonic treatment. What’s that? You think your precious Leica does not leak oil? Have you checked the road outside your house recently? Every machine which uses oil leaks it.

Forget blower brushes. These are an excellent way of blasting grit around the mirror box right onto those oily bits and represent an effective way of making matters much worse. Vacuum is the answer, not a hurricane, but sticking the hose from your Dyson or Hoover inside your silly-priced Leica M Monochrom is likely going to suck out the sensor and any dirt with it …. no more dirt, but a trip back to the Fatherland.

What is called for is wet cleaning. Well, moist cleaning.

One thing should be clear – you are not cleaning the light sensitive pixels in your sensor. Every sensor of any design, whether it has an anti-aliasing filter (most) or not (Leica M8, Leica M9, Nikon D7100, Nikon D800E, etc.) has a sheet of protective glass between the pixels and the lens. That is what you are cleaning. It’s not that fragile. We will be using isopropyl alcohol (poisonous to drink) at $3 for a pint, enough for about a thousand cleanings. UK and Benelux readers are recommended to use unflavored vodka, the higher proof the better, as they can take a shot when contemplating the grey skies outside when the process is done. Of course, they will run out of cleaning solution much faster.

You can pay your camera’s manufacturer $$$ to do this task, lose the use of your camera, expose it to the tender mercies of UPS (twice) and still have no guarantee the job will be done right. That’s if you ever get your camera back. You can buy a sensor cleaning kit for some $50 which comes with twelve swabs and magic cleaning solution, which has to be God’s way of telling you you have more money than sense, especially when you use up six of the swabs first time out.

Or you can use Dr. P’s low risk, fast and free method and have the job done in 20 minutes, tops.

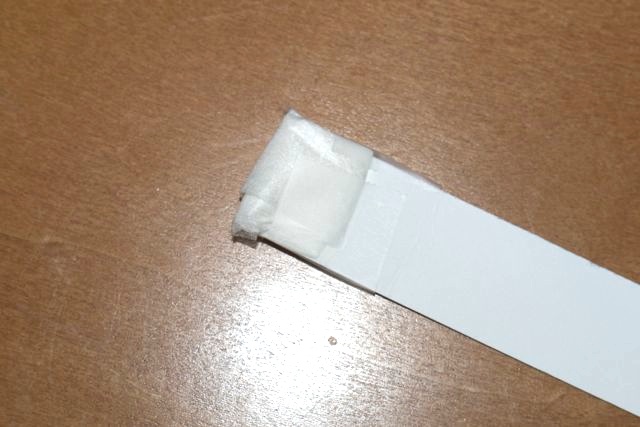
You need to concoct a tool which prevents the application of excess force to the sensor glass. No, not that rusty old file from the cardboard box in the basement. Not that the sensor glass protective plate is that fragile, but the cack-handed amongst us can be guaranteed to overdo it. Behold Dr. P’s force-buffered, auto adjusting sensor cleaner.

It’s comprised of two pieces of a regular business card just under 1″ wide (for full frame; make it narrower for APS-C or MFT). The end consists of a multiple-folded piece of lens cleaning tissue, attached at the base to the business card with Scotch tape. Do not use Kleenex – loaded with perfumes and grease and abrasive as heck, it’s a sure way to ensure that you will be sending the camera for service.

First, take a picture of a distant plain object like the sky at the smallest aperture of the widest lens you own. That will bring any sensor dirt into sharp focus.

Next step is to get the swab moist, not wet. Soak a piece of clean, laundered handkerchief in 91% isopropyl alcohol from the drug store, then dab the swab in the handkerchief until you can both see it’s moist and smell the alcohol on it. Do not dunk the swab directly into the alcohol. Moist and wet are diverse concepts. We want moist. Fold up the mirror in your DSLR, remove the lens, insert the swab and swipe across the width of the sensor, flip the swab and repeat. You are pressing hard enough to see the business card bend, not break. If you press too hard the business card will simply break (hence the reference to ‘force buffering!’), limiting the force you can apply.

Wait five seconds for the alcohol to evaporate, down with the mirror, then on with the lens and take another picture. If you need more than five seconds to see the evaporation completed, your swab is too wet. (Readers in England are recommended to use a white wall at home for the picture as it will almost certainly be raining outside).

Now load both snaps into something like Lightroom which will permit before:after comparisons and take a look. If there’s still some dirt there, repeat. There generally is.


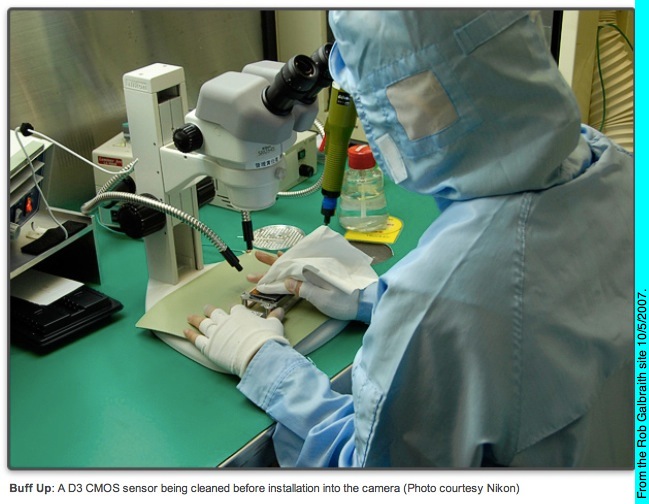
You think that sensor glass is fragile? Here’s how Nikon cleans it.

My D3x was simply filthy and needed five or six passes. More crud than crooks in Congress. Better to do these passes one at a time than go into an abrasive frenzy while your swab dries and becomes a fibrous hell. The less you clean, the better. It’s called wear.

To find dirt quickly and to also make it more visible, watch this excellent video.

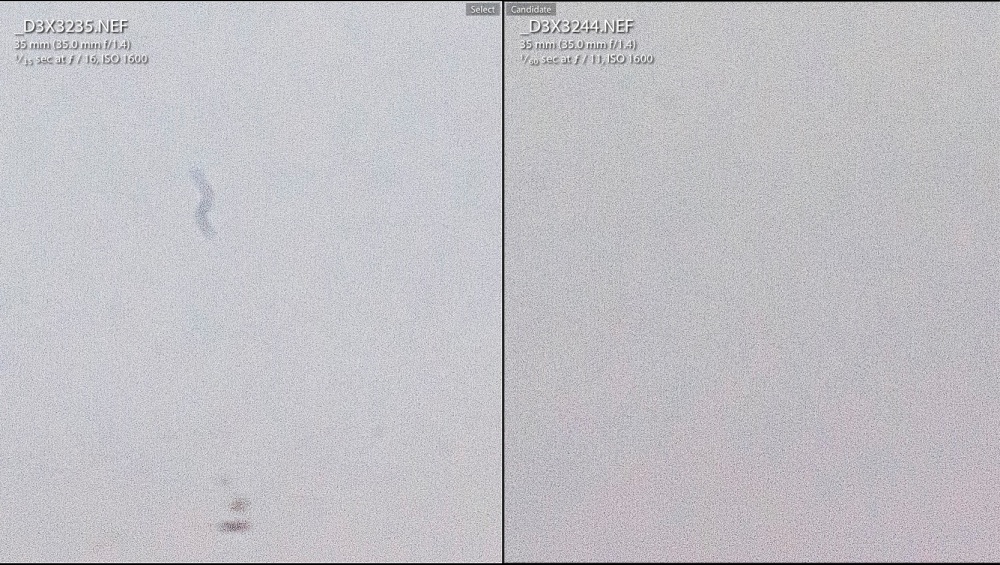
Here’s the result – Before and After – from identical sections of D3x files, greatly enlarged:

Why does dirt build up on sensors? I discount the oft quoted reason that dirt gets in when lenses are changed, unless you are doing this in dust storms in some hell hole south of the Mason-Dixon during tornado season. I have had dirt build-up even when the lens has not been changed – Canon 5D, Nikon D700, D2x, D3x – makes no difference. It certainly is not squeezing in via the lens mount. The particles are too large. Some lenses – the Canon 24-105 L is one of the worst – act like a dust pump when zoomed, blasting environmental dirt into the mirror box through the zoom mechanism. Don’t believe me – take the lens off, and zoom it holding it to your face. Feel the rush of air? Lousy design, improperly vented.

Other causes seem to be sloppy manufacturing processes. Recent reports of the Nikon D600 show dirt build-up with no lens changes, getting worse and worse during the first five thousand or so exposures. Clearly bits of loose material, and excess lubricants left over from the manufacturing stage are being freed up with use and the typically negatively charged sensor is attracting them in the electrostatic hell between lens and sensor. Witness the fact that D600s lose this problem once well run in and cleaned a few times. Motto: Fire off a few thousand ‘wall shots’ at home before using your new D600. Great. Advice to manufacturers: Stop poncing about with inept ultrasonic vibrators and positively charge the protective glass plate instead.

The Panasonic G1 and G3? Never had a problem in years of use and some 20,000 exposures. The sensors in neither have ever been cleaned and realize that these files are enlarged four times as much as files from a full frame sensor, so dirt really shows. I have changed lenses on these bodies with no special precautions on the street many times. Maybe Canon and Nikon could learn something from the fellows at Panny? And guess what? The Pannys have no flapping mirror doing anything up to 10 gyrations a second and flinging oil and detritus around.

It’s not like Nikon et al are new to screwing up with lubricants. Ask any owner of the 55mm f/2.8 Ai-S Micro-Nikkor, made during a long production run from 1979-2006, if he or she has had problems with gobs of oil appearing on the aperture blades. Yup, wrong choice of type and/or quantity of lubricant.

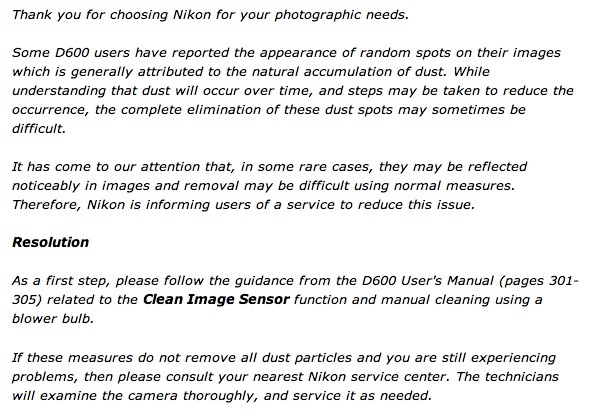
Here’s Nikon’s pathetic D600 sensor advisory, written by some schmuck liability lawyer who wouldn’t know integrity if it whacked him in the chops and whose job it is to help his employer lie and cheat:


“Natural accumulation of dust”, uh huh. “Blower bulb”, please.
.

Here’s the top secret internal memo from the head of engineering to the C Suite:

“Dudes, we messed up royally. The damned accountants cut so many QC steps from our manufacturing to enhance margins that we had to let our Betty go. She was the babe who mopped up all the excess oil inside our gear before we sold it to pikers. Look, no way we can ‘fess up to this. The liability costs would kill us. We all know these bodies are not really meant to do 8fps but it sure makes for good advertising copy. Let’s just keep a low profile and maybe only one or two come back for cleaning and we can simply say it was operator error. No risk from amateurs and we have the ‘reviewer’ set in our pockets.”


Two beauties against a clean sky.

First and last images – Nikon D3x, 35/1.4 Sigma.

Making huge prints

Tiling is the answer.

Background:

Back in 2005 I wrote about making Really Large Prints. That meant 13″ x 19″, a veritable wallet size compared to what I am doing here. We are talking 36″ x 48″ or seven times the area.

On occasion I have regretted buying the 18″ wide HP DesignJet 90 printer, wishing I had instead paid a little more for the 24″ DJ130. But when it came to making a 36″ x 48″ print the other day, neither could have done the trick. At least not in one pass. And making something really huge for my DJ90’s seventh anniversary seemed the right thing to do.

With my DJ in perfect tune after its annual checkup I was all set, comfortable that perfect colors would result following a recent colorimeter profile session.

Why not just delegate the work?

There are so many variables you cannot control in delegating this task that I discounted the idea in seconds. They include:

  • Finding a good print shop.
  • You have someone making minimum wage, charged out at $100/hr, giving tender loving care to your baby, in between beer and pot breaks. Yes, they will have a jumbo printer which makes this on one sheet. So?
  • Getting the colors matched correctly to your calibrated display image – good luck with that.
  • Getting the big print home undamaged. USPS/UPS/Fedex? Ha, ha, ha! They will fold it to get it into your mailbox. Don’t laugh – that has happened to me before.
  • Longevity. How can you believe the claims made by the print shop for the inks and mounting board? I use original HP Vivera inks which have been tested fade-proof for 80 years by Wilhelm Research. As I’ll be 6 feet under, pushing up the daisies – or maybe fertilizing them – in under half that time, that seems long enough. My mounting board is certified, acid free, Bainbridge Alpha 3/8″ foam core, and will probably outlive King Tut. So there.
  • Satisfaction. Sure, it’s a menial task and one you might not want to do daily. But it is satisfying as it gets doing this yourself and doing it to a higher standard than any agent ever will. I despise the saying “If you want a job done well, do it yourself” because it’s asinine in the extreme, but this task makes for an honorable exception. “Printed by the artist”, don’t you know.

Get my point?

Choosing the right image:

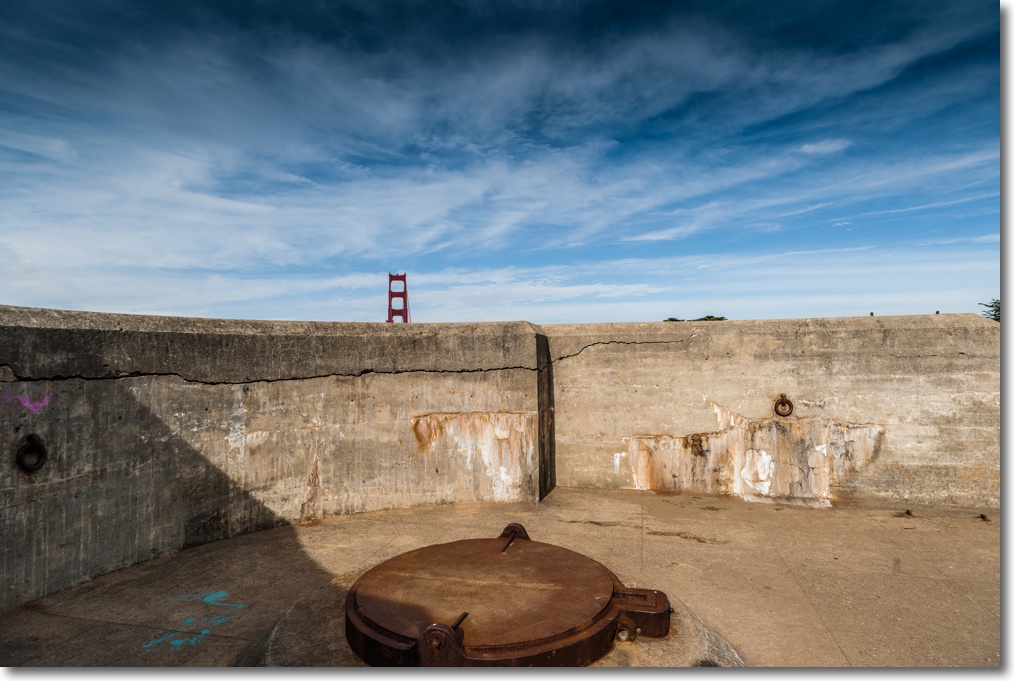
I had a large expanse of wall space viewable from the landing on the upper level but had never quite found a picture to fill it. As I started working on my Golden Gate Bridge series one image immediately suggested itself. Taken from the GGB overlook at the site of the old WW2 battlements, the image is simple, surreal and uncluttered. Just the ticket.


Simple, surreal, uncluttered. The ultrawide 20mm lens used adds to the effect.

Tiling application:

Next it was time to shop around for a good tiling app for the Mac. Tiling apps allows a print to be made over any number of abutting sheets of paper, the result being trimmed and joined just so for display. You can do this in Photoshop but it’s a pain. I settled for the inexpensive SplitPrint which had good reviews and indeed proved capable and easy to use. $5.99.

Preparing the file for tiling:

Before you do anything, examine your file square inch by square inch for sensor spots at 1:1 in your photo processing application, looking especially hard in big, continuous tone areas. Nothing will ruin your day more than finding you have missed some blobs once the print(s) are made. Retouching them now will save a lot of heartbreak later. Just about every sensor will accrue dust and oil spots with use, regardless of whether it has a cockamamie ‘sensor cleaner’ built in or not.

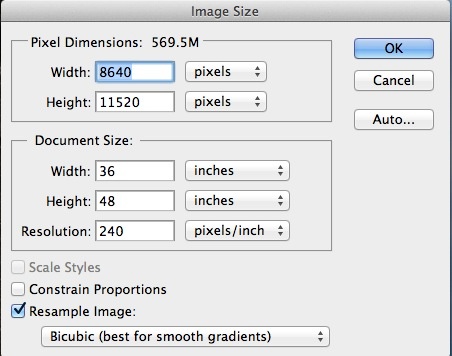
Thereafter the process is simple. I exported the image at the original pixel size of the sensor in the Nikon D3x as a TIF file to Photoshop CS5. Then I ‘uprezzed’ the image to the final print size desired, which would be 36″ x 48″, or four sheets of 18″ x 24″ paper through the printer – the largest it will take. Resolution was set to 240dpi, the maximum the DJ30/90/130 series of printers can handle.

Uprez dialog from Photoshop.

The file was then saved to the Desktop as a JPG, highest quality. SplitPrint at this time only accepts JPG files. No matter. The file was some 45MB in size.

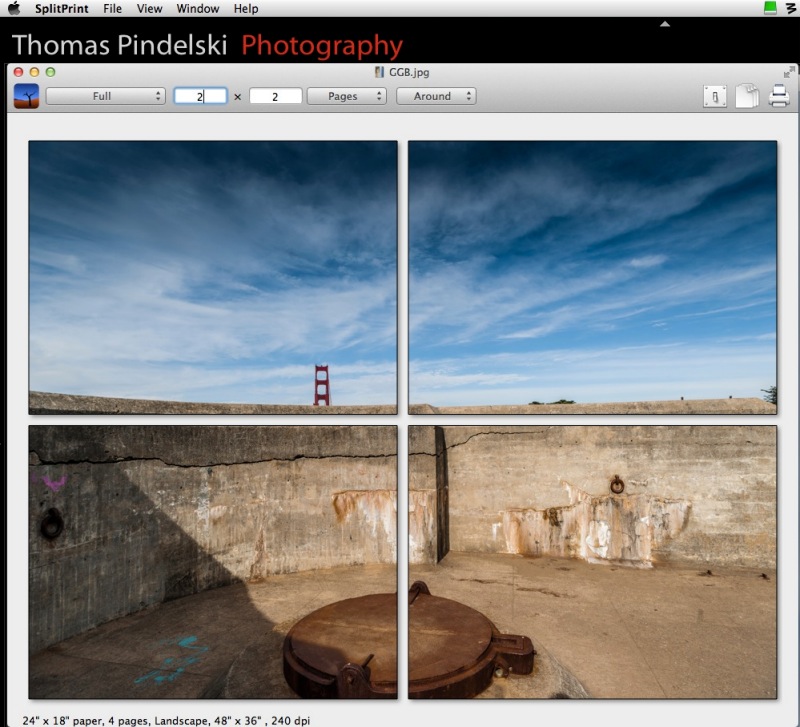
Then into SplitPrint and the required settings were made. I created a custom setting for 18″ x 24″ paper in the Print dialog of SplitPrint and told it to spread the image over four panels thus:


The SplitPrint tile settings.

Dry print runs:

Now 18″ x 24″ paper is not cheap and neither are ink supplies, so I first tested SplitPrint making a 16″ x 20″ print on my office monochrome laser printer using four sheets of 8 1/2″ x 11″ plain paper to see if things aligned and that margins were properly handled. You do not want the margins swallowing any content and neither my laser printer nor the DJ90 can make full bleed borderless enlargements. Margins are unavoidable and the inside ones will have to be trimmed off when assembling the four printed panes.

All went well but, ever cautious, I printed the first panel in color to the DJ90 on a test piece of 13″ x 19″ paper to check that everything was as expected and to verify that colors were true.


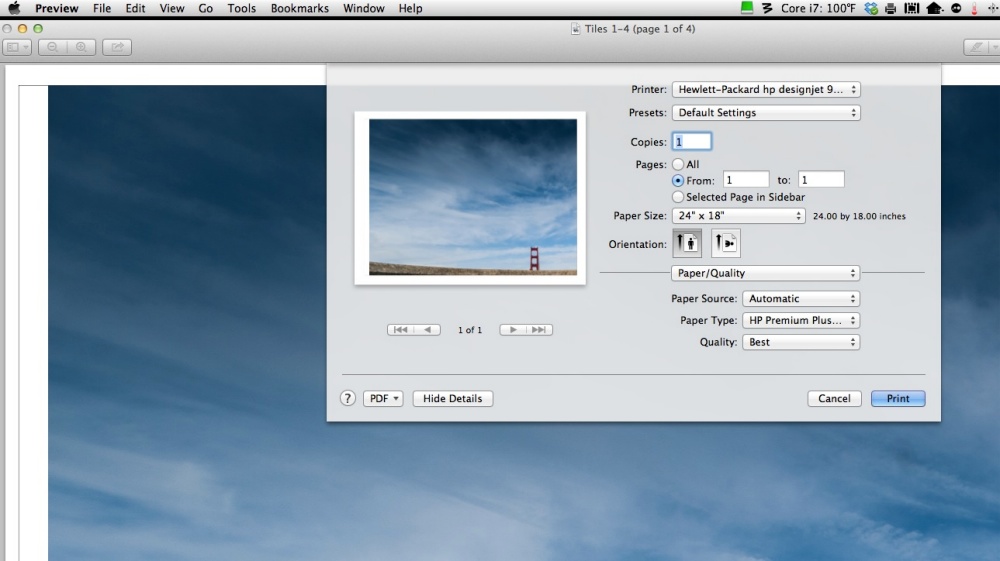
SplitPrint printer dialog.

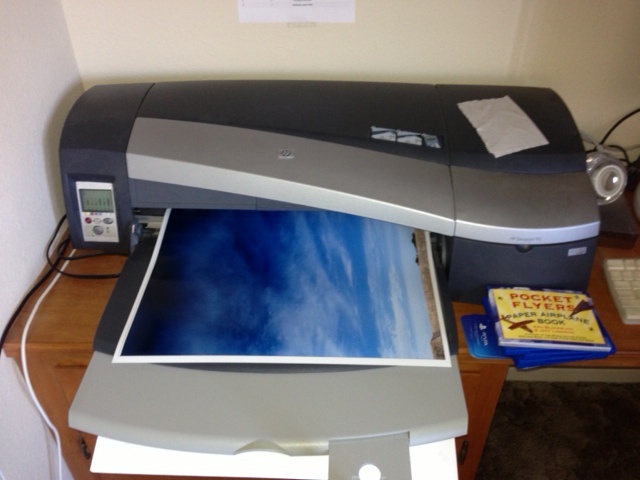
This test confirmed good colors with a perfect match to my display thanks to the EyeOne colorimeter, so I loaded up the printer with four sheets of 18″ x 24″ premium glossy, checked that all the cartridges had ink (running out part way through will not make your day ….) and let her rip, telling SplitPrint to print all 4 images after setting it to use HP Glossy paper with bidirectional printing (‘Best’ quality). This takes a while, some 12 minutes a page, so I did the only rational thing possible. I took my assistant, Bert the Border Terrier, for a walk after the first page started coming out.

Tell me all you want about the romantic days of darkrooms, red lights, blackouts and poison chemicals, for me nothing beats the thrill of seeing a full color image emerging from the DesignJet in broad daylight.


The first pane emerges.

The final prints:

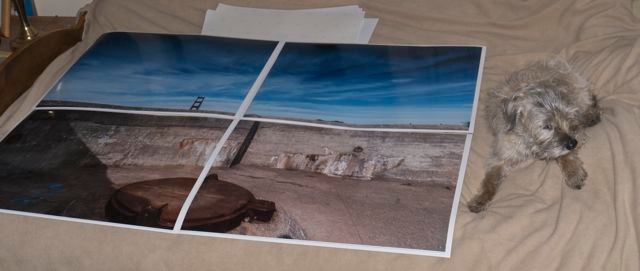
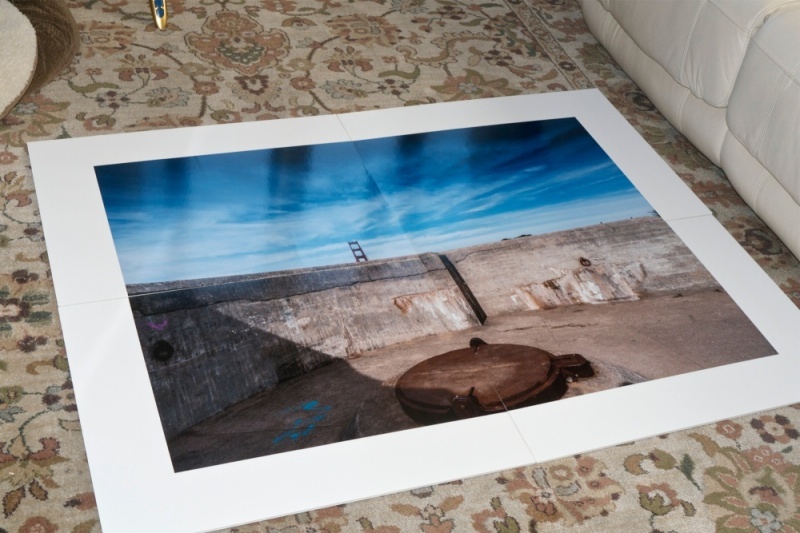
Here’s the finished article, with Bert the Border Terrier for size. I will mount these on acid free board, after trimming the borders (SplitPrint permits small overlaps and draws the cut lines on the images though I had no need of these) then attach all four to the wall, ready for a faux wooden frame. SplitPrint did a perfect job of aligning the images on each page. If it’s of interest I will paint the wooden frame in the colors of the Golden Gate Bridge itself! The paint codes appear below.

Bert and the untrimmed print(s).

Trimming and mounting:

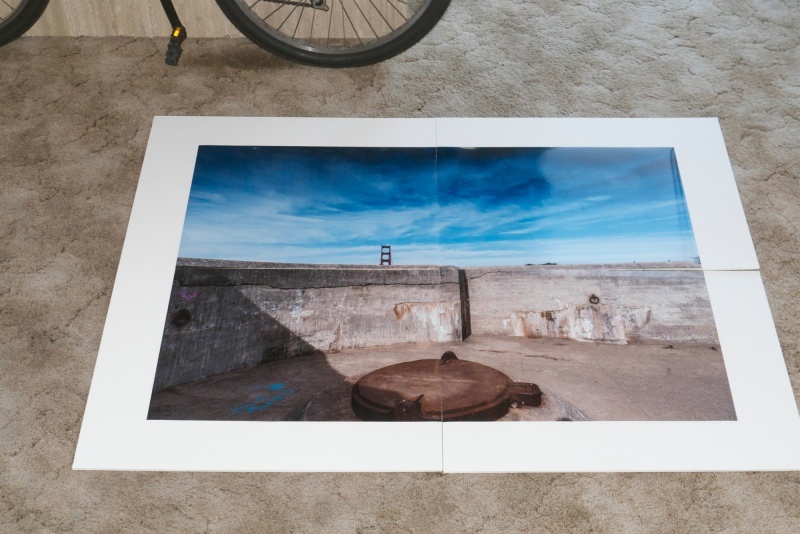
Once the print borders are trimmed (carefully!), the prints are tacked to the mounting boards with the matching sides at the edges of the board. I do not own a 24” trimmer so have to remove the borders with a straight edge and Stanley knife. This is by far the riskiest part of the whole operation, rife with opportunities for error and injury. As the boards are very accurately cut this approach confirms that everything has been trimmed squarely. It’s either right or it looks schlocky. You can opt to leave the margins in place and install these as discrete panels on the wall but I find that sort of thing has been done to death and avoid it:


Tacked prints and boards assembled for dry run to check fit. 26″ bike wheel for reference.

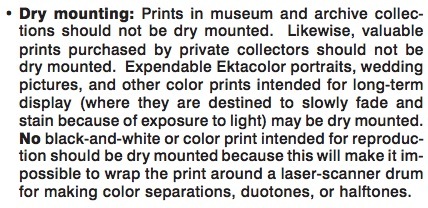
Then it’s off to the dry mounting press to permanently heat mount the prints. Once that is done much of the risk of damage to the fragile prints fades.


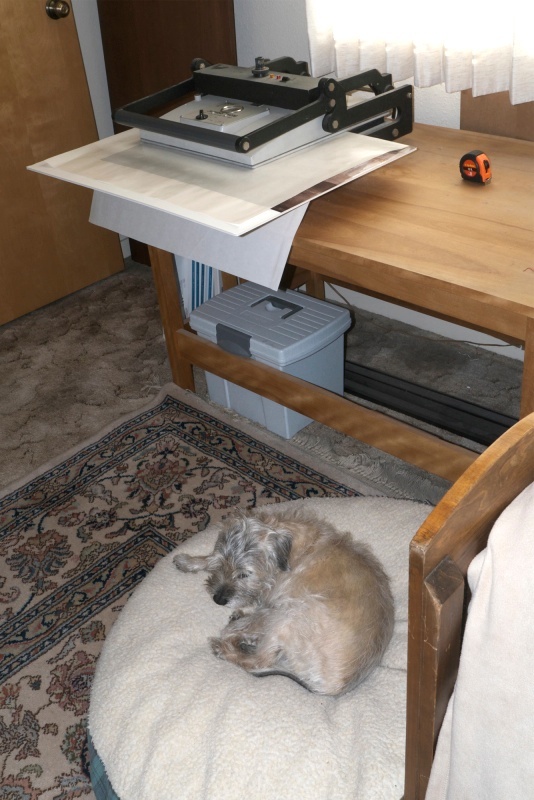
In the dry mounting press at 200F. Border Terrier at 102F.

It’s at this point that you start thinking that Michelangelo had it easy daubing that ceiling.

The prints are dry mounted and ready for wall installation:

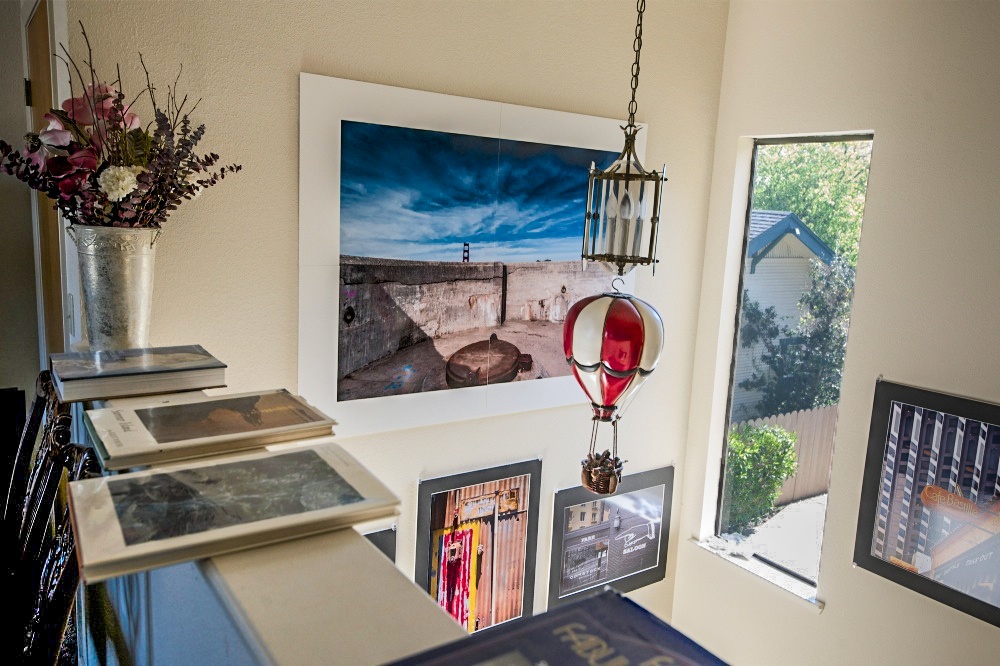
Ready for hanging.

I use glossy paper. Sure, it’s a pain to work with, fragile as heck and demands very high standards of cleanliness for it shows every blemish, but the result is unrivaled among paper prints for detail, resolution and punch.

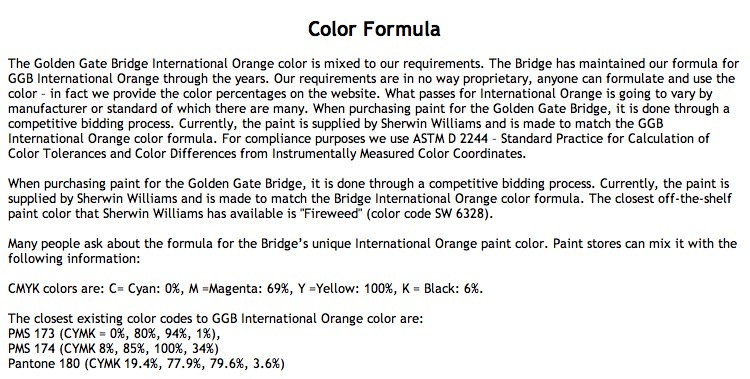
Golden Gate bridge paint color codes:

Here are the color codes for those of you into the most beautiful bridge in the world; you can have the shade mixed at your local hardware store to paint any wooden frame you decide to install:


Color codes for the paint used in the Golden Gate Bridge. Click the image for details.

Speed:

There really are no shortcuts here. It’s hard manual labor. SplitPrint makes generating the four panes trivial but after that it’s an exercise in concentration and attention to detail. The next time I do this I doubt I’ll shave more than a few minutes off the total production time, which is several hours. Trimming and wall mounting are by far the most time-consuming steps.

How does it look:

In a word, stunning. While the viewer can get no closer than 10 feet to the print from the second floor landing, even at 2 feet resolution and detail rendering are to die for.

Gear:

Camera? Nikon D3x with the 24mp sensor. But, frankly, a 12mp D700 or any number of similar sensors (FF or APS-C) would be just fine for this setting, though the image would show lower resolution at the same ‘nose in print’ distance. There is more undiluted swill written about the need for high pixel count sensors than you could possibly imagine.

The lens? No magic sauce here either. An old 20mm Ai-S 20mm f/3.5 MF Nikkor – that’s the tiny one which fits in a jeans pocket, handheld at f/8. Mine is 1982 vintage and ran me $215. I added a CPU for $29. You spent how much on that plastic AF-S zoom?


Installed. Wooden frame to come. Prints below are 18″ x 24″.
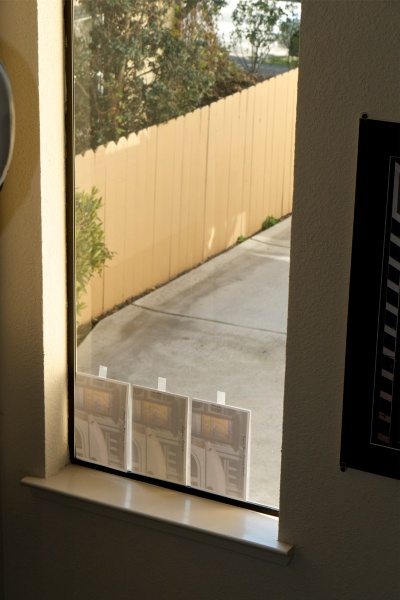
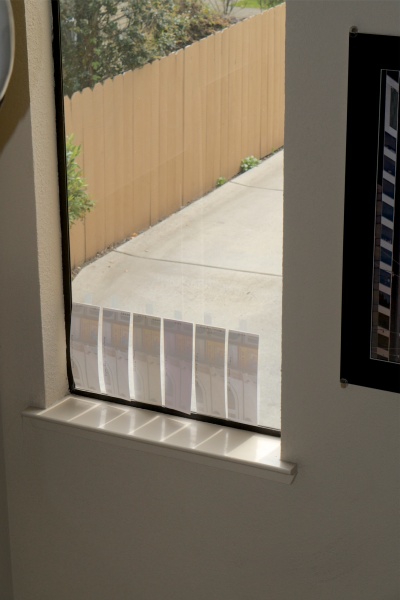
Cotton gloves on the window sill are used to handle the prints.

HP DesignJet annual checkup

A little goes a long way.

My HP DesignJet 90, the 18″ carriage model, was commissioned March 14, 2006, so it’s approaching seven years in age. One recent print with a dark black silhouette showed less than perfect blacks and deep, lustrous blacks are one of the many strengths of this excellent printer. Amazingly, B&H still lists the 24″ DJ130 for under $1300 new, and all ink cartridges and printheads remain available on their site, though you may have to hunt about a bit for the special swellable paper which absorbs the ink dyes used by the machine. Regular modern pigment ink papers do not work.

The HP DJ30/90/130 series is blessed with truly outstanding diagnostics and a quick checkout was all it took to find the cause.

First, I dialed up the HP Maintenance Utility which uses online software at HP. For Mac users you have to use OS Snow Leopard or earlier or an even older PPC machine, as HP never updated the software to run on Intel machines. Snow Leopard comes with Rosetta, the PPC emulator software and will run the HP Maintenance Utility fine. Apple recently re-released Snow Leopard on DVD and if you want to run the HP Maintenance Utility on a modern Mac it’s your best choice, though whether it’s even installable on the latest Macs I rather doubt.

I use a decade old iMac which runs Tiger and uses a PPC CPU. Unlike its modern day descendants it does not overheat and refuses to die.

You can run all these print jobs using plain paper in your printer – 8.5″ x 11″. Here’s the Image Quality Diagnostic – this one can unfortunately be run only by using the online software and is the best for determining if a printhead is failing:

No real issues are disclosed here but printhead alignment is called for, judging my some of the colored squares in the center section. The full interpretive section for the above appears here.

Then I ran a printhead alignment which can either be done using the online utility or using the button presses illustrated here:

This did disclose a problem with the black printhead:

The large ‘X’ mark above testifies to a worn or blocked head.

Before deciding on cleaning or replacement of the head I ran the ‘Information Pages’ printout (see above) and got this:

Gaack! The black printhead is 2,534 days old, meaning 6.9 years. It’s the one which came with the printer when I bought it new in 2006! So rather than trying to clean it, I simply replaced it. Pigs get slaughtered.

After replacement of the black printhead – the new one has been on my shelf for ages and is already out of warranty! Some users claim that heads over 30 months old will not work but obviously my experience does not bear this out.

When a printhead is replaced in these machines, they automatically run a printhead alignment which takes some 10 minutes and requires one sheet of plain paper.

Here’s what I got:

All is well.

Finally, out of curiosity, I ran the ‘Paper Usage’ report:

Some advice on older DesignJet printers:

Would I buy one of these used? Only if I could see the Usage Reports and Diagnostics shown above. Many were used by printshops which have beaten the heck out of them. New heads – there are six – run $35 each and cartridges cost a similar amount, so all new heads and supplies total $420. Add $35 for feed tubes. No bargain. Further, if the printer has been unplugged for any period of time, reckon on changing the clogged feed tubes as I had to do when mine went into storage for a few months when I moved a few years back. I explain how to do that here.

Bottom line? I would not pay more than $200-400 for a lightly used HP DJ90/130 (18″/24″) printer, anticipating that some parts will have to be replaced.

Spare parts:

I get mine from Spare Parts Warehouse. The ink feed tube assembly runs $35 and is easy to replace.

Would I buy a new HP printer? Hell NO. I would not buy anything from America’s worst run business whose customer service is a joke. Buy an Epson. The 24″ model runs $3,000 but they will fix it for you when it breaks.

Result:

Success. Perfect blacks were restored.

Here’s the print which was giving me problems:

In the extract, below, you can see a tear sheet of the old print, before the repair, superimposed on the new – night and day:

Printhead failure and analysis:

I have illustrated this before but it bears repeating. Right after the annual checkup, above, the DJ started printing everything with a green cast. This indicates printhead failure as ink levels were fine.

Here is the analysis chart:

I ran the diagnostic report using the online HP utility and this is what I got:


Diagnostic report showing printhead failure.

Comparing with the above chart, you can see that the color patches at A1 (should be magenta), A2 (should be purple) and B2 (should be red) are faulty.

The chart states that A1=M, A2-C+M and B2=Y+M. Note also that the central patch in the left middle section is wrong – it should be magenta. M (magenta) is the common factor to all four error conditions, so I concluded that the Magenta printhead was faulty. $35 to B&H later and it was replaced (a 30 second task) – do insert plain paper when doing this as a printhead alignment chart will be automatically printed when a head is replaced, and the printhead alignment will be performed automatically. It takes some 10 minutes, so be patient. Sure enough, re-running the diagnostic report showed all is well and the DesignJet is back to perfect operating condition.

Pixel peeping fallacies

Know what you are looking at.

When I migrated from the 12mp Nikon D700 to the 24mp D3x, I did a bunch of thinking about the justification for more pixels.

If you do not propose increasing your print size or cropping more severely, more pixels will likely not serve you well. I contemplate making both larger prints and cropping more when needed. Thus, the higher pixel count sensor makes sense for my contemplated needs.

When I first uploaded D3x images from the D3x to Lightroom, I naturally previewed images at 1:1 and remember thinking “What’s the big deal? This does not look any better than the files from my D700 at 1:1.”

The problem, of course, is that I was not comparing like with like.

Here’s a simple table to illustrate the issue.

I have compiled data for four common Nikon sensors – the math is brand-independent, it’s just that I know these bodies and have RAW images from all. I enlarged these original images using the 1:1 preview function in LR4 and measured the image width on my 21″ Dell 2209WA (1650 x 1080) display. So in the table above, using the D2x as an example, the 12.2MP sensor delivers an image which, if printed 1:1, would be 47″ wide.

What does Adobe’s Lightroom mean by 1:1? It means that images displayed 1:1 are displayed at 90 pixels/inch – you can confirm this by dividing the ‘Sensor – W’, the pixel count across the width of the sensor, by the ‘Width at 1:1 in inches’ and in each case you will get 90 dots per inch. That’s good for an LCD display or for prints looked at from a reasonable distance. If you want to stick your nose in the print, then you want to limit the pixel density to 240 pixels/inch, which is the same as dividing the above ‘Width at 1:1 in inches’ data by 2.7. So a 240 pixels/inch print from the D800’s sensor, for example, would be 31″ wide (83/2.7). But in practice, you do not need that high a density in huge prints.

As you can see, comparing a D700 image with, say, a D800 image, is not fair if identical 1:1 preview ratios are used. You are comparing a 46″ wide image with one almost twice as large at 83″. To make the sensor comparison fair, you need to preview the D800 image not at 1:1 but at 1:2. That will yield approximately the same reproduced image size, making for an objective comparison of resolution and noise if the same lens and technique are used for both.


Preview options in Lightroom.

Yet, I suspect, many snappers fall afoul of these erroneous 1:1 comparisons concluding:

  • I need better lenses with the newer body
  • My images are blurred, I need to use faster shutter speeds
  • My focus is out, there’s something wrong with the camera

All of the above lead to much time and money wasted in fixing the unfixable. Bad data.

It is indeed quite likely that your new sensor out-resolves the limits of your older lenses at 1:1. It’s also reasonable to expect motion blur to be more visible at the same shutter speeds if you use faulty comparisons. And the chances are it’s your technique not your hardware which accounts for poor focusing, the errors only becoming visible at double your former preview magnifications. But, unless you contemplate making crops to one quarter of the area of your previous sensors or making prints 7 feet wide instead of 4 feet wide, your sensor upgrade is only causing you needless pain.

My first conclusion with the D3x compared to its D700 predecessor was all of the above, until I figured out what I was looking at. Some comparisons are easily drawn. It’s clear for example, that the D700 has lower noise than the D2x for the same image size, hardly surprising as we are comparing a recent FF sensor with an older APS-C (D2x) one. The total pixels and 1:1 print sizes are almost identical. On the other hand, comparing the D700 at 1:1 with the D800 at 1:2, for like print sizes, shows little difference. It’s only when you double preview sizes with the D700 to 2:1 and the D800 to 1:1 that you see the greatly superior resolving power of the D800, as the number of pixels you are looking at in such a comparison is tripled in the case of the newer sensor.

Nikon has not helped the situation. After their affordable high pixel count FF bodies – the D600 and D800 – came to market, they started publishing pieces intimating that only their very costliest and newest lenses were ‘good enough’ to extract the best from the new sensors. The rest of the sheep writing purportedly critical analysis followed right along. It’s called sales and makes little sense. Some of Nikon’s highest resolving power lenses were made ages ago, long before digital sensors existed – any Micro-Nikkor macro lens pretty much qualifies (55, 105 and 200mm) – as do a host of pre-Ai lenses, many over four decades old. If you like the latest and greatest (and costliest) have at it. But don’t believe everything you read from such conflicted sources. Their primary focus is not on your image making capabilities but on your wallet, be it through sales (Nikon) or click-throughs (the whores who parrot this stuff as if it was technically proved fact).

So before you chuck out your old lenses and start buying costly superspeed exotics which allow the use of faster shutter speeds, while contemplating return of the body to Nikon for repair of focusing errors, ask yourself what you are really looking at when you preview those enlarged images on your display.

Practical implications: It’s not like you can avoid buying new gear with lots of megapixels by trying to save money on something with fewer. Everything has lots of pixels today. 12MP is hard to find at the lower limit. But the practical implication of this rapid technological advance is that, for those on a budget, substantial savings can result from buying the previous generation of hardware, comfortable in the knowledge that while 8-12MP may not be a lot, it’s more than enough for 99% of needs. DSLR bodies like the Canon 5D, Canon 5D MkII, Nikon D700, Nikon D2x, Nikon D3 and others no less capable from Pentax and Sony offer tremendous savings just because they have been replaced with something that measures better in a comparison table. Heck, a lightly used 6mp Nikon D1x can be had for under $250 and will offer tremendous capability, outfitted with a $50 mint MF Nikkor, far in excess of the abilities of most. The barrier to entry to good hardware has never been lower. 16″ x 20″ prints? No problem. Why do I say that? The D1x’s sensor is 3,008 pixels wide, so for a 90 pixel/inch print (what Lightroom shows at 1:1 preview) you would get a print sized 33″ x 22″. Unless you stick your nose in it, it will show just fine.


Nikon D1x. Add Nikkor of choice.