Category Archives: Technique

Rotating your artwork display

Mirror retainers do the trick.

As any art museum creator what fraction of his inventory is on display at any time and you will learn that most of the catalog is in the basement. Museums rotate displays all the time, thus exposing new works from their basement for all to see and making the viewer’s repeat visit always fresh, without overloading the visual senses.

For large prints I have long standardized my mounts at a 22″ x 28″ size. This allows the use of like-sized mats with varying apertures, be they 8″ x 10″, 13″ x 19″ or 18″ x 24″. Traditionally I have glassed and framed these into what is a pretty costly ‘per print’ assembly, and a labor intensive one at that. At $70+ a framed, glassed original, two-thirds of the cost is comprised of the frame and glass.

I am moving away from this semi-permanent approach by using mirror mounts to hold prints on the wall. The prints are not glassed or framed. The mirror mounts run $2 a packet of four at the hardware store and the provided, ugly, drywall screws are replaced with 1″ roofing nails. These have a large, flat, shiny top and can be hammered into place in seconds, needing only a spirit level to get things aligned just so.

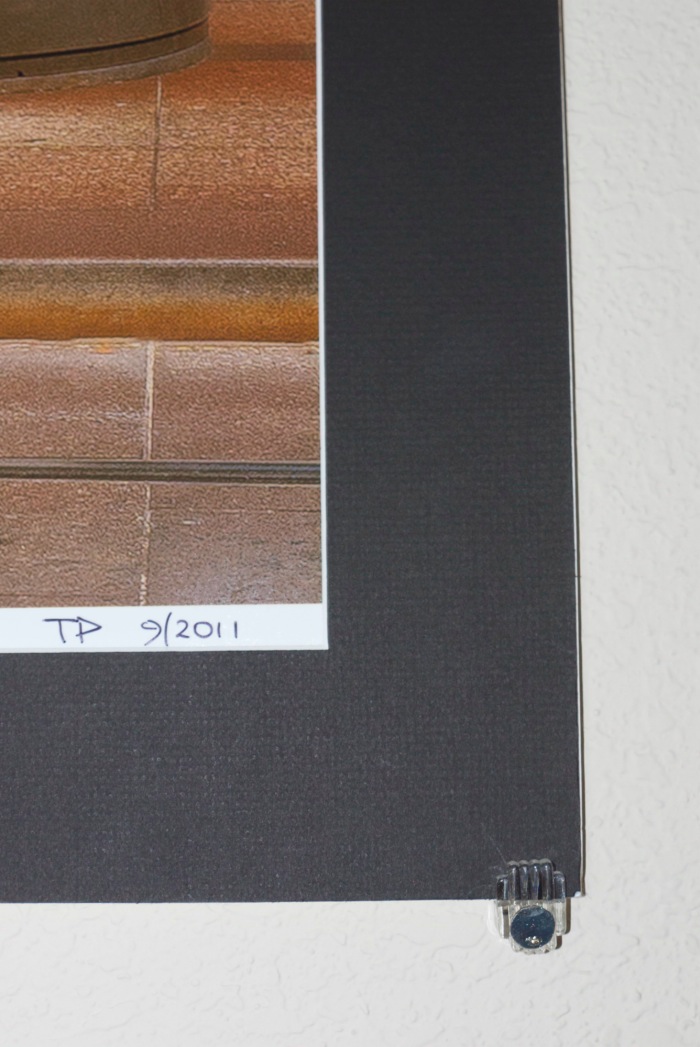
Mirror mount and roofing nail in place.

Using a 3/16″ mount and standard thickness mat, the mat + print + mount ‘sandwich’ can be replaced with another like-sized print in seconds, simply slid into place using the existing mirror retainers. The thickness of the sandwich is just right to allow the mirror mounts to gently hold things in place, the rest being done by gravity. The mat is glued to the mount using 3M Double Sided tape.

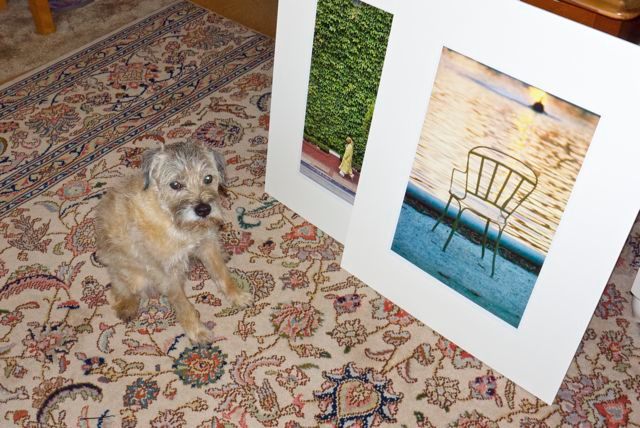
The finished display is simple and elegant, with the mirror fasteners sporting a pleasant Art Deco retro look. And, like that museum curator, you can switch what is on display with ease.

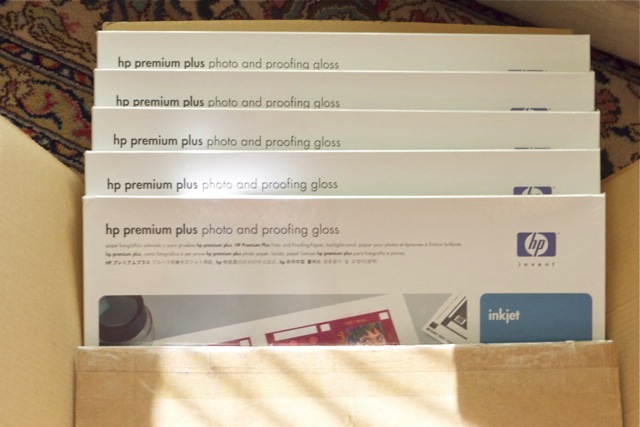
Redimat sells archival mounting board in 22″ x 28″ for $7.10 with mats running some $22.05 plus shipping. So call it $26 a print if bought in quantities of more than ten. That’s a lot less than a glassed, framed print will run you. It’s also a great presentation for those interesting in selling their work, requiring just the addition of a glassine envelope ($0.50) for protection when displayed in a sawhorse at an art show.

Want to distinguish a photographer from an equipment fetishist? Simply ask what percentage of his annual outlay is on gear compared to prints. The higher the percentage, the lower the quality of the work, for the most part.

Dick Blick

A great place for mounts and supplies.

I first made mention of Dick Blick in these pages when writing about how I mount and frame large prints.

My Fletcher FlexiMaster Framing Tool came from Dick Blick Art Materials making trivial a job which would otherwise be too horrid to contemplate.

The other day I wanted to order some 4B (super soft) graphite leads for my son’s pencil, which he uses for schoolwork. My interest in writing instruments is not new to this journal; I wrote of that great ball pen classic the Bic Cristal earlier and my accidental over order has me set for life! When it comes to pencils, the best pencils come from Germany – just like the best cameras used to. Forget your Genine Murrican Dixon Ticonderoga with its wretched soft wood construction, lack of heft and a graphite lead waiting to snap at the merest provocation. Real pencils say ‘Staedtler’ on the body and while I was an aficionado of their splendid wooden ones when younger, time marches on. So when our son needed a really good pencil for homework it had to be a Staedtler, one of the retractable ones. The ergonomics are superb, the design appealing to the eye and the range of hardness in graphites large – everything from 4H (so hard you wonder who needs this) to 4B, the latter a pleasure to write or draw with and easily erased when errors crop up.

Now, elegant as they are, I cannot abide those super fine 0.2mm/0.5mm/0.7mm offerings from Staedtler or the Japanese. Those are for limp wristed pansies. A Real Man (my son) writes fast and presses hard. Those sub-millimeter graphites do not cut it. Period. And forget built-in erasers which always run out when you need them. Carry a big one.

The Staedtler Technico Lead Holder.

Indeed, the criteria for nomination to the exalted level of ‘Classic’ set forth in that earlier piece on the Bic ball pen apply equally here:

  • It has to have class. I can’t define that but I know it when I see it.
  • It must be superbly functional.
  • Its use must be second nature.
  • It must have magic. Yes, that sense of fitness for purpose you get when you pick it up, use it.
  • It must be made well enough to survive the ravages of time and use.
  • It must be reliable.

So you can add the Staedtler Lumograph to a short list where others of the like of the Porsche 911, the Leica M2, the Rollei 3.5F, a Patek Philippe Golden Ellipse, an iPad and the Border Terrier make their home. Most have a definite attitude, but only the last comes with a wet, cold nose.

The Staedtler Technico Lead Holder runs all of $5 and holds a real lead – 2mm in diameter. You are not going to break that. The retraction mechanism is easy, simple and fun and the removable cap includes a point sharpener. Perfection. Ideal for signing your limited run prints with chi-chi ‘1 out of 100’ nonsense (because you will never sell that many). And while you can find these in many local art stores, good luck finding 4B leads. So I dialed up DickBlick.com on the web and ordered the boy some 4B and 2B inserts. Except, being the doofus that I am, I ordered 4H and 2H, realizing my error only after I hit ‘Pay’.

This is where it gets good, and this is where you will want to give your business to Dick Blick. I called them with the usual dread of interminable phone trees and someone who speaks English on a par with the guy behind the counter at the local 711. Well, blow me down. A lady with a genuine American voice speaking perfect English (errr, American) answered on the first ring. No punch this for English, that for Spanish and kick your cat for Swahili. I pleaded stupidity, she changed the order like that, and my boy is now rejoicing in 4B leads in the best mechanical pencil on earth, and has no excuse for a less than perfect point. The two I bought him will likely last through graduation, and he’s in Fourth Grade!

There’s more to it than that. Blick’s paper catalog may only show a fraction of what is available on their web site, but it includes a cornucopia of supplies for mounting and framing photographs. Frames, mats, mounts in any shape, material, finish and color you desire. And tools galore, from the point setting tool I mentioned above to mat cutters, tools and jigs for making your own frames, and so on.

While I have long been a customer of Documounts for my mounting and framing supplies, Dick Blick is going to get my next order. All because of my silly mistake.

FrameShop

A neat frame designer.

Users of Photoshop CS4 or CS5 who like to add frames to their electronic images should rush over to Joe Colson’s site and download his FrameShop script.

Once installed and with an image loaded in PS, you click on it in the File->Scripts menu and set your choices as Joe explains in his well written piece.

It works well. Steve Jobs said “No one reads any more” (right before introducing the iPad!); he would have been closer to the mark with “Nobody prints any more” and this script does the trick for members of that class who like a polished presentation for their online work. Here’s an example which took seconds to do:

5D, 85mm, f/8, Novatron studio flash.

Thank you Gregg L for the tip.

Update March 2015: The script has now been updated to work with Photoshop CC and continues to work fine with my version of CS5.

Mounting glossy prints

Care needed.

I finally got around to mounting some glossy prints made on the HP paper I received as a gift.

The Seal 160M.

I use a Seal 160M press which I bought ages ago, used, on eBay for some $400 + half my net worth in shipping. It weighs a ton! They are still in business and even shipped me some missing nuts no charge. Today’s price- some $1,400 – reflects the uncompetitive cost of US labor. Will we ever see a flood of cheap ones from China? After all, a press is just a couple of slabs of cast iron and a heater. I doubt it. Few make big prints for mounting any more and I doubt the replacement market in commercial businesses is significant.

Only a fool buys these new. They regularly crop up for $250-500 used and all parts are readily available, not that there’s much to go wrong. The 160M weighs 60 lbs so try to buy locally. The 210M comes in at a whopping 75 lbs. Buy locally and bring a friend.

Typical eBay selling price – this is for the 210M. The 210M has two pressure adjustment knobs in contrast to one for the smaller 160M

The device could not be simpler, so if the heater or thermostat blows, replacement is cheap and the process simple. The whole thing is made up of less than two dozen parts, and B&H carries the essential ones. Framers’ Island also carries spares, including thermostats.

Not exactly complex ….

You can read all about mounting prints here.

I turned the temperature down from my usual 190F (HP Satin) to 170F for the glossy and also first removed the heated platen and gave it a thorough scrubbing with steel wool to remove any surface imperfections. You know how glossy is! Further, I’m careful to keep the release paper (prevents the print sticking to the heated platen) in a dust proof bag to avoid ingress of particulate matter which could mar the surface.

The results are simply spectacular. The surface loses a minor amount of gloss (it will much more at 195F so temperature seems critical) and there’s not a divot or scratch to be seen. But it is a labor of love! The faster these prints go behind glass, the better.

Mounted glossy prints with helper.

To learn more about the Seal press click the download buttons below. If you track down a used one, look for the S or M designation in the model number, indicating it’s a later model which does not use asbestos in the wiring insulation. Life’s too short as it is.

Download the Seal 160M/210M manual. 160M – up to 2×18.5″,
210M up to 2×23″. Both accommodate any length.

Download the Seal 110S manual – up to 2×12″

The maximum width of a board which these will accept is twice the larger dimension of the platen – you simply flip the board around. Overlapping/reheating a previously sealed area has no deleterious effect. The maximum length is infinite as you simply slide the board sequentially through the press. A 13″ x 19″ print needs two passes in my 160M, whereas an 18″ x 24″ requires four, both when centrally mounted on a 22″ x 28″ mat. It’s the size of the mat, not of the print, which constrains capacity. 2 minutes under pressure per ‘press’ using Drymount mounting tissue and release paper does the trick.

Nothing beats a professionally mounted print and, as I have written before, I am still searching for evidence of fading or discoloration in prints I mounted almost 40 years ago using a domestic iron. So when snake oil salesmen come calling, telling you that heat mounted prints fade, ask to see the evidence.

Glossy paper

The touchstone of the photographer’s art.

Its been quite a while since I made glossy prints. In the darkroom days I would squeegee the print, face down, onto a high gloss sheet of chrome-plated steel then heat the thing in a press. If you got things right the resulting print would emerge with an indescribably high gloss (this was before awful RC papers ruined traditional printing) which was also quite incredibly fragile. Any moisture or fingerprints and the surface would be ruined. But the definition afforded the image was beyond compare.

This was not all good, of course. Every imperfection in the image was disclosed, every grain of Kodak’s unbeatable TriX emulsion revealed. Sometimes you wanted that. Sometimes not. And the whole process was a real pain in the nether regions but once you saw an unglazed, normally dried glossy print you never wanted to go there again.

Nearly all the many prints I have made on my HP DesignJet 90 dye ink jet printer have been on HP-branded Premium Plus Satin paper. This paper has a semi-gloss finish, retains detail well and is very easy to use. It has a swellable surface, meaning its pores open when sprayed with ink to absorb the dyes. After a few hours the swelling subsides and the print is less fragile and can be handled easily. Until then the surface is quite fragile. I always handle paper using cotton gloves because any grease from fingers on the surface can result in poor ink absorption, blotchiness and reduced life. Done carefully, HP’s Vivera inks are certified by Wilhelm Research for some 80 years longevity.

Well, take a look what arrived on my doorstep the other day:

Nice things happen to nice people.

The buyer of a hefty chunk of my Canon 5D outfit found several goodies in the shipments I made. A few CF cards, a wired and wireless remote, an LCD protector, a CF-to-SDHC adapter and so on. He had been a pleasure to deal with, none of the usual game playing or nickel and dime nonsense so beloved of buyers of even fairly priced gear, that I felt it was the least I could do. Well, Barry B. dropped me a note saying that he no longer made prints and would I like some HP Glossy? Is the Pope a Catholic? It gets better. The small fortune in printing paper is not only the swellable type specific to my HP DesignJet, it was shipped to me at no charge! There are decent people left in the world …. thank you, Barry.

On receipt the first thing I did was to download the paper profile from HP and make it available to Lightroom. Then I took an image which would really benefit from the ability of glossy paper to render fine detail and ran a test print. In this image I had retouched some overhead wires using Photoshop CS5 and Content Aware Fill and it looked just fine on my Dell 2209WA display. But, oh! boy, the test print clearly displayed my retouching so I had to go back into PS and try harder. That’s glossy paper for you. Every imperfection, every pore, every blemish, is writ large to the world.

A second print – I have no fewer than 125 sheets of 13″ x 19″ to play with so I’m feeling a tad profligate – put all to rights and the quality is simply breathtaking. And this from the Panny G1’s poncy little MFT sensor!

A warning. Before these swellable papers dry, a matter of a few hours, they will show a mottled surface reflecting (!) disparate ink absorption across the surface. Give them a few hours and the surfaces returns to normal, meaning a high gloss almost as good as those monochrome prints from ages ago, but a lot easier to make.

Glossy is not for everyone. It’s hard to display, attracting reflections as it does. It’s fragile and really needs mounting behind glass. It’s unforgiving when it comes to the photographer’s technique. And it needs to be handled with kid gloves …. OK, cotton gloves. But, done right and displayed right, a glossy print remains the touchstone of the photographer’s art.

Why do you think that nice Mr. Jobs insists on those dumb glossy screens on all his computers? Because they plain look better on a casual acquaintance. That’s fine for prints. Not so good for computer screens.

HP Glossy is anything but water resistant, so keep it away from rain drops and the like:

Two minutes under a tap and the emulsion starts to run.