Lonely.
Date: July 28, 2009
Place: Between the Tenderloin and Nob Hill, San Francisco
Modus operandi: Happy to be leaving the Tenderloin.
Weather: Typical overcast San Francisco day.
Time: 10:40am.
Gear: Panasonic G1, kit lens at 45mm, f/6.3, 1/80th, ISO100
Medium: Digital
Me: Thrilled to still have an eye for this sort of thing.
My age: 57
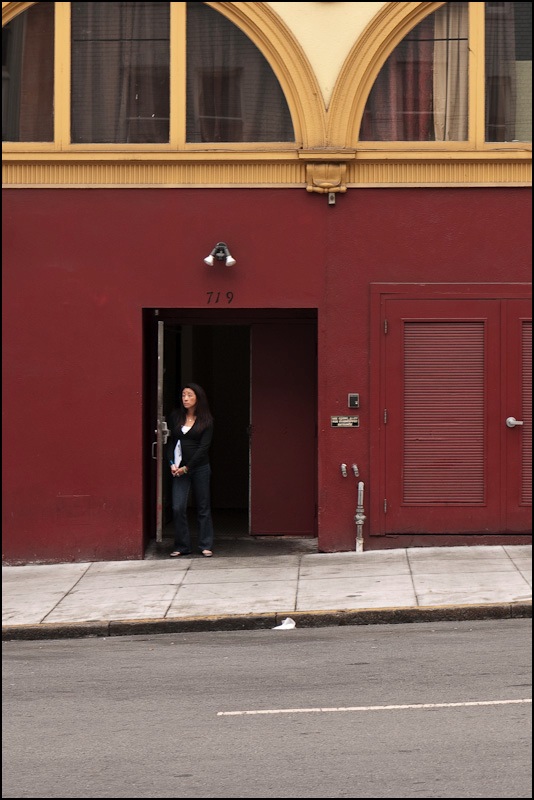
This reminds me of my picture of Perry’s taken at the very end of the last millennium. I had been tramping around the Tenderloin and was pretty much happy to be leaving the area. There’s really very little good that can be said about it.
Heading East, I saw this one from far away and was lucky that the lady remained as still as when I first saw her. Her deeply unhappy face speaks of a date broken, a heart crying.
There was a brief break in the traffic after what seemed like an age (in reality a couple of seconds!) and I managed to get the snap with that sweet kit lens on the G1 racked out as far as it could go – 90mm equivalent.
Just like using that old Leica 90mm but a lot faster and easier. No lens changing, no focusing, no light measurement needed. Words fail me in trying to convey just what a perfect camera/lens combination the G1 makes for street snaps like this. If this is your preferred genre, I strongly recommend the G1 and 14-45mm kit lens. It is all you will need and your ability to give near-100% attention to the subject will make you a better photographer.
In this case, I was fortunate to be able to balance the outward looking figure with the door on the right.
Taken not long after yesterday’s snap and a few blocks east. Seconds later the lady was gone. Sometimes you just get lucky.
Absent the usual sharpening using a Lightroom import preset no other processing was required – the naturally muted contrast of the G1 and my default underexposure setting makes for a low effort camera-to-final-image setup.