$300 and ideal for the traveler.
A friend, fellow photographer and frequent reader of this journal contacted me the other day asking whether I would be interested in sharing his experiences running OS X on an inexpensive netbook computer. He has, of course, paid Apple for the software but as neither of us are lawyers (we prefer to make money in more moral professions) he was a tad concerned that his anonymity be preserved before the $30bn+ cash hoard at Apple Inc. came crashing down on his head in the guise of a life sentence for breaking some inequitable agreement or other. As he added, somewhat acidly, there is no reciprocity here – users have no redress when Apple denies generally know faults like graphics issues caused by overheating in late-2006 iMacs. Heads they win, tails their customers lose. Like me, he uses Apple hardware exclusively for photography, though unlike me he does this for a living, and has many Macs at home and work.
“No problemo”, quoth I, “there’s a little thing called the First Amendment to the US Constitution which protects journalistic sources. So why not write your piece pseudonymously and I will be pleased to publish it?”
So we we though long and hard about a suitable nom de plume and came up with F.U. Steve. My buddy is named Steve and the initials are those of one Francis Urquhart of the BBC’s splendid ‘House of Cards’, a gripping TV series about a crooked British Prime Minister who will do anything for power and fame.
I thought it might be best to present this piece as a Q&A to show the decision process and technical challenges involved in making a $300 netbook behave like an Apple laptop. Or better.
TP: Why bother hacking a cheap netbook to run OS X? Jobs has said that Apple will not make such garbage and certainly not for that price.
FU: It’s a simple question of fitness for purpose. As you know, I refuse to use Windows – life is too short. I needed a really light travel computer for web and email use and did not need the bulk and weight of a MacBook at $1,000+, not to mention the very poor heat management which would fry your lap. Then there’s the non-user replaceable battery. Of course there was always the MacBook Air but the price asked for that is ridiculous. The once nice thing about the Air is shared with most netbooks out there, though, and that’s the lack of an optical drive. I don’t need that for my intended uses.
TP: What about the hacking bit? Isn’t that difficult?
FU: Well, there’s a large hacker community out there with many sites dedicated to specific computer models. After a bit of research I decided on the MSI Wind U100, model 279US. There were several reasons. It is well supported for running OS X, comes in white or black and needs a minimum of hardware changes to make it truly usable with OS Leopard. I bought mine a year ago from Amazon for $429 with the six cell battery which gives you 5 working hours. At 2.8 lbs it’s lighter than the MacBook Air (3.0 lbs – ed) and comes in at 3.3 lbs with the charger. A vinyl travel case is included in the price as is Windows XP which I immediately erased. Today, you can find new ones on the web for under $300. For hacking I used Msiwind.net which is a wonderful resource, though you have to wade through a fair bit of dross to get to the gold.
TP: What was the toughest hacking aspect?
FU: Once you have located and downloaded the key files you have to instal the kernel extensions (“kexts”) required to make the Wind run – kexts are Apple’s equivalent of device drivers in Windoze. Most importantly you need one for the Intel GMA950 GPU screen driver to enjoy the Wind’s full 1024 x 600 screen definition – the screen is widescreen format, 16:9, and ideal for watching movies. Search about a bit at Msiwind.net and it’s all there.
TP: How about hardware changes?
FU: Simple. First you pry off and swap the ‘Windoze’ (=Command) and Alt keys to replicate their positioning on a Mac keyboard, to the left of the space bar.
Then you remove the rear cover (8 Philips screws) and replace the Realtek wi-fi card with a used Apple Airport card bought on eBay for $20 or so. While the Realtek works OK with an add on application, it’s bog slow starting up and you don’t get the Airport ‘fan’ indicator in the menu bar which I am so used to. Further, the included card is poor at detecting favored networks. Just search for “Apple Airport Extreme Card MA688Z/B” on eBay – the card is actually made by Broadcom. Apple doesn’t ‘make’ anything, as you know. You need to pop out the HDD (one screw) to release the old card (another screw) and remove the two antennae – it takes seconds to do.
The stock HDD is 160gB which is more than enough for the intended uses for this netbook, but I replaced it with a 500gB Hitachi because …. well, because I felt like it!
Finally, stock RAM (667mHz DDR2) is 1gB but you can load her up with up to 2gB. I had a 500mB stick lying around so inserted that in the one open slot, for a total of 1.5gB.
International travelers may like to buy an aftermarket power supply with exchangeable tips, as I did. Another $30 or so to eBay.
TP: So what’s it like to use? I mean, there must be a lot of compromises at that price?
FU: To cut a long story short, I sold my MacBook after 6 months with the Wind. It’s that good. The screen is as good or better, it’s matte not glossy, the stock Intel Atom CPU runs far cooler than the C2D in the NutBooks and the Intel GMA950 GPU will easily drive a 1680×1050 external monitor using the included VGA out port. The only shame about the latter is that there are no screw receptacles to hold the clunky VGA cord in place, but you can easily drive a 24″ LCD computer screen or a big screen TV if that’s your thing. The GPU in the Wind (which is identical to that in earlier MacBooks) outputs much more definition than your LCD TV can provide, so you are not limiting yourself.
The keyboard is perfect for touch typing and I added a cheap protector to keep it clean. I only wish it was backlit, but you can’t have everything, I suppose.
The built in webcam works fine with Skype but not with iChat – you can get a picture but the Wind community is still struggling with sound using the built in microphone. To use iChat I use a Bluetooth earphone/mic in a USB socket (the Wind has three) and it works fine, bypassing the internal microphone.
As there is no optical drive (as with the MacBook Air) I rip movies to an SD card (not available on the Air) and simply insert the SD card in the Wind’s reader, using the free VLC application to watch the movie. 8gB cards will hold a lot of information for a few dollars. Plus, with a 500gB HDD, I can put lots of movies on the hard drive for watching on those coast-to-coast flights. The 6 cell battery is good for two full length movies with earphones in use, provided you don’t crank the screen up to maximum brightness. Because the Wind’s speakers are simply horrible (like the NutBook’s), I plug in my headphone of choice and use one of the scripts on the MSIWind.net forum to toggle them on. The sound is excellent, used in this way. You can use your iPhone/iPod earbuds at a pinch, but I prefer a pair of Sennheiser over-the-ear headphones for the best sound.
The stock speed of the Atom CPU is 1.6gHz but, if you are running connected to the mains, a quick touch of Fn-F10 will overclock the chip to 2.0gHz for a speed increase of 25%. MSI provides for this in its BIOS and it’s safe and causes no heat rise. The other day I was using the Wind overclocked in a 92F room and the internal temperature never rose over 117F. Try saying that about your NutBook!
TP: Any other mods?
FU: Well, just one. A nice skin from iSkin to my own design gives me the netbook Jobs refuses to make because he simply cannot sell it for a huge mark-up against the very competent competition from MSI, Toshiba, Dell, HP , etc. It’s not that he’s a greedy jerk – we all know that – it’s the way he excuses it (“we don’t know how to make a $500 computer”) that gets me mad. Anyway, the skin has been tons of fun. I constantly get asked about it in cafeterias and airport lounges and adopt a cool attitude of “I’m sorry, but I really cannot talk about it”. One jerk deserves another, I reckon. I’ll start wearing a black polo and sneakers next – not!
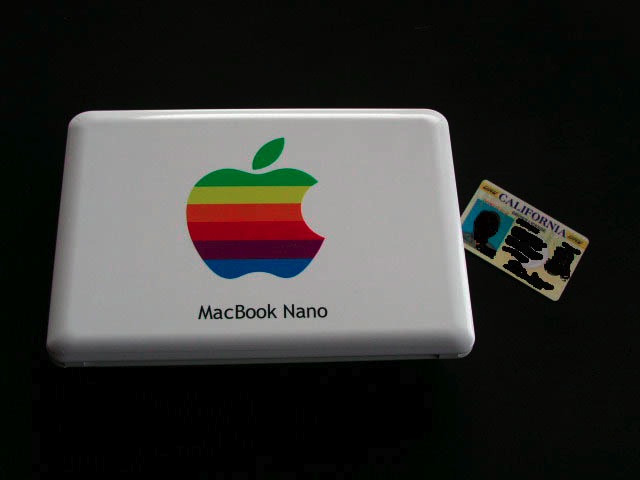
FU’s iSkin in place on the MSI Wind. CA DL for reference
TP: What applications are you running on your MacBook Nano?
FU: First I’m running OS Leopard 10.5.6 – updates make no sense (and are tricky on this hacked machine) and 10.5.6 is rock stable. There were no meaningful improvements in later versions and Snow Leopard only creates new incompatibilities. In addition to all the usual apps – Mail, iCal, NetNewsWire for news feeds, Safari, Address Book, MobileMe (great for synching calendars, mail and address books with my other Macs), Preview, iTunes and iPhoto, I also run the current version of Lightroom. No kidding. Here’s a screen shot – as you can see it’s perfectly usable on the 10″ widescreen:
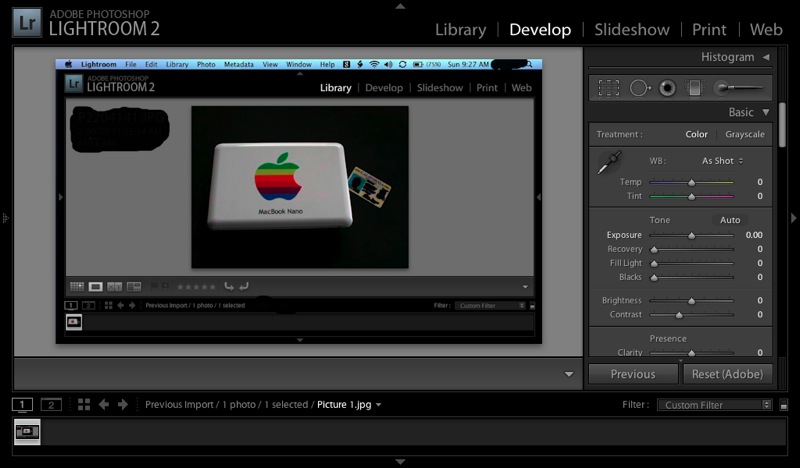
Lightroom 2 on the MacBook Nano
I wouldn’t want to run it all day, but for a quick preview and back-up of my pictures on a field trip and some light processing, the built in SD/SDHC card reader is perfect for this sort of thing. In my business I use several Pentax DSLRs which all use SD or SDHC cards; if your camera uses CF cards, you will need a plug in USB card reader for those.
TP: Fascinating, FU. Any final thoughts?
FU: Mr. Jobs says Apple does not know how to make a sub-$500 computer. Seems that MSI has been making them for a couple of years now at a quality level equal or superior to anything from Apple. Tell that to the Apple zealots who have never tried one yet decry all netbooks as ‘garbage’. Nice to have such stupidly loyal customers, huh? Maybe Apple could learn something from MSI? And you know what? When my MSI fails (it shows no signs of doing so after a year of heavy use and no respect – so much for the Apple premium) I’ll go out and buy another for $300. Or maybe four. That’s still less than one MacBook Air and I won’t have to worry about anyone stealing it. I hope!
TP: Thanks, FU. What’s next?
FU: Well, as you have discovered yourself, Macs are nothing more than industry standard hardware packed in a pretty box with lousy internal design and very poor life expectancy, at least for the newer machines. The electronic part that invariably fails is the only one designed by Apple and made by Foxconn (how appropriate!) in China – the logic- or mother board. Like you, I am struggling mightily to keep my late-2006 24″ iMacs – I have three – running (the one where Apple denies there are any problems) and two are showing the same signs of incipient graphics failure that recently forced you to change out the graphics card in your machine. I’ll likely have to do the same soon but the whole thing has me thinking. As you can see, I have a big investment in Apple hardware.
As Apple makes a great OS that can be made to run easily on industry standard hardware in a well ventilated box, and given that I have shoveled in excess of $20,000 down Apple’s greedy maw in frequent replacements of their poorly made hardware over the past few years, I fancy a desktop Hackintosh is in my future. At least I can write these losses off in my business unlike most regular users. Performance of the new machine would be well in advance of anything offered by the MacPro at one third of the price, with superior reliability and all components cheaply replaced or upgradable. Reliability is my primary dictate – these are working tools, not fashion accessories. And, like you, Thomas, I have paid for the software. Many, many times.
TP: Thanks, FU Steve. I’m sure my readers are eager to learn more. Please share that project with us when it is under way.
FU: Glad to, and thanks for the space.
Update: Check the first Comment to this piece for a very simple installation on a Dell Mini 9. The Dell has a smaller screen (9″ vs. 10″) but that may be more than offset by the ease of installation for many less technical users.