Amazing.
Take a look at David Bergman’s 1,474 megapixel snap of the inauguration.
And you thought your big DSLR had a lot of pixels?
You can zoom in for detail.
Amazing.
Take a look at David Bergman’s 1,474 megapixel snap of the inauguration.
And you thought your big DSLR had a lot of pixels?
You can zoom in for detail.
Amusing writing.
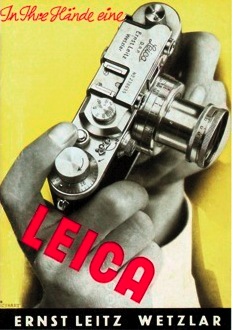
There’s an amusing piece by Anthony Lane on the cult of Leica in the September 2007 issue of The New Yorker, a magazine renowned for using three words where one would do.
Click the picture to read.
The new Leica M?
Call me dated. Say I am out of touch. Ridicule my love of the mechanical age.
I have no problem with any of those accusations as all are true.
So when I wrote a while back, not a little intrigued, of the Panasonic G1, it was for no other reason than that this photographer’s schnozzer sensed a possibility in the making.
Revolution? Why, yes. A modern Leica M for the digital set because, whether you like it or not, we are all members. Meaning small, fast, quiet and with large aperture lenses for low light work.
And we all know who designs the lenses for the best Panny designs, don’t we? Can you say Leica?
These thoughts were brought to the fore when DP Review published its analysis of the Panasonic G1. To cut to the chase, it’s not ready for prime time any more than the L1 (which at least looked like a Leica M) was. But you have to respect where Panny is going with this.
Meaning they are inching closer to the Leica ideal – small, quiet, fast, unobtrusive.
Now all they need to do is throw the design book out of the window and …. take a hard look at the form factor of the Leica M – but 33% smaller this time. And it wouldn’t hurt to have a viewfinder that works in something less than California sunshine.
A Cartier-Bresson documentary.
To wile away a couple of hours being shown his pictures by the great man himself is one of the better things to do with your time.

The documentary is called Henri Cartier-Bresson – The Impassioned Eye and is an orgy of HCB’s pictures, with many interesting tidbits on what was happening at the moment he pressed the button. I am struck again by how special his early (1930s) surrealist vision really was. It’s something which faded over time making his newer pictures mundane by comparison.
If there’s an error it’s the credit for his greatest picture – the man jumping over the puddle. It’s not a 1950s effort – it dates from 1932 and was taken during a time when his vision would forever make Henri Cartier-Bresson the most renowned photographer this world will ever know. And when you listen to the stories behind the pictures of Chanel or Bonnard or the Curies, all will be forgiven.
Highly recommended.
A true modernist.
A reader dropped me a note about a fine slide show profiling the fashion photography of the great American photographer Edward Steichen. Click the picture to view.
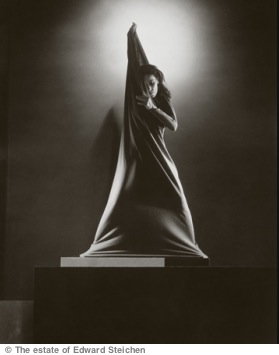
These pictures are from the Conde Nast library and are just as striking today as they must have been 80 years ago.