Category Archives: Hardware

Stuff

Leica SL2-S and macro photography using Leica M lenses – Part I

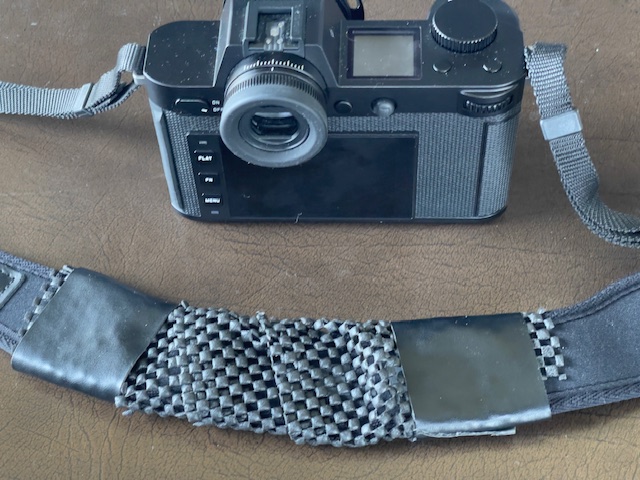
The ancient and the new.

For an index of all Leica-related articles click here.

The goal:

Having resolved to do some serious macro work in the studio, I ruminated on how to effectively use my hardware resources. The idea of going with an AF L mount macro lens was discarded as being too costly for a few snaps. An alternative approach using either a Leica 100mm f/4 Macro-R lens, either in a focusing mount or in the lens head version + bellows was also too costly, with a likely investment of $500 and up, including a R-to-L adapter.

The hardware:

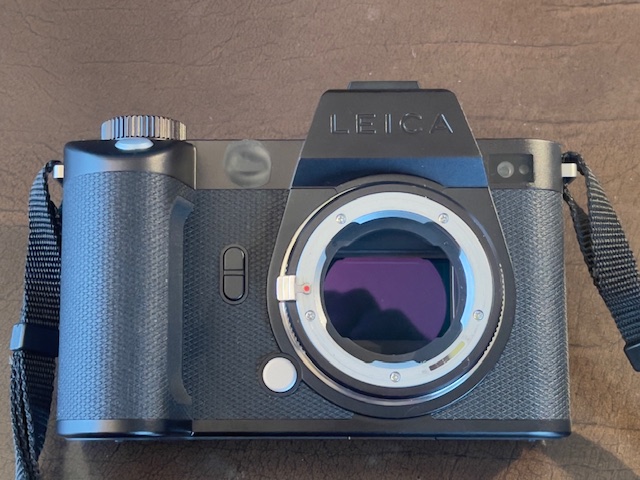
Then it struck me that my Leitz 135mm f/4 Elmar from the mid-1960s has a removable lens head which can be easily installed on a focusing bellows and the bellows, with a Leica M bayonet on the rear, will fit into Leica M-to-L adapter. I don’t need AF or auto-aperture in this application as the magnification capability of the SL2-S’s EVF is very accurate for manual focusing and the EVF screen’s brightness automatically adjusts regardless of the aperture dialed in. Further, the simple 4-element design of the Elmar is known to be a sound choice for macro work, performing well in the close-up range.

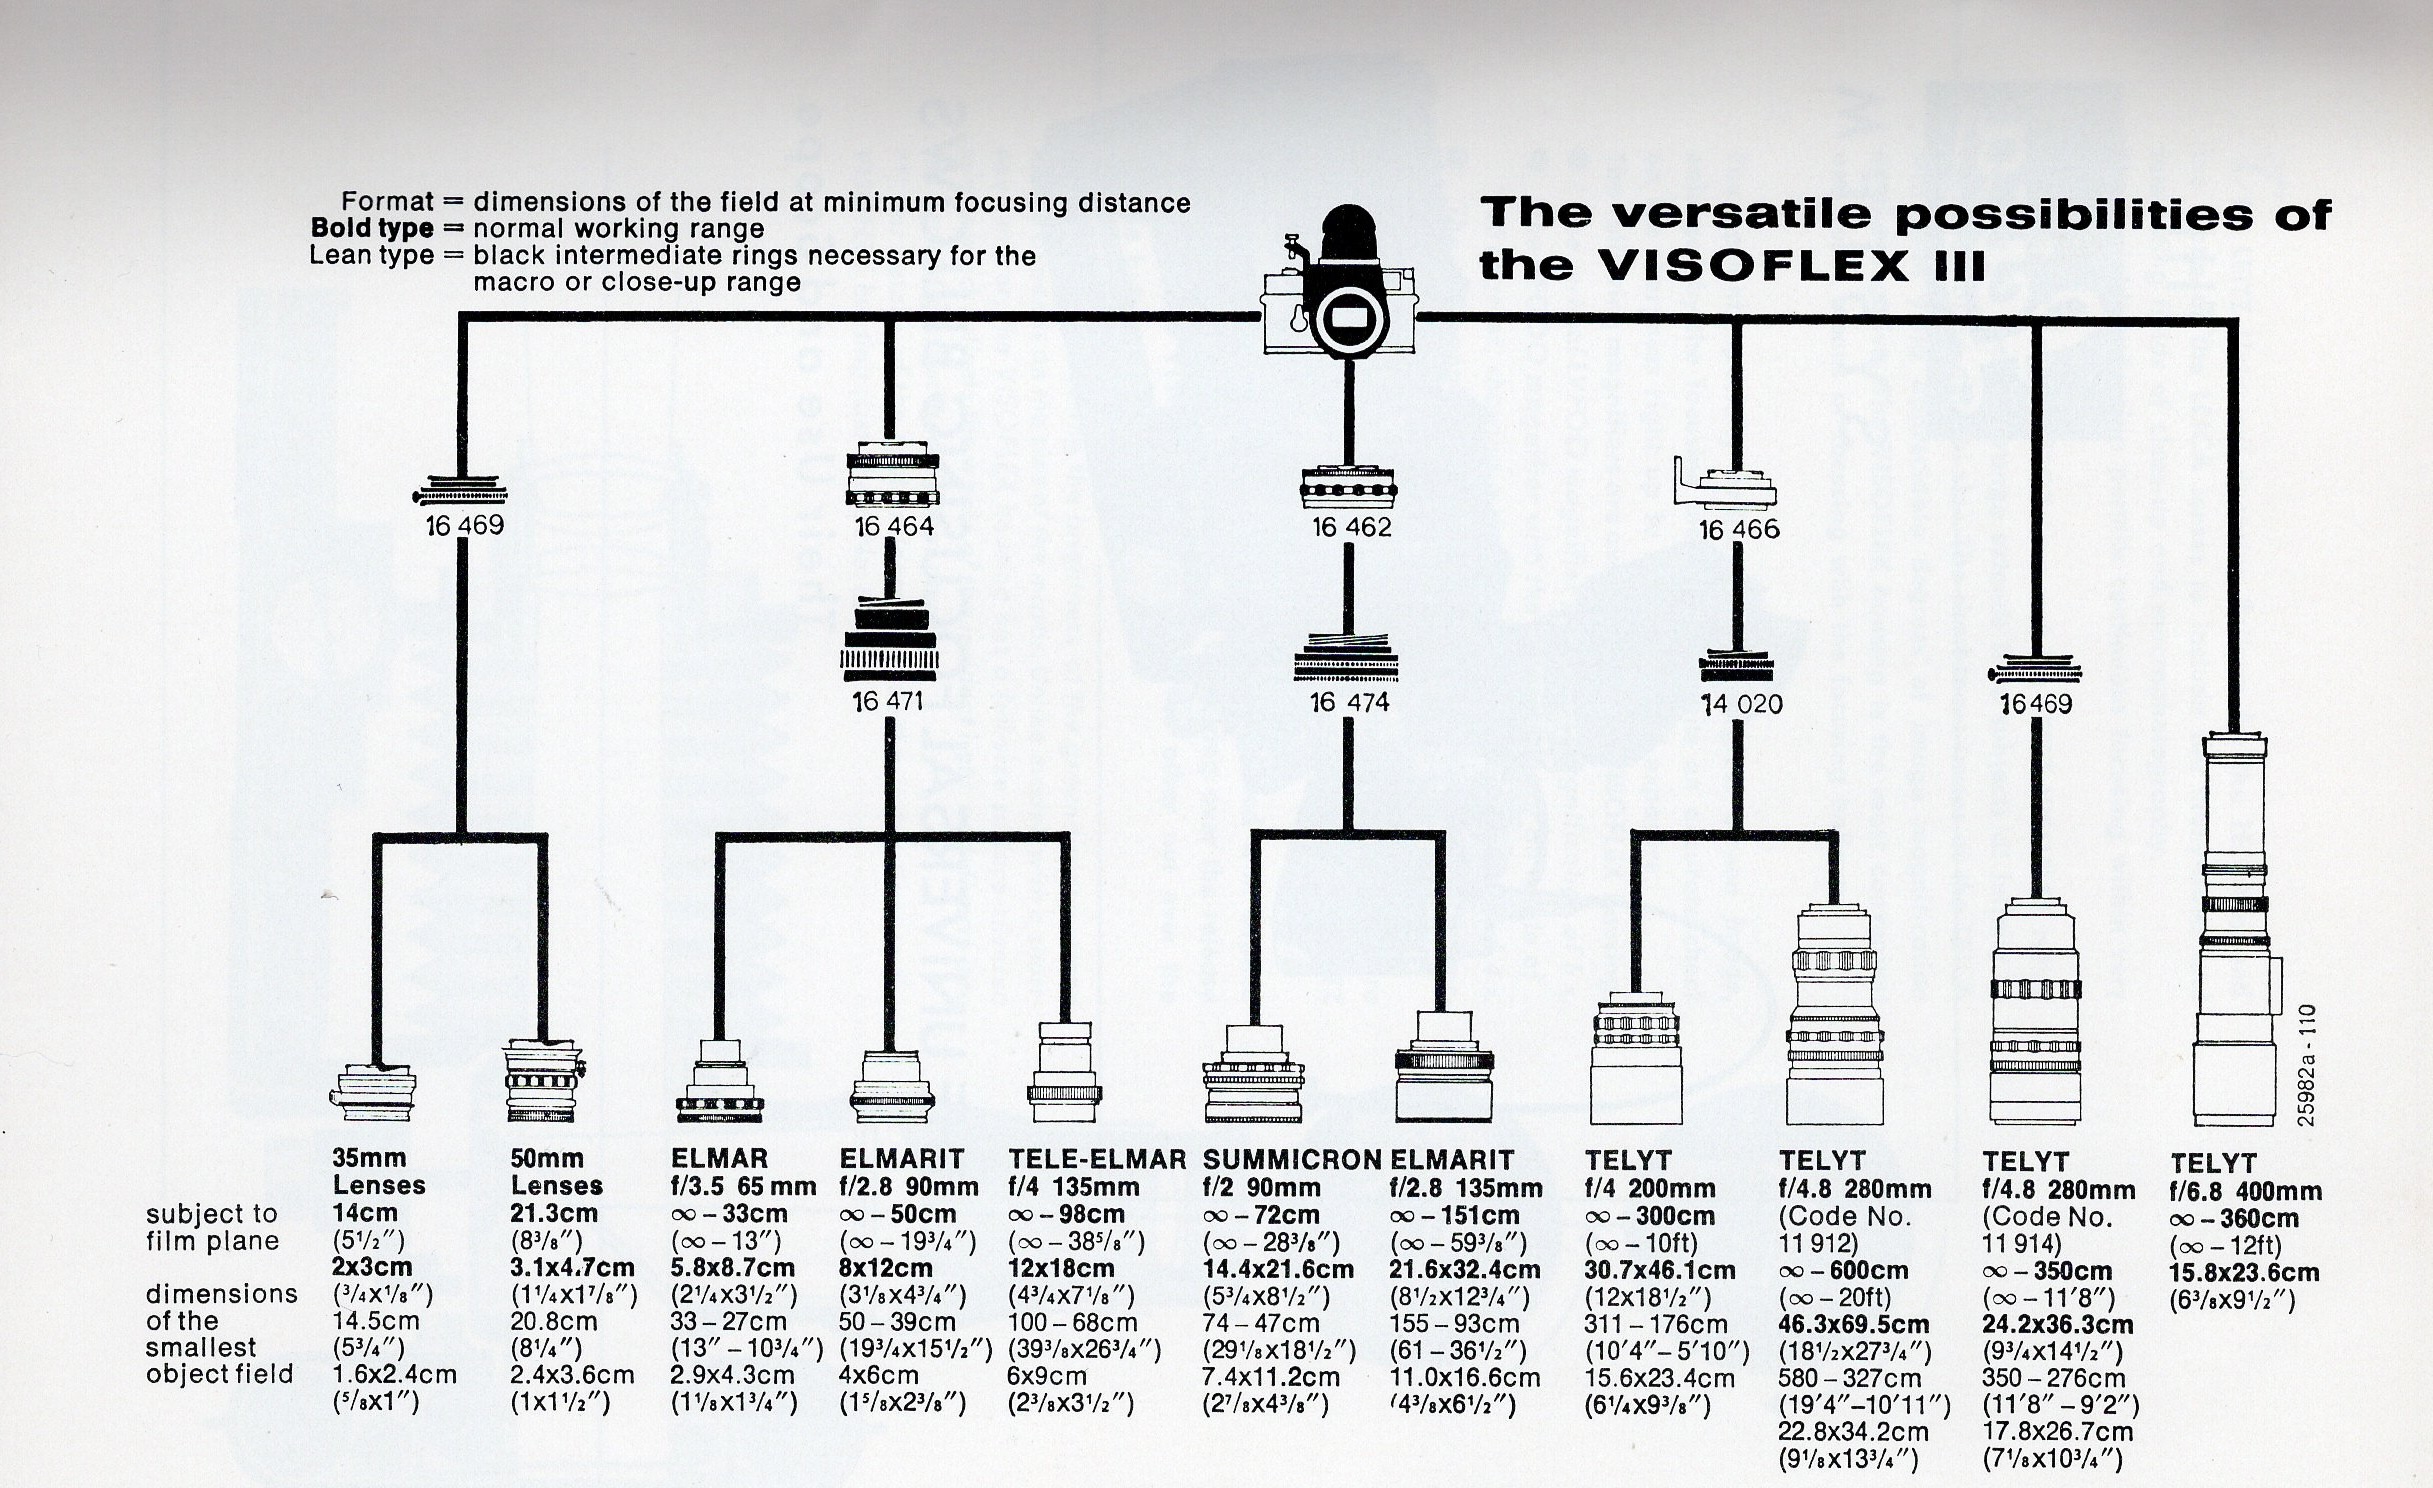
Leitz made a large range of close up and reflex box tools for both the screw and bayonet mount Leica bodies, as best illustrated in this Visoflex III table of the period. The Visoflex was a simple, if rather clunky, mirror box, converting an M or Barnack body to single lens reflex use:


No shortage of options.

The 135mm Tele-Elmar lens head illustrated above has a slimmer optical unit barrel than the earlier 135mm Elmar, whereas the thicker barrel of the Elmar dictates use of an adapter, so I first procured the adapter #16472 ($25, not shown above) to fit the lens to the bellows, then added two extension tubes for really close work, numbered #16471 ($29). These can be stacked – the thread diameter is 33.8mm, smaller than the 39.0mm Leica Thread Mount. A pristine Bellows II was added, in mint condition, in its original box with instructions, no less, for $77. The bellows came with the 16558 front adapter.

The Leitz Focusing Bellows II assembly:


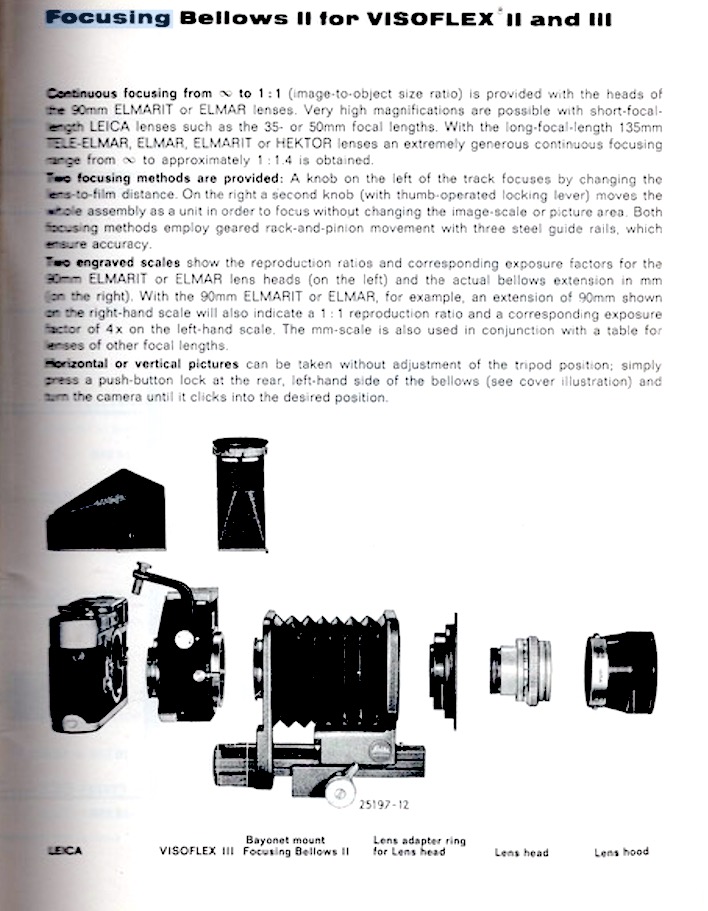
The Leitz Focusing Bellows II assembly.

This bellows is a standout because not only does it provide bellows focusing, with a maximum extension of 97.0mm, it has a separate rack and pinion drive to move the whole assembly back and forth. That drive travels up to 25mm. This is a feature missing from both the earlier Bellows I (though that model does extend to 135mm and a hard to find separate focusing rack was made). The separate rack means you can adjust focus without changing the reproduction ratio by moving the whole camera/bellows/lens/ring light assembly to and fro. Some Nikon bellows also had this killer feature (the PB-4 which added tilt and shift and the PB-6 are examples), making sizing and focusing a breeze. The Leica Bellows R also includes a lower rack.

With 97.0mm of bellows extension and 29.8mm more from the two 16471 extension tubes (they can be stacked and are very robust, as is the whole assembly) I have a total extension which can deliver life size images with the 135mm Elmar. The 135mm focal length is especially handy as it means a greater subject-to-lens distance making for ease of illumination. For illumination I bought this inexpensive LED ring light for all of $31 plus a 39-49mm filter thread adapter as the Leitz lens’s filter thread is 39mm in diameter and no such adapter comes with the ring light. This added $10 to the cost. The ring light is not as bright as a ring flash but much easier to work with, as it delivers continuous lighting, and the SL2-S’s IBIS will take care of any camera shake.

Adapters required:

(a) For the lens head on the Focusing Bellows:


Lens adapters for use with the Focusing Bellows II, which comes with #16558.

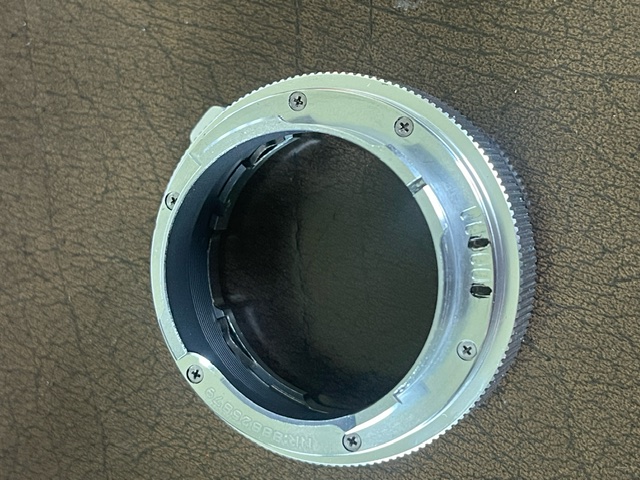
(b) For the Focusing Bellows on the M-to-L adapter on the SL2-S body:


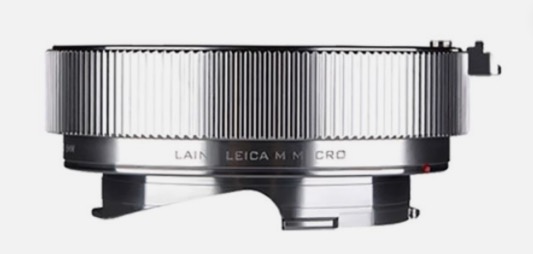
Laina 16mm Leica M-to-M extension tube.

This adapter cost $75 on eBay all the way from China and is required for one simple reason – the Focusing Bellows II will not mount directly on the Leica M-to-L adapter as the focusing rail protrudes too far back, interfering with the body. This 16mm extension tube permits mounting of the Focusing Bellows on the Leica M-to-L adapter mounted on the camera body. It’s not cheap but is made up to Leica quality standards.

To permit rotation of the camera body through 90 degrees:

An additional 10mm extension tube between the rear of the bellows and the SL2-S body is required if the camera 90 degree rotation function is to be enabled. Without this additional extension tube the rear of the rack interferes with the body, preventing rotation.


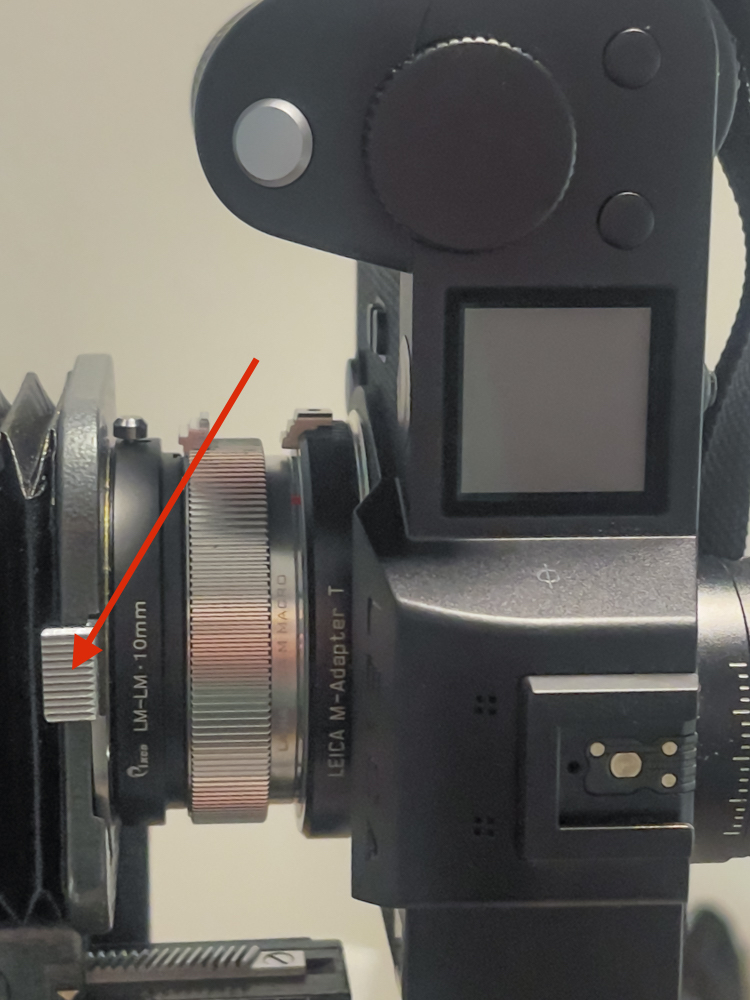
10mm extension tube, $26 from China.
The camera rotation release is arrowed,
and the SL2-S has been rotated 90 degrees.

Reproduction ranges:

These data will convey the exceptional flexibility of the combination(s) possible with the 135mm Elmar/16mm extension tube/Focusing Bellows/16471 extension tubes. Reproduction ratios are shown, so 1.0x is life size, 0.5x is half-life size and so on:

  • 135mm Elmar in RF focusing mount + 16mm extension tube – 0.06x to 0.25x
  • 135mm Elmar lens head + 16mm extension tube + Focusing Bellows – Infinity to 0.6x
  • 135mm Elmar lens head + 16mm extension tube + one 16471 extension tube + Focusing Bellows – 0.17x to 0.8x
  • 135mm Elmar lens head + 16mm extension tube + two 16471 extension tubes + Focusing Bellows – 0.4x to 1.0x

Stated differently these various combinations span a focus range from infinity to life size.

Lighting:

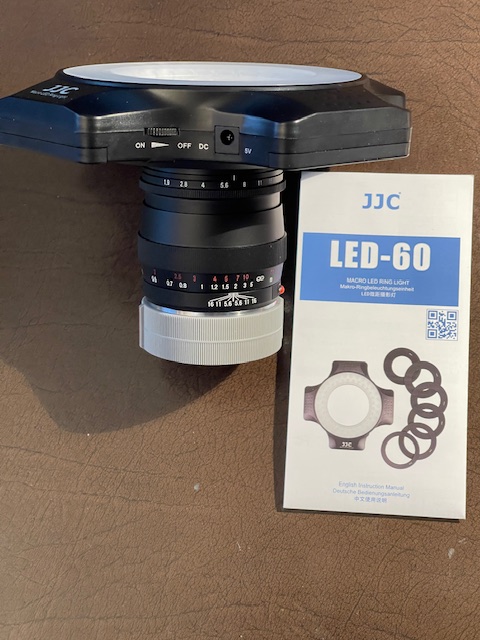
The LED light is made by JJC, the same company which made the excellent film scanning device I used with the Nikon D800 to make high quality scans of my films and slides:


Attached to the 75mm Ultron using the 49mm adapter.

The ring light ($31) comes with a host of different filter thread diameter adapters (49/52/55/58/62/67mm – each slips into the rear of the unit with a tight and satisfying ‘click’) and uses four AA batteries, one in each ‘wing’. It has adjustable lighting power using the rotary On/Off switch. I note that there is also provision for a 9 volt DC power supply through the provided socket, but no transformer is included. In practice using disposable or rechargeable batteries means one fewer cable to trip on. The light is well made and with batteries inserted weighs in at just 7.95ozs/225grams, so it will not tax the lens and body. An additional 49mm to 39mm step up/down ring is attached to fit the LED light to the 39mm filter thread of the 135mm Elmar optical unit – $10.


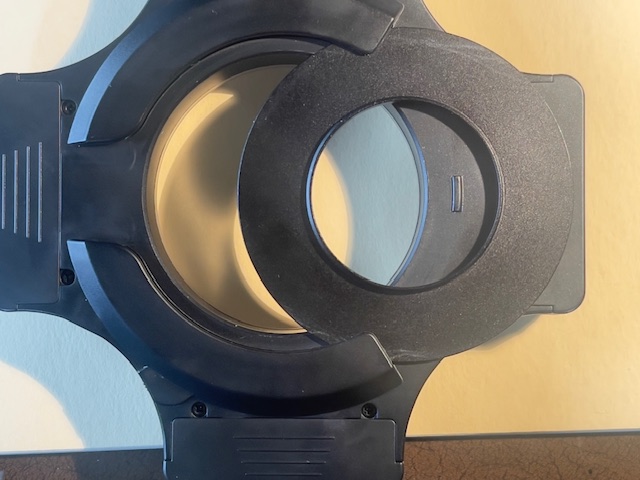
The adapters slide in and are held very securely.

The assembled outfit:

The number of adapters notwithstanding the whole assembly is exceptionally rigid with no play or wobble to be found.


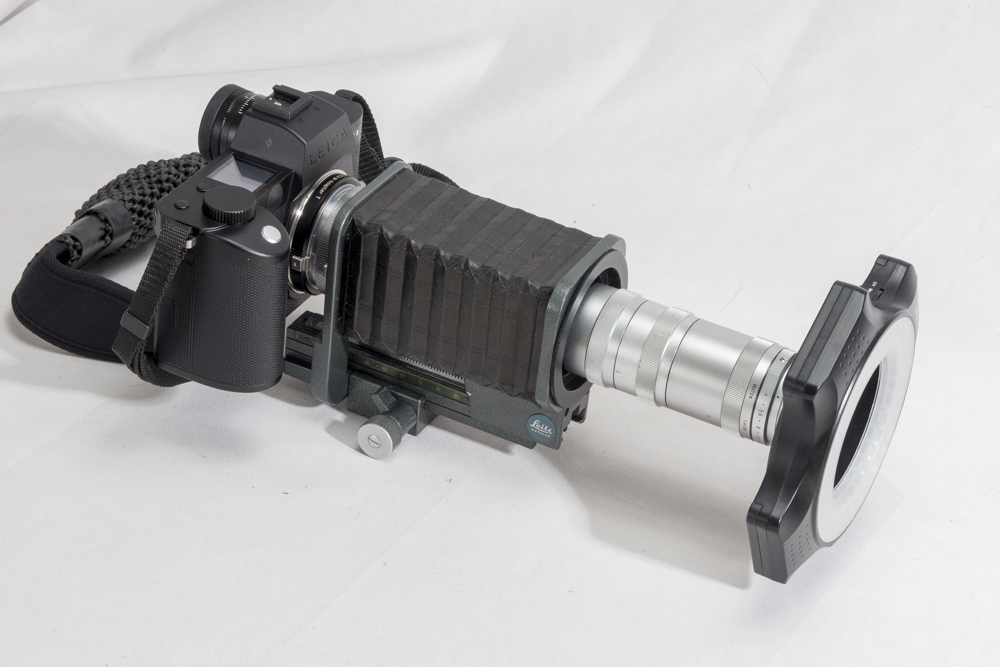
SL2-S body/M-to-L adapter/16mm M-to-M extension tube/Focusing Bellows II/16558 adapter ring/two 16471 extension tubes/16472 135mm Elmar adapter/135mm Elmar lens head/39-46mm step up ring/LED ring light.

The minimum bellows extension is 53mm, as shown below.


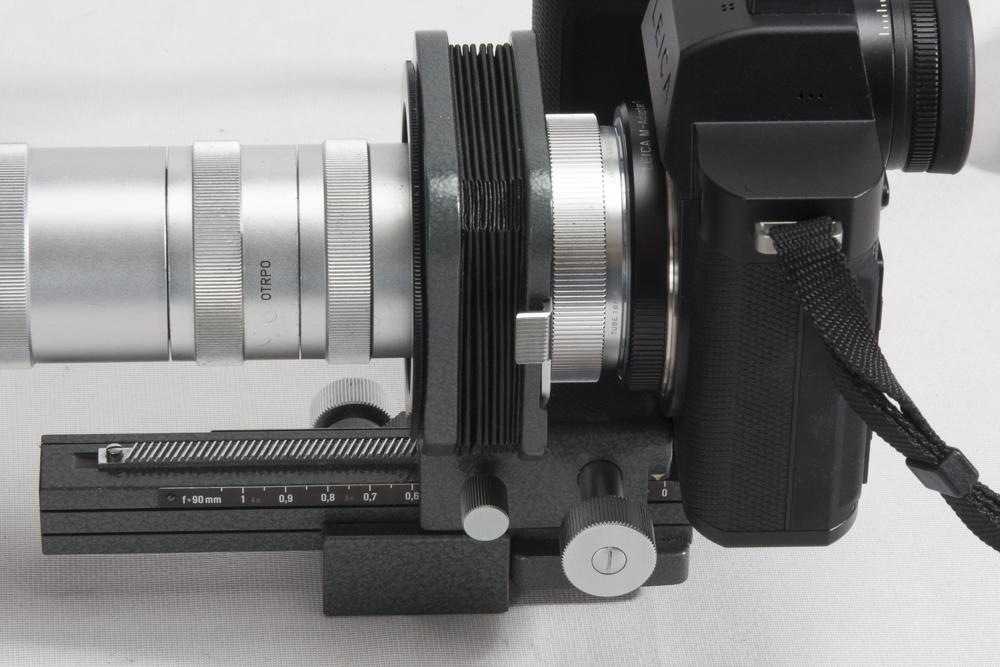
Showing the minimum permissible bellows extension.

Fully collapsed the bellows has a 48mm extension so only 5mm is sacrificed with this combination.

The 16mm M-to-M extension tube comes with engraved pits for 6-bit coding. I have coded it ‘001001’ for the 135mm Tele-Emarit which works well with the Elmar.


The 16mm extension tube 6-bit coded.

Cost:

My total investment is $255 and most of this hardware is easily resold at cost upon project completion. The Leitz bellows and adapter rings for the lens head are abundantly available on eBay, which offers a veritable cornucopia of choice despite the fact that the Leitz components are mostly 60 or so years old. All these parts are inexpensive and you will not find better mechanical engineering than existed in 1960s Leitz hardware.

The Bellows II in use:

It’s impossible to convey just how well engineered the Bellows II is. Both rack-and-pinion drives are beyond smooth with zero backlash and such is the rigidity of the design that nothing wobbles or shakes. German mechanical engineering at its finest.

Focus stacking:

Using the magnification feature of the SL2-S to focus the 135mm Elmar in macro mode is very simple and it’s child’s play to nail focus on a flat subject perpendicular to the camera. But most subjects are anything but flat and the very narrow depth-of-field in the macro range dictates the use of multiple exposures, differently focused, with the images combined in the excellent Helicon Focus application, which can be used as a plugin with Lightroom Classic. Since I wrote that piece in 2009 Helicon has adopted a subscription model (sigh!) but remains the breed standard and is recommended without reservations. The lower rack-and-pinion stage of the Bellows II makes changing focus/camera-to-subject distances very easy between shots. If you are using a regular macro lens then there is a large selection of focusing rails available at all price points.

Manual exposure is used to avoid density changes from image to image.

In Part II I will publish a ‘proof of concept’ result.

Note: Use on a digital Leica M body:

This kit can be fitted to a Leica M digital body and focused using Live View. However, you must use an M-to-M adapter ring between the rear of the Focusing Bellows II and the camera body. Fail to do so a the rear bellows plate will block the lens release button making removal of the bellows from the camera impossible without dismantling the bellows.

Leitz Bellows-R and the 100mm Macro-Elmar-R lens:

For use of this later hardware on the Leica SL2-S, click here.

Leica SL2-S multi-shot super resolution

Pixel shift technology.

For an index of all Leica-related articles click here.

If memory serves it was Hasselblad, a few years ago, who came up with the idea of pixel shift technology to make multiple exposures at very high resolutions, combining the images each of which is shifted 1 pixel by the IBIS sensor. Much loved by curators of oil paintings. Lots of higher end mirrorless cameras with IBIS now offer this, of course, as does my (now discontinued) SL2-S, so as it’s raining I decided to give it a try inside. You need a stationary subject anyway.

The super resolution mode is found at Menu->Page 1->Drive Mode->Multi-Shot.

Here’s the bookshelf scene – the red box highlights the enlarged versions below:


The target.

Camera on a tripod, the Leica gives you the option of 2s or 12s delays between snaps to let the vibes die down. I went with 12s. I probably should have used the electronic shutter for even fewer vibrations, but made do with the mechanical shutter. As Auto-ISO selected ISO3200 I also applied the LRC Denoise algorithm to both images which are shown at 300% magnification below. That figures to a 120” x 80” print. Critical manual focus using the EVF magnification feature was very easy. The multi-shot image is at left:


Super resolution at left, regular on the right.

Fun bit of technology. The multi-shot file came in at >170mB, though the resolution is reported at 96mB, four times the stock 24mB. I used the 75mm Voigtländer Ultron as it’s probably the highest resolving power optic I own. Actual aperture was f/8 – the SL2-S does a poor job of guesstimating the aperture, reported above. The camera warns you if your support is wobbly.

The multishot image looks perfect at 300% at a 24” viewing distance. I believe that in the current SL3-S (up to 60mp from 24mp) Leica has enhanced the technology to allows multiple images to be snapped hand held!

Leica SL2-S – fixing the strap

A temporary fix.

For an index of all Leica-related articles click here.

The only strap that I have found to be truly safe for over-the-shoulder carrying of a camera is the Upstrap and the reasons are simple. First it has deep nubbins on both sides of the rubber shoulder pad and for over-the-shoulder carrying that’s essential as the strap will always twist in practice. And every other strap out there appears to have a rubberized side and a slick side. Once the slick side is in contact with your shoulder the whole ensemble is nothing more than an accident waiting to happen. Second the embossed maker’s name on the Upstrap is invisible.


The nubbins on the Upstrap are on both
sides of the shoulder pad and are very ‘sticky’.

The stock strap for the Leica fails in three respects. It has only one rubberized side and they spared the rubber. The other side is as slick as it gets. Duh! And there’s objectionable and loud “LEICA” stitching which helps your neighborhood thief make a beeline for you.

I keep searching for a second Upstrap on eBay but so far without luck. Sadly, the company is no longer in business. My M10 sports the slimmer version (shown above) for lighter cameras and it works superbly.

So while I wait for one to crop up I have enhanced the design of the stock SL2-S strap and made it far less slippery using some leather patch and non-slip rug pad gripper.


The nubbins are more pronounced on one side.
These should be placed to the outside of the strap.


A two inch wide strip is cut.


A six inch long and two inch wide strip of leather patch is cut.


The anti-slip material is wound around the strap and the leather patch
applied either end to secure it, avoid damage to the original strap.

Pretty? No. Effective? Yes.

Leica SL2-S and FOTOS

Problem resolved?

For an index of all Leica-related articles click here.

In Part III I made mention of the poor experience I had with FOTOS. I don’t care to download images from the camera to my iPhone but I do want GPS data for search and retrieval in Lightroom Classic. FOTOS did not work properly, recording incorrect times and constantly disconnecting from the camera.

Overnight Apple applied yet another of its endless iOS ‘upgrades’, meaning yet another fix for one of the most porous operating systems yet devised. I’m now on 26.3.1. And you thought Windows was bad? I think that makes four upgrades this year. It’s time critics ceased praising Apple for its apparent diligence and started damning it for making a lousy OS in the first place.

Anyway, with the new OS in the iPhone and the FOTOS app updated with the latest version in the App Store I restarted the connection with the camera and took phone and camera for a walk. The iPhone is set to 5gHz wi-fi.

In the setting screen below (Page 5 in the screen system) I had the Wi-Fi Sleep Mode set to ‘Never’ thinking that sleep might mean yet another 30 second wait when the camera was again operated. The result was that the battery was completely depleted in 80 minutes! However, there were no unprompted disconnections, the rectangular LED at the lower left corner of the LCD display blinking a bright blue throughout. (It’s so bright it washes out in the picture below):


FOTOS up and running, switched to ‘After 5 minutes’.

So I switched the Wi-Fi timeout to ‘5 minutes’ to determine the effect on battery life. In the event, after a 5 minute pause, the blue LED continues blinking and placing an eye to the EVF sees the camera wake instantly. So the ‘5 minute’ setting makes sense when the goal is to preserve battery life. After a further 80 minutes with a fresh battery the battery was just 25% depleted. Now this is not quite a fair comparison as I was not taking pictures during that period, but I would estimate that a battery life of 2-3 hours using a 5 minute wi-fi timeout is a reasonable expectation. Nonetheless this cheap and capable backup is recommended, and you will need to re-pair the camera and FOTOS after changing batteries. It’s hard to understand what benefit the ‘Never’ setting confers and the Instruction Manual sheds no light on the issue.

It does not matter whether the iPhone is on or off. FOTOS continues to run in background mode, as long as the camera is left On. I noticed a slight increase in the temperature of the camera body – I measure a maximum increase on the baseplate at 19F after 80 minutes when the ambient temperature was 73F.. No big deal, but clearly something in there – presumably the wi-fi chip – is working hard.

So – for now – it appears that FOTOS is working correctly, until the next iOS change, I suppose. The SL2-S is on the latest OS, version 6.2.0 released in early 2025. Whether the issue was attributable to a dated FOTOS app or to a dated iOS I have no idea as I updated both without interim testing. Not great diagnostic practice, I admit, but I was dreaming of ‘It Just Works’. Remember that Apple slogan?


Correct location mapping in LRC’s Map module.

Update 3/10/26:

After one happy day with a stable connection I cannot reestablish that desirable state of affairs. Simply stated FOTO’s pairing with the iPhone is a disaster. Huge time sink. I’m moving on, forgetting this ‘feature’.

A second update 3/10/26:

I refuse to let this thing beat me, and may have come up with a fix. In an effort to defeat the constant disconnection issue I went to Menu->Page 6->Camera Settings->Power Saving->Auto Power Off and changed the default of ‘2 min’ to ‘5 min’. So far I have been up and running with the blue diode flashing merrily away for 60 minutes, which has to be a record …. The FOTOS app persists in telling me “Camera is not connected” despite what appears to be a good connection. What a mess. More as I experiment with this.

Well, that does not work. While the blue diode continues flashing snd the top display indicates wi-fi is on, all the GPS data are frozen at one location. The time stamp is good, though, as I have told the SL2-S not to use time data from the iPhone. Small progress. The next step will be to revert to Menu->Page 5->Leica FOOS->Wi-Fi Sleep Mode->Never. I still have Menu->Page 6->Camera Settings->Power Saving->Auto Power Off set at the factory default of “2 min”.

Leica SL2-S with Leica M lenses – Part III

Field experience and some snaps.

For an index of all Leica-related articles click here.


The SL2-S with the M-to-L adapter fitted.

Having spent quite a bit of time tuning the SL2-S to my way of working in Part II, meaning simplifying things to the point that it is more like a Leica M10 to operate with all extraneous noise/buttons/settings eliminated, I set about taking the camera for a spin. I brought with me the Voigtländer 21mm Aspherical Color-Skopar and 75mm Ultron, along with the Light Lens Lab 35mm 8 element Summicron clone. For the two lenses stashed in my pockets each is attached to a Leica Lens Coupling ring for safe interchange. All three are properly 6-bit coded for correct focal length recognition in the SL2-S.

The Good:

  • Beautiful color rendering SOOC using DNG/RAW.
  • Exceptional ability to recover burned out highlights.
  • Intuitive handling. The great mass of the beast is somewhat mitigated by the small and light M lenses and the absence of dozens of buttons and controls makes for easy use, even with gloves. In this regard the body is close to the best ‘glove handling’ body ever, the Leicaflex SL.
  • Drop dead phenomenal manual focus when using the magnifier feature. I took over 5 dozen images mostly at or near full aperture and each was critically sharp where I focused. The best MF experience ever, especially with longer focal lengths at large apertures where the focus point is truly binary. Either right or wrong. Accordingly, I did not bother with focus bracketing.
  • Exceptional EVF – once tailored for color and brightness it’s fast and responsive. I completely declutter the view so that only the shutter speed and exposure compensation are disclosed in very small font size when the first pressure on the shutter release is applied.
  • Lovely quiet shutter sound. Just a joy to perceive.
  • Effective IBIS.
  • The inexpensive aftermarket battery – $39 not the $240 Leica asks – works fine.
  • Framing is perfect. What you see is what you get. Not something that can be said of the M10.
  • I made maybe 15 lens changes on this outing and found the process safe, easy and speedy using the Leica M to L adapter. Just like using an M10 in this regard with a large, easily accessed lens lock release button.
  • Flattery. When using the M10 on the street I get the question from passersby “Is that a film camera?” surprisingly often, to which I lie, replying insouciantly “But of course. I would never use anything else”. Today, with the ugly hulk of the SL2-S slung around my neck, I got “Nice camera”!

The Bad:

  • Though it’s shown correctly on the camera files, in Lightroom Classic EXIF data display a time stamp 2 hours ahead of what is correct. This may be a Leica FOTOS anomaly. I will research it more.
  • Exposure (using Multi Field) is constantly 1/4 stop over in all lighting conditions. I simply amended my Lightroom Classic import preset to adjust for this.
  • The level horizon indicator is poor, often being incorrect. I have removed it from the EVF display.
  • Battery life is mediocre. I chewed through 25% in one hour, albeit with the awful Geotagging link to FOTOS on my iPhone running (or not) all the time which probably did not help. See below. I never turned the camera off, but did have the EVF set to sleep after 2 minutes of inactivity. No LCD chimping.
  • The Leica camera strap will have to go. The fact that it is rubberized on one side but slippery on the other does not encourage confidence and I dislike the loud LEICA letters emblazoned on it. It does do a good job of spreading the load, though.

The Ugly:

  • The camera constantly drops the link to FOTOS running on my iPhone 12 Pro Max. It tells you the link has been lost and subsequent images retain the last known good GPS data, which are incorrect. Further the date stamp remains frozen from the time applicable when FOTOS was first invoked. I will revert to using this technique for proper GPS recording. If I find a fix I will report on it.

Update March 9, 2026:

I resolved the issue with FOTOS disconnecting and report on that and on battery life issues when the app is running here.

Some snaps – a few treated in Silver Efex or Color Efex from the NIK collection:


Snaps from a first outing.