America votes.

Click the image for a larger version.
America votes.
Another Night Mode stunner.
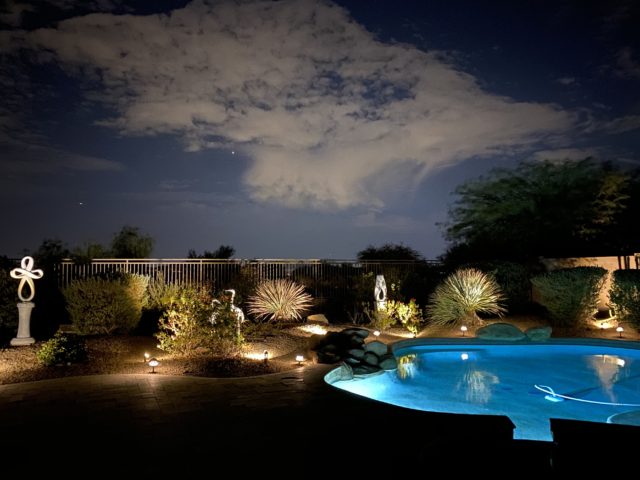
iPhone 11 Pro, 3 seconds, handheld.
Night Mode
With the nights getting colder, it’s time for the annual overhaul of the propane heater on the patio. This exceptionally bad design dictates that something fails annually. Over the four years of ownership, the pilot has got clogged, the tilt switch failed and finally, this year, the pilot had to be completely replaced as it was beyond redemption. (The main burner will not ignite if the pilot is faulty). $18 and some sweat equity did the trick. Quite why so commonly used a device should stick with 1950s technology last seen in the Eisenhower administration defeats me, but the chances are if you eat at an outdoor restaurant equipped with these propane heaters, half of them will not be working. The lead chap at Chernobyl probably cut his teeth on propane patio heater design.
As an example, the tilt switch, which is a safety device intended to disable the main burner in the event the heater is accidentally tipped over, uses a mercury switch last seen 50 years ago in domestic HVAC systems. It is designed to fail and I simply bypassed it when it did so. The risk of a tip over in my location is zero. One thing less to go wrong.
The spark starter finally failed this year and I have given up on replacing it in favor of a wand type gas lighter. Simple, fail proof and cheap.
To cut a long story short I finally got the heater working and when it works it really is an object of wonder, putting out amounts of heat that electric alternatives can only dream about. A 5 gallon propane tank last for many hours.
Add the firepit (no pilot, no sparker, no tilt switch and bog reliable as a result), which also uses bottled propane, and you have a pretty jolly setting for watching the TV at night. As we fired up another episode of the wonderful ‘Endeavour’ series about the early life of Inspector Morse, starring that fine Welsh actor Shaun Evans, an actor far superior to the overrated John Thaw in the BBC original, it struck me that it was time to again report on the magic of Night Mode in the iPhone 11 Pro.
 Winston enjoys some late night TV.
 The sole illumination for this snap was the two propane sources plus the smallish flat screen TV some 10 feet from my son. This image is ‘straight out of camera’ and hand held. Night Mode kicks in automatically when needed.
The just announced iPhone 12 Pro further improves Night Mode by enhancing focus accuracy using the newly added LIDAR detector. I can’t wait.
In beautiful Scottsdale.

iPhone 11Pro snap.
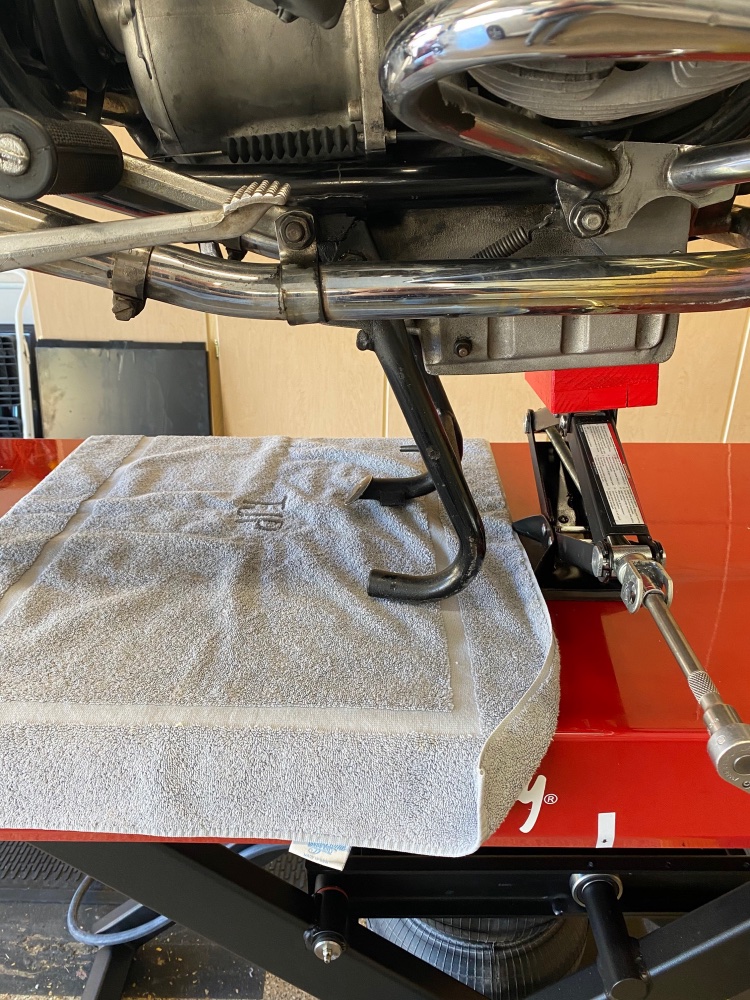
The scissor jack and related modifications were detailed in Part IV.
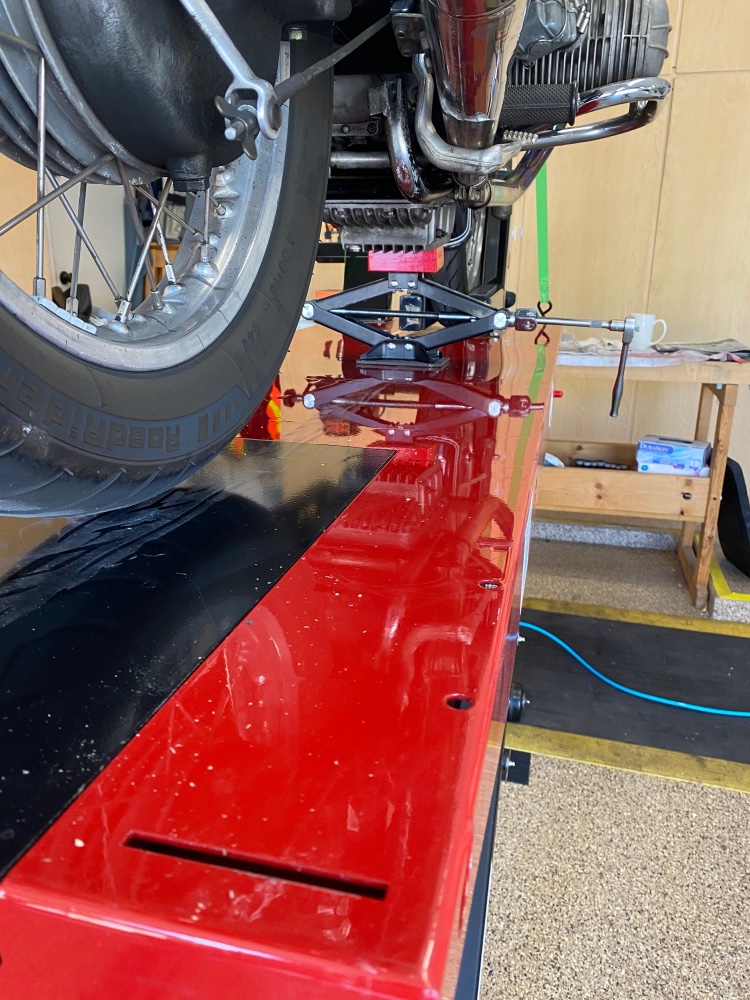
The primary use of the jack is to raise the motorcycle close to its fore and aft fulcrum, using the oil sump as the jacking point. This process is required when either wheel has to be removed with the bike on the lift. The front wheel cannot be removed without use of the jack as it is anchored in the vise on the lift’s table. The rear wheel cannot be removed without use of a jack as my BMW airhead favors the rear wheel at rest. And the center stand cannot be deployed safely on the table without considerable strength and a host of related issues. As the bike is pulled up and back onto the center stand it moves back several inches, which cannot be done if the front wheel is in the vise, though there is a way to do this. See below.
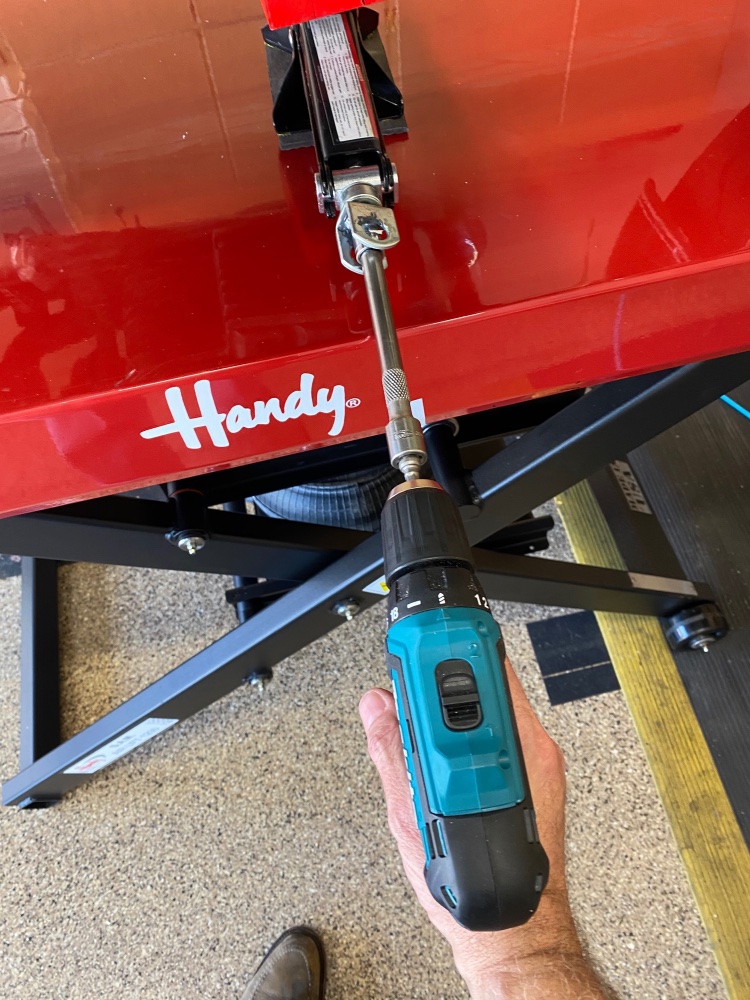
A 3/8″ socket drill adapter is used in a hand drill to raise the jack’s platform close to the oil pan. The screw in the jack has a fine pitch to confer mechanical advantage (not much stress on the user) but the trade off is that a lot of cranking is required. The electric drill makes this a speedy process.
The front part of the oil sump is just ahead of the bike’s center of gravity which resides an inch or two behind the center stand pivot. That’s a small distance so there is very little turning moment on the jack itself, and little risk that it will tip forward.
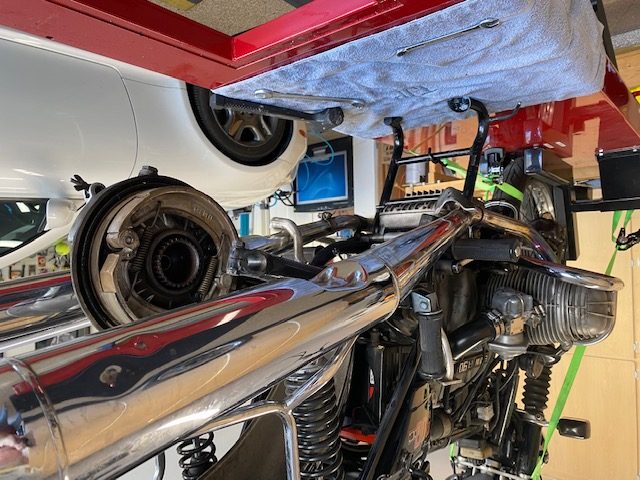
As the ratchet is cranked first the rear wheel will rise off the table, permitting removal of the drop-in rear panel, removal of the wheel’s axle (one pinch bolt and one axle nut). The wheel can then be dropped down through the open panel space.
As the ratchet is operated and the bike rises, the front wheel, still clamped in the vise, permits rotation of the machine about the front axle. I have tie down straps installed at the front and these tighten up slightly as the front shock compresses. I did not find any need to loosen the tie downs.
If you are really strong and a master mechanic like William Plam, you can slam the center stand forward with the front wheel locked in the vise using skill and strength, scratching up your table’s surface in the process. You can see William do this at 27:03 in this video. His large collection of professionally made videos is a joy to watch, full of his decades of expertise and containing lots of tips and techniques. Highly recommended.
I am neither strong, nor a master mechanic and do not like scratched up tools, so I keep cranking on that ratchet until the bike rises a couple more inches at which point the center stand can be deployed by hand, no strength involved. As you can see, I use a monogrammed towel to protect the surface of the table. You can use a plain one if that’s all you have.
At this point the jack can be dropped and removed. If you are pulling the rear wheel you must secure the cross rail of the center stand to the front wheel’s rim, or to the exhaust cross flow pipe, or to the vise on the table. This obviates the risk of the bike falling off the center stand which has no rear wheel to prevent it doing so in the event the front wheel is not locked tightly in the vise.
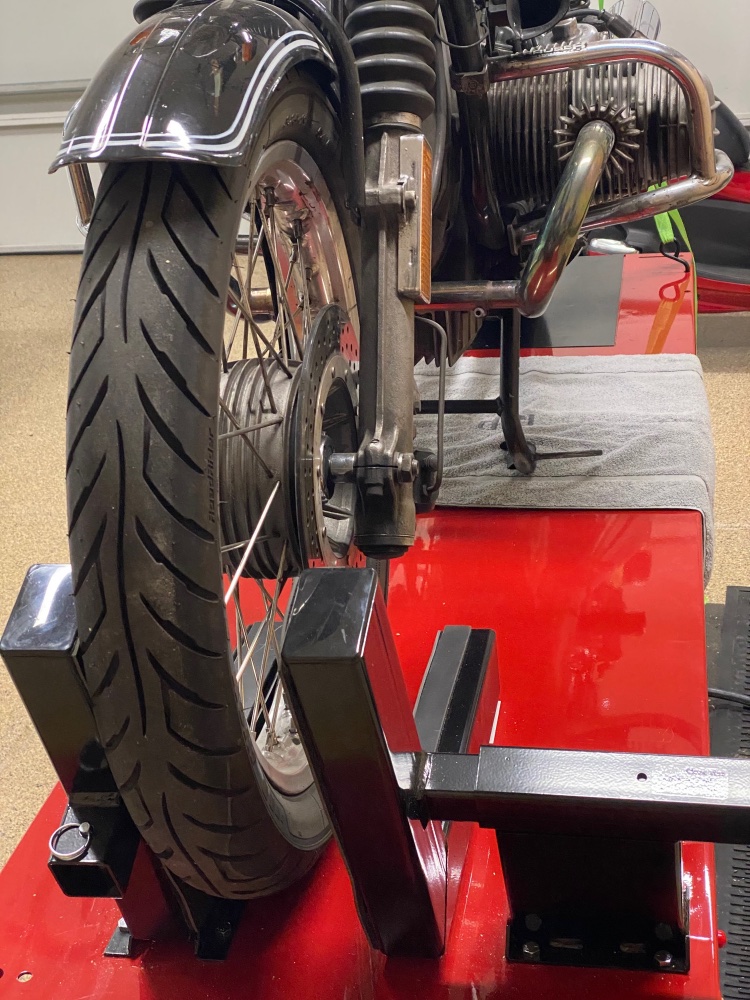
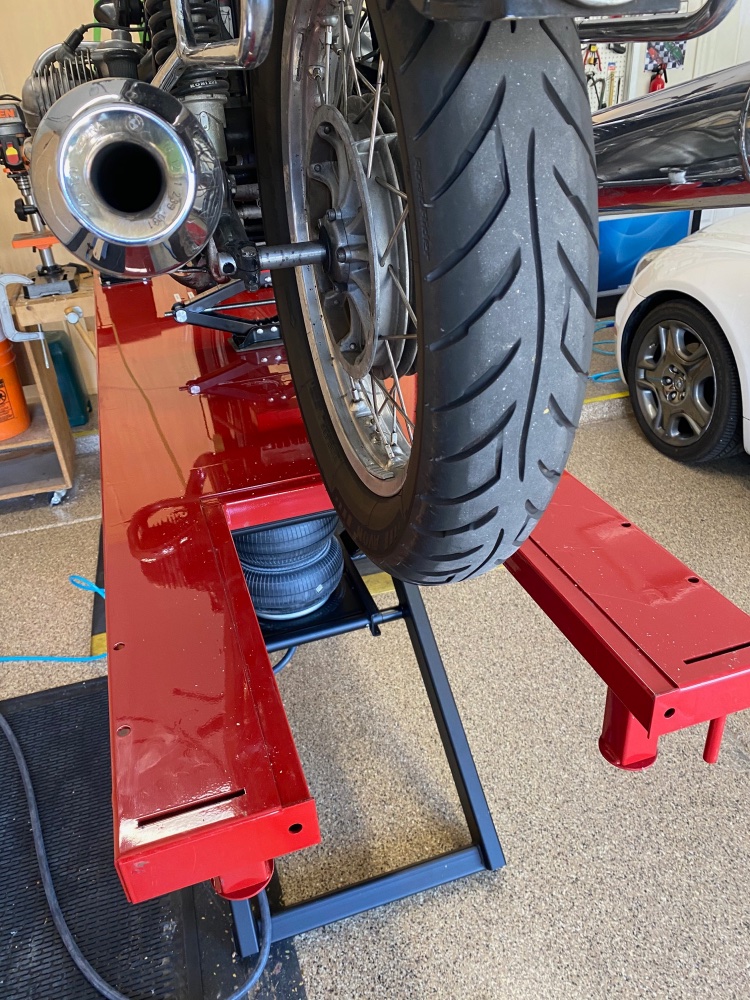
I am working on replacing the taper roller bearings in the front wheel hub so have to remove the front wheel – two axle pinch bolts must be loosened and the axle nut must be removed, along with a washer and spacer, for the axle to be withdrawn and the wheel rolled forward and out onto the workbench. In the next image I have removed the cross brace on the vise and made it possible to remove the wheel forward.
So that inexpensive jack paid for itself very quickly.
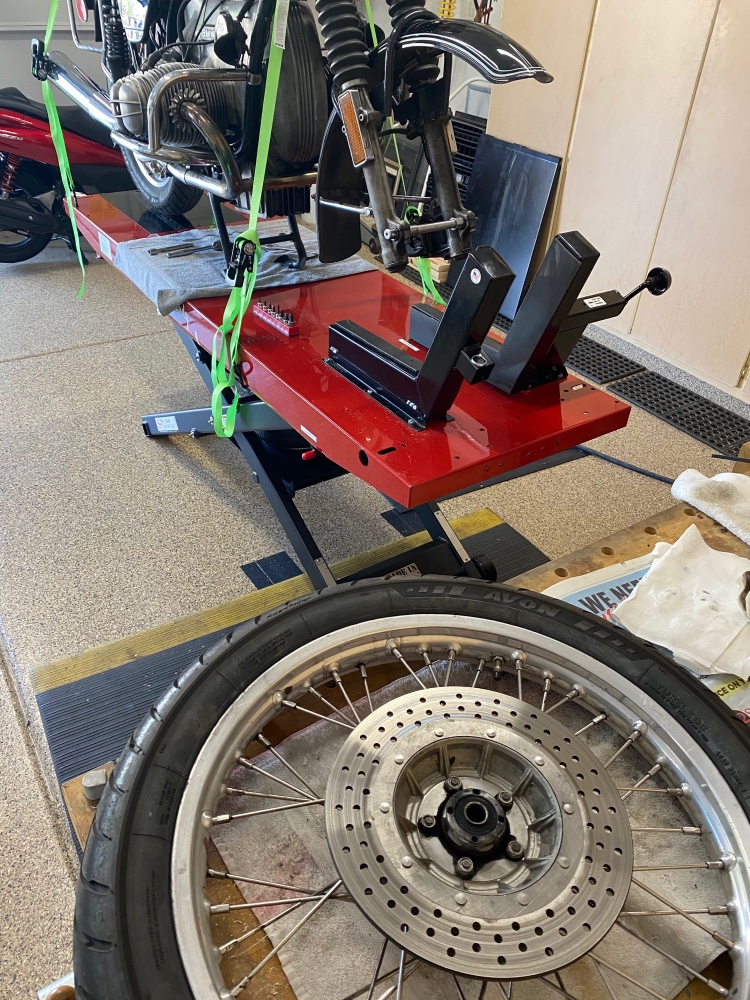
Rear wheel removed, ready for bearing replacement.
Storage of the lift is easy, with movement about the garage greatly facilitated by the furniture dolly:
While I find the smallish workbench adequate for my needs, if additional workspace is needed the lift can be raised to workbench height.
Click here for a brief video showing how to place the bike on the lift.