Finally uploaded.
After two weeks of uploading, some 170gB – comprising my user settings and Lightroom catalog – have been uploaded to CrashPlan’s servers. I first wrote about this cloud storage service here.
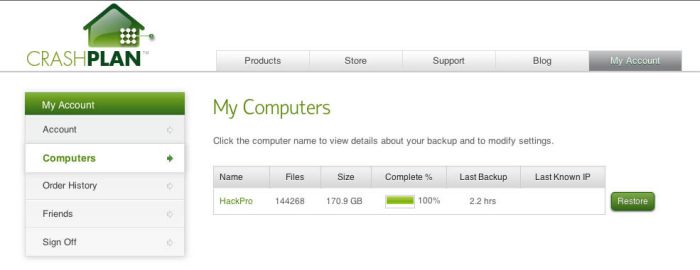
100%! Two weeks of uploading ….
Hereafter, uploads will be limited to incremental changes as new photos are added to Lightroom.
So how well does recovery work? Click on the ‘Restore’ icon and this is what you see (CrashPlan uses East coast time):
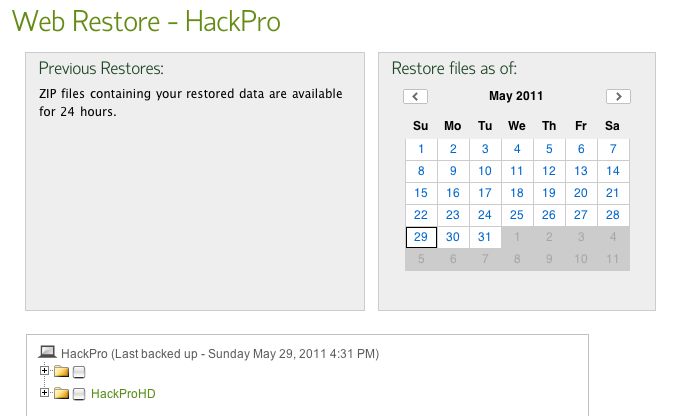
Note that you can recover at any date – just like in Apple’s Time Machine.
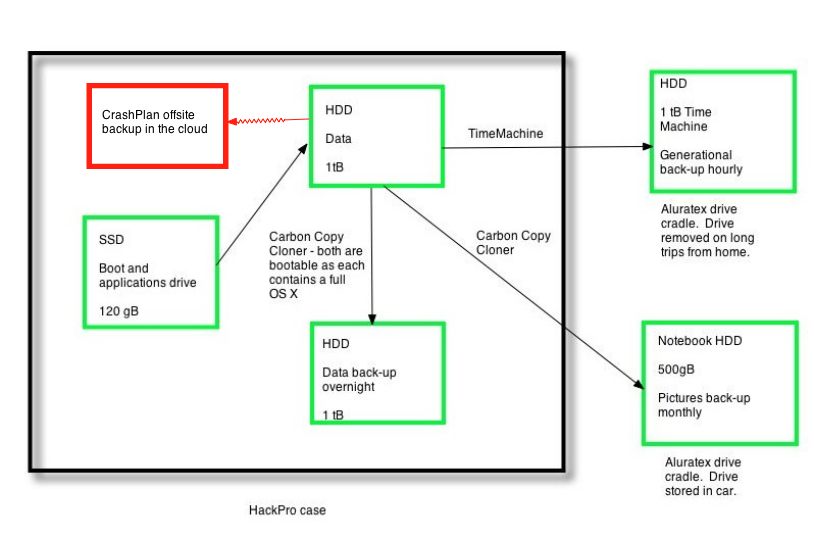
The first, unnamed, dropdown is the User’s directory, which CrashPlan uploads by default. The second, ‘HackPro HD’ contains only those directories elected when the upload commenced. In my case, that means my Lightroom catalog:

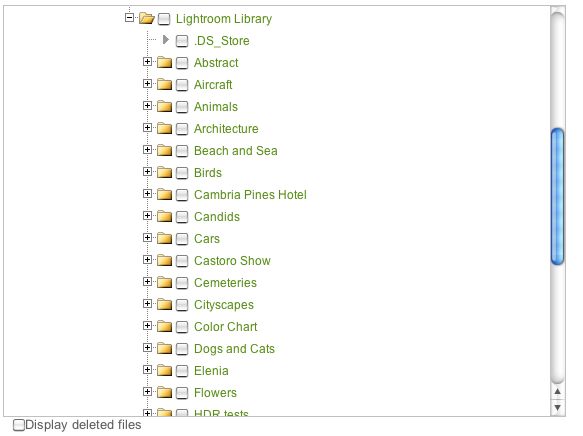
Drill down and you get to the catalog of Pictures:
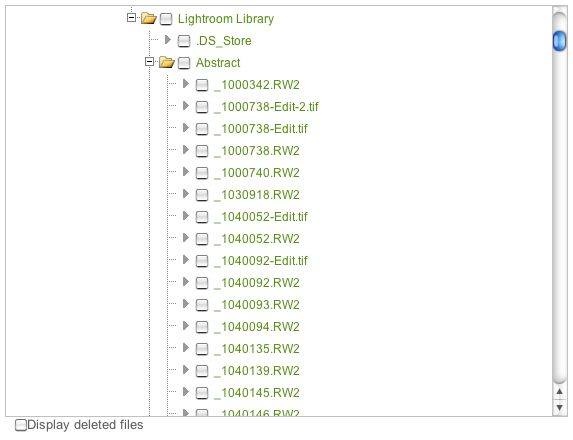
One more step and you see the actual RAW, TIF or JPG files:
Check the files to recover and you see this:

I clicked on ‘Click here to download your restored files’ and the 12.5mB RAW file was deposited on the HackPro’s Desktop in 24 seconds, using my 10 mb/s broadband connection. That’s 0.52 mBytes/second compared to the theoretical maximum of 1.25 mB/s (10 megabits equal 1.25 megabytes and the line is 10 megabits/second). Not bad. The Desktop is a good destination as there’s no risk of overwriting your Lightroom catalog.
A couple of clicks and the file is in Photoshop, ready for processing:

File restored from CrashPlan’s cloud server. G1, kit lens @ 30mm, 1/320, f/5.6, ISO 100.
You can also restore the sidecar file with all the processing data, to avoid having to reprocess the picture.
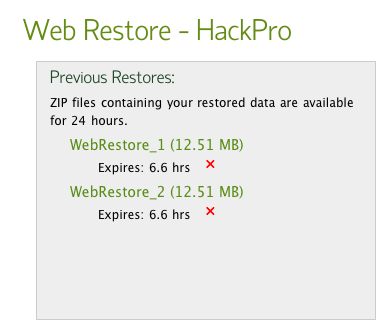
Restored Zip files remain separately available for 24 hrs – the original RAW (or whatever) file remains untouched:
The only anomaly encountered so far is the wildly erratic reporting of upload status. I asked for daily email updates and got them at inconsistent times. That’s troubling, as inconsistency is the last thing I want from a cloud backup service, but the files appear properly uploaded and easily restored:

Erratic reporting from CrashPlan.
A check of files in my HackPro Lightroom and the CrashPlan directories confirms a like file count.
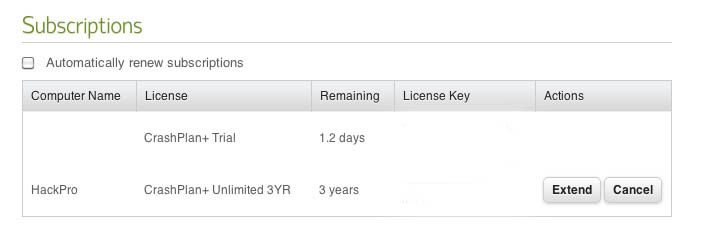
So, for $50 a year with currently unlimited data volumes, CrashPlan looks to be a useful supplementary backup plan. Just don’t make it your primary one. Are you about to trust all your pictures solely to a fragile ‘cloud’, where you have no independent verification of the adequacy of procedures or the financial solvency of the business?
Finally, recalling my earlier mantra that the only valid backup plan is one which has the qualities of paranoia and mistrust at its core, I made a reminder in iCal to prompt me to do a test restore of a file monthly. That way I get some comfort that the cloud database is not corrupted. It takes seconds to do.

Update June 13, 2011:
With incremental upgrades to my Lightroom catalog on the HackPro work machine being conferred faultlessly, and automatically, in the CrashPlan cloud storage database, I have signed up for 3 years for a total of $119.99:
In Part V I look at backing up additional files and at how best to backup applications.