Category Archives: Cameras

Things that go ‘Click’

Leica M10 – Part I

A troubled history leads to a fine camera.

For an index of all Leica-related articles click here.

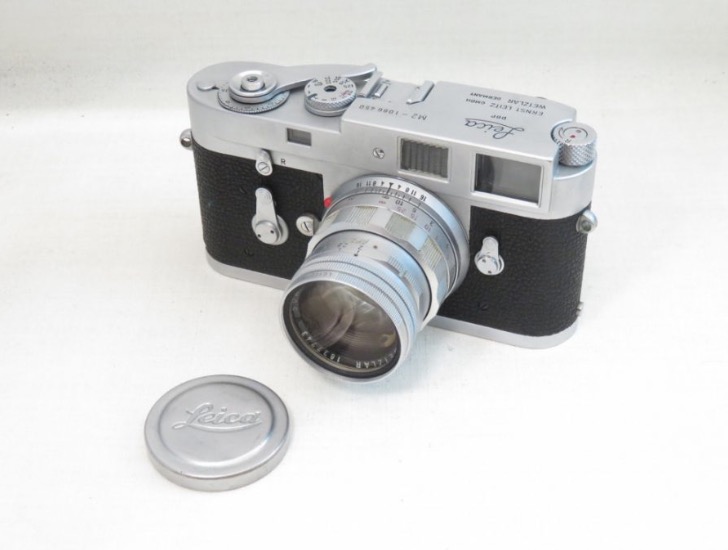
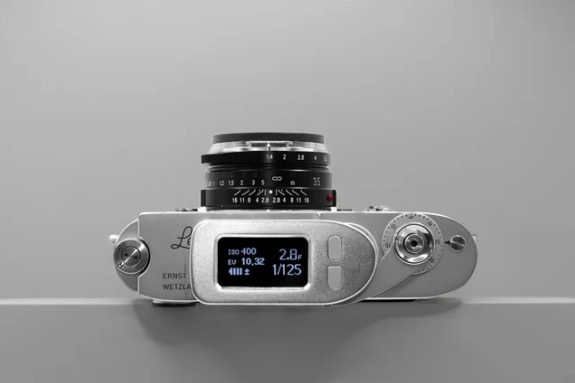
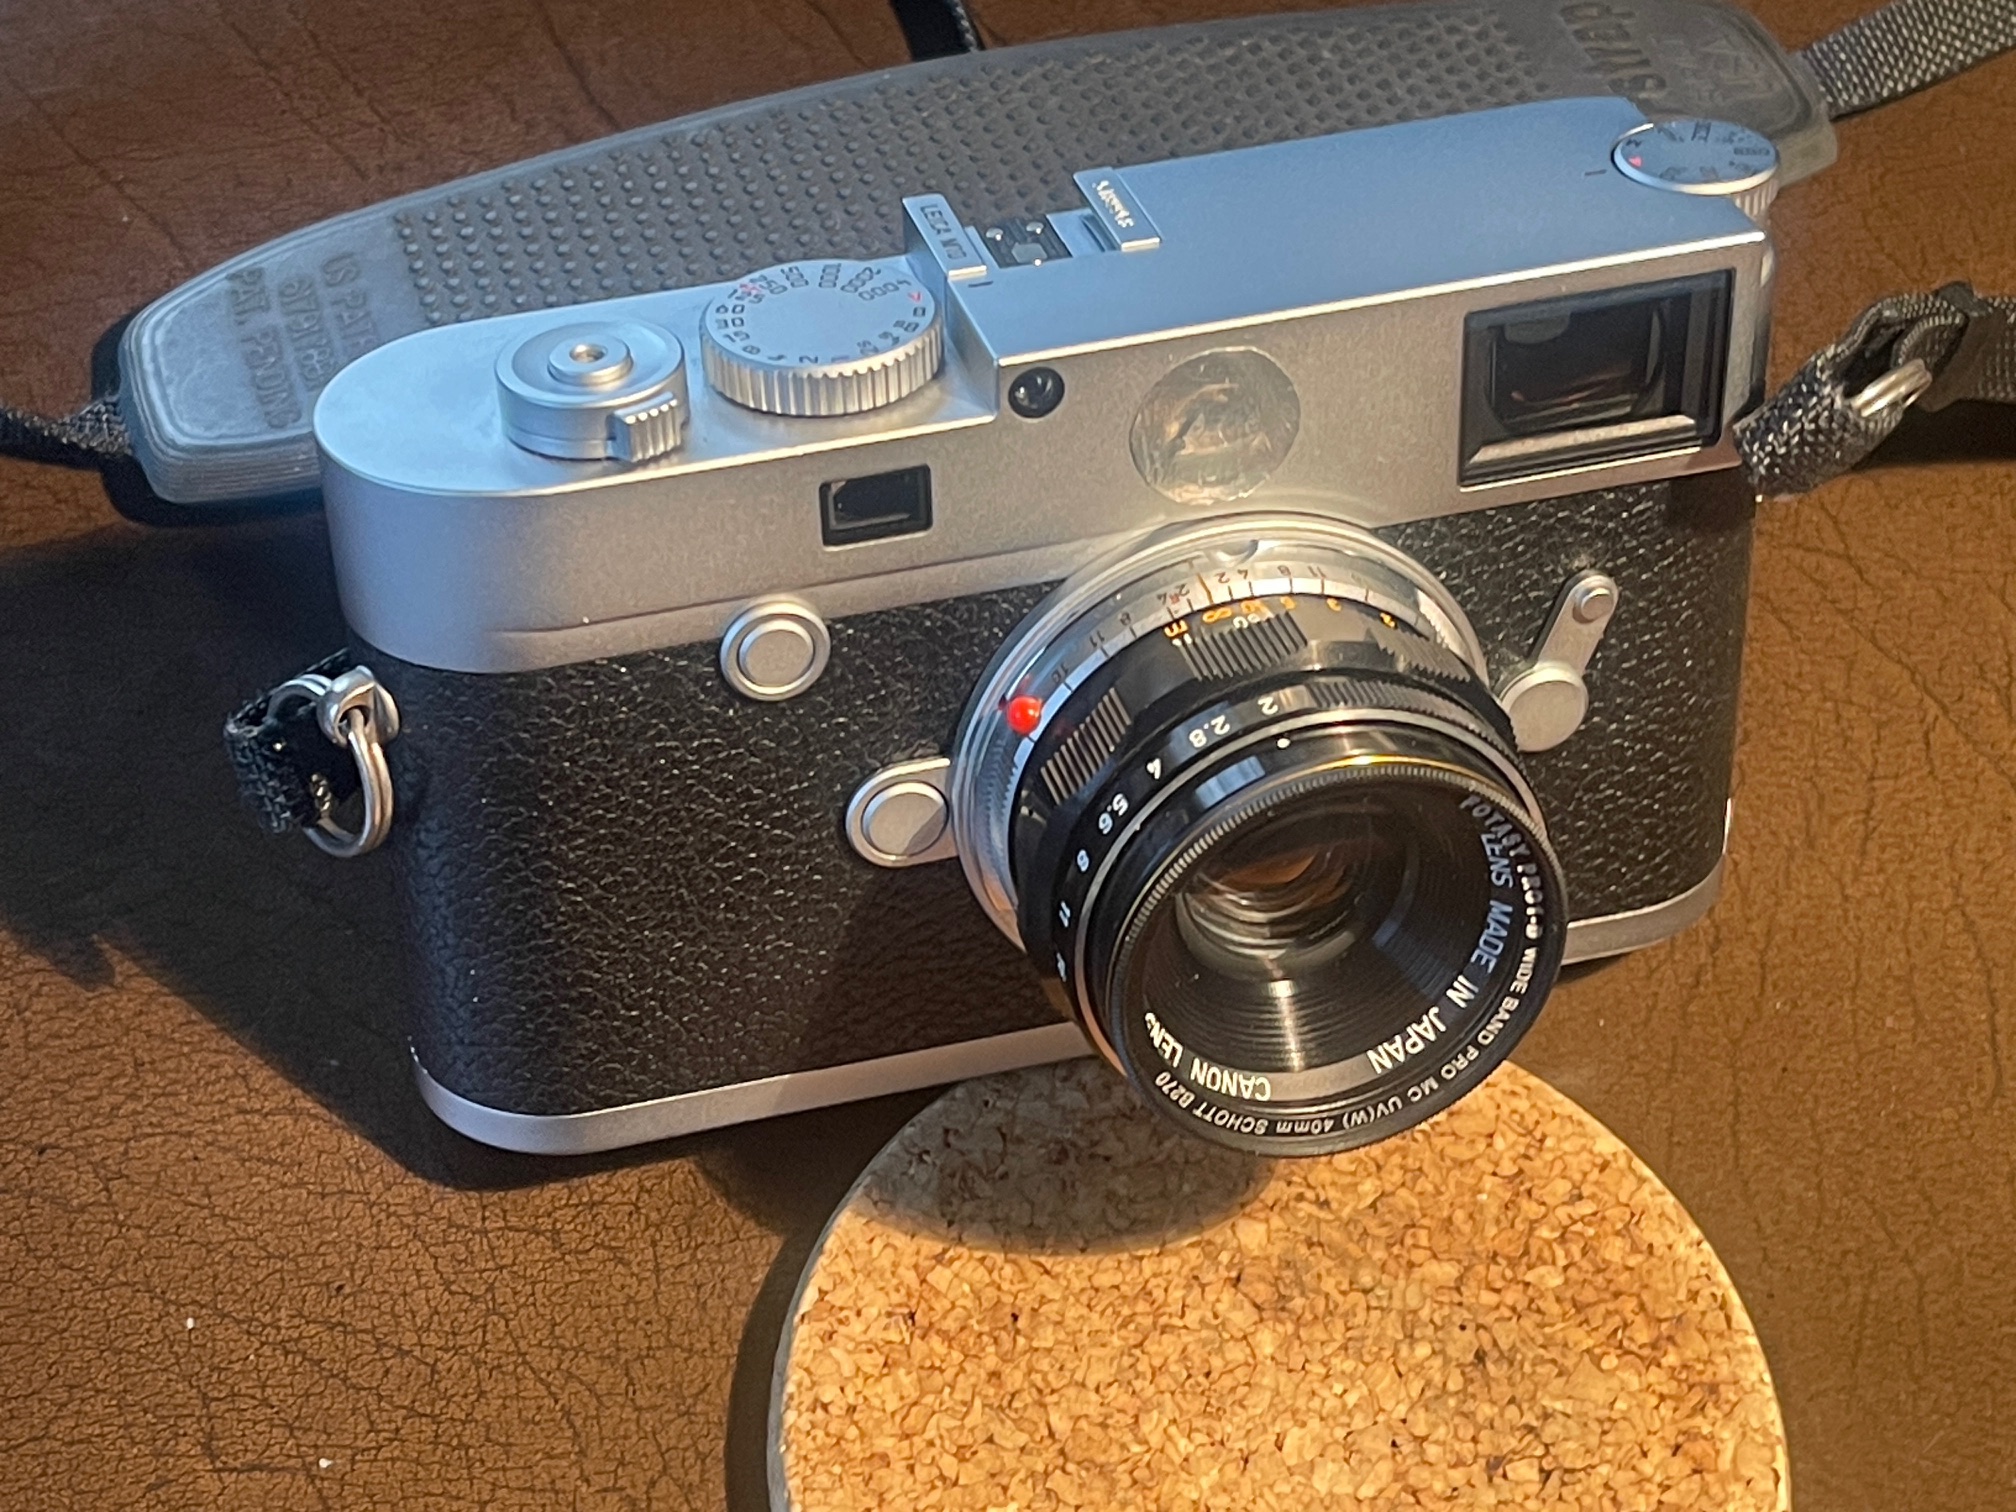
I bought a used Leica M10 the other day. What follows details how I got there.


Just arrived.

Leica’s understanding of the digital landscape was tortuous and error prone to state it mildly.

Leica M digital history: Their first effort, the Leica M8 in 2006, very late to market, used a Kodak (!) 10mp sensor and was a miscue, as it used a cropped sensor. For goodness’ sake, one of the prime reasons to use a Leica is the 35mm lens. Suddenly it was 50mm because of the crop. And your exotic 21mm became a mundane 28mm. As with all digital Ms the shutter is now metal and vertically running. The body is 14% thicker than that of the film Leica. In its defense I suppose the M8 did force Leica into learning how to make a digital camera with the M8. It just was not a very appealing one. To add insult to injury Kodak got the specs for the sensor’s cover glass wrong resulting in Leica having to offer free IR filters to owners to try and reduce poor rendering of dark fabrics. And that’s before mentioning the maximum ISO of 640 (seriously) and random lock-ups like a Windows computer of yore. A hot mess.

Then came the Leica M9 which was their first full frame sensor effort. But someone at Leica chose a manufacturer seemingly clueless about sensor engineering (yup, Kodak again) and after a while their sensors developed corrosion, rendering the camera useless. And, of course, there are no spares.


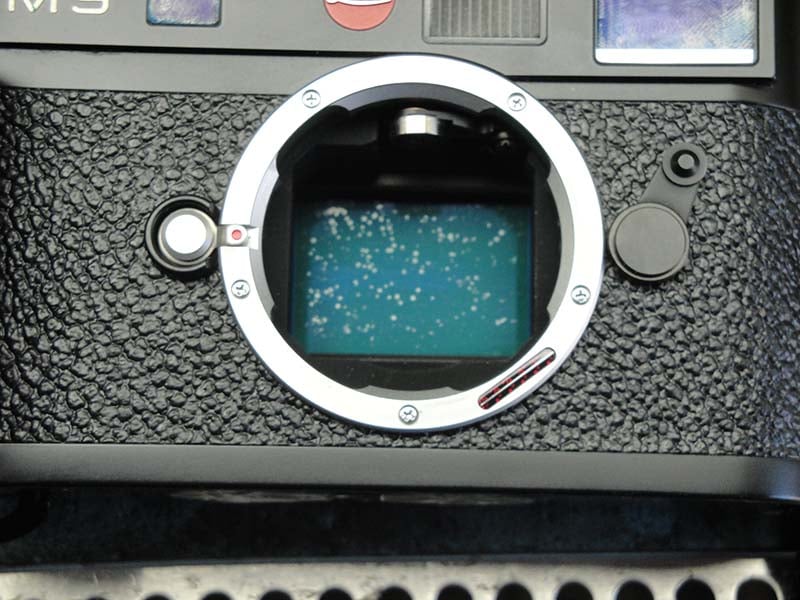
Corroded sensor in an M9.

There’s a repair shop which fits aftermarket sensors …. for $2,500. The technical information regarding the causes of corrosion is very well written on that site and recommended to all Leica M9 owners. Now that’s what I call a repair bill. Both the M8 and M9 used CCD sensors whose colors I love (my APS-C Nikon D2x used one), but the trade off is grain and a lower dynamic range compared with CMOS designs. The M9’s CCD sensor had 18mp. Nice, but the shutters in the M8 and M9 were Nikon DSLR noisy and the garish large ‘M9’ script on the front of the top plate just added embarrassment to loudness, the latter courtesy of that red dot. Surprisingly aftermarket replacement batteries are listed by Amazon.

It gets worse. Much worse. The next effort was the strangely named Leica M240 which now exceeded the size of the lovely film M body because another dope at Leica decided to add video. This porker was no less than 25% thicker than the film cameras. The sensor was designed by a Belgian company named CMOSIS and made by STMicroelectronics in Grenoble. Video in a street snapper. Uh huh. But that’s far from the worst of it. You see the aftermarket never made batteries for the camera as the market was too small to justify the tooling costs and, yup, you guessed it. Leica no longer makes the battery, so every M240 will soon be an $8,000 paperweight.


The M240 $8,000 paperweight. Fat and useless.

No, you will not find it on Amazon and Hung So Low sure as heck is not making it. It was Leica’s first effort with a CMOS sensor and had no corrosion issues. M240s can be had for under $3,000 but once the dire battery situation gets recognized they will quickly fall to zero. Worthless. If there was one really good technology development in the M240 it was Leica’s inspired crafting of a series of conical micro lenses to address and correct color fringing issues with wide angle lenses. Now that was genius indeed.

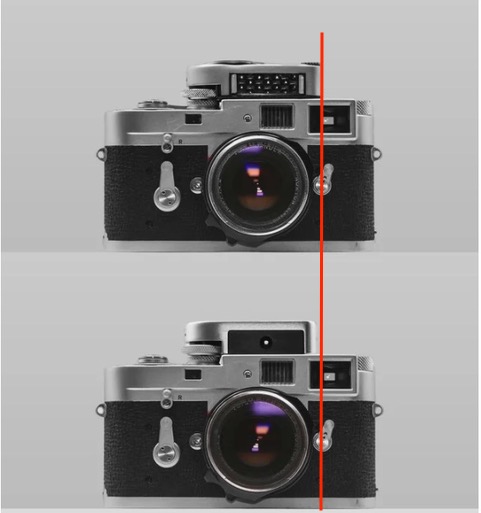
Finally the Leica M10 came along in 2017, priced at $8,995. The sensor was made by the same Belgian company as for the M240. The shutter was now reasonably quiet, like on the M3 of 1954. 24mp, a battery which is still made, no useless video, and the size was almost back to that of the M3. The heights are now identical but the M10 is still 16% (5.5mm) thicker. The button count was reduced and someone is cleaning up selling replacement stick-on logos to cover that ridiculous red dot which screams ’steal me now’. There are two things to dislike about that unnecessary red decoration. First, it screams nouveau riche when all the self effacing street snapper wants is oldveau pauvre. Second, it loudly announces ‘Steal Me Now’. The shortest shutter speed is 1/4000th and there is no electronic shutter. I bought a replacement for the red logo from AGS Supply. It looks like the screw on the M10-P but is actually retained with two-sided sticky tape, just like the red dot. Silly expensive but the alternative of a piece of tape would be an insult to the gorgeous body. The M10 is now discontinued.


The silver tape covering the garish red logo will have to do for now.
The guiding design ethos of the Bauhaus remains, first seen in the 1954 M3.

One interesting variant was the M10-D which deletes the rear LCD, harkening back to film days. I would much prefer this over the stock version, but do you really expect me to pay $2,000 more for less? The M10 was the first digital M that spoke to me on paper, but it required too much paper to buy. I decided to wait, knowing that digital devices lose value faster than a newly minted politician loses his integrity.

With the Leica M11, introduced in January, 2022, also at $8,995, Leica finally knocked it out of the park with a 60mp sensor, switchable to lower settings of 36mp or 18mp. The added sensor Back Side Illumination saw the already good dynamic range of the M10 grow by almost 2 stops. But who needs 60mp? And at almost $10,000 now without a lens you need a really good spell in the market not to feel the pain. Or wait three years for used prices to halve, like with the M10. It’s unclear who makes the sensor for the M11 but given that Sony invented BSI technology it may well be the Japanese company. The M11 offers a silent electronic shutter option for the first time. Nice. That I would like to have in the M10. There’s also 64gB of internal storage so you do not even need an SD card and that 64mB will store at least 2,000 DNG/RAW files. Phew! But, then again, a 64gB SDXC card costs all of $15 so if you are buying the M11 for its internal storage a prior visit to your shrink is probably advised. It’s a current model so wait three years after it’s discontinued to snap one up at 50 cents on the dollar.

Well, here’s hoping that they keep making batteries for ‘my’ M10, even if they are ridiculously priced. The user’s manual states that batteries are only good for a scant 4 years.

Cost: But the elephant in the room is the cost of a good used M10. Even 5 years after it was discontinued it’s still silly expensive. A good user film M2/M3/M4 can be had for $1,600 so the M10 is almost thrice as much. You will not find one for less than $4,500. The way I rationalized this outlay was simple. It’s equivalent to 110 rolls of processed and scanned film. Film is as ridiculously expensive as the modern digital M. 110 rolls is not a lot. Mine came from an authorized Leica dealer with a 12 month warranty and a spare battery. Nice, as the M10 is reputed to be something of a battery hog.

One snag is that when it comes time to sell the M10 for something newer, it will have significantly depreciated from today’s cost whereas the film M bodies, if history is any guide, will continue to keep pace with inflation. That’s a sad fact of throwaway digital technology. At some point in the future there will be no key replacement parts for the M10 just as there are no batteries for the M240.

Why did I upgrade from film after returning to the Leica M3 after a 20 year absence from the brand? Well after running a few rolls of Kodak Ektar through it two things became clear. Large 13″ x 19″ prints from the scanned full frame were perfectly feasible. But start cropping and the resolution of the scanned file is simply inadequate. And that even applies to the highest quality scans made with a 36mp Nikon D800 and a dedicated ‘scanner’ setup. The scan was running out of resolving power way before the lens did and, let’s face it, who wants to depend on the tender mercies of the USPS and the interminable wait to get the mediocre scanned results from a commercial processor?

Knobs and buttons: The design philosophy of the M10 could not be more different from that of the typical DSLR. On my Nikon D800 I count no fewer than 15 physical controls on the back plus another 11 on the front for a total of 26.


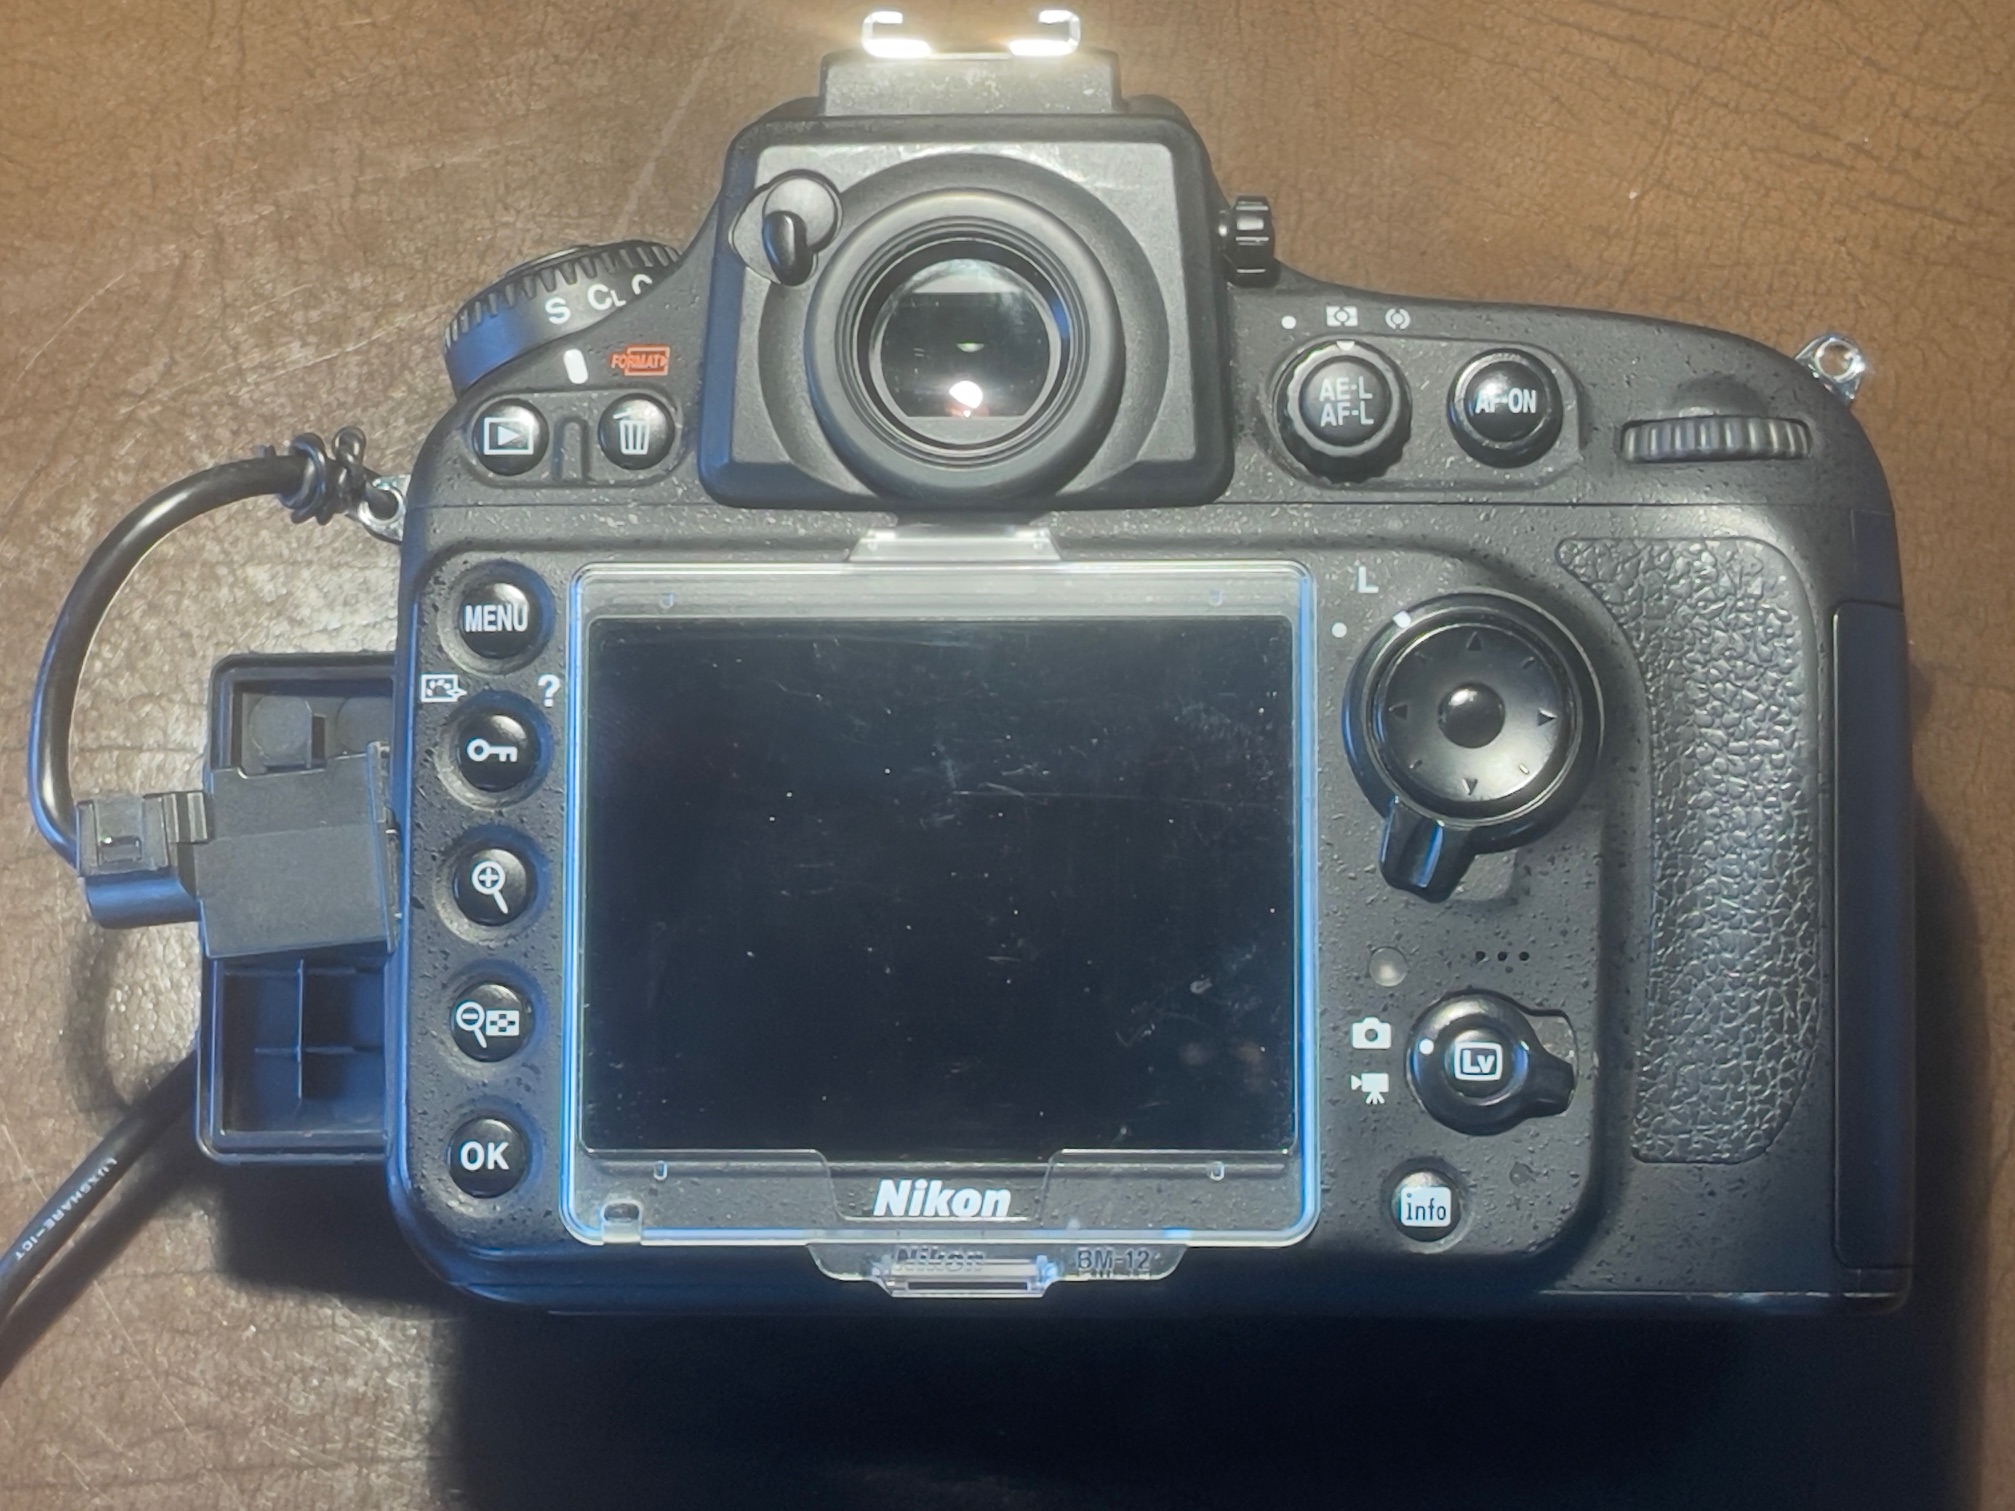
Control madness – the rear of the Nikon D800.

Compare with the rear of the M10:


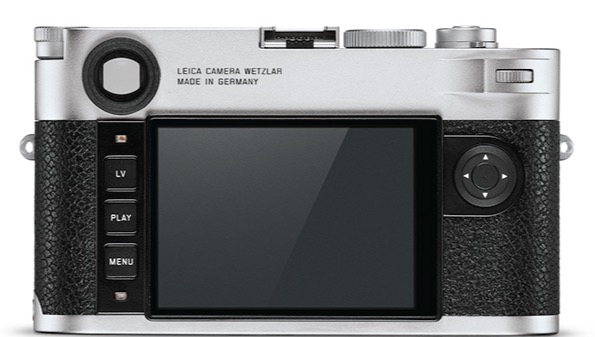
Severity and simplicity – the rear of the Leica M10.

The front adds just 3 controls. The design philosophy of the Nikon takes as many controls from the LCD to the body as is possible but in practice I find you set your favorite settings and hardly ever use these. The M10 allows you to place a handful of favorite settings on the screen which is first seen on the LCD when ‘Menu’ is pushed. Thereafter a second push on the Menu button gives you the myriad of settings which digital cameras revel in. Minimalism trumps maximalism in my book.

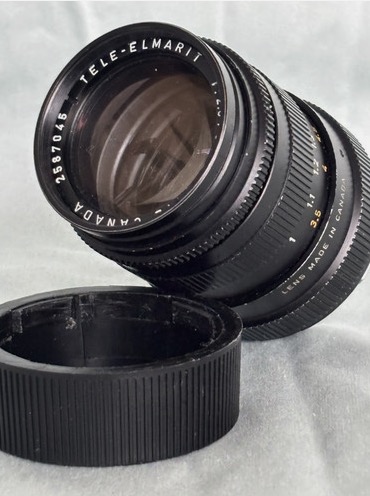
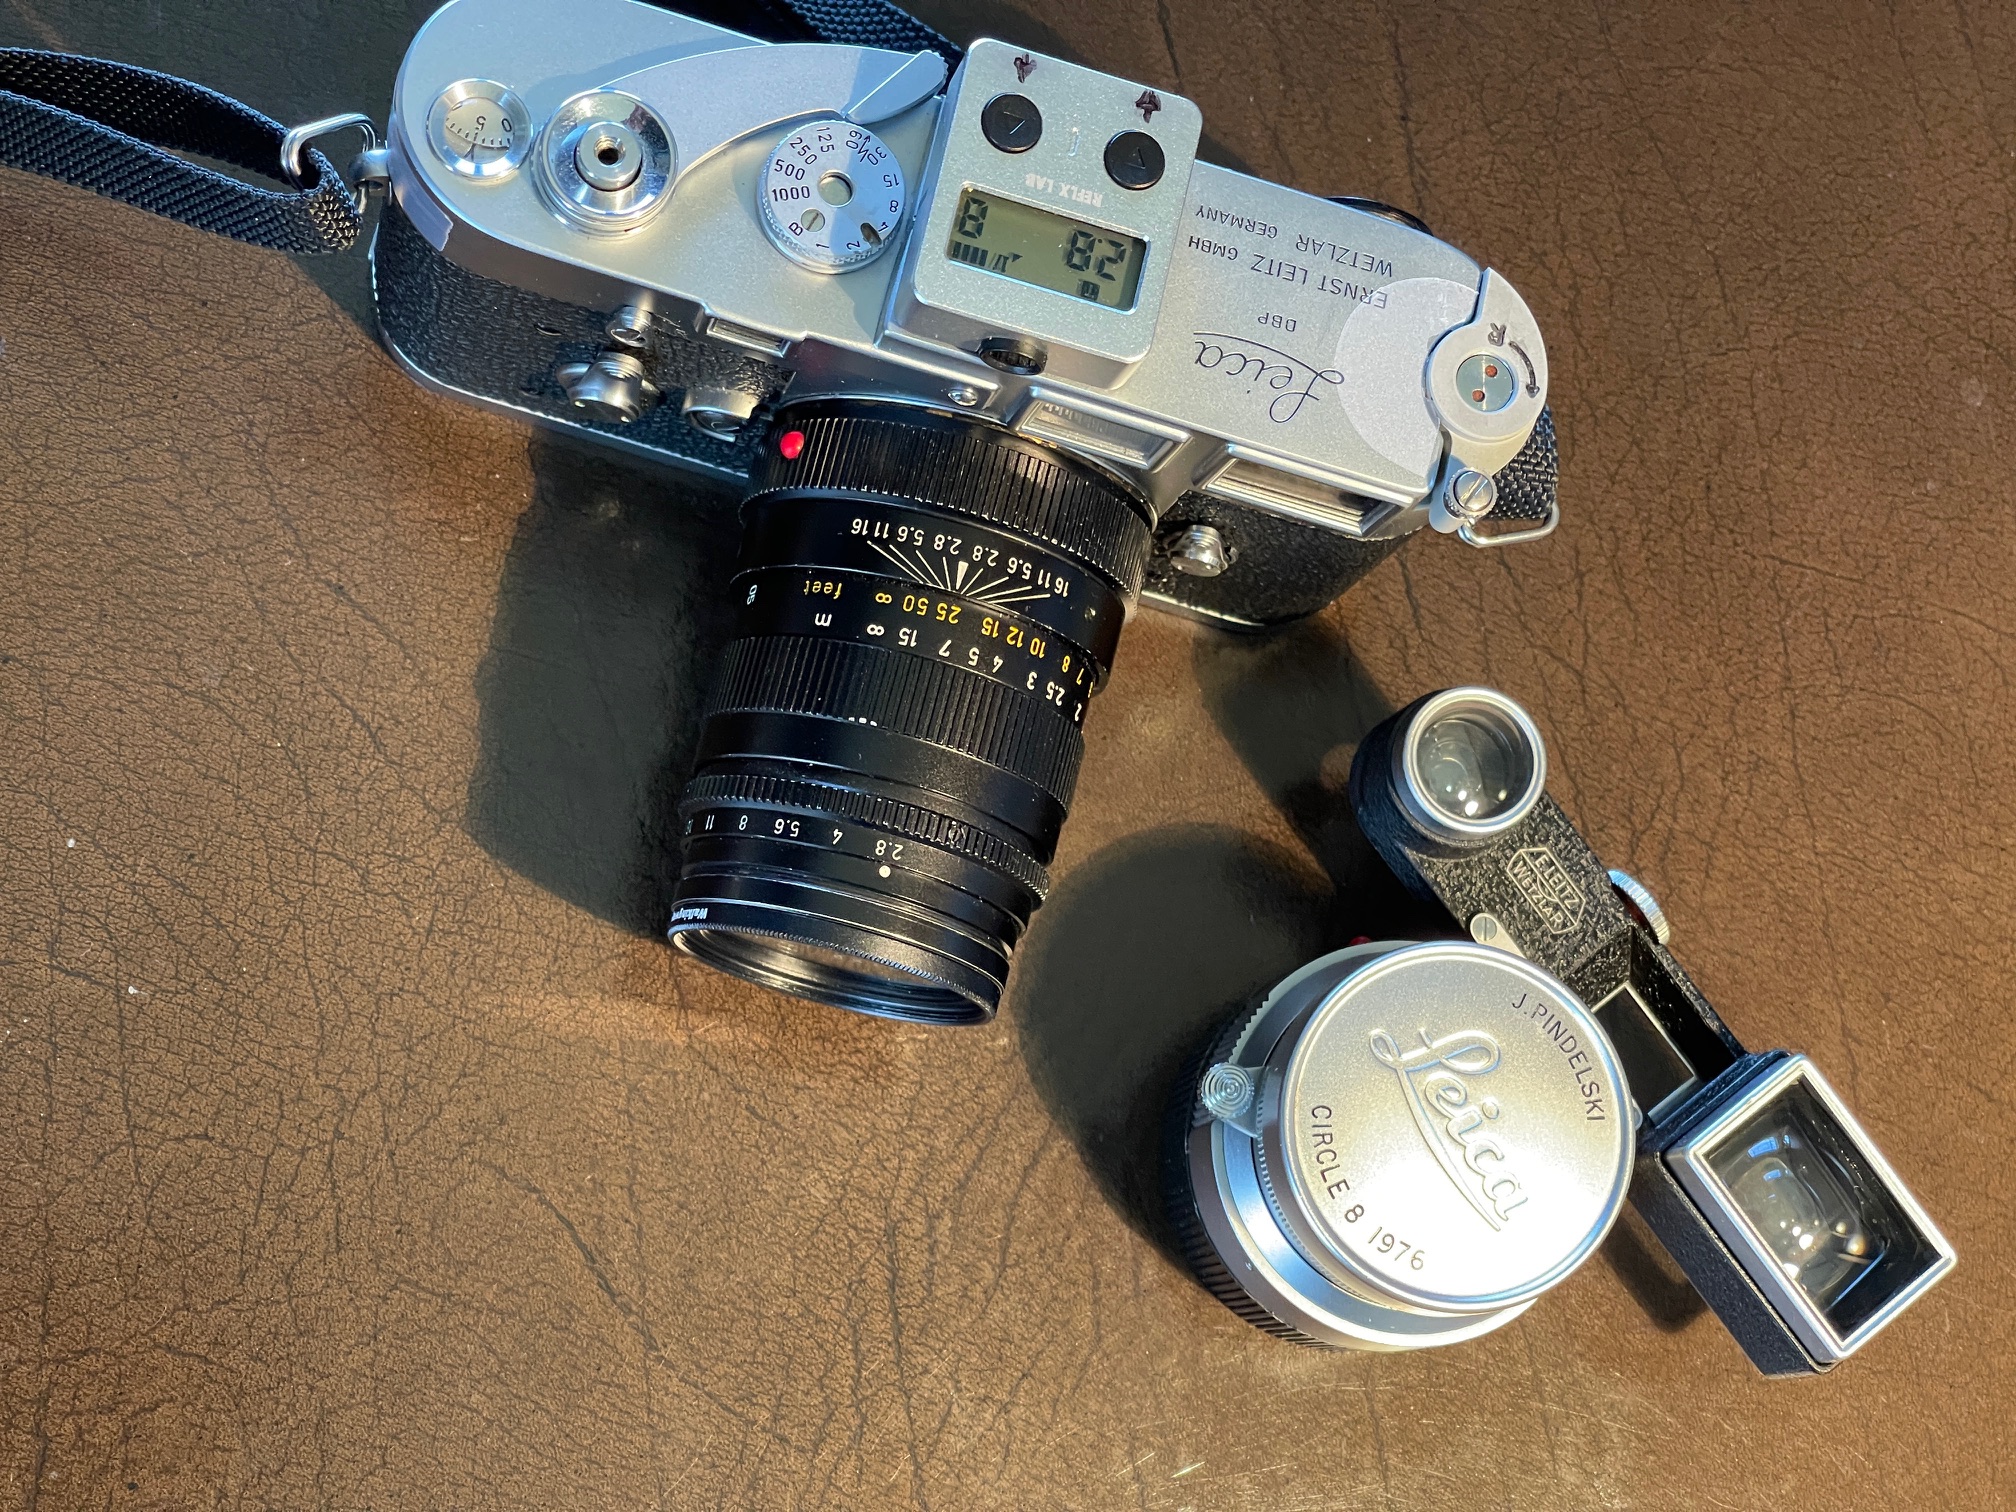
Resolving power: Some examples in later installments of this piece will show the true resolving power of my four M lenses – the 35mm Leitz Summaron f/3.5 RF, the 35mm Canon LTM f/2, the 50mm Canon LTM f/1.4 and the 90mm Leitz Tele-Elmarit f/2.8. In aggregate these cost me less than one modern used Leica lens and I rather suspect that the costliest, the 35mm Summaron, will be up for sale soon, the goggles a needless and clunky reminder of the limitations of the M3’s viewfinder, as the M10 has native frames for the 35mm Canon, which also happens to be 1 1/2 stops faster.

A related reason is that exposure measurement with the M3 is too slow for the street candid work I favor and, by contrast, every digital M body comes with aperture priority auto exposure. Sure there’s still no autofocus but with the speedy rangefinder and zone focusing that’s not a serious impediment to fast work. Yes, there’s no IBIS but I don’t miss it. I’m (still!) steady enough. And the alternative of using my Nikon D800 with its immense mass and weight for discrete street work does not solve.

In Part II I will look at the mysteries of 6-bit lens coding, proper rangefinder alignment and other arcana.

Leica M2 – Asahi Camera review

From my archives.

For an index of all Leica-related articles click here.

In April, 1959 the well regarded Asahi Camera magazine (it ran from 4/1926 through 7/2020) published an extraordinarily detailed review of the recently introduced Leica M2.


Late version of the Leica M2 with the first version of the rigid 50mm f/2 Summicorn.

Like the revolutionary Leica M3 of 1954, the M2 continued with the magnificent combined range/viewfinder but stepped the magnification down from 0.91x (almost life size) to 0.72x (not 0.75x as stated in the Asahi Camera report), to permit display of the 35mm frame. M3 users had to either use an external finder (not possible if you wanted the Leicameter fitted) or had to resort to the clunky ‘goggles’ versions of the 35mm optic to get the correct field of view. The M3’s native frames are 50mm (always displayed), 90mm and 135mm, the latter two switched either with the selector lever on the front of the camera or when the related lens was fitted.

Rumors that the M2, which was cheaper at the time, was less well made are nonsense. Yes, the rangefinder design was simplified (??? Look at Figure 4 in the Asahi Camera report – both look insanely complex to me) to lower production costs, there was no self-timer and the frame counter had to be reset manually after changing films. But otherwise everything was very much identical and, in fact, to Leitz’s surprise, the M2 became increasingly popular as photojournalists migrated to the 35mm lens. Better still, the clunky and always displayed 50mm frame in the M3 with its rounded corners (a Kodachrome slide mount legacy) was gone and the three frames in the M2 (35/50/90mm) would only appear one at a time. I have owned and used both the M3 and M2 for decades and much prefer the finder of the M2 for street snapping, as I tend to favor the 35mm lens.


Click the image for the PDF file.

The Leica M2 had several minor variations. The first version came with a button you had to hold down while rewinding the film. Not great. The second version had the same button but once depressed it stayed down until the film advance lever was worked. Much better. The Asahi Camera report picks up on this. The third version reverted to the same small lever used on the M3. It’s very unlikely you will activate this accidentally, and quite how the earlier button design saved production costs beats me. The lever design is the best of all. You can see it in the first image above. Maybe this was just another case of the old German belief : “Why make it simple when complex works just as well?”

And the originally deleted self-timer could be retrofitted if desired (at goodness knows what horrendous cost) or came standard with later production. But these are minor quibbles. There are strong grounds for arguing that the M2 was the best street M Leica ever made. The successor to the M2 and M3 was the M4 and came with a cluttered finder, showing multiple frames at once. The M5 was a design disaster. The M6 saw construction quality fall, internal screws became rivets, and the whole thing just did not feel as good in the hands, TTL meter notwithstanding. I know. I used one a lot. The single worst feature was that there was no top plate readout to take an exposure reading so you had to raise the camera to the eye to accomplish this. A camera at eye level is anathema to the stealthy approach dictated by street photography of people.

The Asahi Camera report also reviews the first rigid version of the 50mm f/2 Summicron, the finest standard lens of the time. I used one for years and it really is wonderful. Sadly, the collector market has seen to it that a half decent copy will set you back $1,200. Many of this vintage have ‘cleaning’ scratches from fools who don’t seem to understand the purpose of a UV filter, or dried up grease, or corroded/oily diaphragm blades. And haze and fungus are common. Finding a good one is no mean feat.

The scans in the PDF above are high definition at 300dpi, and were made with the excellent scanner included in the Epson T-8550 printer. To view larger images on a Mac hit Command+.

Keks M-meter for Leica M

Finally!

For an index of all Leica-related articles click here.

Update July 17, 2025: For a field review of the Keks M-meter in use, please click here.


Finally!

If you like to use an exposure meter for light readings and use a film Leica M1, M2, M3, M4, M4-P, M4-2, MA, MD, MDa or MD2, you will be ordering one of these unless you are lucky enough to have a functioning Leicameter M/MC/MR/MR-4.

Finally someone has crafted an accessory shoe meter for the film Leica M which couples with the shutter speed dial.

By way of background I suggest you read my comprehensive piece on the Leicameter first.

Then if accessory shoe mounted meters are of interest read this. I have been using that minuscule Reflx meter with success but I would be the first to admit that speed is not its forte. As with all other accessory shoe meters it is not coupled to the Leica’s shutter speed dial. Decide to change shutter speed or aperture and you must first dial in the new shutter speed/aperture on the meter (slow), then take your light reading (fast) and transfer the indicated aperture/shutter speed to the lens (even slower). It takes time. And you have to struggle with that too small shutter speed dial on the Leica with its even smaller shutter speed engravings. This gets to be less fun and more challenging as anno domini kicks in.

By contrast the coupling Leicameter models attach to the shutter speed dial so you set your shutter speed using the knob on the meter (fast), take your light reading and transfer the aperture to the lens. That knob is large and easy to handle and the Leicameter’s engraved shutter speeds and apertures are large. Pretty speedy if you work in shutter priority mode.

Well, Keks has updated the Leicameter with a 1.3 inch OLED display while retaining the shutter speed dial coupling feature. With the Leicameter MR/MR-4 the angle of measurement is equivalent to that of a 90mm lens, which is 26 degrees diagonally. Thus you can use the 90mm frame selector lever for ‘aimed’ exposure measurement. The pidgin English on Keks’s site states: “30 average metering (Approximately 50mm Lens view)” which is wrong as 30 degrees is closer to the field of view of a 90mm lens. If it is 30 degrees that’s a good thing. (The diagonal angle of view of a 50mm lens is 46 degrees).

The battery, while rechargeable (ugh!) is said to deliver a 10 hour life after a one hour USB-C charge. Assuming that the display is set to stay on for 30 seconds – the period is adjustable – once a reading is taken that translates to 1200 ‘on’ cycles or 1200 exposures – call it 33 rolls of film. For me, with a 50% ‘keeper’ rate, that’s a long time and a lot of film. And Keks claims the battery is user replaceable, and while I see no hatch for the replacement, this is promising. See below for an image of the base retaining screws.

Eventually all batteries, rechargeable or not, die. Ask owners who laid down $7,000 for their Leica M240 digital not so long ago for which no replacement batteries are available. That’s a costly paperweight and Leica should be damned for no longer making the batteries. (The market is too small for Chinese aftermarket manufacturers). With the Keks M-meter, maybe you have to undo four screws in 5 years’ time? And they claim it uses a common rechargeable cell. It’s unclear from their images whether the four retainers for the base of the Keks meter are rivets or screws. Hopefully the latter, if their claim about the battery being replaceable is true.

This is not Keks’s first foray into light meter manufacture. B&H lists a couple of models in a variety of finishes, so there’s some reason to think Keks know what it is doing. Here are the specifications for the Keks M-Meter from their site:


Keks M-meter specifications.
That ‘Max/Min aperture’ customization setting is interesting.

Using images from Keks’s web site, here is my forensic analysis with thoughts and questions:


Keks’s meter is less wide (70mm) than the Leicameter MC and MR/MR-4 at 71mm.
At 17.3mm front to back it’s 2.7mm slimmer than the Leicameter.

That’s good news. It means more clearance for an aftermarket rapid rewind crank which I consider an essential enhancement to the stock M knob rewind. While the paper specifications suggest a 1mm width difference it’s clearly more like 5mm, looking at the above and top plate images.

It looks great:


On a Leica M2.

The display is big and clear. Lets hope Keks programs a black-on-white option:


The buttons on the right are for ISO setting.
If you use EVs those are also displayed.

You recharge it using USB-C:


Recharging. The rear button is for taking a light reading.
One press for instantaneous reading, two for continuous.

And you don’t even have to remove it from the camera. And there’s no funky specialized 1.35 volt battery considerations like with the Leicameter MR/MR-4. Looking at the images on the Keks site it’s clear that the socket at the meter end is USB-C, not the awful and fragile Micro-USB. Good:


USB-C recharging socket on the meter.

And here’s a surprise:


British (design) and Best.

It looks like the retainer, lower right, is a hex head Allen screw, but it’s hard to tell. Here’s another image – the same goes for the accessory shoe retainers. I have increased the contrast in their image to make things clearer:


Hex head Allen screw retainers?

The coupling pin for the Leica’s shutter speed dial is there – let’s hope they got the length and location right:


Coupling pin.

The various Leicameters had five screws in the accessory shoe – three to attach it to the meter and two to tilt the meter left to right to ensure proper coupling of the pin with the camera’s shutter speed dial. The Keks appears to have the three attachment screws only, no provision for tilt, but I imagine one could easily shim the shoe in the event of incomplete pin coupling with the shutter speed dial. It looks like they are using Allen head hex screws (hard to tell from their images), so this has to be determined in practical use.

And it looks like exposure compensation is a feature:


Exposure compensation setting.

If this meter functions well, Keks will sell a lot of these. And I will be one of their first sales. With a functioning Leicameter MR-4 selling for $200 and up, and they are all end-of-life, this is a bargain. Keks offers variants in black chrome or shiny black paint for those thus inclined. The black paint version is on brass for fetishists who like the worn/war zone look. The other two are on an alloy base.


My order.

The final icing on the Keks cake? If your early M3 has the 1/5, 1/10, 1/25, 1/50 etc. shutter speed progression you can set it up so. How cool is that? And you can limit the aperture and shutter speed ranges displayed to your specific hardware. For example, the aperture range in the Keks goes down to f/128 whereas the smallest aperture on any Leica lens that I am aware of is f/32. And you can switch between full stop, half stop and one third stop intervals. The same applies for ISO settings. Shutter stops are at full values only. Display brightness is adjustable in four steps (25%/50%/75%/100%) and Auto. The display ‘live’ time is adjustable from 30 seconds all the way to 5 minutes in seven steps. Hard to see using anything other than 30 seconds. A 15 seconds lower limit would be better. You can calibrate the shutter speed to correctly match that set on the camera in case it’s off. Nice.

The only drawback I can think of, compared with the MR/MR-4 Leicameter, is that you have to turn the Keks on to change shutter speeds. Not a big deal as you will be taking a light reading before doing that in any case.

You can download the user manual by clicking here. It’s silent as to battery replacement.

90mm f/2.8 Leitz Tele-Elmarit

Truly tiny.

For an index of all Leica-related articles click here.

I hardly have to tell readers how ridiculously overpriced Leica lenses for their M bodies have become. Just look at this idiocy. Any Leica M user already knows that and he’s either too wealthy to care or too poor to afford these. And that’s just the standard 50mm range, which starts at $3,000 and goes all the way up to over $13,000. The price of a half decent used Toyota sedan. And no autofocus or VR. These are truly Veblen Goods, having transitioned from being the working pro’s hardware of choice in the 1950s to the hedge fund manager’s collectibles today. The greatest shame is that most of this hardware will never be used. Testifying to their Veblen status – meaning increasing prices see increased demand – Leica just had the most profitable year in its long history.

So it’s hardly a wonder that a substantial business has arisen in offering aftermarket optics in the M mount for both film and digital bodies. But the big issue I have with many of these offerings is that the focus (!) is on very fast lenses and that means weight and bulk. To me both are anathema to the Leica M concept which is about a small package capable of high quality results. Hang a monstrous f/1.0 or faster aperture optic on that poor body and you have a camel – a horse designed by a committee. You can read excellent reviews of many of those optics on Phillip Reeve’s site, which tests lenses with focal lengths as short as 11mm, all the way up to 135mm, the limit of the Leica M’s viewfinder frame lines.

And while it’s tempting to purchase one of these aftermarket optics at a fraction of Leica’s prices, there’s no need to abandon the marque and get something from the far east. There’s a rich variety of affordable Leica lenses to be found on the used market and as long as you can satisfy yourself that mold, scratches and haze are absent, and that the lubricants have not dried to the consistency of treacle on an Anchorage winter’s day, then you can get some fine glass for relatively little. Or be prepared to pay a little more for a professional overhaul.

Having recently added a pristine Leica M3 and 35mm Summaron lens to my small home collection – both recently cleaned, lubricated and adjusted – I quickly realized that letting these machines rot in a display case was a crime and determine to use them to take pictures on film instead. And because for me the ideal Leica M outfit is one body with 35mm and 90mm lenses, I set about finding a 90mm to go along with the 35mm Summaron.

There is a very large range of Leica (more correctly Leitz, if you go back before the many changes of ownership) 90mm lenses to choose from. When I bought my first M3 in 1971 I quickly added a 35mm Summaron and a 90mm Elmar to the modest 50mm Elmar with which it came. And while these were the bottom of the line choices for this impoverished snapper, they worked fine, delivered large prints when asked to do so and never let me down. While that 90mm Elmar came in a rotating mount (as with the 50mm Elmar the aperture numbers rotate as you focus the lens) and had no such luxury as click stops, the lens was made in very large numbers and can be easily found for around $100. For twice that sum you can find it in a retractible barrel version with a non-rotating barrel and click stops. Add another $100 and you get a Leitz Canada Elmar-C which is also f/4 but benefits from later glass and optical design. It’s also very small.

And don’t knock Leitz Canada. The optical works were run by a German named Walter Mandler, one of the outstanding lens designers of the previous century, back when designers had names and breathed air, unlike the computer dominated environment of today.

But when it comes to size, one of the smallest and lightest 90mm lenses Leitz ever made was the second version of the Tele-Elmarit. The original ‘fat’ version weighed in at 335 grams (chromed brass mount) but when reissued in a ‘thin’ barrel (black anodized alloy and with 4 elements instead of the earlier 5) the weight dropped to 225 grams (8 ounces) and you gained a stop compared with all those Elmars as the lens, also made in Canada, is f/2.8. And the second, alloy barrel version is actually lighter than the 90mm f/4 Elmar-C, a lens intended for the Leitz/Minolta CL small body camera, which apparently works fine on regular M bodies.

There’s also a 90mm f/2.8 Elmarit in a non-telephoto design, meaning the lens is physically longer, and it is optically fine, if less compact. Reckon on $250 for a good one. The later Elmarit-M was a rehoused and bulky Leicaflex lens and, well, the pricing is silly. As maximum apertures rise prices tend to rise with them, and the f/2 and up offerings really are too bulky to meet my idea of ‘small camera, big picture’ as the Leica used to be marketed. If Auntie Mame just passed and left you an inheritance, and if you now have more money than sense, I suggest you spring for a 90mm f/1.5 Summilux-M at $13,995. This is a 2.2lb abomination of everything that Oskar Barnack intended. Just try and avoid getting mugged with it.

My Tele-Elmarit ran me $454 shipped and some previous owner has added the 6-bit coding on the mount to optimize performance with digital sensors. Plus $8 for a cheap aftermarket multicoated 39mm protective UV filter.


The 90mm f/2.8 Tele-Elmarit, ‘thin’ barrel.
On of the lightest 90mm Leitz lens ever.


6-bit coding has been added for digital sensors.
The ‘000100’ pattern is correct for the 90mm Tele-Elmarit.

How does it perform? Well, how long does it take for film scans to become available?


The serial number dates the lens to 1973.
The filter size is a scant 39mm.

On the Leica M3:


Note the Reflx exposure meter atop.

Used without a lens hood this short telephoto design does not impinge on the view within the 90mm viewfinder frame of the M3, even at its closest focus distance of 39″ with a protective filter installed. The stock Leitz hood is unbelievably inept – gargantuan and ugly. If you must use a hood I recommend a folding rubber design which is in keeping with the design spirit of the lens. 39mm thread.

The lens is very small indeed. 1/2 click-stops all the way through f/16:


Tiny. UV protective filter in place.

The film outfit grows:


With the 35mm Summaron RF.

The strap is the excellent Upstrap, now seemingly discontinued, but available used on eBay. The anti-slip two-sided shoulder pad is especially safe, and the strap is highly recommended. I have decades on this one and recommend you read my linked page for proper installation. If you really want your Leica to go crashing into the sidewalk after slipping off your shoulder then I strongly recommend one of the extremely costly all leather straps made from genuine German cows. Incredibly inept. But these do prove that there is one born every minute.

Rangefinder accuracy with a 90mm lens, especially at wider apertures, is far more critical than with a 35mm wide angle optic. Accordingly I first confirmed that the rangefinder was in agreement with the lens with both set/aimed at a subject at infinity. Then I set up my high tech optical test bench with the target at 39.37″ (or 1 meter) from the camera using the rangefinder at the minimum focus distance of the lens, and then measured the distance from the Leica’s film plane to the target using the laser measure. Here is my result:

  • Lens indicated focus distance: 39.3700″ – 1.0000 meter
  • Laser measured distance to film plane: 39.3125″ – 0.9985 meter
  • Error in inches: Leica rangefinder reads 0.0519″ too far at 39.37″ to the subject
  • Percentage error in rangefinder reading: 1.32%

That is a startlingly good result, testifying to the quality of the CLA performed before I purchased the body and well within the depth of field error even at full aperture of f/2.8. And this was measured/focused in the relatively weak lighting in my home office, which came in at 1/30th at f/2.8 at ISO100. The focus accuracy is certainly far better than any conventional manual focusing SLR could manage, where the process is ‘back and forth with the focus collar until it looks sharp’. That’s the beauty of a well adjusted Leica M3 rangefinder. There’s nothing more-or-less about the point of focus. It’s binary. Right or not.

So this lens may be a good one. In case you are wondering where to measure to on the camera’s top plate, as it is not marked on the top plate of M2, M3 and M4 Leicas, the film plane mark coincides with the base of the engraved top plate words which read ‘Wetzlar Germany’. (From the M4-2 onward a film plane mark was engraved on the top plate and is hidden by the film advance lever). If you want to be even more accurate, the film plane is 0.1900″ from the rear of the top plate in that location, measured with my “Dead on balls accurate” to 4 decimal places killer dial caliper. I determined that by measuring from top plate to film rail, with the hinged back removed! (With thanks to “My Cousin Vinnie“).


Testing minimum focus distance
accuracy with a laser measure.

Early results appear here.

Reflx light meter

Tiny and accurate.

Finding a working and accurate Leicameter light meter for the Leica M2/3/4 is an exercise in frustration. The earlier selenium cell batteryless ones are mostly dead, their cells exhausted after some 70 years or more on planet earth. Search long and hard for the later Leicameter MR or MR4 and one in twenty auction listings will actually include words that the device has been tested and is accurate. Why even bother looking at the others? And then it’s far from inexpensive. Reckon on $200 for a decent one which does not look like a survivor of the Tet Offensive. And if you have fitted your Leica M2 or M3 with a rapid rewind crank or you use an M4 with the stock canted crank, then you must opt for the Leicameter MR4, over the earlier MR, to provide clearance for those cranks, or be prepared to remove the meter every time you have to rewind a roll of film. So now your chances of finding a good MR4 are further halved. Ugh!

The advantage of the Leicameter is that it couples to the Leica’s shutter speed dial and provides its own considerably larger dial for adjustment of shutter speeds.

But if you have despaired of finding a good one there is a host of inexpensive aftermarket alternatives, any one of which will fit in your accessory shoe and which can be found for under $100. Downside? None couples to the shutter speed dial. B&H lists no fewer than seventeen choices from the overpriced Voigtländer at $225 to the Reflx for $50, and it’s the latter I’m writing about. It’s what I chose because its size and looks most closely conform to the Leica film camera ethos. The fitment and positioning are just right.

It ships without a battery so buy a CR1632 when ordering the meter. The meter uses a silicon cell (so does not suffer from the excess red sensitivity of the Cadmium Sulphide cell in the Leicameter MR/MR4) and like the MR/MR4 measures over a center weighted 30 degree angle. It is small, encased in alloy and looks just perfect on my Leica M3. The accessory shoe foot can be mounted in one of three positions and is shipped centered. Looking from the back I had to shift the foot to the right whereupon the meter aligns perfectly with the shutter speed dial.


Perfect alignment with the shutter speed dial.
Fitment and positioning are just right.

Note the black felt tip shutter speed indexing line (red arrow), added by yours truly.

The meter ships with a spare battery holder – it’s hard to remove for battery insertion and requires that you push the flexible tab away from you and then tug on the door to the right. Broken fingernails are likely so I used a plastic pointer (for the tab) and spudger (for the holder). The battery goes in with the + sign showing, when the meter is upside down. Reflx provides a spare battery holder as well as two spare mounting screws for the shoe and a small slotted head screwdriver. They claim a battery life of one year. The screws are a tight fit and are unlikely to come out. Should they loosen I will apply a tiny drop of blue Loctite thread locker #242 to each to confer safety.

Is the chrome plating on the meter as good as that on the Leica? No. It’s coarser and slightly differently colored. Nothing compares with the chrome plating on a Leica.

The Reflx meter weighs 19 grams, or 2/3rds oz. By contrast the Leicameter MR4 weighs 76 grams (2 2/3rds oz.).

The included instruction sheet is printed in such a small typeface that it’s next to useless. I went to the maker’s web site and enlarged/copied the instruction sheet there. Even so, it could be less confusing.

Here’s what you need to know.

After inserting the CR1632 battery, mount the meter on your camera. On my M3 it’s a reassuringly snug fit. No way it’s going to fall out, even if brutally nudged. Now single press the black button on the rear. The LCD display will show the ISO you have set (it ships set at ISO100) then switches to aperture (left) and shutter speed (right). Nice that you get this ISO reminder. That single press locks the exposure reading so if you need a new reading simply depress the rear button again – whether the meter is on or off – being sure to point the meter at your subject area.

For street photographers who need to be unobtrusive, a light meter should be decipherable when looking down on the camera. Many shoe mounted meters have the display in the back which defeats the unobtrusiveness goal. With the Reflx you look down. By the way, the single biggest complaint I had with my Leica M6 (apart from the lower build quality compared with my M2 and M3) was that its built-in TTL meter could only be set with the camera to the eye. The diodes indicating exposure were in the viewfinder. There was no top plate readout of exposure. So you had to raise the camera to your eye to first measure the light, then take the picture. Completely wrong. Are you a street snapper? Get a meter you look down on to take the light measurement. An iPhone metering app is almost as obtrusive as that Leica M6 of old.

To change the ISO, after a single press on the rear button hold the right top Up arrow button for three seconds and then increase or decrease the ISO using the two top arrow buttons.

The worst description in the instructions is the meaning and use of the Aperture Priority and Shutter Priority modes available. You switch from Aperture Priority (‘A’ at top left of the LCD display) to Shutter Priority (‘T’). with a double press of the rear button. In ‘A’ mode the meter will restart showing the last aperture you used. In T mode the meter will start showing the last shutter speed you used. For street snapping I ordinarily leave the shutter speed fixed – say at 1/250th of a second – so I set the meter to T mode and to a shutter speed of 1/250 using the Up and Down button on top. Then taking a light reading becomes a one button press affair, every bit as fast as the Leicameter. Point the camera at the area to be measured, press the rear button once and transfer the indicated aperture to the lens. No need for any other button presses as long as you stick with the shutter speed dialed in on both camera and meter.

This single button press method is quite different from that used by the costly Voigtländer or the TT Artisan $62 knockoff of that design. On those you have to turn either a top mounted physical click stopped aperture or shutter speed dial until the center one of three LEDs alights. Far less elegant, though analog dials and click stops are always nice for an analog human being.

Finally, a long single press on the rear button puts the Reflx into exposure compensation mode, adjustable with the top buttons in 1/2 stop changes. A separate flag notifies the user that EV mode is engaged. This is actually quite handy should you find that your meter is reading incorrectly compared with one of known accuracy, allowing for one – albeit across the board – exposure correction without having to input a misleading ISO value for film speed.

Accuracy? Dead on. I checked it against the meter in my Nikon D800 with the zoom lens at 90mm and in averaging mode, which approximates the measurement angle and method of the Reflx and in both weak interior and a variety of bright exterior lighting the Reflx was in agreement with the Nikon.

Display size? Though the Reflx is very small indeed the aperture and shutter speed display is easily large enough for stress free reading, and much larger than the engraved digits on any Leicameter.

Battery life? I have no idea. There are four bars showing at the top right of the meter with a fresh cell but it remains to be seen whether the one year life is accurate. These trend down to three or two bars after one minute of use suggesting either excess current draw or incorrect calibration of the battery strength indicator. Let’s hope it’s the latter, because I really do not want to remember to carry spare batteries. (The display pops right back to four bars after a minute or two of rest). You can turn the meter off with a three second press on the Down button or it switches itself off after 55 seconds (during which time the battery is working only to power the LCD display, not the light measuring circuitry so current draw should be light). The instructions confusingly refer to this as ‘sleep mode’. If you turn the meter on again in under 5 minutes the ISO display, which is otherwise the first thing you see, is turned off. No biggie, as it’s unlikely that you will change the ISO setting by accident. After a 5 minute off period the ISO display will show once more on start-up.

One missing feature is no provision of an illumination option for low light use. The black on grey figures in the LCD display get hard to read in poor light. Well, there’s always the flashlight in your cell phone, I suppose, a sub-optimal solution at best. In this regard the white galvanometer needle in the Leicameter is superior. Further, there’s no continuous reading option available in the Reflx like there is in all Leicameters (with the black side button depressed with the MR/MR4, by default in the M and MC). One press of the rear button of the Reflx and the light reading is locked. To take another reading you have to press the rear button again.

One other missing feature is the absence of any warning that you have reached the limits of the meter’s range. For example, in very poor light the meter will show an aperture of f/1 in shutter priority mode whereas in fact something even faster than f/1 is called for. It would be nice if the manufacturer would revise their software to flash the aperture symbol at the limit, warning you that you need a far slower shutter speed for a usable aperture. A like issue affects the shutter speed setting in aperture priority mode. I get around this by reminding myself that if a ridiculous aperture like f/1 is indicated (see the image above) that I need a far slower shutter speed setting. Not a big deal.

Leica ethos, you ask? Well, small, silver chrome, accurate and unobtrusive, not to mention fast. And, unlike that Leica, inexpensive. What’s not to like?


Is this a match or what?.

Plus, unlike that Leicameter of yore, it’s easily pocketed for use on any camera without an accessory shoe and far easier to use ‘off camera’.

One last thought. Many aver that black and white film has such a broad tolerance of incorrect exposure that no meter is needed. This is pure rot. Expose even monochrome film stock incorrectly and definition goes down, highlights or shadows get lost and grain shoots up. There is no excuse for poor exposure whether with color or black and white stock, and there’s simply no way, regardless of how experienced you are, that you will nail exposure without a meter. Would you rather have great originals with a $50 additional outlay or crap that cannot be printed larger than 5″ x 7″ from your $2,000 piece of hardware? And if you do not regard large prints as your goal, why are you wasting money on gear?