Category Archives: Hardware

Stuff

A real workout

A real live ‘shoot’

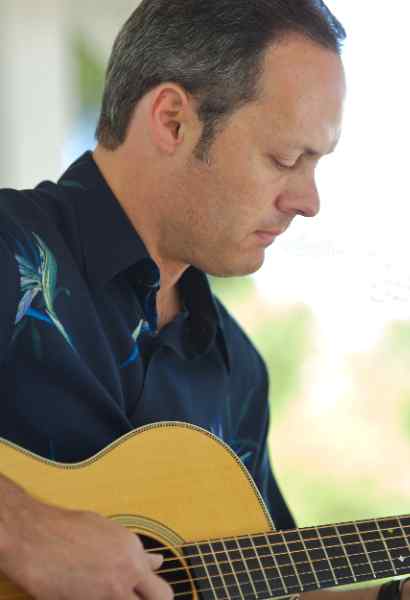
Marty Paris is not only a friend, he is also a fine acoustic guitarist. So when Marty asked me to take pictures at his open air concert this weekend I was glad to oblige, though somewhat apprehensive about the high contrast lighting issues this opportunity would present.

I would like to tell you that I took ‘just the EOS 5D and a couple of lenses’ for the ‘shoot’ (ugh!) but then I only have a couple of lenses, so that’s what I took!

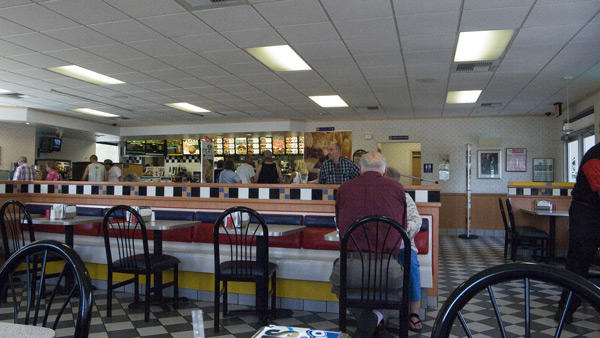
The group, comprised of two guitarists, a vocalist and a drummer, would be playing at the town square in Templeton, near my home, in the shade of the bandstand. A charming throwback to all that was good and great in Norman Rockwell’s America. People gambolling about with children and dogs. A hot dog stand. Sunshine and oak trees. Church steeples at every corner with the fire engine poised in case of emergency.

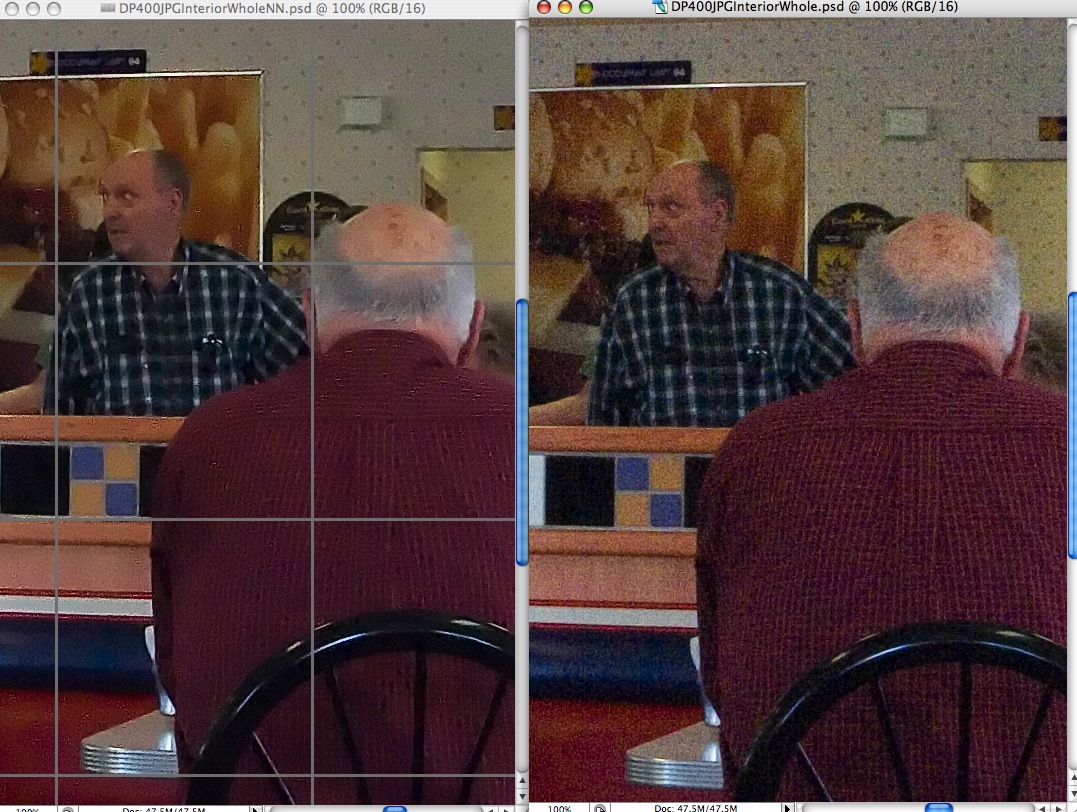
All well and good, but the bright sunlight meant blown out backgrounds from the huge contrast between lighting on the performers and the park setting. So I decided to make virtue out of necessity and used the Canon 200mm f/2.8 ‘L’ lens (what a piece of glass!) mostly at f/2.8 to blur the background and give the pictures that studio look. Hardly the controlled environment of a studio, but the best I could do. The 5D was set at 400 ISO which resulted in short shutter speeds, mitigating the absence of the wonderful IS feature in the 200mm lens. Canon, are you listening? And prior experience with the 5D had confirmed that ISO 400 is grain free at any realistic enlargement size. Try that with color film!

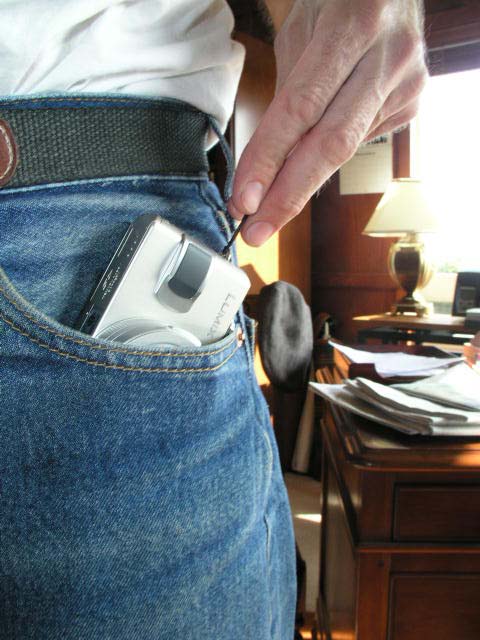
I used that inspired little belt-mounted back up gadget, the exotically named Hyperdrive, to dowload full CF cards from the camera, alternating the one in the Hyperdrive with the one in the 5D. I ended up taking some 350 RAW pictures or some 6 cards’ full, and if you think that’s a lot, words fail me when trying to explain how many reasons there are for a bad picture in this environment. Clutter everywhere, closed eyes when they should be open, background noise, and on and on.

It took some 25 minutes to load Aperture from the Hyperdrive when getting home and, owing to Aperture’s superb user interface, only another three hours to cull the pictures down to the 85 best. That includes deletion of bad pictures, exposure correction and the occasional crop or straightening of the horizon. The only snags I ran into were that Aperture locked up on me twice when downloading from the Hyperdrive (no images were lost) and would take up to 20 seconds to load an image for processing. My iMac G5 has the modest Nvidia Radeon 6600 graphics card which is the major cause of the slow loading of an image on the screen. Then again, the iMac costs $1,500 rather than the $5,000 it would take to get a full blown Mac with a posh video card and Cinema Display. I can wait a few seconds for a picture to load at that price difference.

85 is a lot of photographs to end up with but the goal was to give each performer twenty or so pictures to choose from. You can see the snaps here.

Some practical notes from this little assignment. I set the focus sensor in the 5D to the center rectangle. I was not about to trust the camera’s system to guess optimum focus at f/2.8 with the 200mm lens when depth of field can be as little as an inch or so. I would generally take an exposure reading (using center weighting) from the concrete floor of the bandstand and lock it before composing, then locking focus with a first pressure of the shutter release on the performer’s eyes prior to final composition. This is all very fast once you get the hang of it. Despite all this I got the exposure wrong in several pictures, but RAW is so forgiving that correction in Aperture was easy without any noticeable quality loss. In particular I find the Highlights & Shadows slider in Aperture far superior to that in Photoshop as it produces far more realistic results and introduces far less noise into the image.

The slide show was generated using Aperture’s web creation function and this took far too long compared to using iPhoto. Some three hours. Apple really needs to speed this up.

The next morning I made four 13″ x 19″ prints on the HP DesignJet 90 plus five CDs with the slide show, and they were at Marty’s door by noon. I was trying to emulate what, say, a wedding pro might be faced with in delivering timely results to his client. The workflow above was encouraging in two respects. The percentage of overall time spent on processing compared to photography was relatively low and the processing experience was markedly stress free. So the 5D + RAW + Aperture + HP DesignJet proved to be a powerful and effective set of tools.

Was my ‘client’ pleased? Well, there were a lot of gurgling noises on the phone when he called back, so you be the judge. Now maybe I can get him into my studio.

The designer as star

It’s great to see the designers of innovative producets credited

Panasonic will soon release their L1 interchangeable lens SLR to market. The camera is notable for a couple of things. First, there’s the compact Leica M ‘look’, owing to the flat top, the result of using a mirror and prism design pioneered by Olympus in the brilliant Pen F half frame some thirty years ago. Second, the continuation of the Panasonic-Leica collaboration with the Panasonic vibration reduction system integrated into the ‘standard’ Leica zoom lens.

The last time I remember this sort of thing was when the inspired designer of the jewel-like Olympus Pen F and OM1 cameras, Yoshihisa Maitani, was featured prominently in advertisements, also some thirty years ago.


Maitani.

The Leica DP – Part V

Noise Ninja does a number on high ISO noise

A kind reader suggested that Noise Ninja from PictureCode might be a worthwhile product for cutting ISO 400 noise produced by the sensor in the Panasonic LX1 (or Leica DP as I prefer to think of it, once modified with a proper optical viewfinder).

I downloaded the Photoshop CS2 plug-in and gave it a shot. PictureCode has a long listing of profiles created for many different cameras, so I downloaded that also, not really feeling up to a lot of messing about with the product’s myriad sliders, and this is what I got – the Noise Ninja version has the grid pattern as I have yet to buy and register the product:

This is the 400 ISO interior snap taken in RAW mode, best quality. While there are trade offs – look at the loss of detail in the red pin-striped shirt, you can dial in just enough noise reduction to get the color artifacts out – the standard profile might have overdone things a bit. Again, these are the size of 22” x 39” prints, so less noise reduction would be needed in regular sized prints.

Noise Ninja strikes me as a useful adjunct in the toolbox for the occasional image where ISO 400 is used indoors. Remember that the OIS vibration reduction system in the camera is good for two shutter speeds, making your ISO 100 equivalent to ISO 400, so it would be a fairly rare image that needed ISO 400.

More interestingly, Noise Ninja also has profiles for film and scanner combinations, so those plagued with noise in small 35mm negatives now have a useful tool to look to.

Rather cheekily, PictureCode provides a canned profile for the Canon EOS 5D; cheeky as the sensor in that camera has exceptionally low noise properties already.

I’ll take a look at vibration reduction, what Panasonic calls OIS, in Part VI.

The Leica DP – Part IV

Sensor noise at 400 ISO

Harley Davidson motorcycles are ridden by Real Americans who pride themselves on their rugged individuality. This means they all wear identical clothing, place piss pots on their heads a reflection of the value of the protected part, and sport beer bellies. However, spotting one of these expensive pieces of their infatuation outside the local burger joint today, I whipped the Leica DP out of the pocket of my (rugged individualist Levi 501 Button Fly) jeans and snapped a picture of the motor with the camera set to ISO 400 the exposure was 1/1250th second at f/4.5 using RAW.

As I mentioned in Part II, the camera automatically records a 16 mB RAW file and a medium definition JPG file, both being 3840 x 2160 pixels.

Here’s the whole image (is the Widescreen format wide or what?):

After converting the RAW variant to PSD, I created center crops from both the PSD and JPG files – the original picture is sized at 22” x 39”.

Here’s the version from the RAW file:

And from the JPG:

The RAW file is clearly holding better detail and, strangely, the JPG has exaggerated cyan (look at the reflected sky) and is almost a stop overexposed. Applying 70/1/0 Unsharp Masking in Photoshop CS2, a process that tends to exaggerate grain, gives a very sharp RAW image with tight, smooth grain/noise with no color artifacts. (I have not included the USM versions here). A 16x print would be quite acceptable. The JPG version shows color striations in smooth areas and the general loss of definition makes the grain less visible, albeit to the overall detriment of the image. So for bright light, RAW is the choice – this was taken in full sun.

Inside the same hamburger joint, where the Harley rider could be seen perfecting his figure, matters are quite a bit different. This time the exposure, reflecting a mix of natural and fluorescent light, was 1/80th at f/4.5, once again using the RAW format and ISO 400.

Here’s the whole image:

The sensor has done a fine job of color balancing and the scene looks natural.

Enlarging to actual pixels, as before, meaning a 22” x 39” print, gives the following results:

From the RAW file:

From the JPG file:

The RAW file is the sharper of the two, but displays a lot of grain – like over-processed Tri-X rated at 800 ISO. The grain is smooth but verging on intrusive. By contrast the JPG image appears much better, grain is blurred (as before) at some cost in sharpness, but the image is much more pleasant to look at.

After applying 70/1/0 USM on both, the results look like this:

From the RAW file:

From the JPG file:

The JPG is much better; at this point the grain in the RAW versions becomes objectionable.

Bear in mind these results are at a huge print size – 22” x 39”. Scale that back to a 16” x 20” print, after lopping off the sides to fit and you have a decent result, with grain visible but well controlled in the JPG file. While I have yet to try it, the highest quality JPG setting should further reduce the barely visible color artifacts at this print size.

So the Leica DP needs a bit of care in low light situations at ISO 400 to produce the best results. As ACR cannot get rid of the grain in the RAW original, I would opt for highest quality JPG (which gives over 230 images on a 1gB card!) and then use USM in Photoshop for the best results. In bright sun it’s RAW all the way and there’s little grain to worry about. All of this suggests that the DP’s sensor begins to struggle in low light at ISO 400, and it’s certainly no Canon. In the wonderful EOS 5D, the ISO setting is just a ‘crank it up to whatever you need’ control, at least up to ISO 800, yielding superbly grain free results in all light situations.

Then again, you cannot stick the 5D in your genuine, macho, Levi 501 Button Fly jeans, and will never be able to use Cleavon Little’s great line from Mel Brooks’s Blazing Saddles: “Excuse me, ladies, while I whip this out”.

More seriously, it seems to me that the circle from Leica rangefinder film camera + Medium Format film camera, representing the speed and quality ends of the spectrum, to their digital equivalents – the Leica DP and the Canon EOS 5D, has now been closed. The Leica DP compares well with the Leica M, offering small size, unobtrusive operation and good print quality, but limited when it comes to huge enlargements. The Canon EOS 5D equals or betters medium format film with far greater operational convenience and is the tool of choice when the very best results are called for.

More on sensor noise in Part V.