Finally – a digital Leica
Preconceptions abound in our society.
Italians are great lovers.
The French cannot be trusted.
The Welsh are liars.
Poles are stupid.
Jews are smart.
The British cannot cook.
Americans are crass.
And so on.
When it comes to photography, the one that always jumps to mind is:
Leica makes the best lenses.
This is about as accurate as the little collection of bigotry introducing this piece.
What is ‘best’ is a function of the situation. If you want an interchangeable lens camera with tracking autofocus, for example, there is no best Leica lens. In fact, there is no Leica lens. Better look to the great Japanese manufacturers (or, more correctly, designers, as most everything is made in China anyway) for that.
Yet, I confess, that after over thirty years of using Leica M rangefinders with any number of Leica optics attached, that I am something of a bigot. You see, I do believe Leica makes (some of) the best lenses. Even the Leica company is beginning to realize that its salvation lies not in making bodies, but in supplying lenses for other manufacturer’ bodies. Small, undercapitalized, forever on the verge of bankruptcy, Leica Camera cannot hope to develop a competent modern body without massive out sourcing of electronic needs – LCDs, motors, microprocessors, software, you name it.
Back in 1976 Leica showed a working version of their Correfot autofocusing system at Photokina. That was the last that was heard of it on a camera. Either they failed to patent it or lacked the capital to enforce their patent so that, before you knew it, every major Japanese manufacturer had autofocus based on Leica’s (or was it Honeywell’s) genius.
No, it takes major capital to make electronic gizmos and Leica cannot hope to compete.
When I moved from medium format to full frame digital, acquiring a Canon 5D from the sales proceeds of all that clunky 6×6 gear, the knowledge still rankled that a miniature camera, as the original 35mm cameras were known, was missing from my tool kit. ‘Miniature’ is the operative word, for whereas the 5D delivers medium format quality with a fraction of the bulk and weight of medium format, no one could accuse the body and lens of being compact. Try to stick it in your pocket and Mae West would be apt to remark “Is that a 5D in your pants or are you just happy to see me?”
I have long been searching for a digital camera which would combine those special features a street shooter needs, and I have some claim to the appellation, much of my early work having been street photography, pure and simple. You can see the results of these Leica years in my book Street Smarts. What are those special features? Well, the camera must be small and unobtrusive. Quiet of course. Must have a 28mm or 35mm lens. Must have the shortest possible shutter delay. And it must have an optical viewfinder. Plus, of course, that elusive Leica lens.
Let me present the Leica DP, or the Leica Digital Panasonic:
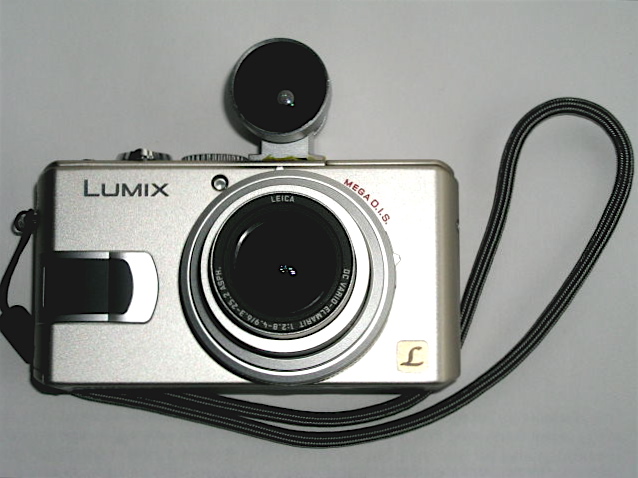
I wasn’t about to wait for the much rumored digital Leica M. First, who knows when, if ever, it will be available. Second $5,000+ paid to a near-bankrupt company for a body with a cropped sensor, which makes my 35mm Summicron into a 46mm ersatz wide angle, is not my cup of tea. So when the Panasonic company released its Lumix LX1 I spent the last of my excess medium format gear proceeds and got one. Something tells me Panasonic will last longer than Leica and while not chump change, the $480 I paid beats the $5k or whatever that the Digital M will go for. The lens is a 28-112mm (I’m using 35mm full frame conventions here) zoom, f/2.8 at the widest setting, falling to f/4.9 at the long end. I had no desire for a zoom, but there was no alternative. What attracted me most to the camera was that it came in chrome (I like to look as amateur as possible) and boasted a very short shutter lag. The latter has been the bane of all but the most costly digital cameras. Sure, the 5D has a lag similar to a Leica M, but it’s hardly a low visibility candid camera.
The biggest drawbacks were the lack of an optical viewfinder and reports that the sensor is very noisy. Well, an email to Cameraquest and $160 later saw a gorgeous Voigtlander 28mm optical viewfinder of bejeweled quality arrive in the mail. Some 3M Super Weatherstrip Adhesive and a few minutes of work saw the finder neatly glued to the top of the LX1, where it replicates the camera’s field of view pretty accurately at the widest setting of the lens. I was going to glue an accessory shoe to the top plate of the LX1 but the only useable space – between the mode dial and the pop-up flash – is so tight that I had to resort to simply gluing the finder directly to the top plate. By using weatherstrip adhesive the bond can be undone at any time with 3M Adhesive Remover, yet is robust enough that the integrity of the ensemble remains unthreatened. You can see just how tight the clearance is here:
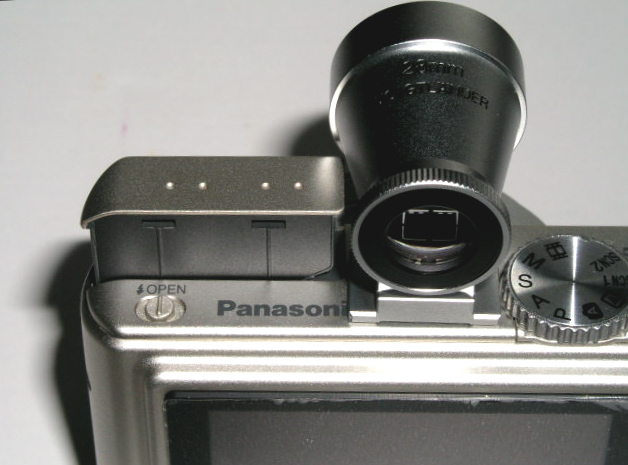
Here’s how the assembly looks from behind ….
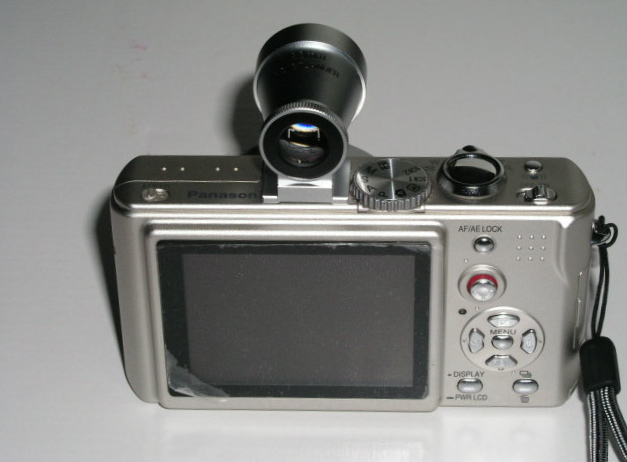
….and in close up:
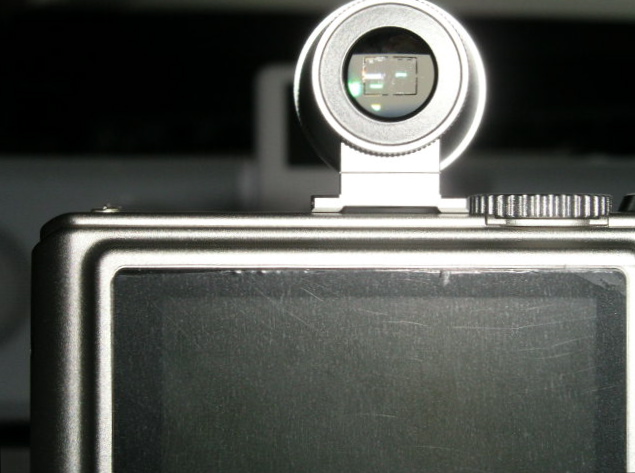
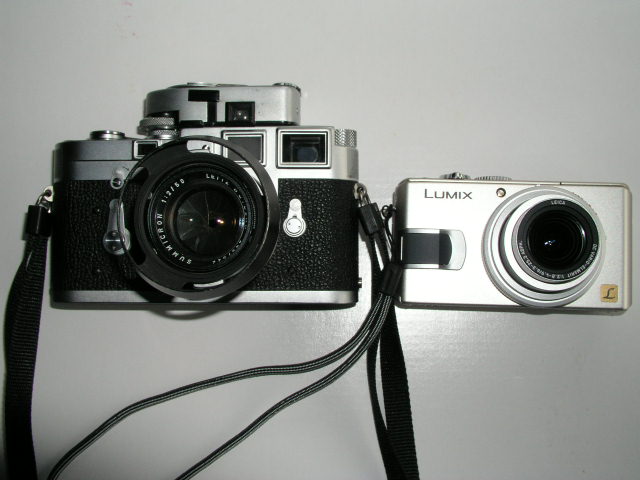
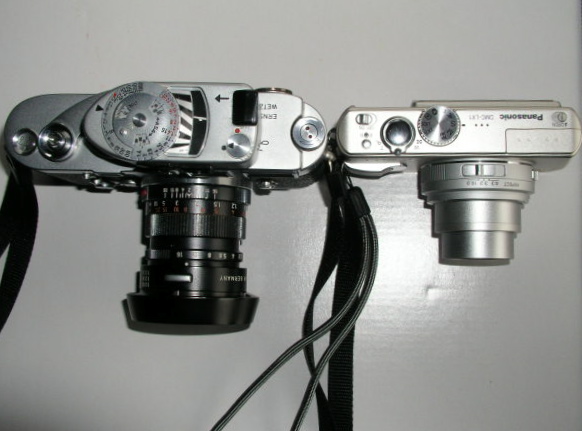
Compared with the M3 the Leica DP is miniscule, weighing in at some 6 ounces plus some 2 ounces for the finder.
Here’s a top view:
Now for some tuning. The LX1 comes with the usual mind numbing collection of mostly useless digital settings. I set the lens at 28mm and the aspect ratio to 16:9. There are three ratios – widescreen 16:9 (like a movie), classical Leica 3:2 and standard digital 4:3. I like the widescreeen look so I went with that. Second, the mode dial was set to ‘A’, meaning aperture priority – you set the aperture, the camera does the shutter speed. I keep it at f/2.8, the maximum. That gives me a shutter speed range of 8 seconds to 1/1000. Stop down a bit and you can get to 1/2000. You will not miss that as the camera has built in vibration reduction, somewhat akin to the IS feature on some Canon lenses, and good for a couple of shutter speeds in terms of camera shake.
ISO is set to 100 until I can figure out just how bad the digital noise is at higher speeds (the camera only goes up to 400 – just like TriX of old), and focusing is set to ‘high speed center area’ to further reduce shutter lag compared with the standard multi-area setting. I leave the auto focusing on but reprogram the AE/AF lock button on the rear to lock exposure only. That way scenes with, say too much sky, are pre-metered by pointing the camera down and jabbing the AE button. Focus can be locked separately, if needed, by taking the first pressure on the shutter release with the focus rectangle pointed at the area of interest, prior to final re-composition. All take much less time than manually focusing your Leica M and messing about with the aperture and shutter speed controls.
How is the key aspect of this combination, shutter lag? Well, accepting that the Leica M and the Canon EOS 5D are pretty much instantaneous, there is a very short delay with the Leica DP as focus take place. Not enough to bother about. The default setting for shutter sound made by the DP is described as ‘soft’ (a very loud ‘clack’) and the loud setting is something like a Pentax 6×7 going off. I switched the shutter sound to ‘Off’ and while you can just barely hear the shutter tripping in a quiet room, in practice you learn to judge when the picture has been taken from the feel of the shutter release button. Compared to a Leica M? Well, the M’s shutter noise is to the Leica DP what the Pentax 6×7 is to the M. The Leica DP wouldn’t disturb your next audience with the Pope in his chambers.
Hey! wait a minute, you protest. Why didn’t I buy the Leica D-Lux 2 which is, after all, a real Leica. Oh! do come on. I saved $300 on the identical Lumix and put some of the savings towards the viewfinder and a 1gB Sandisk Extreme III fast SD card, the better to write out those RAW files that the camera produces. You can opt for a variety of JPGs too, of course, but I feel RAW is the way to go with a noise challenged sensor. The 32 mB card shipped with the camera is a joke – it will accommodate 2 or 3 images. The 1gB Sandisk will store 52 pictures using the highest quality RAW setting with the 16:9 aspect ratio. That feels like two 24 exposure rolls of film from the old days, just right for a day’s street photography. Still, if you want to pay another $300 for a silly red label, have at it.
Drawbacks so far? Well, Aperture does not yet recognize LX1 RAW, so it’s back to that old dog Photoshop CS2 and Adobe Camera RAW for conversions. This combination has all the ergonomics of a Swiss Army knife but at least it yields high quality RAW conversions. Once converted to TIFF the images can then be dropped into the Aperture database. The camera is also very small, meaning it’s easy to drop. The provided wrist strap fixes that. Finally, apertures or shutter speeds (if you use aperture or shutter priority) have to be set using the built in LCD (the camera can be used in fully manual mode if you desire) but at least it’s easily readable in all but the brightest sunlight. That’s in contrast to the truly horrid screen in the $3,000 Canon EOS 5D body. C’mon Canon, wake up!
In Part II I relate some practical field experience with this little jewel. Meanwhile, I’m off to find one of those idiotic ‘Leica’ red stickers, beloved of dentists and investment bankers who collect jewelry, as it should double the value of my new Leica DP.