Category Archives: Photography

Useful apps – Dock and Desktop

More for OS X users.

Following on from yesterday’s article about Menu Bar apps, here are some others I simply cannot live without on my Macs and Hacks.

Mouse Locator:
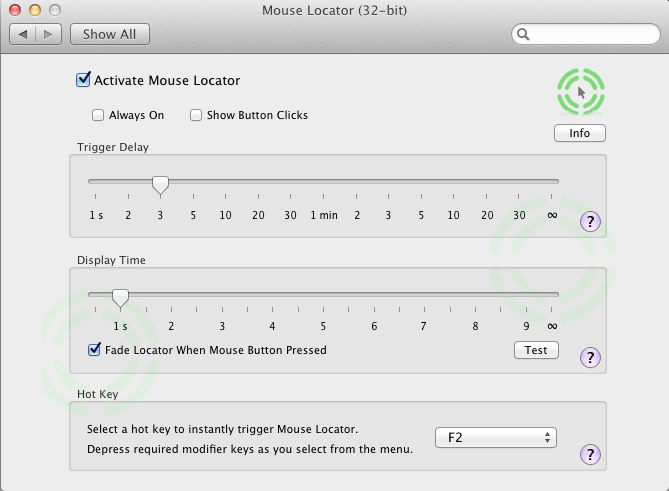
This installs as a System Preference pane and flashes a cursor circle to help you find your mouse cursor. Incredibly useful with multiple displays where the mouse cursor is easily lost. If instructors making software teaching videos used this their work would actually be possibly to follow. As it is, everytime I watch some video on LR3 or Photoshop I end up frustrated trying to see exactly what the mouse is being clicked on. I run this on all my machines. More here.

Total Finder:

Apple’s OS X Finder stinks. In Lion it positively reeks. Total Finder takes out some of the reekage with enhanced features like split screens and is highly recommended. Total Finder integrates tightly into OS X and version updates after new OS X releases are timely.

More here.

Spam Sieve:

By broad acclaim, SpamSieve is the best spam filter in the universe for Apple Mail. The one in Apple Mail works about as well as Finder, meaning hold your nose. Michael Tsai, the author, does a superb job of keeping it updated for new OS X releases. SpamSieve integrates tightly into Apple Mail, the latter much improved with the ‘Conversations’ feature in Lion. It’s the best $30 you will ever spend, from the change left after junking your iMac and building a reliable Hackintosh. More here. I have been using this app since OS Panther.

NetNewsWire:

This journal’s choice as the best software of 2009, NetNewsWire puts the lie to the saying that ‘information is power’. Properly filtered and delivered information is power, the fire hose of the internet browser being for losers whose time is worth little, prefering aimless surfing to focused content delivery. Thank goodness these nitwits exist – who else would we sell all that Chinese crap and American TV sitcoms to?

For the iPad I recommend Reeder which does a far better job of using the touch interface.

Second Bar:
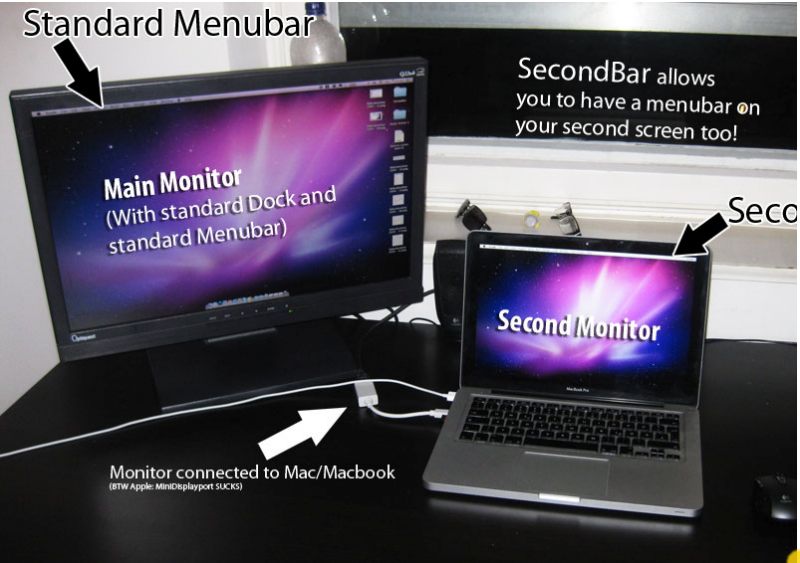
Another huge failing of Apple’s Finder is its inability to display the menu bar on more than one monitor. SecondBar, still in beta for what seems ages now, has just been updated for Lion and is now pretty stable. It replicates your menu bar on additional displays and stops a lot of mousing about. It used to work on my third display which is attached using a USB-to-DVI adapter (the two DVI ports on the video card being used) but no longer does so. Shame. More here. Quite why on earth this is free beats me.

SteerMouse:

I use an old Logitech bluetooth mouse which never came with Mac drivers. SteerMouse not only does the trick, allowing extensive programming of additional buttons, it also allows me to use a proper mouse with OS X in contrast to the execrable offerings from Cupertino. Over these many years, despite its focus on the UI, Apple has never got the mouse remotely right. The closest it came was the MightyMouse with its scroll ball, but the latter would clog and fail after use, and could not be repaired unless you took a hacksaw to the little bugger. I have tried many mouse utilities and this one is the best. A close second is Microsoft’s Intellimouse software (free download) which works well with their RF wireless mouse. Both install as System Preference panes.

EyeOne:

Many photographers use the EyeOne colorimeter to profile their displays. My rant about EyeOne back in February remains exactly on point. As I write the nematode worms at xRite have yet to release an Intel Lion version of their app, meaning your colorimeter remains a paperweight unless you have a Snow Leopard or earlier version of Mac OS available, which allows the related software to do its thing. Scandalous incompetence for a company which has a virtual monopoly in the colorimeter business. Like the jerks at Intuit, xRite has blithely disregarded millions of its users. Unlike the jerks at Intuit, they actually make a great product. What is it with these people?

ImageWell:

I make it a principle to rarely run pieces here without at least one image. Pictures are worth a thousand words. So no article of this kind can go without mention of ImageWell which makes the sizing and uploading of images to my hosting provider trivial. $20. I have used it for the 5+ years this blog has been around and it ‘just works’. When you see images here with circles or arrows to distinguish information, that’s ImageWell at work. It’s on all my Macs and Hacksters.

Transmit:

Transmit is another one of those utilities which has been around for ever, is constantly updated by its makers and one I cannot live without. It allows seamless upload of files to your hosting service. When I create a new slide show for display on my static photography blog, Transmit is the tool I turn to. Cabel Sasser, the author, is a genuine code genius.

Instapaper:

I do not know Marco Arment, the man behind Instapaper, but it’s probably a reasonable assumption that he does not have Apple’s cash pile of $76 billion. If he did, he would be suing their rear off right now for stealing Instapaper from him and adding it to Safari as a Reading List feature. Instapaper is so much better it doesn’t really matter. Whenever you see an article from your feed reader which deserves more time later, or one on your iPad which has Flash content which will not play, one click or two touches and off the URL goes to Instapaper for retrieval at your convenience. Brilliant, simple, effective and a massive efficiency enhancer.

Macaroni:

Remember that old saw that when something goes awry with your OS X installation that you need to go to Disk Utility and run ‘Repair permissions’? Fughedaboutit. Blow $10 on Macaroni and have it do this tedious task invisibly in the background.
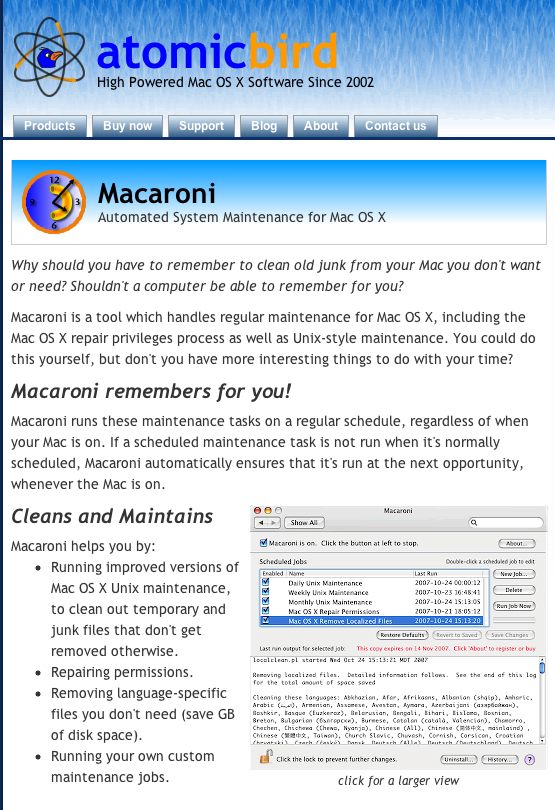
Hard to think of a better way to spend $10. I have been using Macaroni for at least the last four OS X versions and I never have to run ‘Repair Permissions’. Never.

1Password:

To say that Agile Systems has committed the software cock-up of the year with its formerly great password utility 1Password is sort of like saying that Hitler marching on Russia was not so smart. A great product is currently ruined needing constant password input where before there was none. Wait a minute! Isn’t this app meant to cut down on password input? In Safari it’s now crap and in Firefox 6 (just released and no bloody different from Firefox 5) it does not work at all as we await an update from these dopes. Let’s hope they get on it. Finding anything on their web site is an experience solely for masochists and they are doing an excellent job of disregarding the outpouring of derision and anger for the mess they have made of a great product, which still works well (still – until they screw it up, I suppose) on the iPad and iPhone. 1Pissword, as I now think of it, keeps your password file on Dropbox in the cloud, accessible from any device, and tightly integrated into Safari and Firefox desktop browsers. Currently it makes Microsoft Vista look good.

iBank:
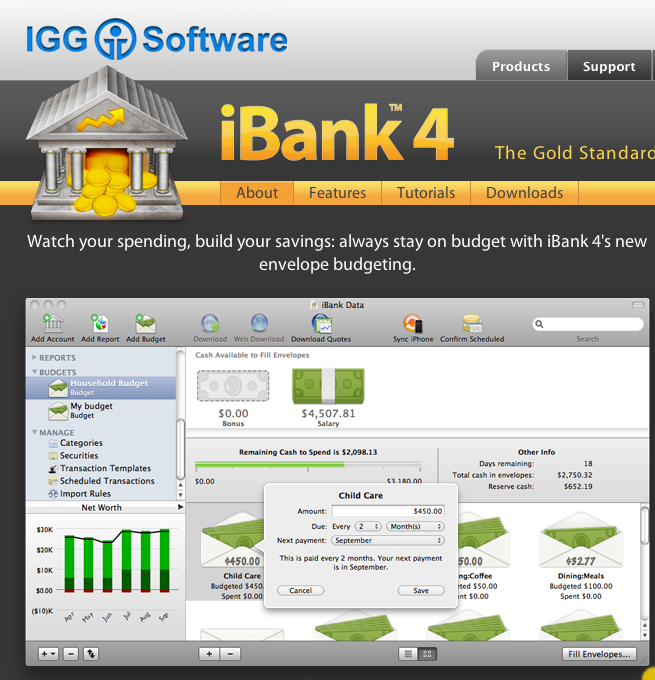
Giving Microsoft an excellent run for the “Couldn’t design software if you paid them” award are the stinkers at Intuit. OS X in its Intel version has been out, what, 5 years now? But forget about Inutit making Quicken run on Intel Macs. The current offering (cynically named ‘Quicken Essentials’ which always reminds me of soiled underwear) does indeed resemble toilet paper and the last ‘good one’ (relative term given its suckage) was Quicken 2007. If you update your Mac OS to Lion, tough, it won’t run. So after much scratching about I moved to iBank which did a decent job of converting the Quicken data file with 20 years of my life in it. The app is not so good at investment transactions, meaning I have to depend more on the crooks at Fidelity who have good database access when they are not screwing me on bid-asked spreads, but what are you going to do? A curse on Intuit and their kind. iBank’s forum makes lots of promises for improvements but they never happen, in my experience.

There’s a fortune waiting for someone who can make a cross platform, competent asset and money management app.

Bing:

Long time readers here know I detest Microsoft’s OS. In fact meeting a Windows user my first reaction tends to be one of caution, much as, say, meeting a fat person who is too friendly. Both have lots to say about their standards, or lack thereof. I prefer neither in my home or office. So when I tell you that I abandoned Google for Microsoft’s Bing on all my hardware over a year ago, you may raise an eyebrow. It’s a case of the lesser evil. Microsoft is an incompetent but successful monopolist and I have nothing but tremendous regard for Bill Gates. He’s right up there with J D Rockefeller in my book and like the oil baron is doing great things for the world (having also first tried to destroy it) with his capital.

But the main reason I prefer not to use Google is that I deeply resent a business model which is based on theft and whose creators perpetrate the sham that what they ‘give’ you is free. Google steals your ideas, your photographs, your financial data and your very identity, then sells it to others for gain. And you are going to store your data in their ‘cloud’ using their ‘free’ office apps? Get a life.

While I rarely do free form web searches (mostly a waste of time with paid results topping the list) when I do it’s using Bing which also shows me a stunning photograph daily on its home page.

VirtualBox:

Last, and most certainly least, sometimes even Mac users have to run Winblows. You can pay money to VMWare or Parallels for their products and continue the frequent lock-up experience which comes built in to every copy of Windows through at least XP SP3, or download nice Mr. Ellison’s VirtualBox free from Oracle and install Windows within this little prison, whence it cannot escape to pollute your pristine OS X workspace. VirtualBox rocks, has industrial grade support from Oracle (who bought it along with Sun a while back and have continued to move the product to strength) and you can run any number of other OSs within it. A great product, despite the company it keeps.

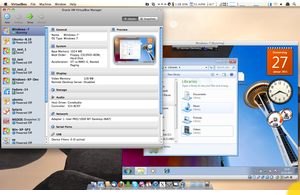
Why, for those who still don’t get it, ‘it’ being the fact that the OS has more to do with efficient computing than hardware, and who are still running on a non-hacked Windows box, you can even load OS X into VB on your Windows machine as in the following snap where OS X is running on a Win 7 computer:
Enough already. Get a Mac or make your own, and get your life back.


Useful apps – in the Menu Bar

For OS X users.

Setting up the economy Hackintosh which my buddy FU Steve built the other day made me realize just how many little applications I use which require installation on a new machine.

Several of these appear in the menu bar on my desktop and here are a few words about the ones which add greatest value.

Dropbox:

You can download Dropbox here. It provides 2gB of free cloud storage and is handy for exchanging large files with friends when Mail rejects them as attachments. Equally, it stores your 1 Password key chain allowing you to use 1 Password on any computer. MobileMe does not work properly with 1 Password, in case you were thinking of going there. Plus MM will soon be shuttered by Apple and who knows what their cloud offering will support? 1 Password availability is a tremendous time saver when setting up a new machine which invariably requires the input of many cryptic serial numbers for newly installed software.

Dropbox will install a folder in your Finder which makes it very easy to access and to move files as with any Finder folder.

Fingerprint:

When Apple added wireless printing to its iOS devices only selected printers from Hewlett Packard supported it. Given that the worst run US computer company, HP, is now getting out of the PC (and printer?) business (who knows with these jerks?), it’s not a great place to depend on for your printing needs but you can get iOS to work with any Bonjour printer using Fingerprint. Just remember to switch on Printer Sharing in System Preferences. More here.

Ralink:

If you use an aftermarket USB wireless dongle for broadband, Ralink provides updated drivers which work with Lion and allow wireless to work. This used to be an ugly dock icon but is now a discreet menu bar one. More here.

Moom:

Moom rocks! Not only can you finally get the green button in app windows to work properly – it’s still broken in Lion – you can save your favorite window arrangement in Moom and restore it at the click of a button. More here.

Air Display:

Air Display allows you to use your iPad as an additional display at a pinch. More here.

LogMeIn:

Need to access a file on your home or office machine when you only have the iPad or a notebook with you on the road? LogMeIn is the answer. It’s surpisingly fast to refresh screens and works perfectly with my three display setup, showing any one of the three or all three at once, though that’s a bit of an eye strain on an iPad display. More here.

SMARTReporter:

SMARTReporter tells you about the health of your drives – spinning disc or SSD. If a drive is failing the icon turns red. Why wouldn’t you install this? More here.

Temperature Monitor:

If you forced me to have just one menu bar icon, it would without a doubt be Temperature Monitor. This utility shows you temperatures at selected points in your machine and I have mine set to display CPU Core #1 for my Core2Quad and Core i3 CPUs. For whatever reason, core #1 in these multi core CPUs always seems to run warmest. Having lost any number of Apple’s poorly engineered iMacs and MacBooks to overheating, you can understand just how sensitive I am to proper temperature management. More here.

Airport status:

Wonder why I have this in the Menu Bar when I use a wireless dongle with Ralink software, above? Well, I also use a PCI-E TPLink internal wireless card set up to emulate Airport. In other words, I have two wireless systems working simultaneously, in case one goes down. Without wireless you are literally dead to the world, something I cannot afford in my day job. It’s like that old joke about Jaguar car owners. You always own two. One to drive, one with the mechanic. Of course, now that Jags are made in India, you only need one.

DVD ejection ‘button’:

Arrogant Apple doesn’t want you placing this in your Menu bar and makes no such option available in System Preferences. Simply follow these instructions and you can open your DVD drive regardless of the keyboard you are using.

Time Machine:

I use an external Time Machine versioned backup HDD and take it with me when traveling, in the event of fire or earthquake damage to my office location. You can invoke this icon from System Preferences->Time Machine. My backup philosophy is on display here.

MobileMe sync:

One thing MobileMe does well, when it’s not down that is, is to keep your Calendars, Address Book and Safari bookmarks sync’d across all your OS X and iOS devices. Essential to me and an incredible time saver when setting up a new machine.

Time and Date:

Not as obvious as you might think. It took Apple until Snow Leopard to finally provide a full Time and Date display. If you haven’t realized that, check System Preferences now.

That’s it for selected Menu Bar icons. The beauty of all these apps is they work on a Hackintosh. Why, they even work on your overheating iMac. In a follow-up piece I’ll address some of the other applications I find essential in my daily OS X use.

An economy Hackintosh – Part II

Cheap speed.

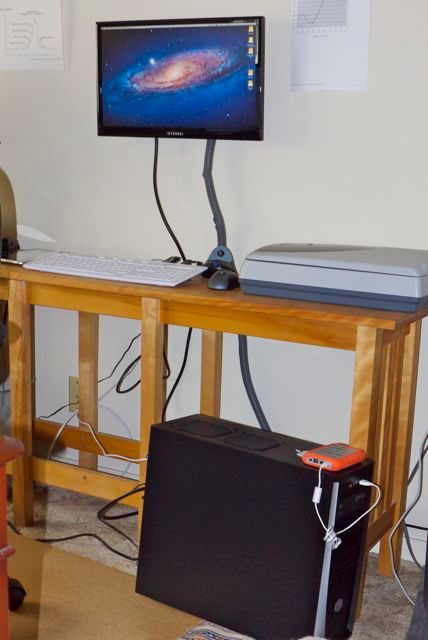
Mission style sofaback made by Yours Truly in best Canadian maple.

There are rumors circulating the San Francisco Bay peninsula that FU Steve has been seen wandering the street at night, head on chest, muttering various incantations.

The way I hear it the builder of the economy HP10 Hackintosh, the backup Hackintosh to my nuclear powered HP1, my standby these past two years, had a singular ‘six sigma’ problem in getting HP10 to fire up. Scuttlebut has it that his wild eyed forays on the streets of the Bay area were fueled by his conviction that all was not well with the power supply makers of this world.

You see, FU went through not one, not two, not three but four power supplies before finding one that would engage with the rest of the hardware. And the fourth and final one, the one which actually worked, came from the local computer recycler for $10.

It’s all too sordid to relate and suffice it to say that HP10 with its Intel i3 2100 3.1gHz CPU and Nvidia GT 430 GPU is perking along just fine as I write, delivering ever falling stock quotes to this stock market maven who loves pain for a living.

Well, a disgusted FU left the hardware with me and I duly applied the relevant tests of interest to photographers.

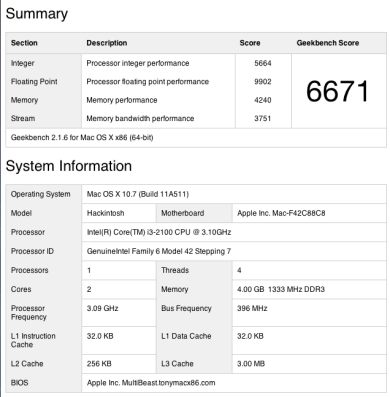
First the old standby, Geekbench (64 bit), a test of CPU performance.

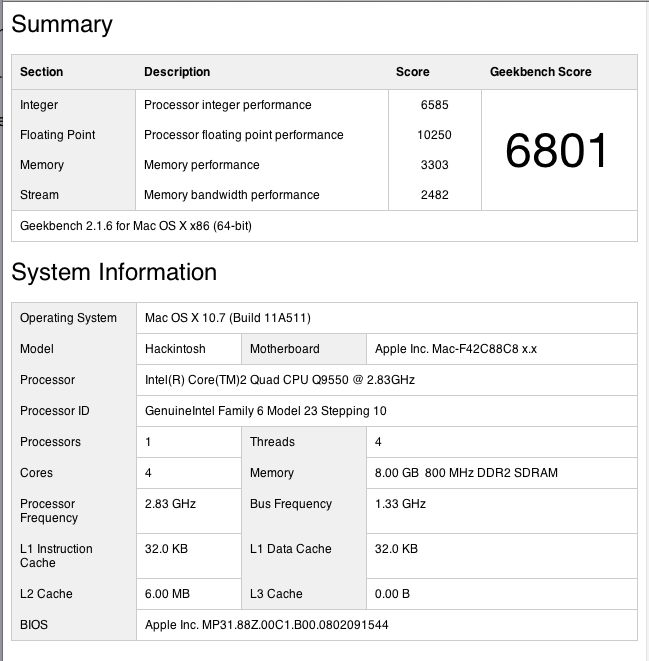
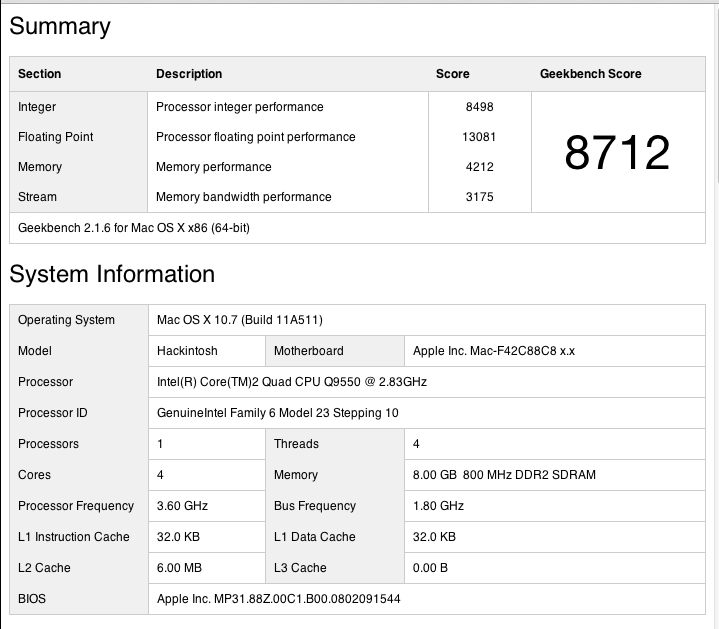
The benchmark here is HP1, my Core2Quad Hackster with an Nvidia 9800GTX+ GPU, in both stock (2.83gHz) and overclocked (3.6gHz) modes, with 8gB of RAM. By comparison the HP10 uses an Nvidia GT430 GPU with just 4 gB of memory, albeit 1333mHz, compared to HP1’s 800 mHz speed.

Here are HP10, HP1 (stock) and HP1 overclocked:

HP10 stock, HP1 stock, HP1 overclocked.

So el cheapo HP10 with its bottom-of-the-line i3 Sandybridge CPU comes in at 98% of HP1’s base speed. What’s not to like?

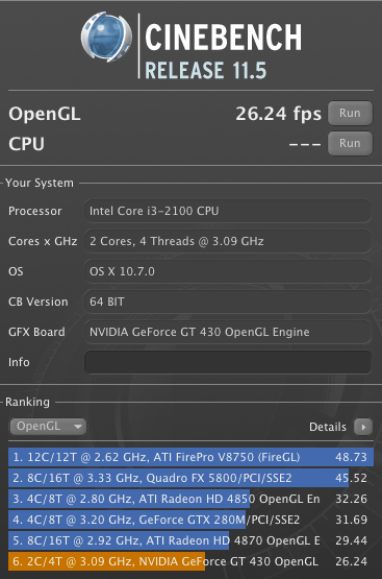
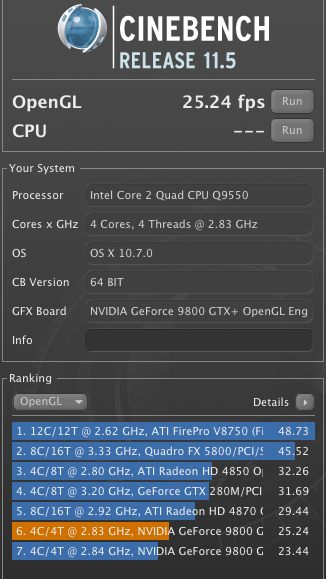
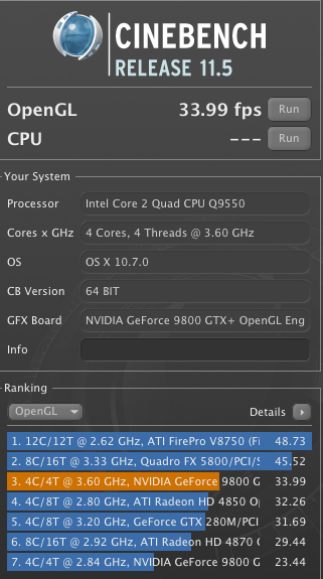
OK, how about GPU performance? Here are the Cinebench benchmarks:

HP10 stock, HP1 stock, HP1 overclocked.

So you are getting stock HP1 performance (Core2Quad – $290) for an i3 price (Core i3 2100 – $128). Your GPU at some $80 is half the price of the fancy one in the older machine. And it’s faster. As is the memory – Memory Performance is 32% faster in stock mode for the i3 machine, even though there’s only 4gB in HP10 compared with 8gB in HP1. The DDR3 memory in HP10 runs at 1333MHz, compared with 800MHz for the DDR2 in HP1. And you don’t need to worry about fancy cooling solutions as the new bits use a lot less power than their predecessors. Similarly equipped to HP1, HP10 will use 30% less power. Less power, contrary to popular belief, is a good thing – whether in computers or bankers.

Tests with LR3 and PS CS5 confirm the above results. HP10 flies in photo processing tasks.

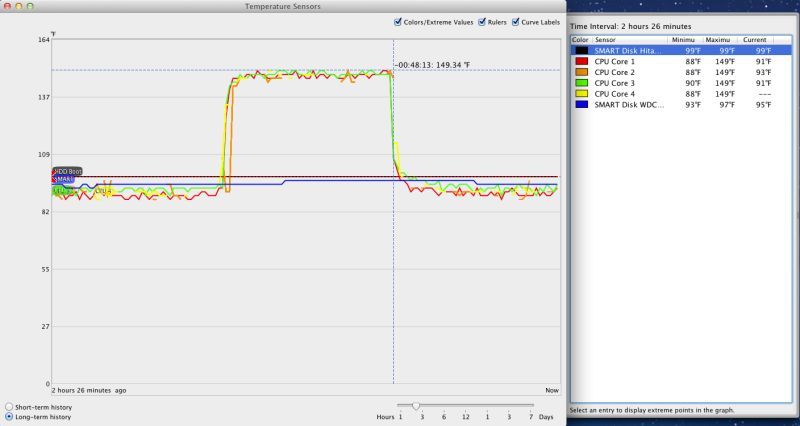
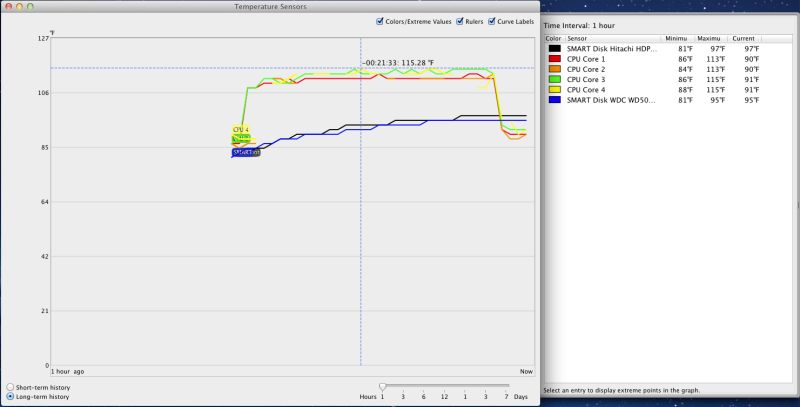
Do you need better cooling? Check out this chart using the poor stock Intel i3 cooler – the rise indicates the use of Handbrake to convert and compress a full size, full length DVD movie to M4v format for viewing on the iPad:

Stress test – stock Intel CPU fan.

The 149F maximum is well below the 176F service limit.

I hate heat in computers – it’s the great killer. So, a few days later, finding myself in Palo Alto, I blew $27 on an open box return Cooler Master 212 Plus at Fry’s Electronics, the same giant radiator and fan used in HP1, with the following result on the stress test:

Stress test – Cooler Master 212 Plus radiator and 120mm fan.

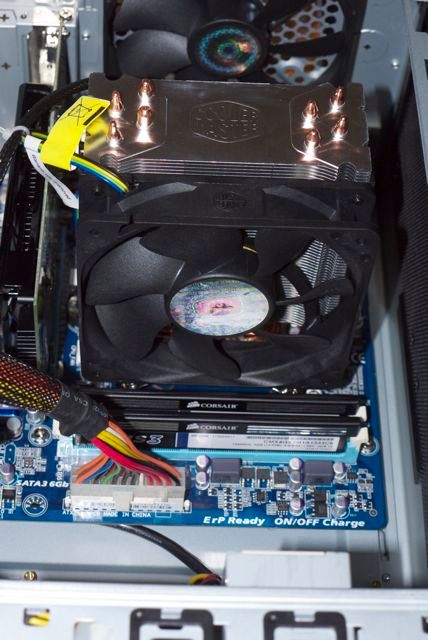
Here’s the Cooler Master installed in the case – this is a tall radiator so make sure it will fit your case if buying one.

Cooler Master 212 Plus installed.

As with HP1, the motherboard has to be removed when installing the Cooler Master as it requires installation of a retaining plate for the large radiator beneath the motherboard. It’s worth it – the temperature peaks at 115F under load compared with 149F with the stock fan. That is a startling improvement for very modest outlay and confers great peace of mind. As with the stock Intel fan, the Cooler Master uses a four pin connector for the fan (all included in the price) meaning that it’s energy efficient, speeding up only when needed. In practice I could only hear it speed up on restart.

What are you waiting for?

This is a dream photographer’s rig for a price much less than the bottom-of-the-line MacMini with its lower Geekbench score of 5700. And it comes with a DVD drive and proper cooling. The latest Mini (no DVD drive) runs its Core i5 CPU at only 2.3gHz versus 3.3gHz in the version sold by Intel. This is probably to keep heat down in the Mini’s cramped interior. The premium for upgrading the Mini to a Core i7 which runs at a pathetic 2.7gHz is $400, whereas the premium for dropping in a 3.4gHz i7 in HP10 is a mere $190, and you can bet it will blow the Mini away on performance measurements. And overclocking the i7 to 3.8gHz (i7-2600K version) takes about two minutes to do and is approved by Intel within its three year warranty term.

So you want more speed? The premium for an i5 CPU is $90 and for an i7 $190. Drop in plug-and-play replacements. Based on published data I would expect a stock Core i7 CPU to run at almost twice the speed of HP10 for that modest cost premium. Add a further 12% in speed for an overclocked i7. This sort of performance is way in excess of any photographer’s needs and HP10 proves that the modest i3-2100 Sandybridge CPU is a tremendous performer at an unbelievably low price, when properly installed and cooled in a large case.

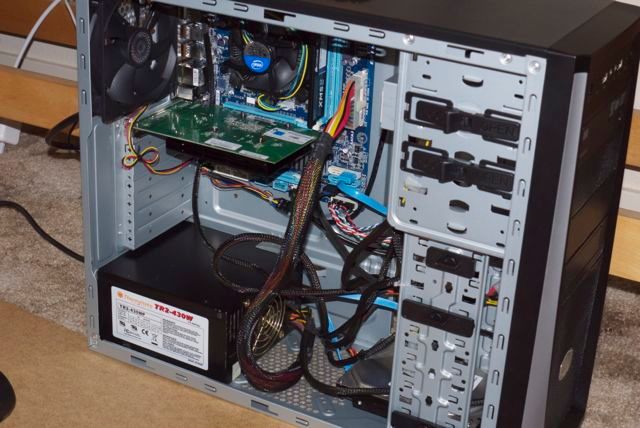
By the way, there’s no shortage of expansion room in this rig and, yes, it will accommodate the super tall Coolermaster 212 CPU radiator used in HP1 if you want to run an overclocked i5 or i7 CPU. (The overclocking possible with the i3 is so low that’s it’s a waste of time).

HP10. Lots of room for growth.

Memory update – August 21, 2011:

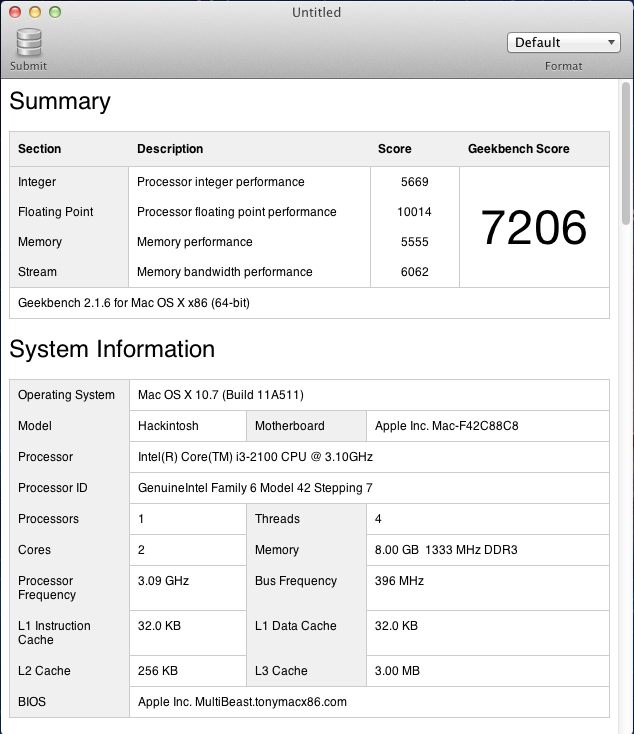
Because memory is now so cheap, I went wild and ordered another 4gB stick of 1333mHz DDR3 memory ($30) and inserted it in the remaining RAM slot on the motherboard. No tools needed – two thumbscrews to remove the cover and that was it.

The result is that HP10 with its bottom-of-the-line i3 3.1gHz Sandybridge CPU is now 6% faster overall on Geekbench 64 than HP1 with its top-of-the-line Core2Quad CPU running at stock 2.83gHz speed.

HP10 with 8gB of memory – 6% faster than HP1 stock.
The loss of Processor integer performance is more than made up for by Memory performance which is far more important when moving files to/from LR3 or Photoshop.

Adding memory does not affect OpenGL Cinebench performance which remains unchanged at 26+ fps. That’s a function of the GPU’s RAM, not system RAM.

iCloud update – October, 2011:

OS 10.7.2 adds iCloud functionality. I ran Software Update and it works fine but to access the AppStore, Facetime and iCLoud (in System Preferences) you need a new bootloader named Chimera.

To get iCloud and AppStore working, you must install the latest Chimera boot loader; the old Chameleon one for 10.7.0/1 will not do, if that is what you used. If you used an older Chimera, you will have to update to the latest.

Go to www.tonymacx86.com, choose the downloads area and download MultiBeast. Run it and select Bootloaders->Chimera. Reboot after installing.

Microsoft Surface

MSFT drops the ball. Again.

Microsoft Surface has been around for, what? 5 years now?

Think of it as a large iPad on steroids, but with tremendously improved touch functionality.

Not surprisingly, MSFT’s web site on the product is simply awful. No dynamism. No excitement. A narrative as thrilling as the instruction book for repairing a washing machine. What is it with Microsoft? Even the ‘copy and paste’ link does not work!

If I was marketing this product I would make sure to give free versions to every major film studio, news channel, publishing house and famous photographer I could find, make it sell for $3,000 and watch it take off. I have seen it used twice – once on a TV news show and once in a James Bond movie, both times to jaw dropping effect. And if I was MSFT, I wouldn’t care about the profit or loss. They have already lost millions on it. What I would care about is the tremendous halo effect it would have on my other mass market products. It’s a simple variant of ‘win on Sunday, sell on Monday’ in the car world. Porsche wins Le Mans? You buy a new 911.

Microsoft Surface – click to view the boring video.

Steve Jobs’s was so right all those years ago when he said ‘Microsoft has no taste’. Even when they make ground breaking products like Surface and Kinect, their marketing, in a word, sucks.

Watch it from the man himself.

You can even get to enjoy the world’s worst CEO in this video – though he has strong competition from Howard Stringer at Sony. Here Ballmer extols Windows ’95 which most would agree was the worst OS ever. Or was that Windows ME?

An economy Hackintosh – Part I

Equalling the original at half the price.

Expert computer builder FU Steve set out the current state-of-the-art in Hackintosh building for photographers and video artists in his piece here. At a cost of $1,347, which included one Dell 21.5″ IPS display it’s some 20% faster on most tasks than my Core2Quad machine which is overclocked to run at 3.60gHz versus 2.83gHz stock.
Truth be told, that latest build, using the Intel i5 Sandybridge CPU is overkill for most, so I asked FU to spec out a lower cost machine whose goal was to equal the performance of my Core2Quad Hackster at half the price. In contrast to the paper specs of the i5 machine, this one would be put to work as a stock quote and Excel machine in my office, so there is no room for any cost cutting which threatens reliability.
I’ll hand it over to FU Steve. Having built the HP1, my daily user, he now embarks on the HP10.

* * * * *

Thank you Thomas.

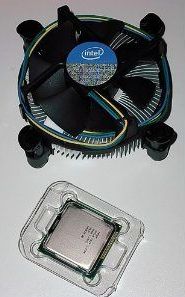
This build is going to use the Intel i3 3.1gHz CPU and a low power drain motherboard and graphics card. That will save on cooling without compromising reliability. On the other hand, the power supply will be over-spec’d to allow for the addition of more drives and monitors down the road with a possible upgrade to an i5 or i7 CPU which is a drop in replacement for the i3. The stock Intel cooler will be used; it’s a poor cooler but should be adequate for the demands here.

CPU:

Intel Core i3-2100, 3.1gHz – $124

This is a superb bargain. It can only accept very modest overclocking, which is a waste of time, but uses little power and is easily cooled.

CPU cooler:

I am using the stock Intel cooler which comes with the CPU, with Arctic Silver thermal paste in lieu of the stock paste supplied by Intel.

Motherboard:

Gigabyte Intel H67M-D2-B3 – $100

I’m sticking with Gigabyte as it’s a known and reliable maker. This board is a Micro-ATX board, though we are using a full sized ATX case. It supports the new 6gB/s SATA data transfer rate, twice as fast as the older 3gB/s. It will only accept two memory sticks, but we will only be using one, for 4gB.

Memory:

Corsair XMS3 4 GB 1333MHz PC3-10666 240-pin DDR3 Memory Kit for Intel Core i3 i5 i7 = $30

Another can be added if needed later on.

Graphics and video:

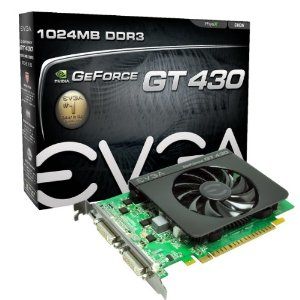
EVGA GeForce GT430 1024 MB DDR3 PCI-Express 2.0 Graphics Card Video Card 01G-P3-1431-KR – $64

There are faster and far costlier GPUs than this one but this is a tremendous price for an advanced card which will support two DVI-D displays. You can start with one display and then add a second later. I’m sticking with EVGA and the Nvidia chip as Thomas has had such excellent performance from his EVGA Nvidia 9800GTX+ card, which is marginally slower than this card, but cost twice as much. The card comes with its own cooling fan, which is as it should be. This is a low power consumption card and does not require plug in power, deriving what it needs from the motherboard.

In addition to the two DVI-D sockets for computer displays (a rarity on a card which is so inexpensive), the card also has an HDMI socket for use with modern LCD TV sets, making this machine ideal as a home theater PC, though I would use a smaller case and a notebook HDD for such purposes. There is no VGA socket – if that’s required, look at other cards. Gigabyte alone makes so many it’s mind blowing.

Computer case:

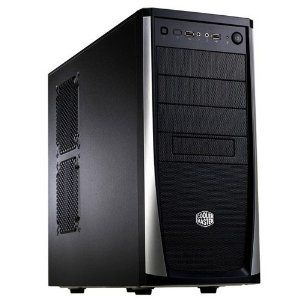
Cooler Master Elite 371 Mid Tower ATX Case – $40

Not as massive as the Antec Sonata III Thomas uses in his Core2Quad machine, but adequate for our purposes. It has especially easy installation for disk drives and peripherals and lots of space for cooling and expansion. There is no reason to go with a small case for this application.

Power supply:

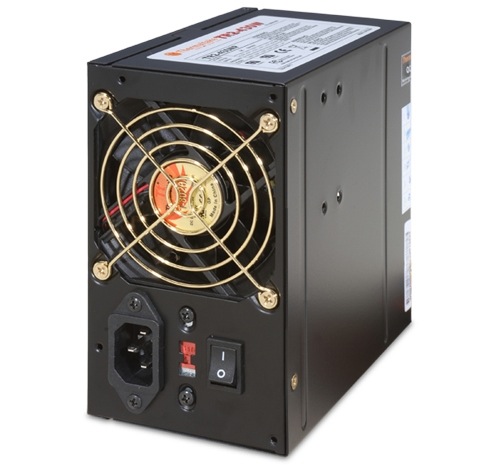
Thermaltake W0070RUC TR2 Series 430W Power Supply with 2 Fans – $41

It’s easy to be cheap here, but an under-spec’d power supply will die on you, maybe taking the motherboard with it. Plus it limits upgrade potential. The power supply used here has shielded cables, lots of connectors, a twin fan and a great reputation. It includes a 115/230 volt switch.

You can use the table here to properly determine the power supply wattage needed. This rig demands 234 watts, so with a 430 watt power supply there’s no stress. Add a second HDD, two SSDs, more USB devices, more fans and an i7 CPU overclocked, and the power needed rises to 295 watts. (By contrast the Core2Quad Thomas uses needs 404 watts at full power, which gives you some sense of how power needs have fallen with the latest components).

Keyboard:

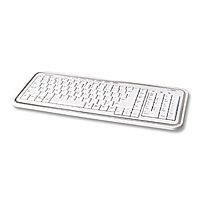
Kensington K64366 wired slimline USB for Mac – $38 (not at Amazon).

Forget wireless – simply not reliable enough. This keyboard uses mechanical scissor-type key springs and is superior in every way to the execrable ergonomics of the overpriced ones made by Apple. You use a keyboard all the time – why not the best? Get a cover while you are at it – $20 – and keep it clean and long lived.

Disk drives:

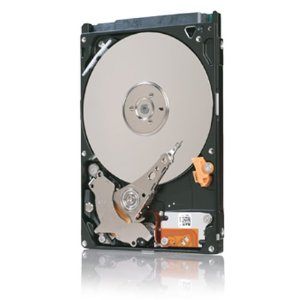
Seagate Momentus XT 500 GB 7200RPM SATA 3Gb/s 32 MB Cache 3.5 Inch Solid State Hybrid Drive ST95005620AS-Bare Drive = $100

You can get awfully used to the fast boot of an SSD but it comes at a price. As you can leave your HackPro on 24/7 there’s no need for a fast booting costly SSD, so use a good compromise, a hybrid HDD. This uses some internal memory to cache frequent uses (open PS, open LR, etc.) but traditional spinning disks for storage. The price is right. 500gB is plenty; if you need more buy larger traditional drives and consider using a small SSD drive for booting the OS and for loading apps. If the budget is tight, you can get a 500gB 6gB/s Seagate 7200rpm drive for as little as $40.

DVD readers:

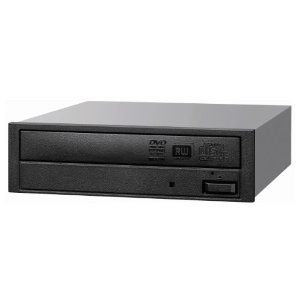
DVD: Sony 24X SATA Internal DVD+/-RW Drive AD-7260S-0B – $20

Steve Jobs may be junking the DVD drive but you don’t have to at the price Sony is asking. Forget slimline or slot loading drives – made to fail.

If you need an SDXC card reader, external USB types can be had for $20.

Mouse:

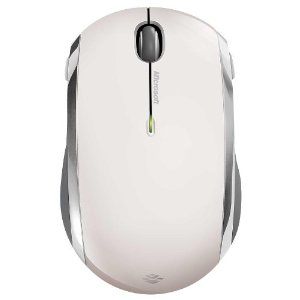
Microsoft Wireless Mobile Mouse 6000 – White – $23

Bluetooth mice – Apple’s and many others – are plagued with interference problems. Like Thomas once did, I use the Microsoft Mobile Mouse because it’s cheap, comfortable, runs for three months on one AA battery and uses RF not BT. A small dongle is inserted in any available USB port and there’s no pairing or disconnection issues. Instant on, never off. Best of all, the white one has a semi-gloss surface which does not show fingerprints and is $4 less than the shiny black one. Go figure. Download MSFT’s Intellimouse software and you can tailor the two side buttons and the scroll wheel. The latter supports both vertical and horizontal (tilt the wheel) scrolling. A superb product, even if it does say ‘Microsoft’ on the box. The scroll wheel is freewheeling – if that does not work for you look at RF mice from Logitech.

By all means try Apple’s Magic Mouse. I suspect you will conclude, as I did, that the ergonomics suck, leaving you $70 poorer.

Bluetooth:

IOGEAR USB 2.1 Bluetooth Micro Adapter GBU421 – $12

If you need BT, plug this in to any USB port. The mouse used does not need it.

Speakers:

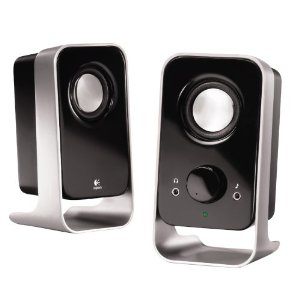
Logitech LS11 2.0 Stereo Speaker System – $18

These will give you sound about a billion times better than the ones in an iMac for very little outlay. They are wired – forget wireless toys. This model has been around for ever, with just cause.

Display:

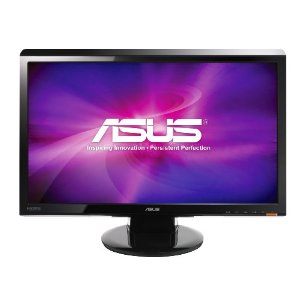
ASUS VH222H-P 21.5-Inch Widescreen LCD Monitor – $138 + $5 for a DVI-D cable.

With 1920 x 1080 definition this is a nice modern display. Not top of the line but adequate for all but the most critical users. Comes with DVI-D cable included. There’s a small built in speaker (poor) but will suffice if you do not need big sound.

Wireless 802-11n:

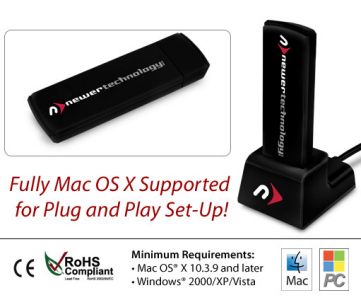
Newer Technology USB dongle from MacSales – $30

The latest driver works perfectly with OS Lion.

If you prefer wired Ethernet, be sure to install the RealtekRTL81xx.kext file (available free from kexts.com) using KextBeast (available free from the Downloads area of Tonymacx86.com). Simply place the kext file on your desktop and run KextBeast, then restart the computer.

Software:

OS X Lion – $30

The most overrated ‘upgrade’ to an OS ever, but robust, stable and easily made to behave like its awesome predecessor, Snow Leopard. Thomas has written about it a lot on his blog, and it is priced right. I used the TonyMac installation which is clearly documented here. The site has a host of DSDT files – these are specific to your hardware to make Lion run. Installation is simply a question of placing the file on your Desktop and running MultiBeast.

Sound is a little tricky. The motherboard uses the Realtek ALC888b codec. To avoid nasty crackling sounds run System and AppleHDARollback from Multibeast. Then go to Kexts.com and download GigabyteALC888b.kext and HDAEnabler.kext, place both on the Desktop, run KextBeast, reboot and you are done.

The installation here is a ‘clean’ Lion one, with no need for a pre-existing Snow Leopard installation.

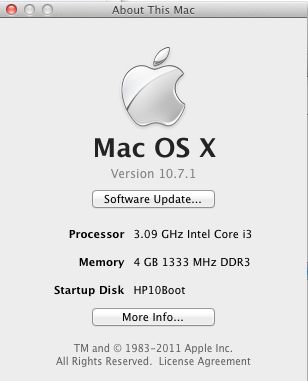
You can update Lion 10.7.0 to 10.7.1 using Software Update in OS X; mine installed flawlessly.

Time to assemble the hardware and tools required:

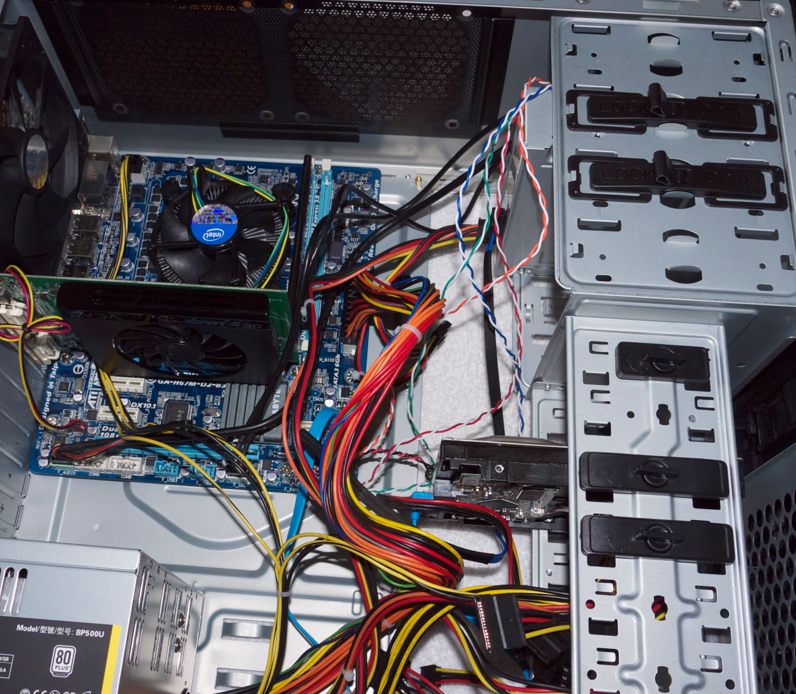
Study the pictorial at the end of this piece first, then run it on your iPad as you do the work. I believe that even a first time computer builder could assemble this in a very leisurely ninety minutes, two hours with a pause to walk the dog. Tools needed are a medium Phillips screwdriver, a flat bladed screwdriver, a pair of snips to remove blanking plates (though you can just wiggle them until they break off), a 5mm nut driver to tighten the motherboard stand-off posts (though you could butcher these just as easily with a pair of pliers if you have no pride in your work), a thin piece of stout plastic to spread the thermal paste on the CPU and heatsink in the fan base, and a bent paper clip to test the power supply before installation.

Software hacking for Lion OS X:

There are a large number of web fora addressing OS X hacking. Some of the most useful are:

  • InsanelyMac – a lot of noise on this forum, but the chances are high that your issue will have been encountered by someone else and, if not, posting a question comes with a good chance of a reply.
  • TonyMacX86 – this aims for a much ‘cleaner’ presentation and comes with a host of free hacking tools and files.
  • Lifehacker – Hackintosh – the source for the original Adam Pash build of Thomas’s HP1 Core2Quad Hackintosh, much enhanced since original construction. Lots of great tips on upgrading to Lion from Snow Leopard.

In both cases there is a strong sense of community and helpfulness, so if you derive value from these be sure to try and help others if you can.

Economic risk:

No component costs over $140 here, so if one part blows, your replacement cost exposure is low.

Expandability:

The beauty of using a generously sized computer case is not only that it makes cooling easy (you can get three more case fans in there and a large CPU fan) but also that the computer can be greatly expanded as needs dictate and the budget permits. Some examples:

  • Add three more case fans
  • Upgrade the Intel Core i3 CPU to an i5 or i7 – drop-in replacement, no software changes. The Core i3 used has excellent resale value.
  • Use an i5 or i7 in the overclock version and you can further significantly increase processing speed
  • Add more RAM – one more 4gB stick for 8gB total or two 8gB sticks for 16gB
  • Add SSDs, HDDs, card readers, etc. until you are blue in the face
  • Replace the Micro-ATX motherboard with a full sized ATX one if your needs are extreme
  • Migrate to an exotic graphics card for the most demanding video processing needs
  • Add a second monitor without the need to add a second graphics card

Further, by not chintzing on the power supply at this stage, there is more than enough current and connectors available to cope with increased power demands.

Total cost:

$814.

$724 if using wired internet and a regular 500gB disk drive.

Add as much as you want to spend for a costlier monitor. Or two.

In Thomas’s case, he had many of the peripherals and OS Lion, needing only the CPU, RAM, motherboard, graphics card and power supply, for a total outlay of $400.

For that price you get performance comparable to a mid-range iMac at half the price and with far better cooling, meaning far greater reliability.

* * * * *

Thanks, FU. FU is building the machine right now and I will run Part II with performance measurements on Photoshop CS5 and Lightroom 3 once it’s up and running.

Click the picture below for a slideshow of how FU assembled the HP10 computer:

Click the picture for the HP10 assembly pictorial. © FU Steve.

Part II on the economy Hackintosh appears here.