Trust HP to design this for engineers, not humans
In yesterday’s column I mentioned the existence of aftermarket profiles for some interesting papers made by the likes of Hahnemühle and Arches. These are swellable papers designed to absorb the ink dyes used in the HP DJ 30/90/130 printers. That’s all well and good, but how on earth do you get these to show up as choices in Lightroom when you are in the Print module? Especially as the instructions from HP for the right place to install these simply do not work.
Well, HP is first and foremost an engineering company which means that things obvious to engineering graduates are gobbledeegook to regular humans. Mercifully, your instructor, Dr. Pindelski, happens to have an engineering degree, so if you use an HP Designjet 30, 90 or 130 printer, follow the instructions below and all will be well …. so long as you have the good sense to get a life and use a Mac. PC users can probably figure things out from what follows, but please do not ask as I neither use nor propose to ever use a PC again.
Here’s the Print module in LR2:
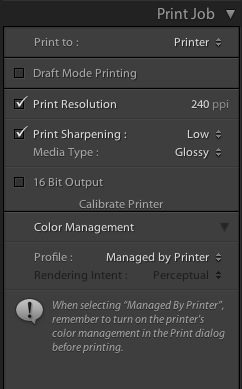
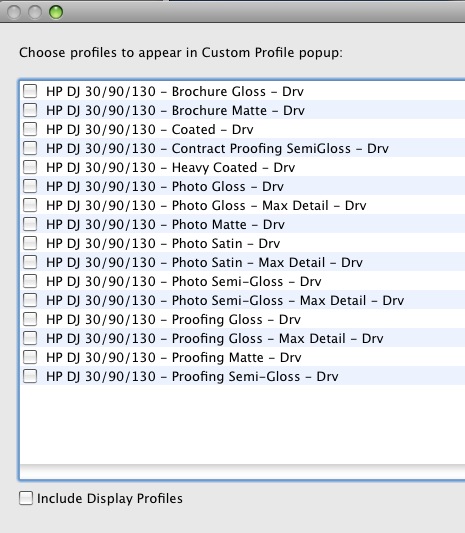
Click on ‘Managed by Printer’ then click ‘Other’ and you get a listing of the standard HP paper profiles:
Now go to Finder and click on the Library (this is the Mac’s library on the root of your internal hard drive, not the one under your name in Users) and navigate to the directory show – navigation is from bottom to top (this is for OS Tiger – see below for the changed location in Snow Leopard):
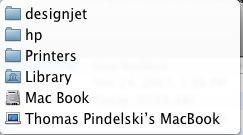
Your Finder screen now looks like this:
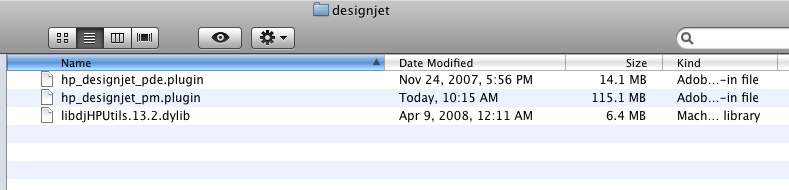
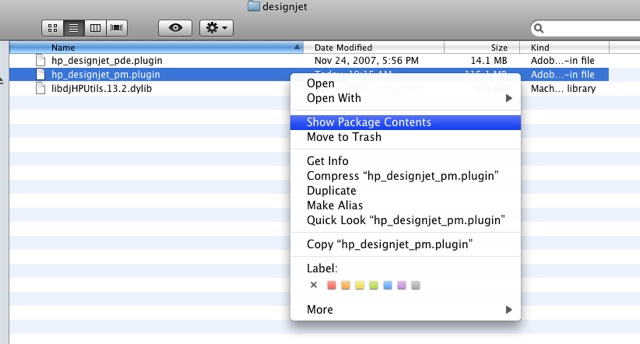
Now Control-Click on the file named ‘hp_designjet_pm.plugin’ then click on ‘Show Package Contents’:
Now drag and drop the downloaded package of profiles (see yesterday’s entry for the download link) onto the directory named ‘ICCProfiles’:
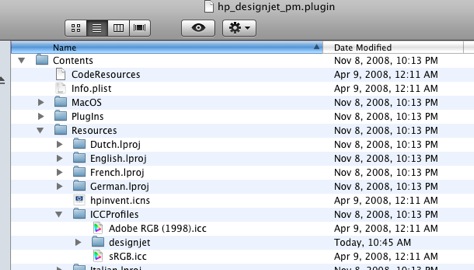
The ‘designjet’ directory is the one with the new profiles, which you just dragged and dropped.
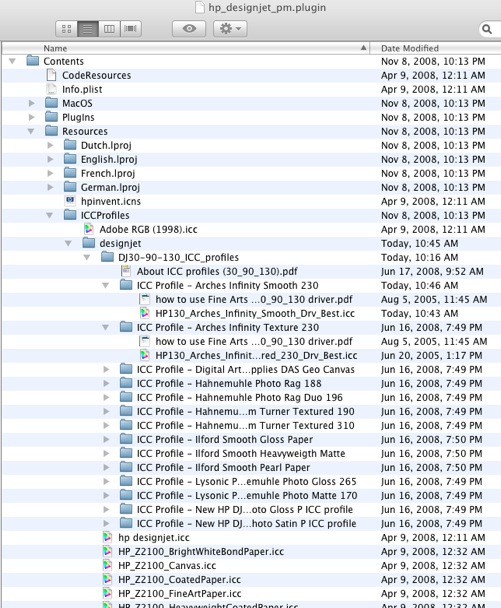
Click on the ‘designjet’ directory in ‘ICCProfiles’ and you will see all the additional profiles, thus:
Snow Leopard update:
Additional paper profiles are stored in your user directory thus:

Location of additional paper profiles in Snow Leopard.
The remaining task is to edit the ICC profiles of your choice so that they will show up in the LR2 drop-down box. The snag is that you have to use one of the tailored HP name strings to force the choice to show. This means two things:
1 – You must use a file name identical to one of the existing ones used by HP for their papers
2 – You will have to embed your profile description of choice in the replacement new paper profile for it to display meaningfully in the LR2 drop-down box.
First, then, we have to determine which of HP’s standard paper choices we can dispense with. That’s easy, because you didn’t buy this fabulous printer to use Brochure or Proofing paper or for that matter generic Coated paper, so that means at least nine of HP’s file names can be reused. Further, if you stick with the ‘Max Detail’ drivers, you get even more redundant file names to use – and why would you want anything but maximum detail in your display prints?
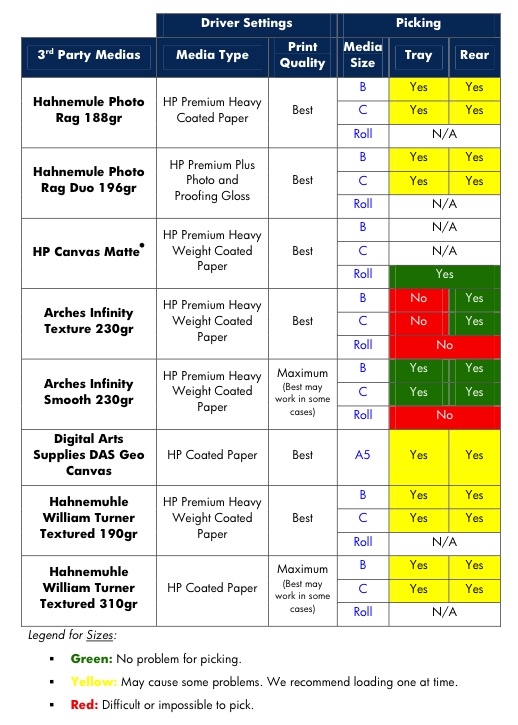
First, determine the new papers for which you would like to install profiles – here’s the list from the file downloaded from HP:
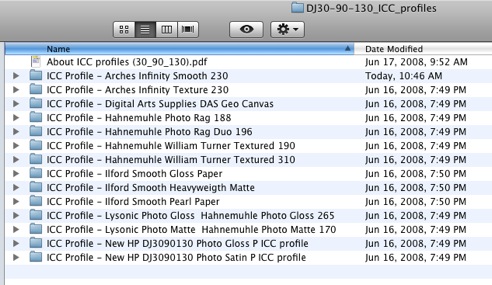
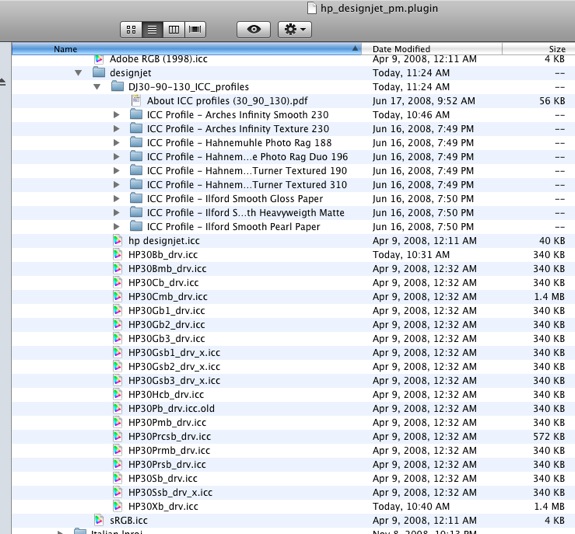
I’m intrigued by the Arches, Hahnemuhle and Ilford papers. so in the following screen snap I have erased those imported profiles which are not wanted and also erased all the clutter from the inclusion of the HP Z2100/Z3100 profiles which are for HP’s latest – and very expensive – wide carriage pigment printer, thus:
As I am adding nine new profiles I will need to reuse nine of HP’s file names to make these show up – here’s the ‘conversion’ table:
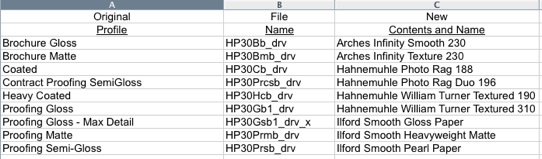
To embed these paper names in the new profile ICC files we have to edit the profiles, rename them using HP’s cryptic file naming convention, rename the original files rather than erase them, in case they are needed in future, then move the new files down one level in the directory so that LR2 can read them.
Double-click on the first new file, the one for Arches Infinity Smooth 230 paper. You will see this as Colorsync opens:

Click on ‘Localized description strings’ and enter the name you want for the paper of choice – the default looks like this:
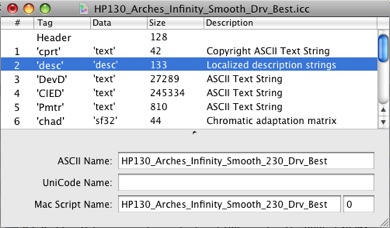
Those names are awful (this is the text which will show up in LR2) so I make them more user friendly, like so:
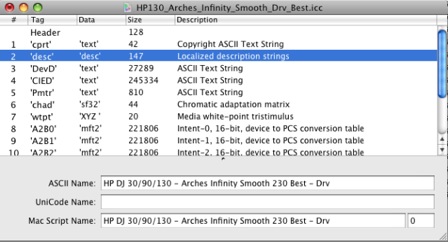
Now save the file in Colorsync (Command-S) and move on to the next one, repeating as necessary with descriptive names for each paper.
Next we have to rename the original files which are no longer needed; I do this by simply appending the text “.old” to the name of the original file; use the conversion table you created above to determine which files need to have ‘.old’ appended to their names:

Next, rename the new paper profile files using the old HP file names – the same ones where you just added the “.old” extension, like so, repeating for each new profile and making sure to use unique HP file names from the original files, with no duplications:
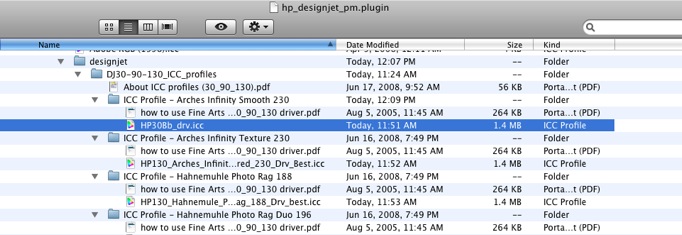
Here all all the name changes on the new files:
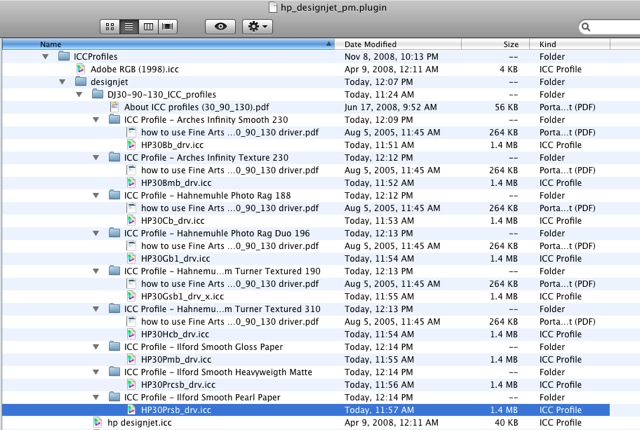
Finally, drag these renamed .icc files down one level to where the “.old” files reside, thus:
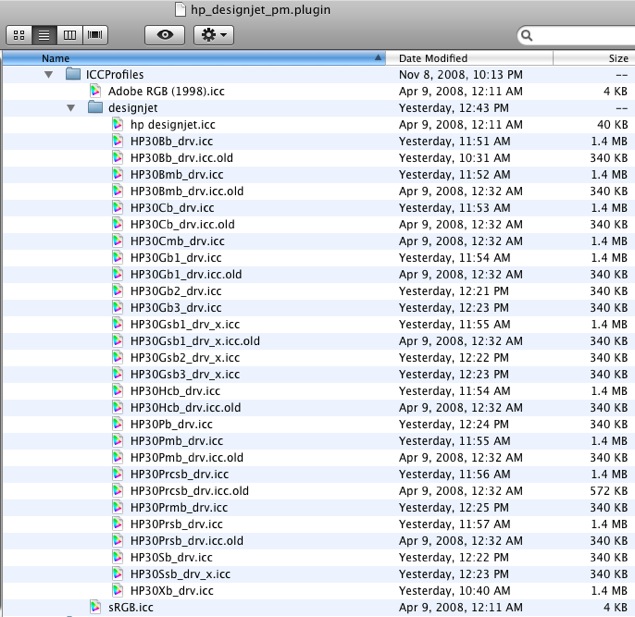
Load LR2 and click on Profile->Other in the Print module and this is what you will see:
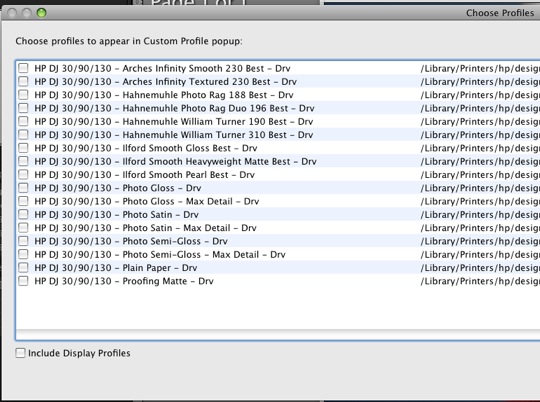
To further clarify matters, I then add the text “HP” to the HP paper profiles, using Colorsync as before, with the following result – compare with the previous screen snap:
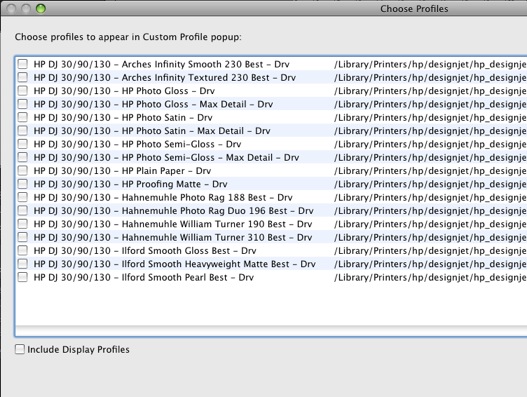
Now check all the boxes thus to make these properly named profiles show up in future when you click in LR2 and hit ‘OK’:
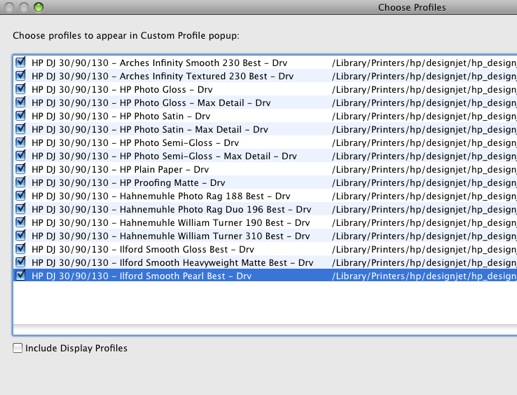
Next time you click profiles in the LR2 Print module you will see this:

Select the profile of your choice, load the appropriate paper in the printer and off you go! But do first make sure your display is profiled properly and, of course, I highly recommend Dr. P’s free screen profiling approach which will not only save you money on the colorimeter you do not need, but will get you more accurate colors to boot.
I took the additional precaution of making the new, renamed .icc files ‘read only’ to make sure that any new profile or application updates do not overwrite the files created above. You can do this by control-clicking the .icc file, clicking on ‘Get Info’ and making it ‘read only’ in the dialog box that pops up.
Why use printer-managed profiles rather than application managed colors? For the simple – and vital – reason that when you hit Print->Preview in LR2, Apple’s Preview application will display a Preview; at the lower left you will see a box for previewing the print on the screen using the color profile you have chosen – so much for all the ‘experts’ who maintain that you cannot soft proof with applied paper profiles in Lightroom:
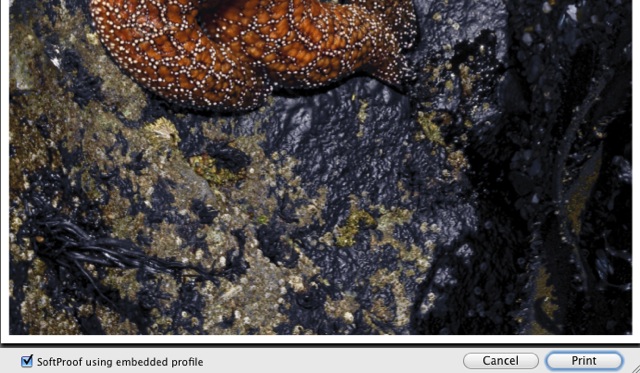
You are now viewing a Print Preview of your picture with the paper profile of choice applied to the image. And you can use a selection of non-HP branded printing papers. What’s not to like?
And I can think of no better time to buy one of the truly great wide carriage printer bargains – HP still lists the Designjet 90 (18″) for $995 and the Designjet 130 for $1,295 (24″). I would not hesitate to buy another today and do, on rare occasions, rue the fact that I did not buy the 24″ model as the form factor is much the same with six inches added to the width. Either takes up little room for such a large format printer. OK, so they go ‘clankity-clank’ when they print, but you can afford ear plugs from the $2,000 saved on not buying their latest Z series machines. And ink use is so frugal, even a Scot would approve.