Category Archives: Technique

The 400mm close-up lens

Helicon to the rescue.

Go to Helicon’s web site and you will, understandably, see many examples of the use of this application in insect photography. That’s a natural given the miniscule depth of field for such small subjects in extreme close-up.

But how about at the other end of the spectrum, when used with really long lenses?

Well, it turns out Helicon Focus is every bit as capable.

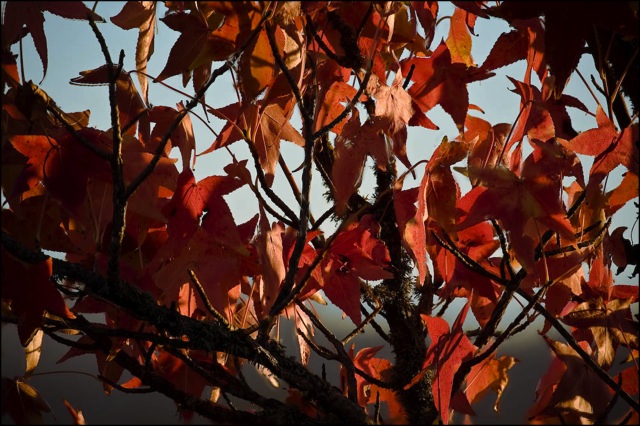
In the following example I was taking snaps of the maple tree, in full fall color, at a very close distance (maybe 15 feet) using the 400mm lens at maximum aperture. This renders the background as a complete blur, but also very much restricts depth of focus in the subject, as this picture discloses:


Maple leaves. 5D, 400mm ‘L’, 1/500, f/5.6, ISO 250

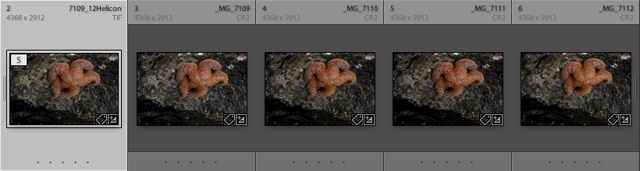
I took nine images with the lens on manual focus focusing through the depth of the subject. Helicon refused to combine these, so I took out the first and last (which, on closer examination, had nothing sharp anywhere) and tried again. Success.


Composite of seven images using Helicon Focus. Manual exposure setting.

Why not simply close down the aperture and take one snap? First, that would dictate a very slow shutter speed with the attendant risk of camera shake even though the camera was mounted on a solid tripod. Second, there’s no guarantee at these short distances that everything would, in fact, be sharp, as 400mm lenses have little depth of field at any aperture, and depth-of-field preview in SLRs is near useless at small apertures. The Helicon approach generates an image which simply pops from the background while in no way changing the blur. Formerly blurred twigs now no longer detract from the image and the result is dramatic and natural looking.

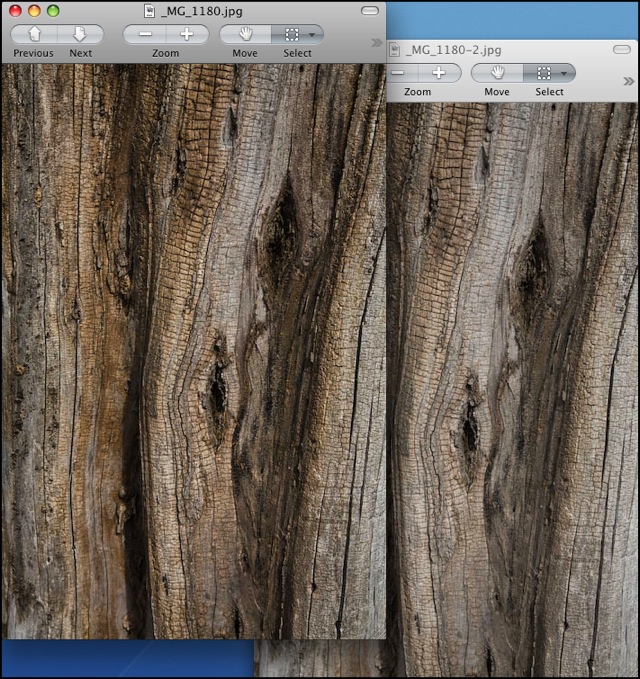
Snags? Well, your subject has to be stationary, you must use a tripod and on close examinaton you can see some ghosting here and there:


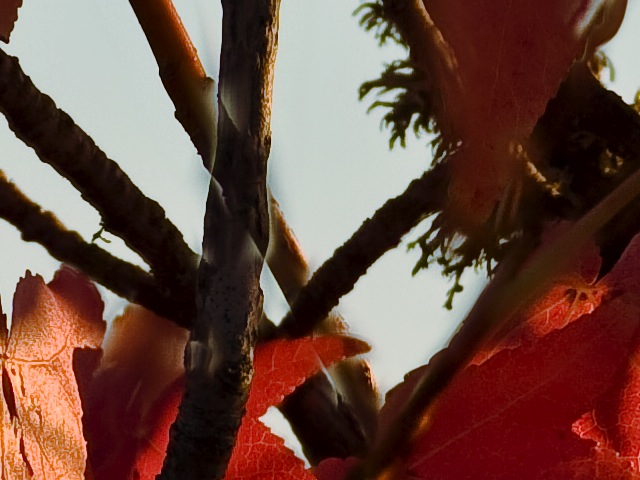
Detail of ‘ghosting’ in the combined image

But when you realize that this enlargement is consonant with a print size of 40″ x 30″ and the effect is not objectionable, it’s something I can easily live with when balanced against the advantages of the technique. And who knows? When Danylo Kozub and his fellow geniuses at Helicon release the much awaited updated Mac version maybe even this minor issue will be resolved?

So Helicon is not just for the macro and microscope photographers amongst us.

More Helicon macros

Make your macros sing.

I wrote about Helicon Focus recently and for this new inductee to the macro world it’s fair to say that the software opens up new realms in macro photography. This application requires that you take several pictures of your subject, each focused slightly differently, after which it applies some serious processing to stitching together the sharp zones of each into one sharp whole. Magic!

Now your subject must be still and you need to use a tripod (unless you are very lucky doing this handheld, which I think is a long shot) to permit proper stitching of the sharp zones from your constituent images.

I import the originals into Lightroom in the normal way and stack them using the ‘time between pictures’ slider, which allows automatic stacking of pictures taken close together. I then export the stack in TIFF, making sure there are no export size constraints in the Image Sizing section of the export panel. The exported images are then dropped into Helicon Focus, I hit ‘Run’ and ‘Save’, then import the composite image back into Lightroom where it is added to the top of the stack, like so:

The deeper the required depth of focus the more images you need. For reasonably square on subjects with some depth I find 3-5 images works fine. For more drastically sloped ones, more may be needed. Digital film is cheap! Take too many rather than too few. The processing times in Helicon on my MacBook (C2D) are short – four uncompressed 72 mB TIFFs are combined into one new one in the space of thirty seconds. These are full frame TIFFs generated by Lightroom from the RAW originals taken on my Canon 5D.

Even though these images were taken at f/22, the close focus distance and the 100mm focal length of the Canon macro lens make for very shallow depth of field, so I simply set the lens to manual focus, focus on the nearest part of the image and take a picture, repeating with a small adjustment of the focus ring every 8 seconds, the time it takes for my ring flash to recycle to full power. That’s important – you really want your images identically exposed.

And here is the result – taken yesterday after more time spent wading in the tide pools at my top secret Highway One location on the Pacific coast, 22 miles west of home. This chap was hanging out on the underside of a big boulder waiting for high tide. If you do this sort of work, check the tide tables before you go – the best being revealed at low tide. He is maybe 3″ in diameter.


Starfish. 5D, 100mm macro and ring flash, 1/60, f/22, ISO 400, tripod. Four constituent images.

Do this sort of thing at sunset with glancing rays from the sun and add a touch of ring flash to reduce the contrast range and make all tones easily visible (much easier than doing HDR), and you get something like this:


Kelp at sunset. 5D, 100mm macro and ring flash, 1/45, f/22, ISO 400, tripod. Five constituent images.

It’s no surprise if I tell you that the Canon Macro plus Helicon Focus are in the running for my Best Gear of 2008 award.

If you want to see Helicon Focus applied in the more traditional area of photomicrography, take a look at the beautiful images crafted by Charles Krebs.

HP Designjet 90 still available!

A great bargain.

Click on ‘Printing’ in the left hand column and you will see that I am a huge fan of HP’s previous generation DesignJet 90 18″ wide printer. A small footprint, fade free inks, great reliability and …. cheap for what you get. HP’s current large format printers start well north of $2,000.

I thought that the HP DJ90 was no longer available, but a quick spot of Googling and it seems they are still available new.

The print quality is beyond reproach, not least owing to the use of dye inks which results in a really deep black. As for the fade free claim, I can attest to one print I have at a friend’s home, under plain glass, which is in bright sun 8 hours a day and has been for two years. It’s as good as new.

So if large prints are your thing, check out the HP DJ90 or 130 (which will print up to 24″ wide).

Update: Check the Comments to this piece for a discussion of paper and supplies availability. I have also added extensive details about HP’s newly released (2008) profiles for many non-HP papers.

A little tweak here ….

…. a little color there.

The beauty of the adjustments in Lightroom (I’m on 1.4.1) is that the results are seen instantly on the screen and the sliders for these are really quite intuitive – not something that can be said of the industrial might of Photoshop with its poor user interface. Further, unlike Aperture, which I no longer use, you do not need the latest liquid helium cooled MacPro with 16 gB of RAM and the latest $2,000 graphics card to run the thing at half decent speed – an old iMac G4 more than suffices and you can probably pick one of those up for $50 with a nice big screen at a yard sale.


Canon 5D, 24-105mm at 58mm, 1/250, f/8, ISO 100

Here you can see the bland original (underneath) and the final versions of this snap. The final adjustments can be seen here from Lightroom’s History panel – look at the right hand column of data.


Adjustment history for the image above

That seems like a lot of work until you realize it took about a minute or so to do, aided by the nice large 21.6″ Samsung LCD screen attached to my MacBook. Exotic? Hardly. Available today for under $200 from many makers. Viewsonic now lists a 22″ screen for as low as $160 – a perfect accessory for the MacBook’s small screen whose gloss finish does little to help photographers. The aftermarket screens come with matt surfaces, as they should. Another example where Apple’s marketing focus does little to serve users. Unless you are in a pretty dark room, the glossy screen is a real pain to use, but Apple no longer markets a matt screen version.

The Vibrance and Clarity sliders are especially useful in giving your image ‘pop’, but I find it’s easy to overdo things. A little goes a long way. Unlike the 50mm Canon f/1.4 optic, the 24-105mm L zoom used here displays no color fringing. Instead you get severe barrel distortion at 24mm, not something that’s visible here.

Immersive media

A step up from QTVR.

I have written a lot in this journal about my discovery and adoption of QTVR 360 degree virtual reality photography using Quicktime and a special camera mount. If you would like to see some of the results of my efforts, please click here.

Now all of that is old hat!


Immersive Media’s Dodeca 360 camera

How about a 360 degree movie version? Click here for a demonstration. The camera, by Immersive Media has no fewer than eleven lenses and can be worn on the head, for those seeking to emulate the man from Mars. It seems pretty light.

Now where’s my check book?