Keks M-meter for Leica M – in use

Finally here!

For an index of all Leica-related articles click here.

I ordered the Keks meter for Leica-M the day I profiled it here on March 8. It finally arrived today from Hong Kong, 18 weeks later.

Why buy this? To my knowledge this is the first meter since the Leicameter – discontinued in its various guises decades ago – which offers coupling with the shutter speed dial of the Leica M for speedy shutter priority readings. Users of older Leica M film bodies have been waiting for this every bit as long and, as what follows discloses, I doubt they will be disappointed.

Nicely packed, the first impression of build quality is better than that of the Leicameter M/MC/MR/MR-4 from Metrawatt, meaning up to the standard of the contemporary Leica M2 or M3. The coarse and incorrect satin chrome of the various Metrawatt meters is replaced with a beautiful smooth finish in the Keks meter, done as it should be, and very close to that of the Leica M. Just a tad grainier. And the color match with the camera’s satin chrome is well nigh perfect. That’s close to as good as it gets. Well done, Keks.

Weight: The meter weighs 1.6ozs.

Charge as received: As received the state of charge was 40%, and rose to 90% just 15 minutes after plugging it in using a USB-C to USB-A cable. 90% to 100% took an additional 15 minutes. Not at all bad. (Keks claims 60 minutes for a full charge from flat). As the image below shows, the meter ships with a short USB-C to USB-C cable. I prefer to use a USB-A wall mounted power socket with a USB-A to USB-C cable, which is nice and fast, but the meter should charge nicely from a modern laptop or desktop computer equipped with USB-C, if maybe not as quickly.
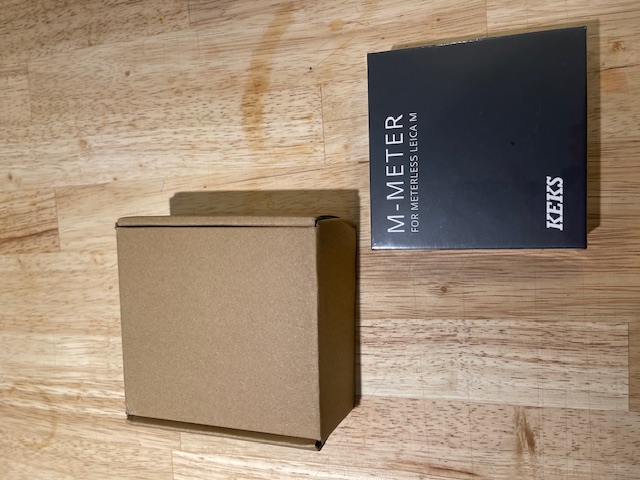


Boxed.


Unboxed.


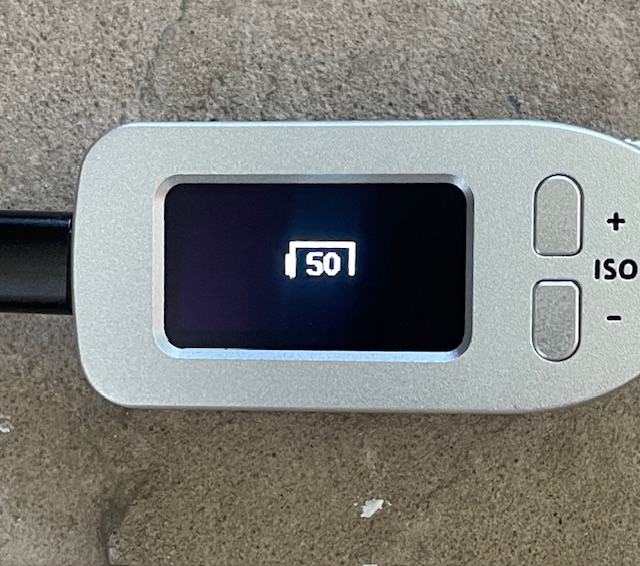
Connected to USB power. Just 20 minutes
from 40% to 90% charged. The state of charge
is displayed when the rear button is depressed.

Setting variables: A host of variables can be tailored. You can see how to do this by downloading the manual here. Here is how the meter is shipped, with parentheses showing my preferred setting:

  • Exposure compensation: 0 stops (Same)
  • Apertures: 1/3 stops* (1/2 stop)
  • ISO stops: 1/3 stops* (1 stop)
  • Display brightness: 50% (Auto)
  • Display on time: 15 seconds (Same)
  • Max aperture: f/1.0 (f/1.4 for my 50mm Canon LTM lens)
  • Min aperture: f/128 – rather silly really (f/22)

    * Using 1/3 stop settings with a film camera is confusing precision with accuracy.

    The last setting allows the user to dial in the 1, 1/2, 1/5, 1/10, 1/25 etc. steps for early Leica M3 bodies. Wonderful that the manufacturer thought of this. (Check my Comment, below, how to do this). As I said in my initial review, Keks is going to sell a lot of these meters and I see they are already on backorder at B&H.

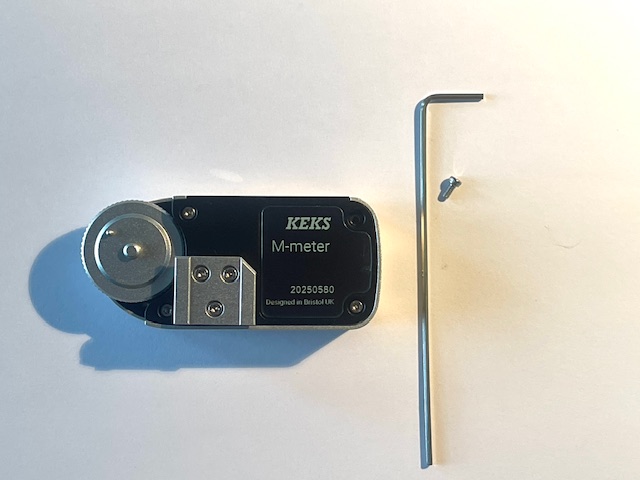
    The claimed replaceable battery: At this time I have yet to summon up the courage to remove the baseplate to discover what sort of (purportedly replaceable) battery is used. The specifications state only that it is a 220mAh cell. Suffice it to say that the base is retained with four Allen head bolts and these fit a 1.5mm (tiny!) Allen wrench. Update: See the conclusion of this piece, below.

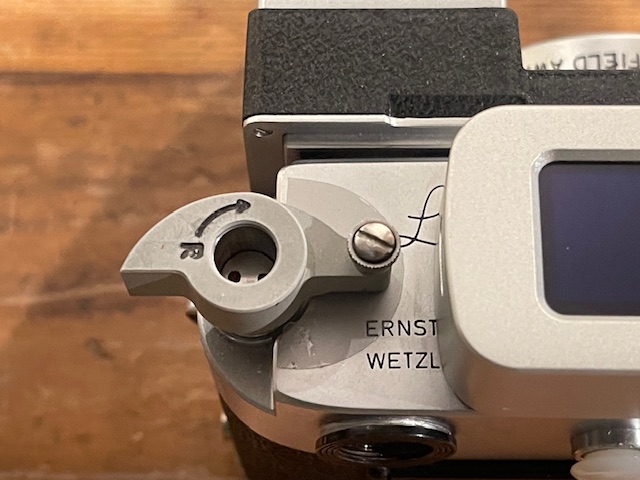
    Coupling with the camera’s shutter speed dial: The shutter speed coupling dial turns to ‘B’ smoothly whereupon it is lifted and turned further CCW to a stop. The meter can now be slid into the camera’s top plate mounting shoe, with the camera’s shutter speed dial first set to B. The process is identical to that with the earlier Metrawatt meters. The knurled ring on the meter is then turned CW until the pin drops into the corresponding slot on the shutter speed dial of the Leica. The meter is now coupled to the shutter speed dial and offers far superior ergonomics for shutter speed setting owing to the larger diameter of the meter’s knurled knob. The Keks meter engaged perfectly on my 1959 single-stroke Leica M3.

    Use with long shutter speeds: The Keks meter can display shutter speeds as long as 30 seconds. To access these you set the shutter to ‘B’, lift the knurled knob and keep turning counter-clockwise. Coupling is lost but the shutter speed dial is set at ‘B’ where you want it, and you can count the indicated seconds long exposure when making the exposure using a cable release. This function is identical to that in the various Leicameters.

    Acceptance angle: Using a point light source and a protractor I measured the horizontal angle of acceptance of the meter at 36 degrees (Keks claims 30 degrees), which is close to the 27 degrees (=90mm lens) claimed by Metrawatt for the Leicameter MR/MR-4, meaning that with the 90mm frame line invoked on the camera semi-spot readings of the area indicated by that frame line are possible with the Keks meter. Now I’m getting the sense that some real Leica M enthusiasts were involved in the design of this meter.

    Design errors: Five boo-boos, and none is a big deal.

    First, the meter displays Exposure Values (EVs) below the ISO setting, as shown below. Who on earth uses these with a Leica M, which is not equipped to display them?

    Second, why show EVs (to two decimal places!) when no decimal places are used in practice with EV equipped cameras like certain Rolleis, Retinas and Hasselblads? It would be nice if the EV display could simply be hidden as it adds useless clutter. Perhaps a piece of black insulating tape is called for?

    Third, it would be nice if the aperture was indicated as f/4 etc. not 4.0F.

    Fourth, the display sometimes indicates 1/50th (the flash setting) when it should display 1/60th, especially when moving from a slower to a faster shutter speed. This error is accounted for by sample-to-sample variations in the Leica shutter speed dial’s detents and is not Keks’s fault. Keks is to be applauded on delivering a fix – see “Shutter speed calibration”, below.

    Fifth, on one or two occasions I got wildly inaccurate readings on a first press of the rear button (the readings come on instantaneously), cured by a second button press. The errors are so egregious that you are not about to be fooled. Just press the button again.


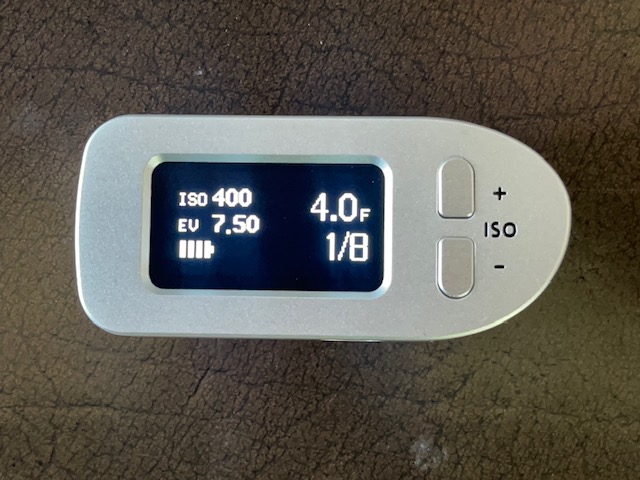
    The EV display is below the ISO. ISOs can be changed with the two top plate buttons.

    Continuous exposure readings: A double press of the rear button is required to enable continuous readings – a ‘C’ will appear on the display to the right of the battery charge indicator. A single press will lock the reading, exiting continuous reading mode. Beautifully implemented.

    Shutter speed calibration: The shutter speed dial click stops are equally spaced on the Leica except for those between 1/30th and 1/50th and between 1/50th and 1/60th. 1/50th is the electronic flash synchronization setting and the click stops between the adjacent speeds of 1/30th and 1/60th are half the spacing of all the others. As shipped my Keks meter could not distinguish between shutter speed dial settings of 1/50th and 1/60th, showing 1/50th for both settings as the shutter speed dial was rotated toward shorter shutter speeds. So a speed of 1/60th was incorrectly shown as 1/50th. Keks includes a useful calibration function to address the issue of the set speed and the indicated speed differing, as here.

    With the shutter set at 1/60th but the meter indicating 1/50th press the power (rear) button and the ISO ‘-‘ button to enter Settings. Then use the ISO ‘+’ button to cycle to ‘Reset’. Press the power button then press the ISO ‘+’ button until you see ‘Calibrate SS’. Press the power button. The display will read ‘Shutter: B-2’. Using the ISO ‘+’ button keep pressing the button until you see ‘1/60’, then press the power button once more. What was formerly displayed erroneously as 1/50th second is now correctly displayed as 1/60th second. This calibration function works for all shutter speeds, though in my case only one shutter speed was being displayed incorrectly. Given that there will be sample-to-sample variations in Leica M bodies Keks can only be applauded for adding this function. Clearly the designers are avid Leica M film camera users. Ingenious.

    Tech specs for the sensor:. Keks uses the Vishay VML7700 sensor and you can see the full technical specifications by clicking here.

    Setting shutter speeds with the meter off: You cannot set shutter speeds on the camera when the meter is off. It must be on for these to be visible. But it’s just a quick press of the rear button to illuminate the display so, again, not a big deal.

    Battery level: This is disclosed as shown at the lower left in the image above. 4 bars = 100%. The Leicameter MR/MR-4 uses a front panel battery level check, notorious for mechanical failure. The Keks approach is better, acting as a continuous reminder in use, with no buttons to press.

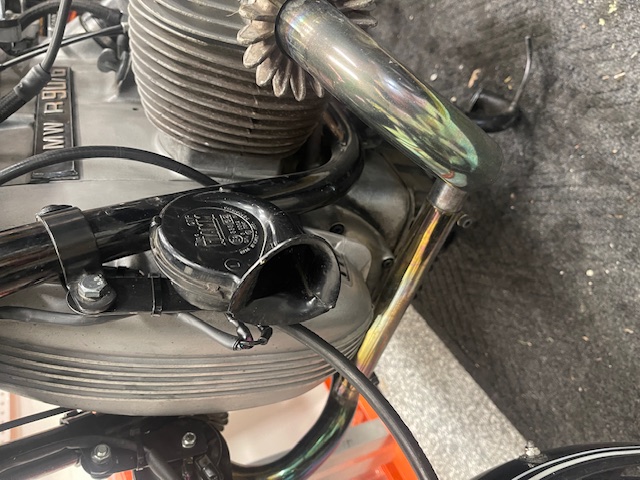
    Clearance for a rewind crank: Unless your camera is one of the M4 variants with the angled rewind crank, you may prefer to fit your earlier Leica M with a rapid rewind crank, as I do. In this case clearance with the side of the meter’s case is important as you really do not want to have to remove the meter to rewind the film. As the image below shows, clearance is more than adequate:


    Clearance with the rewind crank installed.

    Use in poor light:. Far superior to the older Leicameters as the Keks meter’s OLED display is internally illuminated. I just wish it was black on white rather than white on black.

    Beyond the limit? If the light is below the meter’s sensitivity range the aperture display simply changes from an f-number to three dashed lines. Fine with me.

    Sensitivity: Keks claims EV1 at the lower end, which is 1 second at f/1.4 with ISO100 film or 1/4 second at f/1.4 with ISO400 film. My tests suggest this is fairly stated. The upper limit is stated as EV20 which is jolly bright sunshine! I could get it as high as EV21 in the brightest setting.

    Accuracy: I compared readings from the Keks with those from my Leica M10 (built-in meter) and from my Gossen Luna-Pro F under a broad variety of lighting conditions. Used properly the Keks was in agreement with both.


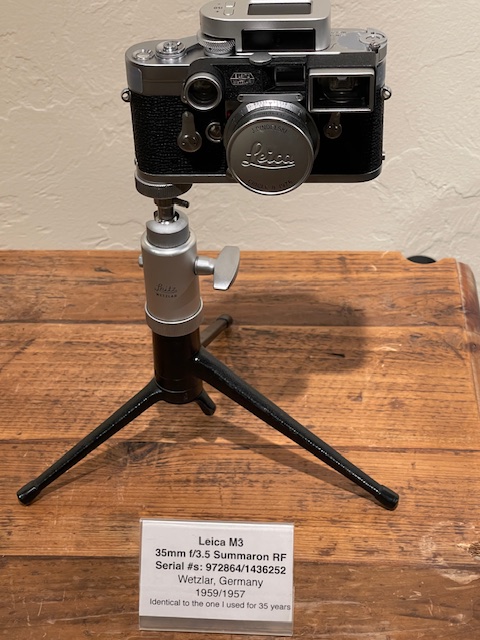
    On my 1959 Leica M3.

    The Keks meter for Leica M is recommended without reservation, especially at the price asked.

    Battery replacement: I screwed up my courage and decided to take the top cover off to see about battery replacement.


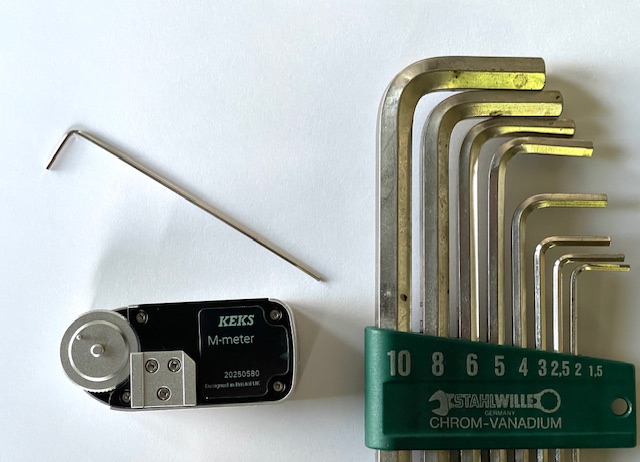
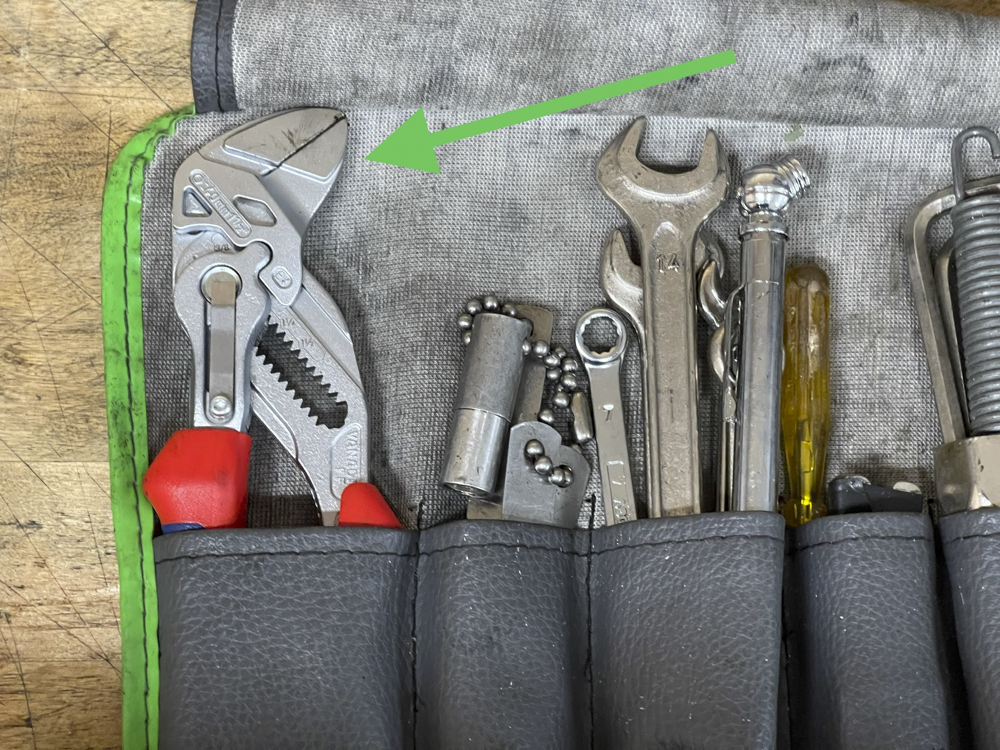
    A 1.5mm Allen wrench is required. A German
    Stahlwille seems appropriate!


    The four screws around the periphery of the black
    plastic plate are removed. While no thread locker
    appears to be used they are a snug fit.


    The nicely machined top plate comes off
    along with three free-floating buttons –
    power, ISO up and ISO down.


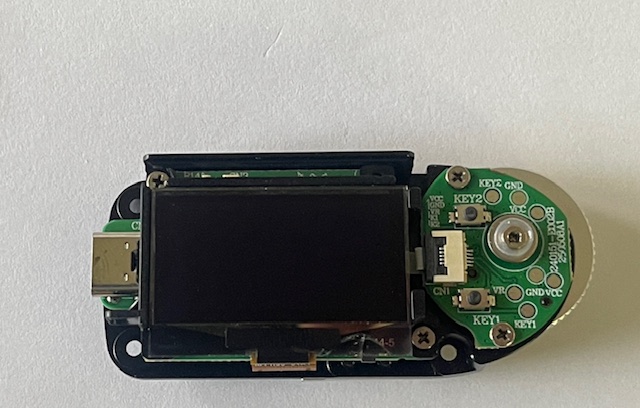
    The innards exposed.
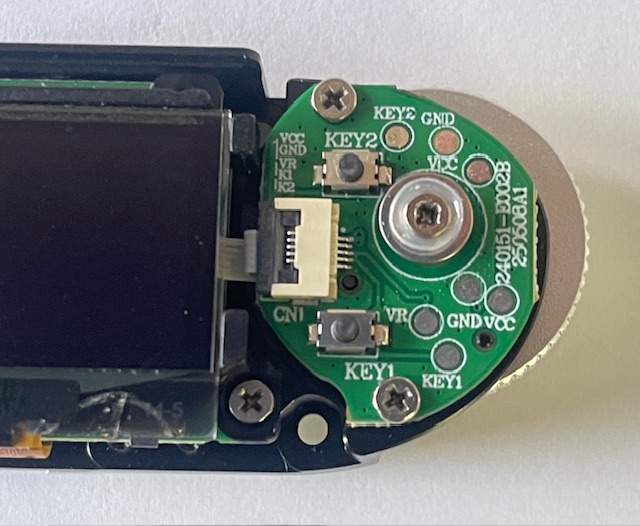


    Battery location?

    The battery is not immediately visible after this first stage dismantling. I suspect it’s under the right hand assembly – last image above – but fear that dismantling that will make reassembly difficult as it houses the shutter speed dial/rotator. So I called it quits at this point. (Check the Comment by Keks, below).

    So my suggestion to Keks – their comment below suggests they read this blog – is to publish the battery replacement procedure for those mechanically adept. The economics of sending the meter in for battery replacement likely do not solve. Now, sure, that battery should last many recharge cycles and several years, but as a legacy product – and a fine one at that – it would be nice to know that the meter can be kept functional in the long term.

Konnwei battery tester

Handy and inexpensive.

I have hit a bad battery spell. The one in the two seater died, no start. The one in my 1975 BMW R90/6 died despite being just 14 months old. And the one in my scooter was beginning to sound weak. All batteries are maintained on a trickle charger in a heated garage.

Now I have been very lucky as all my recent battery failures have occurred at home, meaning I was not left stranded on the road. But this spate of failures left me determined to become more proactive about knowing the state of health of my vehicle batteries so I splashed out $23 on a Konnwei KW208 car battery tester. Maybe not the greatest choice of name, true, more like something you expect of the White House, but at that price hardly a great risk either.


First, the manual, in half decent English is printed in minuscule type. Click Konnwei instruction manual and you can enjoy a proper sized version.

The device can test batteries in or out of the vehicle, and this model is limited to 12 volt cells. If in the vehicle and still working you can also test the cold cranking amps (CCA) as a percentage of the rated value (it’s on the battery’s label under ‘CCA’). This is a key measure as CCA is the high current delivery required to activate the starter and turn the engine. Additionally you can test the alternator’s power delivery (the alternator keeps the battery charged when the vehicle is running) as well as the starter’s cranking efficiency. I tested all of these on a failing and then on a new motorcycle battery and the measurements accurately reported ‘Replace’ and ‘Good Battery’, respectively. For the good battery state of health (SoH) and state of charge (SoC) were both reported as high, as expected.

The cables are nice and long so there is no difficulty installing the clamps (remember to connect the red – positive – first and disconnect it last) and the clamps grip well. No battery is required as the tool uses the vehicle’s battery for power. The LCD screen is easy to read, unlike the instruction book.

As for getting stuck on the road with a dead battery, I carry one of these jump starters – it delivers the instantaneous high cranking current which a failing battery cannot deliver and, once the vehicle is running is disconnected as the alternator can pass sufficient current through the dying battery to keep the engine running.

I now feel better prepared for the inevitable battery failure(s) down the road …. or in the garage!

BMW R90/6 – 35 and 50 years on

Thirty five years of happy wrenching and riding.

I became the custodian of my 1975 BMW R90/6 ‘airhead’ motorcycle 35 years ago today, buying it for $2,000 in Los Angeles from the original owner with just 15,000 miles on the odometer. René, the wonderful Chilean seller, was returning to the country of his birth and assured me that riding a single track vehicle on local roads was not a prescription for a long life. He also informed me that he had turned down two earlier offers from ‘irresponsible kids’ who would not accord his machine the duty of care it was due. I do not think I have let him down.

This beautifully made machine, an exemplar of the best mid-twentieth century technology – and not all that much changed from the 1931 original design – is notable for its near total absence of electronic gizmos, a source of considerable joy for this mechanical engineer. Any self respecting mech eng will tell you that electricity is the work of the devil. And this is very much an engineer’s dream for the machine is easy to work on, most parts easily accessible with few special tools required. Best of all the machine’s enthusiastic following sees to it that most replacement parts remain available, 30 years after the last airhead left the German assembly line. Yes, there’s more maintenance than with a Honda but reliability is comparable to that of those fabulous Japanese designs.

What follows is a pictorial history of my time with the bike over the past 35 years. I continue to ride it regularly.


June 16, 1990. Accepting delivery in Encino, CA from
the first owner, René Francisco Lama.


At the fabled Rock Store in Malibu in 1990.


Ready for touring with bags and a small windshield.
The original café fairing broke when the bike fell over
in my Encino garage during the Northridge earthquake,
January 17, 1994, the only time it has been down.


Manufactured in October 1974, the bike was sold by
Bob Brown’s Motorworks in Pomona to the first owner in 1975.


The motor is a simple two valve pushrod design.


Engine maintenance is easy owing to the horizontally
mounted ‘boxer’ cylinders. The valve cover and valve
head have been removed here.


Resealing the cylinder with new gaskets is a simple task.


With the piston removed the con rod is held safely
in place with a cable tie. Nicks on the base gasket mounting
surface are not a good idea. The rubber pushrod seals
are replaced at the same time – they harden with
age and heat and leak.


Spaghetti junction. Not BMW’s proudest moment.
The wiring meets up with a small distribution board
in the head shell


The stock Bosch starter motor is awful, struggling to
turn a cold engine. After having it rebuilt twice over
the years I replaced it with a Toyota truck starter with
an adapted Bendix. Twice the power, half the weight and
current draw. The bike’s modular design means that the
starter can be removed in under 15 minutes.


Look hard enough and you can still find original German
Bosch copper spark plugs. That’s all the bike needs in
the ignition department. And ignition timing is 100%
mechanical, no electronics.


A collection of metric fasteners is essential.


Back in the day batteries came filled with liquid acid, which
would inevitably leak, corroding the battery tray.
The tray has been removed, wire brushed and repainted here.
Modern gel cell batteries do not leak, so this is a lifetime fix.


Well, I do have one electronic part in the bike. Here’s
the daylight sensor for the Kisan headlight modulator which
flashes the headlight in daytime riding, enhancing the rider’s
visibility to motorists focused on their cell phones. The
three position steering damper is below.


Over the years I have replaced most of the steel fasteners
with stainless ones.


A rare failure – the choke cable toothed follower snapped
rendering the choke inoperative on one side. A fellow airhead
kindly gave me the replacement part which is NLA from BMW.
Magura could learn from Rolex when it comes to engraving.


The bike came with the smaller 18 liter tank,
beautifully pinstriped by the ladies in Berlin.
The QD trunk is by Givi of Italy, and holds a full face helmet.


A few years ago I finally got my beaten up 22 liter larger
tank refurbished and the pin striping, done in
Scottsdale, is beyond perfect. I think it
looks far better than the small tank.


Way ahead of its time, the largely modular design makes
accessing most assemblies easy. Here the rear wheel,
driven by a shaft – no chains here – has been removed
for tire replacement. Sadly the wheels require
tubed tires, far less safe than modern tubeless ones.
The shocks are aftermarket Konis, superior to
the stock ones, and recently rebuilt.


The brake light sensor is a simple pressure switch.
Here I am replacing it as it failed after 30 years.


During baking Scottsdale summers I kept the bike indoors
to avoid premature rotting of rubber parts. Eventually
I insulated and air conditioned the garage to make for
better summer storage.


After 30 years the saddle foam was shot and the vinyl
seat cover was cracking. New foam from the Fatherland
on the left.


New seat cover installed over new foam
A very time consuming job, but very satisfying, and
easier on the bottom to boot!


While the stock tool kit is excellent the pliers
are poor quality. A superb pair of Knipex adjustable
pliers
does the trick far better. The cylinder on
a chain emulates TDC when adjusting the mechanical points
ignition when installed on the nose of the cam.


The twin FIAMM Italian horns are not only much louder
than the weak stock offering, they are also paired out of
tune, the resulting interference effect on the two sound waves
making the output truly obnoxious. You want that in
a world which often does not see or hear bikers,
especially those on quiet BMW airheads. As the horns
draw high current I added a relay to avoid frying
the relatively lightweight horn button circuitry.


The horizontally opposed boxer engine design lasted through
1995, but remains available in some of BMW’s latest
machines where it is now oil and air cooled. Here the
1975 valve cover compares with that on a 1994 R100RT
touring machine. No prizes for guessing which I prefer.


In Scottsdale, Arizona.


A happy owner, with the bike on an all American
Handy bike lift. The hair is greyer but the smile is
every bit as wide.

I wish I could tell you that I am looking forward to the next 35 years with this beautiful machine but statistics and anno domini suggest otherwise.

Amaranth flour waffles

Super healthy.

For an index of cooking articles on this blog click here.

One simple rule of healthy eating is to avoid any product with ingredients whose names you struggle to pronounce. That pretty much includes all ultra processed foods and store bought pancake mix for waffles.

In my piece profiling the Presto waffle maker I mentioned that I used Aunt Jemima pancake mix. (In deference to modern times, the ‘Aunt Jemima’ black mammy branding has been retired in favor of ‘Pearl Milling Company’ but the product remains the same). Well, applying the above guideline I note that that mix contains a slew of nasty sounding chemicals, so in the garbage can it goes. Garbage to garbage.

And say ‘Hullo’ to Amaranth flour, a five pound bag costing $30. I had to buy from Amazon but if you can source it locally it will almost certainly be cheaper. That’s roughly twice the price of the Aunt Jemima poison but, hey, that’s the cost of healthy eating. Do you think all those superbly toned Hollywood stars subsist on Big Macs, America’s biggest killer?

The recipe I use is here with the following changes:

  • Do not bother beating the eggs and milk, or pre-mixing the solid ingredients. Just put the lot in a bowl and stir/beat.
  • There is no need for the 15 minute cure period for the batter. It can be used immediately.
  • Do not add ANY granulated sugar or salt. There is absolutely nothing good about refined sugar or salt and the maple syrup will add all the sweetness you need.
  • I add dark chocolate chips to the batter – a solid handful
  • You should substitute Avocado oil (smoke point 515F, no saturated fat – good) for the vegetable oil (smoke point 400F, loaded with saturated fat – bad) or butter (way too low a smoke point) for a healthier mix. The high smoke point of the healthy avocado oil makes sure the pancakes do not get charred – avocado oil has the highest smoke point of any commonly used cooking oil, and is by far the healthiest choice
  • You must use a touch of anti-stick spray or the waffle will stick to the waffle maker’s platens – not ideal but the Pam spray I use mostly contains oils, with a touch of anti-smoke and anti-sticking chemicals. The waffler runs at 395F which is right up there with the smoke points of the three oils in the spray, hence the need for an anti-smoke agent.
  • After a requisite 3 minute warm up period I heat the batter for 3 minutes, flip the waffler, then heat for 3 minutes more, for a total of 6 minutes.
  • A five pound bag of flour will make 14 waffles in the Presto waffle maker.

The health benefits of amaranth are described here. It’s an ancient grain first used for food by the Aztecs! Perhaps most significant is the fact that amaranth flour is gluten free, a blessing for those who are wheat intolerant. The health benefits of avocado oil are described here.

For a fully formed waffle in the Presto waffle maker you require 1.1 cups of batter, meaning the following amounts should be used to make 2 waffles:

  • Egg – 1 large
  • Milk – 285 grams
  • Avocado oil – 45 grams
  • Amaranth flour – 155 grams
  • Salt – NONE.
  • Granulated sugar – NONE
  • Baking powder – 1 teaspoon (a dry chemical leavening agent, a mixture of a carbonate or bicarbonate and a weak acid which releases carbon dioxide into the waffle to make it rise)
  • A handful of dark chocolate chips (avoid the white variety which is loaded with saturated fat)
  • A handful of walnuts on top
  • Real maple syrup to taste
  • For a crisper waffle use a 50/50 mix of amaranth and bread flour

You can see that most of these measures are stated in weight rather than volume, which is the accurate way to go.


The result.

Here is the result using 1.1 cups of batter in the waffler:


One perfect waffle.

A single waffle topped with bananas, strawberries, blueberries and walnuts, chopped hazelnuts or slivered almonds makes for a healthy sub-300 calorie meal and please, only use real maple syrup. Sure, it’s costly but your body does not need the many poisons and imitation sugars in the cheap stuff.

By the way, the beautiful country style plate shown above is proudly made in America by H F Coors, in Tucson, Arizona, and is highly recommended for its provenance, quality and toughness.