Migration pains.
Apple’s Mac laptops and desktops have seen four generations of CPUs. The original Macintosh used Motorola 68000 CPUs, the first ‘modern’ Macs used IBM’s G3/4/5 series, then came Intel and now it’s Apple Silicon.
When Apple decided to switch to Intel Steve disclosed that they had been working for two years on an ‘invisible’ app named Rosetta which would magically allow IBM configured applications to run seamlessly on the new Intel CPUs and his words were true. It was cleverly named Rosetta and kicked in invisibly when you fired up an IBM application. It never failed and the running speed of the many apps I used was fine.
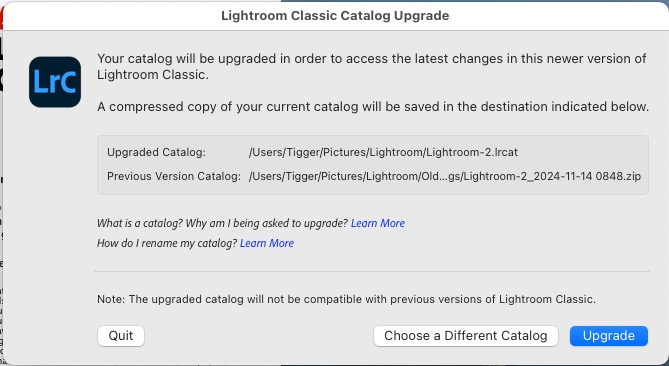
Well, Apple crafted a new Rosetta for the Intel to Apple Silicon switch and …. it’s an absolute disgrace. It hardly works with any of my old apps, forcing me to upgrade (read: more cost, more complexity, more crappy unwanted ‘features’). The one old app which asked for installation of Rosetta was Lightroom, the first one I tried, which promptly shut down and refused to boot ever again. So I called it right in Part I – Adobe finally forced me to go with the subscription model. My $10 monthly gets me Lightroom Classic – the one I have been using for over a decade – and something called Lightroom Creative Cloud. Anyway, I ponied up, the LR interface came up and I hit Migrate to import my old LR catalog. 12 hours later I got this after many messages telling me my cloud storage was full and attempting to extort yet more money:
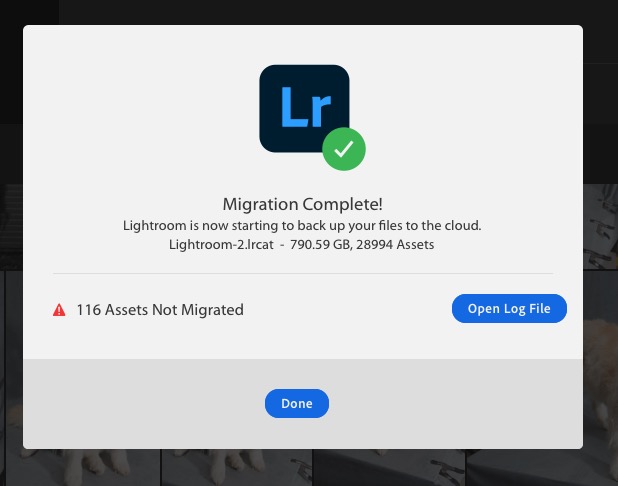
12 hours later.
I also got a huge file of error data telling me something about images not migrated. Blood pressure started spiking.
I fired up LR and, to my horror, found that the images were lumped together in one folder chronologically, all folder data lost. Meaning useless. Further, it appears that my images are stored in Adobe’s cloud. Seriously, are you going to trust this business with your art?
Then it occurred to me to check which version of LR this was, and the answer was v8. And yes, the interface is ghastly, pop ups everywhere, cryptic symbols in lieu of words. This is a disaster, I’m thinking. Blood pressure now through the roof. Wait a moment. LR Classic is now on version 14. I had used the wrong version of LR – the cloud one, not the local standalone! Back to the Adobe site, a quick download of LR Classic and 3 minutes later my old LR catalog and previews were converted and I was up and running in the familiar interface I have known since 2007 when the much missed Aperture was discontinued by Apple. Compliments to Adobe for a smooth conversion and a curse on the person who came up with the confusing naming of the two applications. Maybe they should call the cloud version LR Crappy?
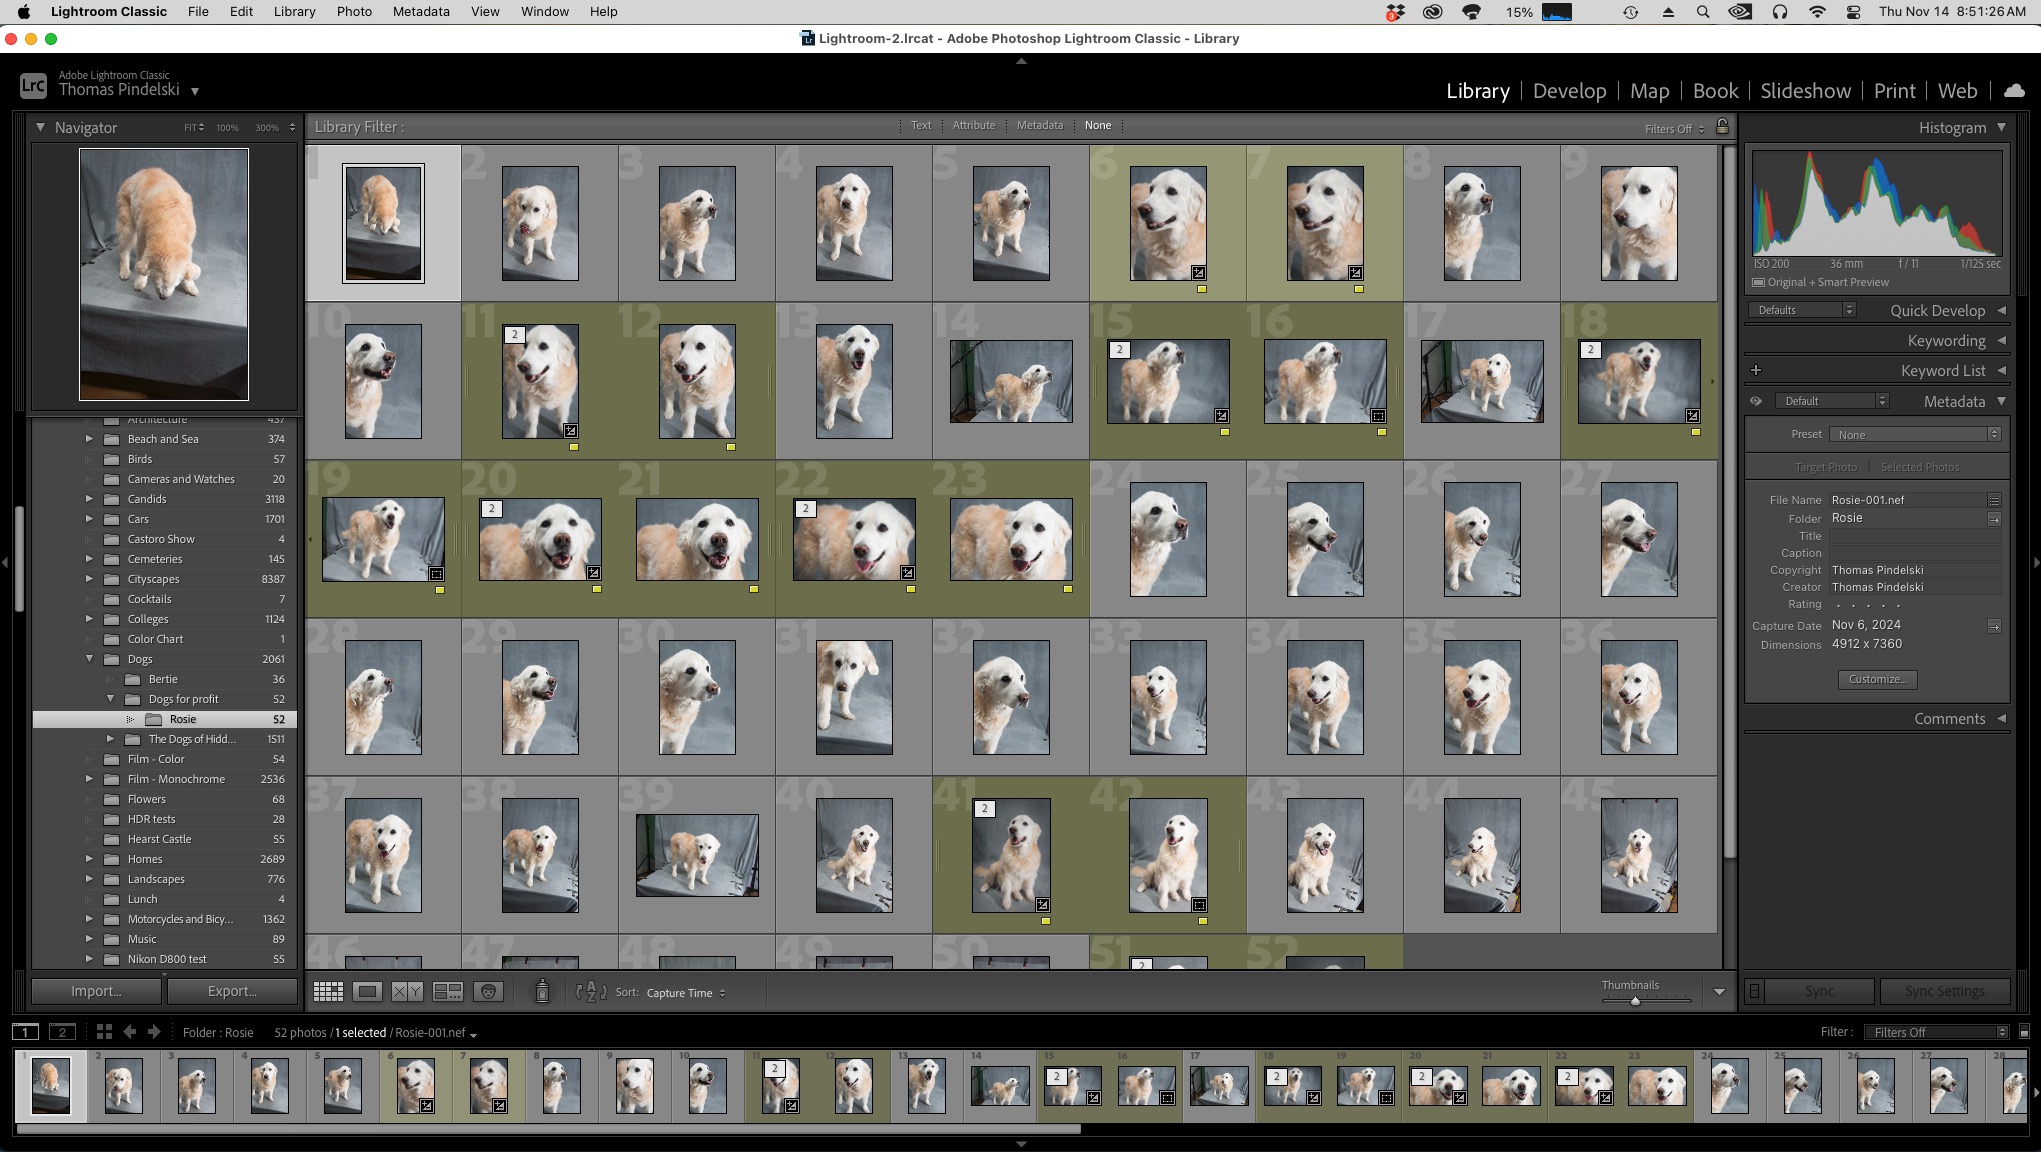
A familiar interface.
The files reside on my local drives just as does the application, but cease paying Adobe and you can say hasta la vista to processing capabilities. Still all is up and running and even my several presets and plug-ins appear to be working. The old Photoshop (version CS5 in my case) is toast and I have to learn the many enhancements in LR since my old version 6 to see if PS is needed any more.
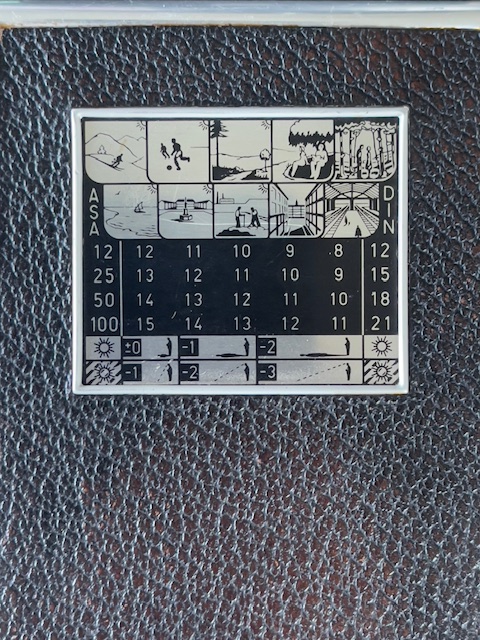
Helpful catalog information:
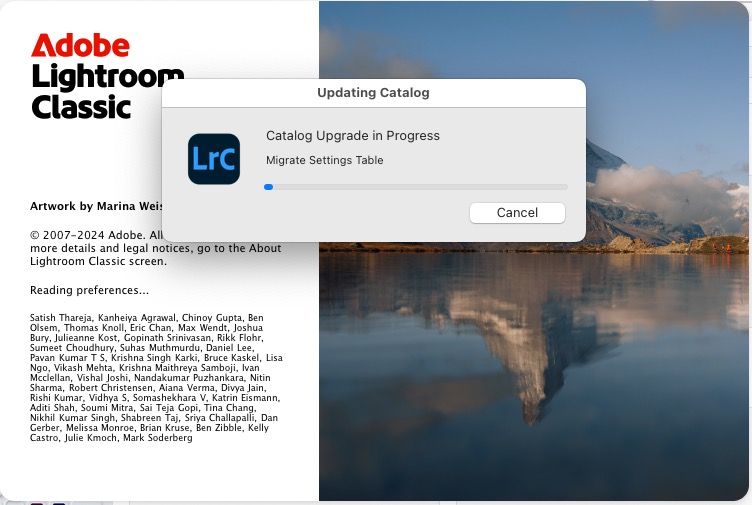
Migration in progress.
How about other commonly used applications?
Intuit Quicken 2007: Rosetta failure. Had to pay an annual subscription fee of $35 for the new version, conversion of the old data file was seamless and the new interface is ghastly. Rosetta fail. $36 annually for the ‘upgrade’.
Steer Mouse: This is an essential utility to enable the programmable functions of the several buttons on my Logitech G500 wired mouse, now in use 11 years and as good as ever. These buttons allow me to jump to the desktop, fire up Mission Control or start a web browser and the application comes with great programmability. Rosetta fail. $20 for the upgrade. Needless to add Logitech ceased supporting its own product years ago.
Carbon Copy Cloner: Mike Bombich’s backup and recovery software is state of the art, has been around for ever and is quickly updated for Apple’s latest planned obsolescence efforts with its OS. Rosetta fail, so another $39 for the upgrade.
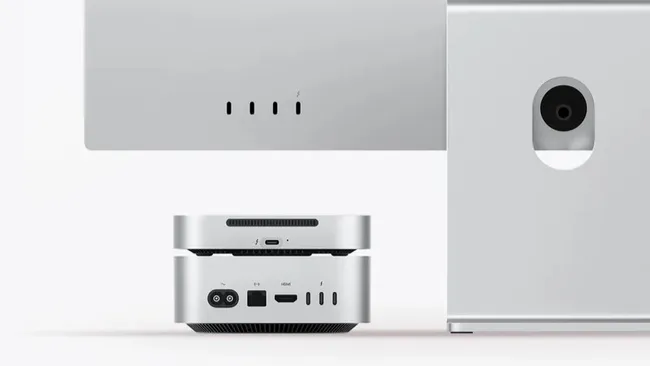
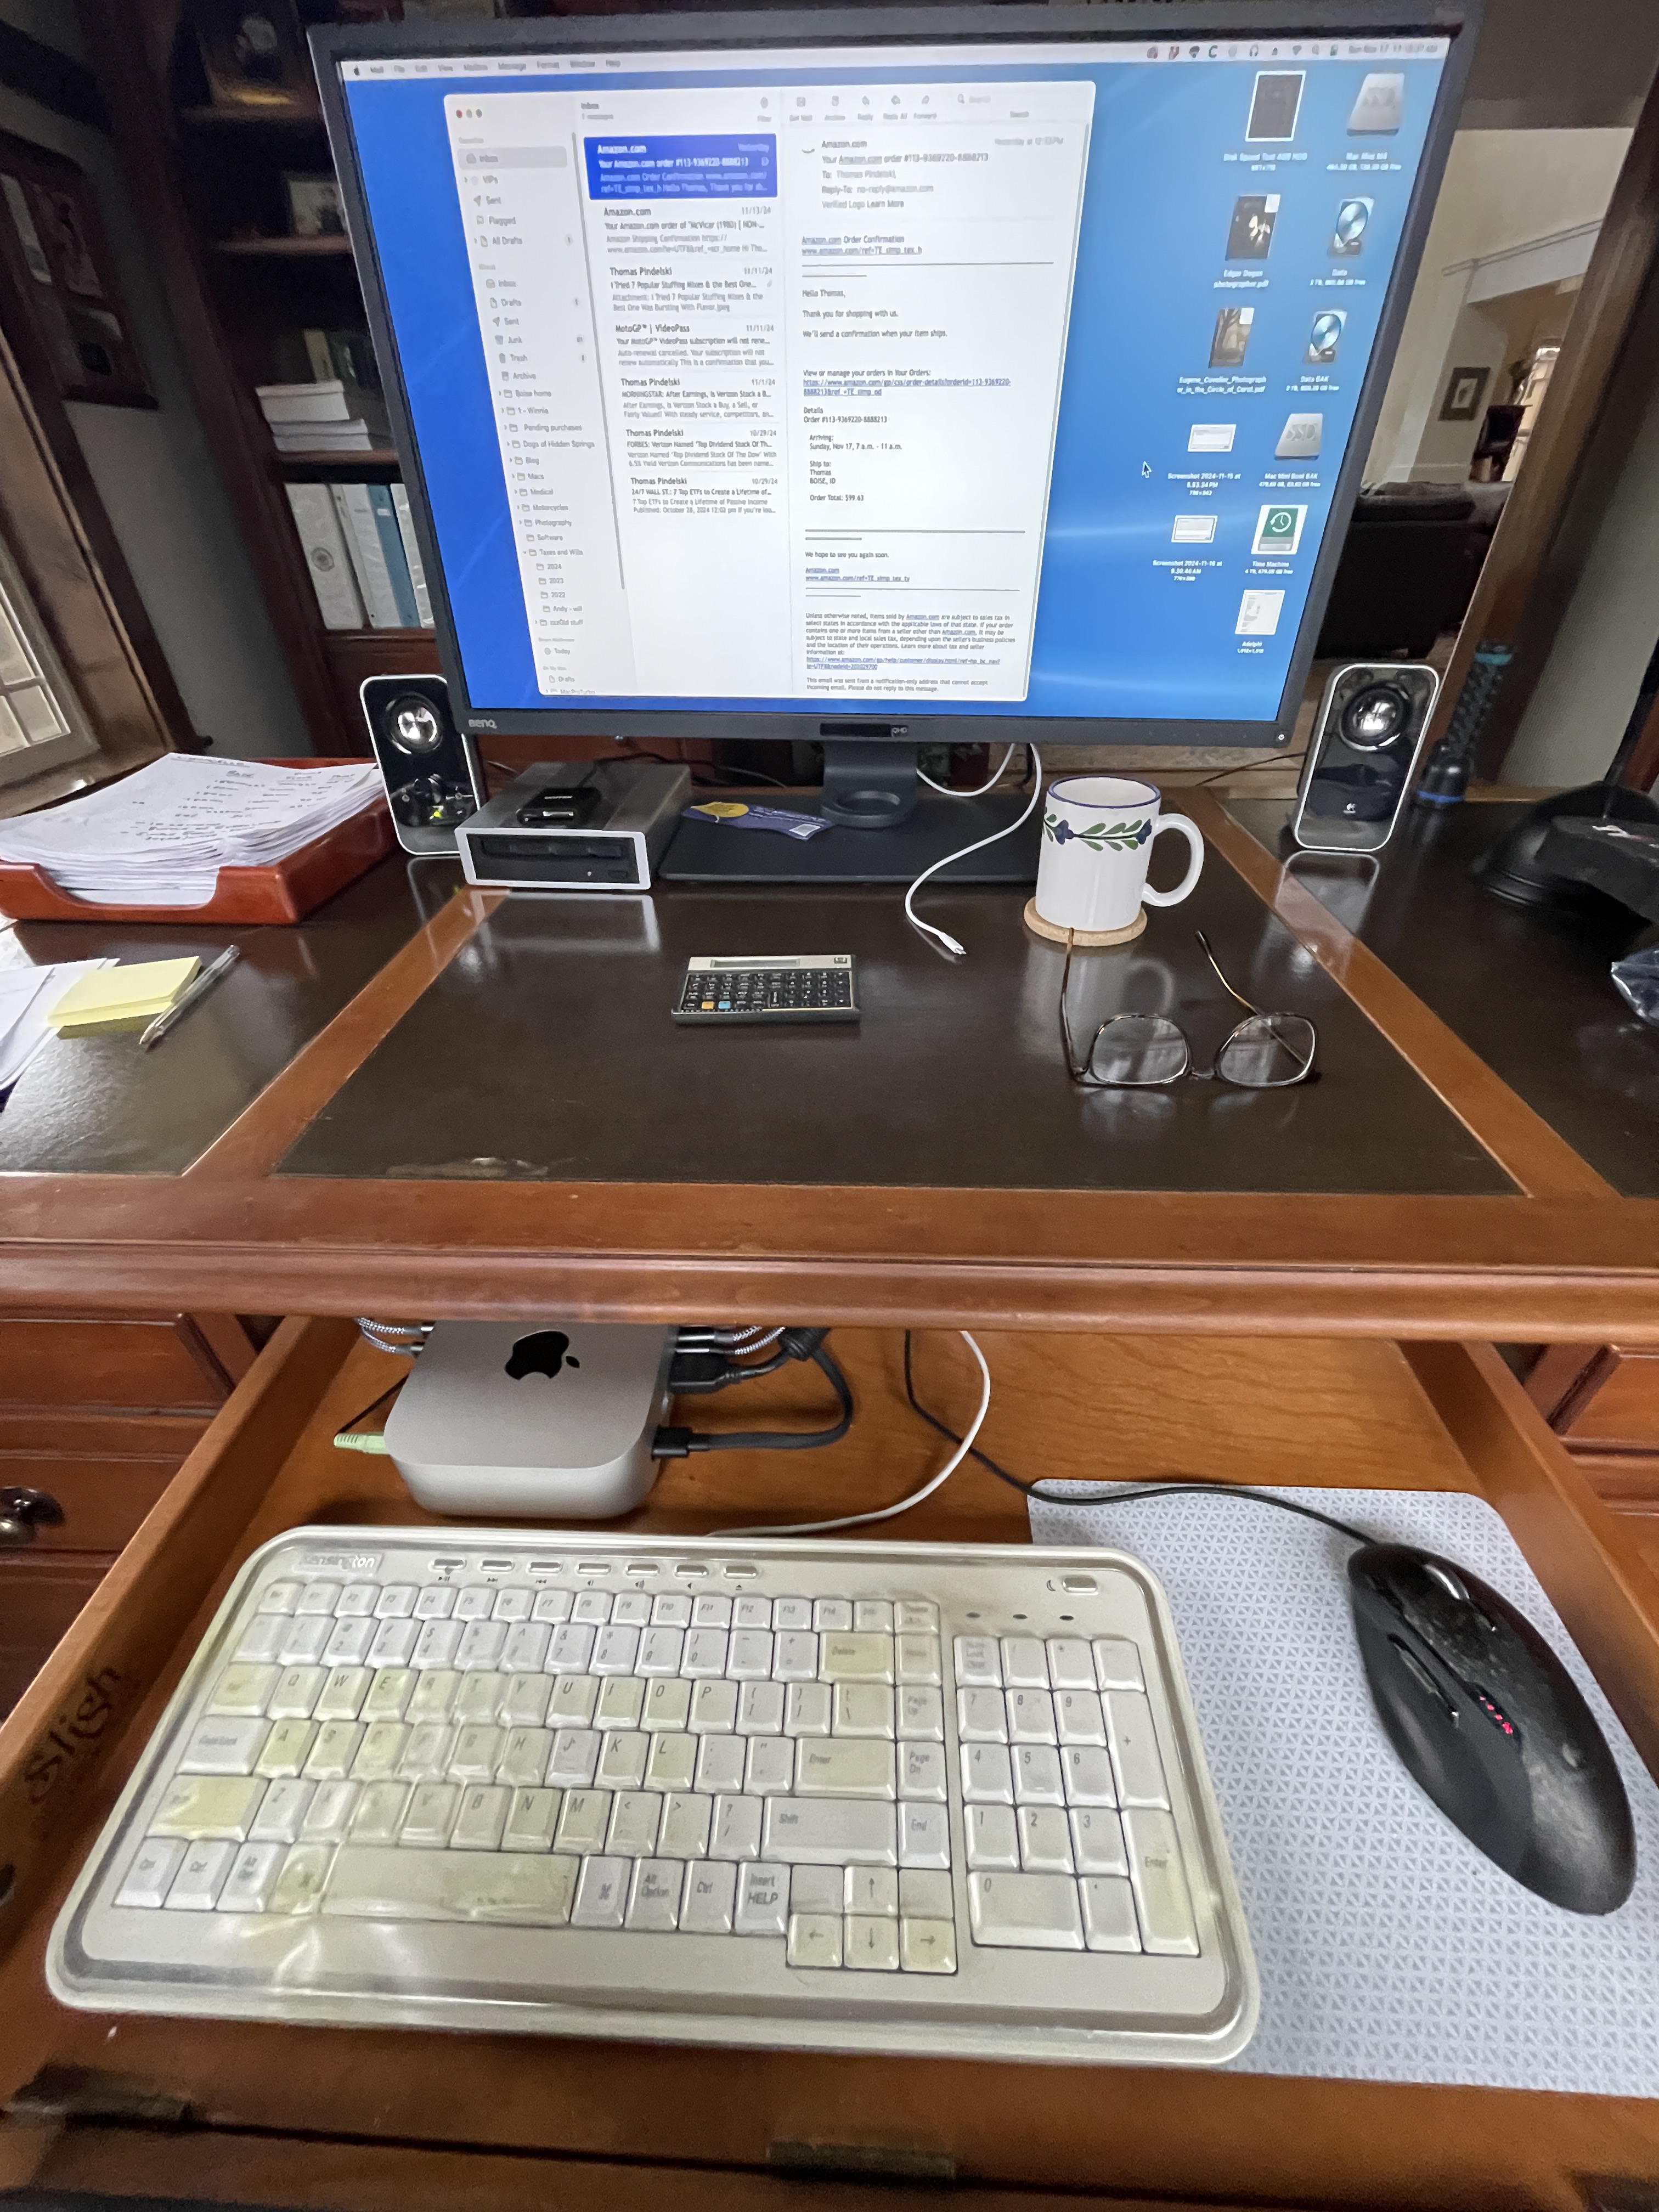
Keyboard and mouse connectivity: I am using these short connectors to attach my USB-A devices to the USB-C only Mac Mini M4. The spacing of the three USB-C sockets on the rear of the Mini is way too tight, so do not use those plug-type adapters. They are too thick and you are likely to break one or more of the rather fragile sockets. On my first attempt neither the Kensington keyboard or the mouse were recognized – panic – but pulling the connectors and reinserting them cured the problem. Phew! I have to say those sockets strike me as way too fragile and I would not recommend frequent plugging and unplugging,
Disk drive enclosure: The Terramaster enclosure is now fully populated with 3.5″ spinning and 2.5″ SSD drives. No adapter is required for the latter. Sitting on my desk 2 feet away I can just hear the HDDs working but now that it has been relocated in the footwell the noise is inaudible. The instructions state you should replace the removable side pieces on the removable trays but that’s impossible once the drives are screwed in place. Not a problem. Just leave them off. $170.

Fully populated drive enclosure.
DVD burner/reader enclosure: The OWC enclosure is OK, though the sharp edges could be better finished. It looks rather crude and is missing rubber feet on the base, meaning that the four protruding screws will mar your desktop. I added rubber feet. I think there are better designs out there but it’s not like it cost that much. On first plugging in the drive was not recognized but pulling the plug and reinserting it cured that. Seems like this is a common issue for me. Both the MKV (BluRay) and MDRP (regular DVDs) apps work fine. A rare Rosetta success.
Microsoft Excel: DOA. Rosetta fail. I’m no longer slaving for an honest crust on Wall Street so do not need the power of Excel. Apple’s free Numbers is adequate and reads the Excel .xlsw file just fine. $0. Ditto for Microsoft Word. I simply use Apple’s excellent Text Edit, which is free. For more advanced formatting I would use the free Apple Pages.
Apple Sequoia OS 10.15: One look at System Preferences – now named System Settings because all change is good, right? – and you can see what an absolute pig OS X has become. Too much of everything, useless features that few want or need, change for change’s sake. At least it has not yet locked up so I do not need to access the Mini’s power button which some idiot placed underneath the machine. Probably the same idiot who placed the charger socket for the (not so) Magic Mouse on the underside. Steve must be spinning in his grave.
Lessons learned? Migration is hell and Rosetta is largely useless. Be prepared to pay for software upgrades for all your commonly used apps. And set aside a solid 8 hours because things will go wrong and you will have several setbacks. I’m already missing my Mac Pro …. if not its size and electricity demands.
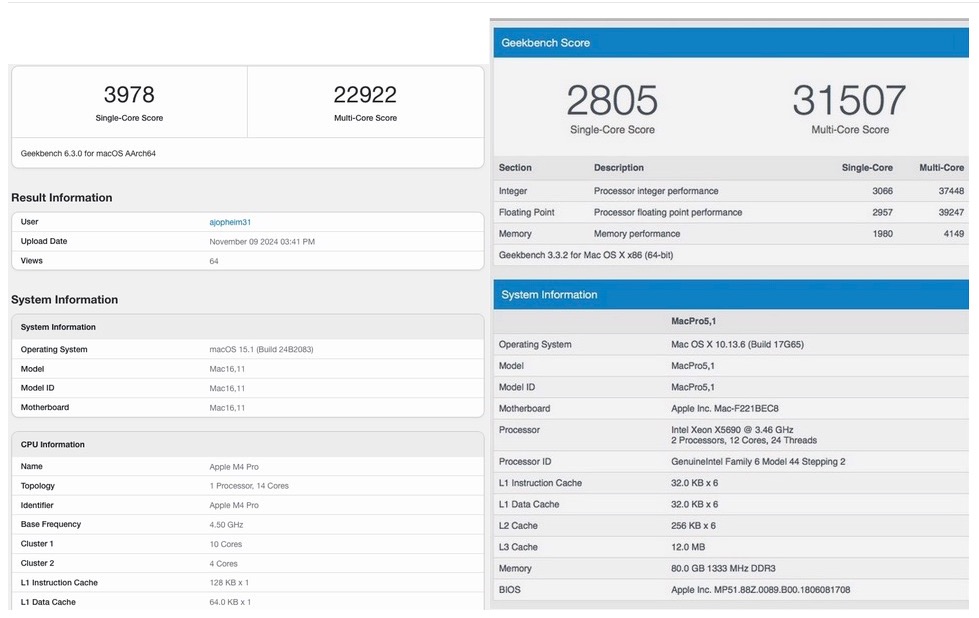
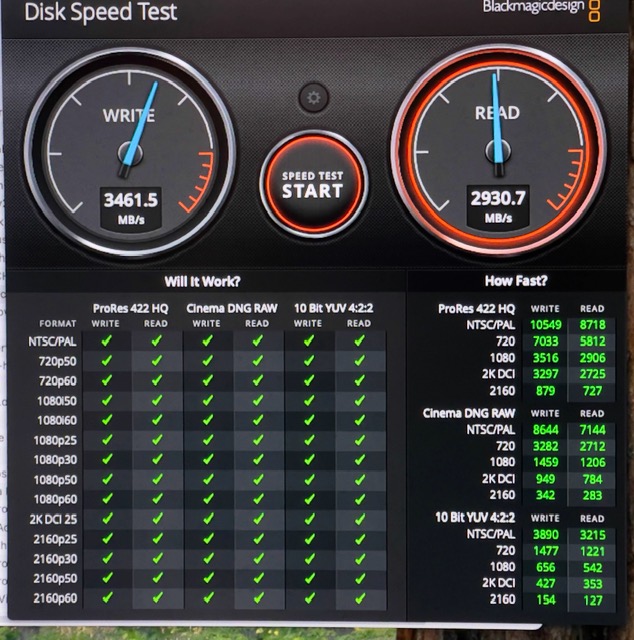
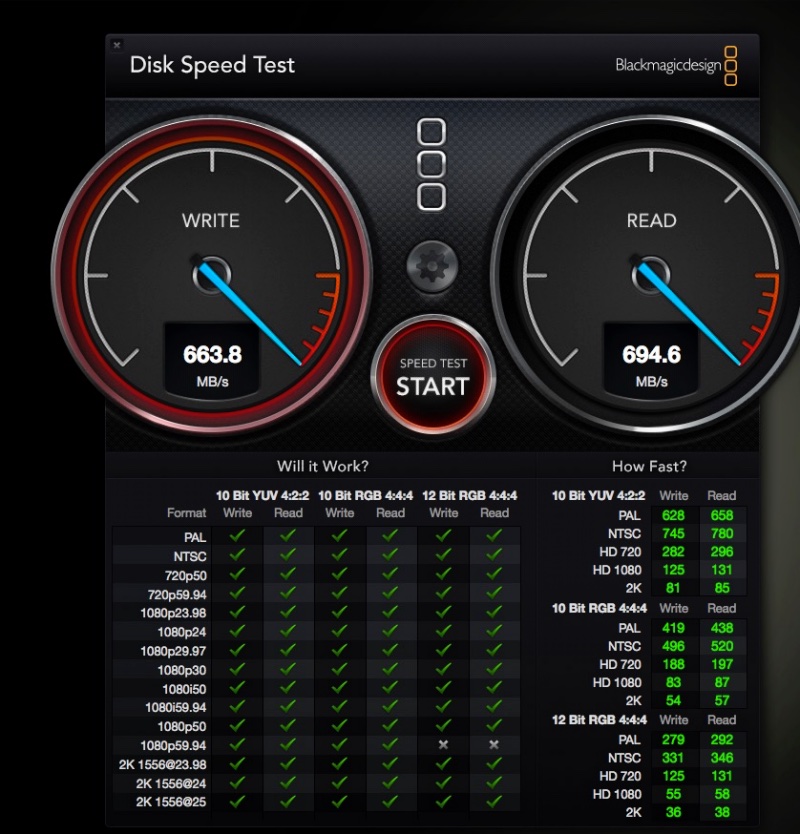
In Part III I will address performance data.