Category Archives: Hardware

Stuff

Mac Pro 2009 Part XXI

A 4K capable graphics card.

For an index of all my Mac Pro articles, click here.

I first wrote of the Zotac nVidia GTX660 graphics card used in my Mac Pro back in my Hackintosh days. That Zotac card has proved to be outstanding, cool running, silent and capable of simultaneously running four displays (2 x DVI, 1 x DP, 1 x HDMI). When I migrated to the 2009 Mac Pro the Zotac joined that migration and except for the lack of the cog wheel/splash screen on a cold start of the Mac, the card was compatible in every way.

My displays are rather dated Dell 2209WA IPS panels, 21″ in size, and I use three. Eventually these will give way to two larger 4K panels once the technology settles down but with a far higher pixel density (3840 x 2160 vs. 1680 x 1050 computes to 4.7 times the number of pixels for a like sized screen) I will go from 21″ to 30″ or so, and the factor increases to 9.6 times. That’s a big increase.


The EVGA has only one fan, yet the card is much larger overall.

Thus I decided to get the best ‘Made for Mac’ card out there, the choices being the ATI Radeon 7950 or the EVGA nVidia GTX680 both ‘Made for Mac’ variants selling for some $600 new. I like the external connector choices on the EVGA more and found a used, mint GTX680 on eBay for $450. I doubt you will go wrong with either. There are yet faster cards but not in ‘Made for Mac’ editions and power consumption becomes an issue, many of these really requiring auxiliary power supplies if they are to be driven hard and if damage to your computer is to be avoided.

The power consumption issue:

The EVGA GTX 680 requires the use of two auxiliary 6-pin power cables connected to the backplane board, in addition to the power provided by the double-width PCIe slot. Each of these runs at 12 volts and can deliver up to 75 watts of power (6.25 amps of current – more than that and you risk frying things).


The two 6-pin connectors attached to the backplane board. I use 1/2″
flex tubing to neatly dress the cables. The PCIe fan is on the right.

The EVGA card I bought came with two six pin cables while the card itself has one six-pin and one eight-pin socket. The instructions clearly state that the 8-pin will accept a six-pin in one orientation only and this proved to be true.


One of the 6-pin connectors goes in an 8-pin socket at the card end.


GTX680 installed. The Apricorn PCIe card with the boot
SSD is below and the powered Orico USB3 card below that.

Installation in the double-width Slot 1 is a breeze, and no tools are required. It took me some 10 minutes, most of that spent unplugging and replugging cables to the Mac Pro. As with the GTX660, the claw at the rear base of the GTX680 is retained by the sliding bar activated by the push button on the PCIe fan’s casing, the latter being moved back for removal and installation, then pushed back into place, making for a secure fit for this large and heavy card.

Why Slot 1? Because inserted in any other slot your card will block a free slot. Not good, considering there are only four PCIe slots available in any Mac Pro.

Static current draw in PCIe slot 1 is 2.95 amps (35 watts) compared with 2.46 amps (30 watts) with the GTX660. An immaterial increase and the new card seems every bit as silent as the old one which was outstanding in this regard.


About This Mac.

The full splash screen appears on cold start, allowing choice of boot drive if the Option key is held down during start. This was a black screen in the GTX660 so boot drive selection had to be made in System Preferences->Startup Drive before restarting. It’s nice to have the splash screen back, but hardly a reason to upgrade, especially as I never turn off the Mac Pro, preferrring to let it sleep. Adventurous hackers can buy a stock PC GTX680 and, using Windows, flash its ROM for the splash screen functionality. As I do not use Windows, and as there is no circumstance under which I can see that changing, I opted for the ‘Made for Mac’ flashed card – though the appearance of the casing on mine suggests it’s actually a flashed PC version. There’s no difference in use. It’s not the first, nor the last, time that a vendor on eBay has lied. For new cards there is negligible price difference between Mac and PC versions and the Mac version will work fine on PCs.

The PCIe fan spools up to some 1500rpm on cold start then quickly settles to the stock 800rpm idle in under 30 seconds:

Noise at ear level (3′ from the front grille) measures at 43dB, the same as with the GTX660, whether idling or under stress.

Benchmark tests:

The most stressful tests for graphics cards include Unigine Heaven (now in 4.0 guise) and the recently released Unigine Valley (v. 1.0), and I show comparisons with the GTX660 below. All run using OS X Mavericks 10.9.1. The GTX680 is 73% faster on Heaven and 10% faster on Valley:


Heaven – GTX680 vs. GTX660


Valley – GTX680 vs. GTX660

With two X5650 12-core CPUs performance is much the same as with two X5590 8-cores:


Heaven – 12-core performance.


Valley – 12-core performance.

This is as expected. These are GPU tests, not CPU tests.

How about power consumption under stress? Using Unigine Heaven as the most stressful test, the current draw from the three sources (PCIe plus the two 6-pin connections) measured thus (worst cases shown):


PCIe current draw.


First six pin connector current draw.


Second six pin connector current draw.

That total power use of 52/63/42 watts, respectively, meaning 157 of a total permitted of 225 watts – is 70% of overall capacity. But individual percentage of capacity is equally important here – you can be under in aggregate but over on one source, a danger point. With each limited to 75 watts, the highest use noted was the 63 watts on 6-pin slot 1, or 84% of capacity. Given the very stressful nature of this test and the short-term peak power use, I remain satisfied that the health of my Mac Pro is not threatened.

With Unigine Valley, the maxima noted were 51/37/41 watts, for a more modest total of 129 watts, and a worst case use of 68% at the PCIe slot.

Monitoring the 1,000 watt Mac Pro power supply, I never saw power use exceed 500 watts during the Unigine Heaven test, a mere 50% of capacity.

GPU temperatures:

I cannot report on these as the GPU sensor is not ‘seen’ by the system. However, the power draw readings, above, are a fine proxy for determining GPU stress, and the permitted maximum power draw is not exceeded here.

Real world subjective use with Lightroom 5.1 and Photoshop CS5:

I’m not one much for subjective data. “It feels faster” is usually the placebo effect at work. But here are my subjective observations with LR and PS, applications I use all the time.

Lightroom is a key app for me and I actually noted a perceptible improvement. The occasional “Loading …” flag when flipping fast through 1:1 previews (I would get it 30% of the time) and the associated 2 second delay has now fallen to 2-3% of the time and a consistent 1/2 second delay.

When exporting a file from LR to PS, the longest part of the process is rendering of the PSD file from the RAW original in LR, before it can be opened in PS. With the GTX660 this took 6 seconds. With the GTX680 it’s down to 2.5 seconds – much faster and a noticeable enhancement to workflow smoothness and speed.

Are these improvements enough reason to upgrade? That’s a function of your patience threshold and the state of your pocket book. You will not go wrong with the slower GTX660 but once you have used the GTX680 it’s tough to go back. If your budget is $200, the GTX660 is unreservedly recommended. A new GTX680 is three times as much.

Comparison with the new Mac Pro:

Will the GTX680 match the D300/500/700 dual GPUs in the new Mac Pro? Once test data are available we will know and I will update the metrics above. If it lags, I would guess it will not be by much. Either way, you will have a great deal of money left in your pocket by sticking with the 2009 Mac Pro.

Now it’s time to start thinking about 4K displays. For a full list of nVidia GPUs which support 4K, click here.

Update May 27, 2014 – new OS X drivers: nVidia has just released a new driver which claims to fix all existing 4K issues. Click here.

Update June 6, 2014 – new Mac Pro:

Here’s Unigine Heaven running on the new Mac Pro (cylinder) with the 6-core CPU and dual top-of-the-line D700 GPUs. In a word – underwhelming, epecially given the very high cost of the D700s:

The premium for the D700 GPUs over the base D300 ones is $1,000, whereas a GTX680 ‘Made for Mac GPU’ for the old Mac Pro can be had new for $640, used for half that amount.

Update June, 2015:

The newest top-of-the-like Nvidia GTX980 card doubles the speed of the excellent GTX680 but also doubles the price – $600 new compared with $300 used for a flashed GTX680. Add a further $180 if you need the ROM in the GTX980 flashed to show the boot and option-start screens.

You can get it in many socket configurations from the usual vendors – Nvidia, EVGA, PNY, Gigabyte, Zotac, MSI, etc. – so choose based on your peripherals. I opted for a dual-DVI/DP/HDMI configuration, but if DP or MDP is your thing any number of multi-socket options is available.

For still photographers the GTX980 is overkill but for heavy video rendering using CUDA-capable apps it’s a must and the premium will be quickly recovered from enhanced productivity. You can read all about the GTX980 here and I recommend it without reservation. Performance is some 20% better than the costliest dual D700 option for the new (‘dustbin’) Mac Pro.

Meanwhile, a used, flashed GTX680 at $300 or less is an excellent choice for many users.

Olympus 45mm F/1.8 MFT Zuiko – Part II

Some snaps.

In Part I I took a look at the ergonomics of this MFT lens and also linked to my RAW lens correction profile for use with Panasonic bodies.

Here are a few snaps from a first spin with the lens on my Panasonic GX7 body. Most were taken in Carmel, CA. All were processed with my lens correction profile applied and with LR5’s Sharpness slider at ’60’:

Apertures varied from f/1.8 through f/5.6. The last image had the sun in the frame partly behind a branch. There are no flare spots. For a lens so compact the performance is excellent. Not quite as natively sharp as the 17mm Olympus MFT f/1.8 but perfect for a traveling, very light outfit.

Olympus 45mm F/1.8 MFT Zuiko – Part I

An outstanding short telephoto lens.

So enamored was I of the Olympus 17mm f/1.8 lens that I decided to add the 45mm f/1.8 optic. I paid $350.


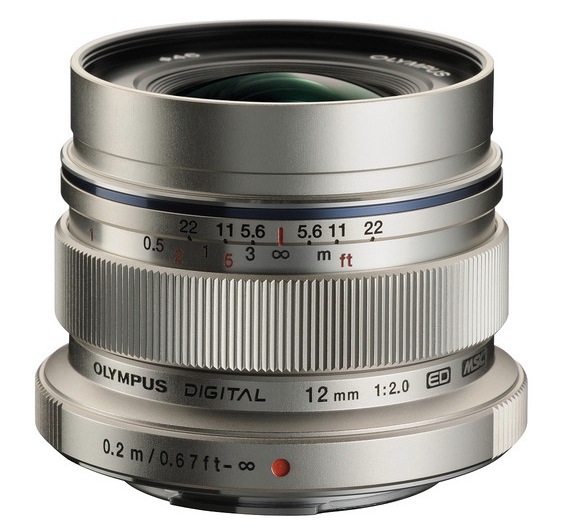
The 45mm on the GX7, next to the 17mm.

This makes for a superb, light and compact outfit with the two classical film era focal lengths of 35mm and 90mm, FFE. For a street snapper, that little outfit is good for 99% of daily needs.

Rather than build an exposed bayonet for the lens hood (extra), Olympus decided to hide the bayonet under a weakly attached plastic, chromed ring:


Bayonet exposed.

This is so weakly held in place and the lens so ugly were it lost, that I immediately attached a piece of chrome flue tape to make sure it does not fall off, This is especially recommended if, like me, you do not use a lens hood. If the lens hood fits as poorly it will soon be lost. It seems Oly simply cannot resist adding some asinine feature to most of its products – take the collapsible barrel on the 9-18mm MFT zoom and the retractable focus collar on the 17mm/1.8. But the optics of all three are so good that these eccentricities are but minor annoyances.


Flue tape in place.

How light is the lens? At 4.1oz it’s a featherweight, almost identical in weight to the 4.2oz of the 17mm. The 45mm appears to use more plastic in its construction, but who cares when the optics are so good? Length is 2.3″ against 2.2″ for the 17mm – it’s tiny.

Focus is almost as fast as the instant focus in the 17mm. It’s as near silent as it gets. There is a slight ‘bounce’ around the sharpest focus point, missing from the 17mm and much more pronounced in the 9-18mm, but nothing that gets in the way of rapid execution.

Much as it makes sense to compare the 17mm with the Leica 35mm Asph Summicron, the 45mm is the equivalent of the 90mm f/2 Apo Summicron, one of the finest lenses I have owned. (I bought mine years ago for $900 and sold it for some $2,000 when the Leica Ms moved on. Today it remains available, now for $4,000, which is plain daft. All 18 ounces of it. I owned mine for some 5 years, which computes to a compound annual return of 17.3% for those into such things, confirming Leicas are for China cabinets, not for real world use.) What both Leica lenses lack is AF, of course, and both will leave a mighty hole in your savings, one dug deeper still once you add an M body to use these with. Definition-wise it’s tough to comment as my catalog only contains film snaps from the Leica optic, a medium far inferior for capturing detail than modern digital sensors. However, purely subjectively, the 90mm Apo Summicron is the better lens wide open, though add a touch of sharpening at f/1.8 for the Oly in Lightroom and there’s nothing in it. Well, OK, there is something in it – the $3,650 burning a hole in your pocket if you are an Oly man.

The Olympus lens shows very minor vignetting which disappears by f/4, and mild pincushion distortion at all apertures. Accordingly, I created a lens correction profile for use on Panasonic bodies with RAW files and you can download it here. Install the profile as I explain and its application becomes automatic when images are loaded into Lightroom (3, 4 or 5), so it’s a ‘set and forget’ thing. Definition at f/1.8 and f/2 benefits from a little sharpening in LR (I use ’80’) otherwise the default setting of ’40’ for the GX7 body is fine, until you get to f/22, at which point diffraction takes the edge off sharpness. Setting sharpness to ’80’ at f/22 once again does the trick.

In practical terms there’s absolutely no need to stop the lens down unless you need depth of field, and one of the signal appeals of the wide apertures this optic offers is the very absence of depth of field, with backgrounds rendered pleasantly out of focus.

I constantly read about how MFT camera X or compact camera Y is not pocketable. This, I confess, leaves me confused. What, pray, is the utility value of a camera when it is in your pocket? What is important in a light traveling kit is that a spare lens is pocketable. One on the body, one in your pocket. The two Olympus f/1.8 lenses, the 17mm and the 45mm, are so small that they will fit even in the pocket of a jeans wearer, unless he is a hipster opting for skin tight fit. That is pocketability.

In Part II I will publish some snaps taken with this lens using the Panasonic GX7.

Olympus 17mm f/1.8 MFT Zuiko – Part III

Some snaps.

You can read my review of the Panasonic GX7 here.

Part II of this lens review is here.

AF speed:

By way of preface, I can state categorically that the AF focus speed of the Olympus lens on my GX7 body is as close to instantaneous as is possible regardless of the lighting. Whereas I had a 30% rejection rate with the 20mm Panasonic because the lens did not focus in time, the rejection rate with the Olympus, based on the 193 images I snapped the other day, none at an aperture smaller than f/2.5, was zero. Such rejects as there were resulted from poor composition, weak subject matter and so on.

For the street snapper little more need be said.

Flare:

Before getting into the serious street stuff, let’s dispel any issues concerning flare, the other debilitating ‘feature’ found in the Panasonic optic. This unexciting image was shot with the sun in the frame, shining directly into the lens:


Minimal flare.

No modern lens I own, not even the 35mm f/1.4 Sigma for the Nikon, can hold a candle to this performance. One other note. The Olympus 17mm f/1.8 lens delivers exceptionally high contrast images (which goes hand in hand with its outstanding flare resistance), so much so that I found that I often had to turn down contrast (Down with the Highlights slider, Up with the Shadows one) when processing the RAW images in Lightroom 5.

Sharpness:

Resolution? The only thing to report here is that 18″ x 24″ prints, a medium far more demanding than any electronic display, are par for the course at any aperture you care to use. Stopping the lens down need only be done when more depth of field is required.

Is the lens as sharp as Sigma’s monster 35mm f/1.4 on my (even more gigantic) Nikon D3x? No. I doubt anything is, if you have the patience to actually find an example of the Sigma whose AF is properly adjusted – it took me three before I got there. Then again, the Sigma with no camera body weighs more than the GX7/17mm combination and the Olympus focuses noticeably faster.

Is the Oly sharper than the Panny 20mm? Who knows, given the Panny’s inability to lock in sharp focus in a reasonable time?

Pictures:

Here are some snaps from my outing, all taken in San Francisco on the Saturday after Thanksgiving, the city alive with shoppers and tourists. All were taken between f/1.8 and f/2.8, using RAW originals processed in Lightroom 5, with ISO from 400 (Kodak TriX lives!) to 3200. Mostly these are straight out of the camera, with no post processing other than RAW conversion to JPG and automatic application of my lens correction profile :


Lighting up. Nothing beats a 35mm (FFE) lens on the streets.


Selfie. The GX7/17mm Oly combination is almost impossibly responsive.


$5 pup. I snapped five in five seconds here – a buck a snap – and the fourth
caught the dog just so. The truly silent electronic shutter in the GX7 is a boon.


These charmers were getting a lot of attention.


Carving my pastrami at Lefty O’Doul’s.
The rye bread here is beyond fresh.
At f/1.8, ISO3200.


Dining al fresco on Maiden Lane. Quite lovely colors here.


Impossible not to make a donation when visited with warmth like this.
At f/2.5 and ISO400, this one made a gorgeous 18″ x 24″ print.


Uh huh.


Tattoo dude.


Looking up.


Toothless in San Francisco.


What happens when you listen to sell side stock tips.


Shoeshine man. The electronic shutter is inaudible at any subject distance.


Porsche girl.


Alone.


The sales pitch here was “Jesus is a Negro”.


Ritz Carlton guards making out like the CIA.


Beautiful color rendering. The GX7’s in-body OIS works well – this was at 1/20th.


The shallow depth of field at large apertures comes in handy.
The Oly lens has excellent resolution.


Some faces leave no time for composition. The last snap of this outing
and I was half dead from exhaustion, but could not pass this by.

Color rendering:

The color rendering is really pleasing in these images. Whether that’s due to the camera, the lens or both I have no idea, but the combination is right up there with Bogart and Bacall, Astaire and Rogers, and JP Morgan and systemic corruption.

Aperture priority operation:

I used the ‘A’ exposure mode for all of these snaps, with the electronic (silent) shutter, meaning that the only thing I ever had to fiddle with was the control wheel to change apertures. Panny really needs to update its firmware to allow one stop intervals between clicks, here. Only gear fetishists need the default 1/3rd stop steps, which only serve to slow operation down.

Electronic shutter math:

One caution – as I always use the silent electronic shutter in the GX7 – doing so with fluorescent lighting as the sole light source is not a great idea. You will get stripes as the tubes flash on and off during the exposure, as here:


In the little boys’ room. f/1.8, ISO 3200. Spare GX7 battery
is in the coin pocket in my jeans. The excellent
slip proof Upstrap is on the camera.

Be sure to read the Comment below regarding the use of non-OEM batteries.

Assuming a 60Hz flash frequency (US mains) the five cycles seen here suggest that the electronic shutter takes 1/12th second (5/60) to traverse/scan the field of pixels, which is why you get noticeable distortion of moving images taken using this shutter. You can bet that the scan speed will increase in subsequent iterations of this design, making for less movement distortion.

For my preferred subject matter, movement distorion is not an issue. If it’s an issue for you, use the faster traversing mechanical shutter in the GX7, which is some ten times faster in this instance. Why anyone would need the primary benefit of the electronic shutter – silence – with a moving subject is beyond me, so I fail to see this as an issue.

What I write is genre specific:

In these articles it is not my goal to comment on anything other than taking street snaps and making nice, big, sharp prints from them. If movies, landscapes, birds, bugs or sports are your thing this is the worst place to look for guidance. If you want to learn about the mind numbing selection of exposure modes, issues like framing rates, white balance and sensor aberrations or how well this gear compares with dozens of competitors, there are any number of fellows with white lab coats and zero imagination out there whose site content you should be reading instead.

Controls and ergonomics:

The knurled ring surrounding the shutter button is programmed to change apertures, being faster in use than the rear control dial. Other than the shutter release, it’s the only control used in the field, along with the C1/C2/C3 top right dial settings which are programmed to ISO 400, 1200 and 3200, respectively. ISO 3200 is the maximum the electronic shutter works with, which is just fine at f/1.8 in poor light.

Panny has some silly statements in its instruction manual as to the largest prints which can be made at different ISOs – silly on the conservative side, that is. Anything up to ISO 3200 will, given a modicum of technical skill, yield prints of any size your heart desires. Panasonic has made steady progress from the sensor found in its groundbreaking G1 and is to be highly commended for its efforts.


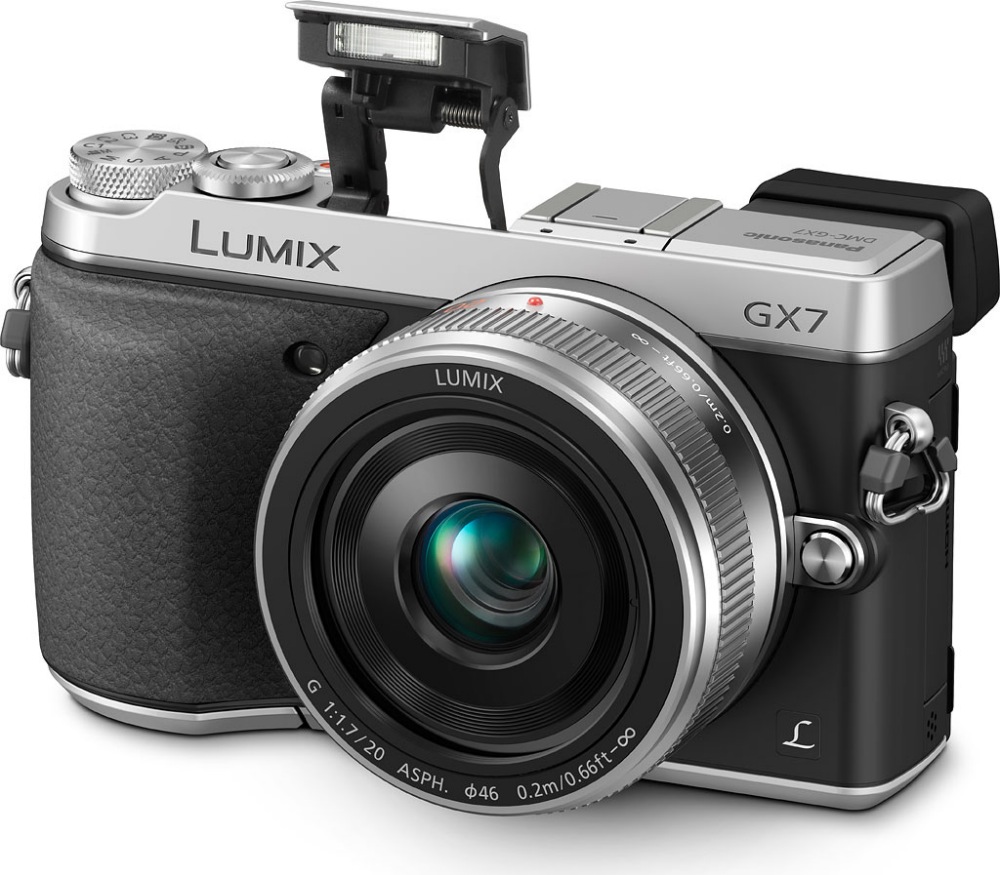
Street snapper’s dream machine. Amateur looks, state-of-the-art responsiveness.

The nice chromed protective lens filter is a 46mm UV from B+W and is a recommended accessory given the relatively exposed front element which, like the rear element, is plane on the outside, being neither convex or concave.

Finally, note that I dispensed with the duct tape on the top plate holding the EVF in place, replacing it with some double-sided sticky tape below the eyepiece, where it’s invisible.

Conclusion:

For years I have dreamed of a small, fast, automated digital camera and fast prime wide angle lens to do what the Leica M did so well for me on the streets for over three decades. Small with instant response, silent, unobtrusive, sharp. And with autofocus, please! Let’s not forget in-body OIS. Don’t-care-if-it’s-stolen cheap would be nice, too.

In the Panasonic GX7 mated with the Olympus 17mm f/1.8 MFT lens, I rather fancy that my dreams have been granted, and for less money than a couple of hours on the local shrink’s couch for far greater benefit. The sheer ‘transparency’ of this combination, placing fewer obstacles between the eye, the brain and the recorded image than ever before, redefines the street snapping standard for this devotee of the genre.

Recommended without reservations for like minded photographers.