Category Archives: Hardware

Stuff

Easy Hackintosh wi-fi

Never easier.

The ease with which full function wi-fi can be installed in a Hackintosh has never been greater or the cost lower.

What follows assumes you use an Airport Extreme (AEX) or Time Capsule (TC) wi-fi router. My AEX is a Gen 1 (2008), single band only, but Gen 4 AEX/TCs and later are dual band, meaning that they can support both 2.4GHz and 5GHz (802-11n) devices simultaneously. With the advent of iPhone 5 most of my ‘go to’ devices now support 5GHz, including Hacks, iPads and iPhones, so dual-band is not a requirement. We do have two devices in the home which are 2.4GHz capable only, the xBox 360 and the old iMac G4, and these are set to receive their broadband signal directly from the A&T Uverse router which is 2.4GHz, 802-11b. As usual, the Telephone Company is a decade behind. Everything else looks to the Airport Extreme and now uses the 5GHz band.

The Hackintosh wi-fi issue has become much simpler over time. First one used an external USB wi-fi dongle with the associated (awful) Realtek software. Then TP-Link came along with internal PCIe cards which delivered Airport capability and, later, when OS X Lion came along, AirDrop functionality after you messed with Pref files some. You would buy the TP-Link PCIe card then an aftermarket wi-fi card which was an SOB to install in the card owing to the fiddly connectors. After application of cable ties and solder for the joints you destroyed, the card worked fine.

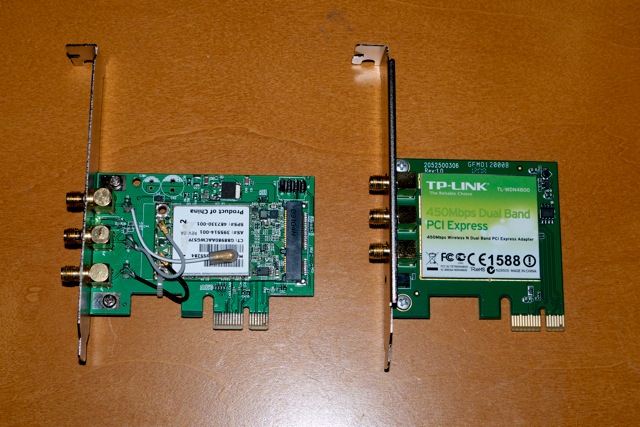
The other day I learned from the excellent Tonymacx86 Hack forum that TP-Link now makes a dual band wi-fi card which integrates the PCIe card and the wi-fi card. The model number is TL-WDN4800 and Amazon has it for $35 – which is less than the previous card + wi-fi card combination cost and is a plug-and-play installation in any Hack. B&H Photo also carries the card for a similar price. (Prices seem to fluctuate daily by a few dollars). The card comes with regular and low-profile brackets, the latter for use in Hacks built in Micro ATX cases.

Here are the old and new cards, antennas removed:
And here are the before and after results on one of my Hacks – the one with the botched old card installed, one antenna missing, replaced with the new card. A two minute job:


Clearly, having three working antennas does no harm. Comparing the speed of the new card with a properly installed old one at a like location, the new card consistently reports download speed 10% higher than the old, possibly attributable to superior antenna design.

There is but one quirk. The Airport Extreme defaults to channel 149 with 5GHz wi-fi, whereas the new TP-Link card only goes up to 48. So, go into Applications->Utilities->Airport Utility->Airport Extreme->Edit->Wireless->Wireless Options and set Radio Channel to 48, then Save. Your new TP-Link card will now be visible to the Hack in which you installed it.
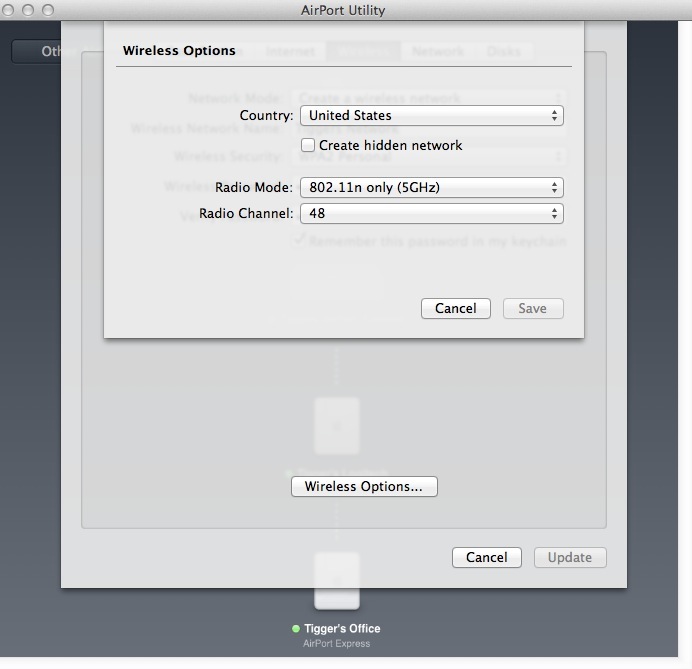
Setting the Channel to 48 in Airport Utility.
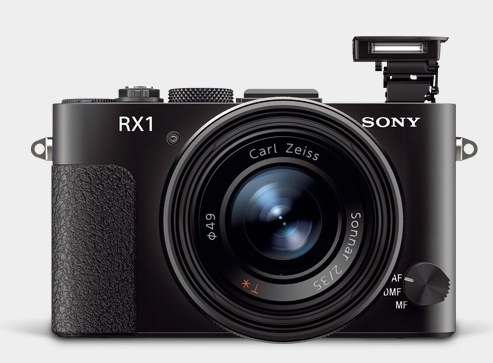
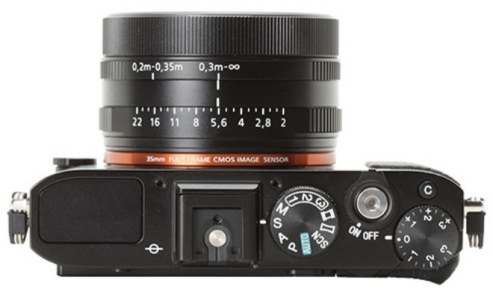
Sony RX1 camera

The (not so) poor man’s Leica at last?

If you told me to select just one lens for all my street snaps it would be the 35mm f/2 Summicron on a Leica M body. Optically unsurpassed, the problem with that combination is that it comes in at some $10,000, and the dated body design comes with a cluttered multi-frame finder. Further, the Leica is manual focus only and 35mm is long enough that focus often matters, especially at larger apertures. So even putting aside price, the Leica no longer cuts it for rapid action street snaps where auto-everything is the order of the day.

Sony has just released its RX1 camera and it is an intriguing design for street snaps. First, it comes with a full frame sensor in a very compact body – 4.5 x 2.8 x 2.6 inches weighing just 18 ounces. The Leica M9 without lens is 5.5 x 2.9 x 3.2 inches and 30 ounces, with the 35mm Summicron. Second the non-interchangeable lens is a 35mm f/2 design from Zeiss who have recently been distinguishing themselves with outstanding optics for full frame Canon and Nikon DSLRs.

There are some quibbles from reading the specifications. There’s no optical viewfinder which is essential for street work. Squinting at an LCD screen at arm’s length in bright light is not a prescription for stealth. Sony is asking $600 for their clip on finder, which is silly, and you can get the wonderful Voigtländer from CameraQuest for $209. I use the 28mm version and can recommend it without reservation. It’s unclear what battery life is like, but if the LCD screen can be turned off – assuming it’s the greatest power consumer – then over 300 snaps on a charge seems possible. Sony claims 270 shots when using the LCD. It is also unclear how responsive the camera is. The Leica’s shutter release remains the standard against which to judge, being beautifully sprung, predictable and fast – after you have futzed with manual focusing, that is. If the Sony is anywhere close then it’s a winner in my book.

The 24mp sensor looks to be the one from Nikon’s FF D600 which is known to be outstanding, especially at high ISO where it takes over from where the low light sensor in the D700 excelled. Focus is down to 5 inches and there’s a movie mode if that’s your thing. And, best of all, it says ‘Sony’ in large chrome script on the front so no one will ever take you seriously while you get your snaps. Sony makes TVs (OK, loses money on overpriced TVs) and point-and-shoots, right?

Controls include an Aperture Priority auto exposure mode and the lens has a real aperture ring – excellent! That remains the optimal design in my opinion, not the modern Canon and Nikon DSLR approach which dictates the use of fiddly control wheels while removing the aperture ring from the lens. There’s a built-in pop up flash which is nice to have, if hardly relevant to street snapping. There’s also a nice clickable exposure compensation dial on the top plate for corrections up to +/- 3 stops which is hands-down a better way of doing it than using LCD menus. Very handy.

Chimping the test snaps at DPReview compared to the Nikon D600 (taken with the outstanding 85mm f/1.8G lens) shows little quality difference, though the Sony’s lens displays modest barrel distortion. Once Adobe comes up with a profile the barrel distortion can be easily corrected on import into PS or LR. Noise is barely visible in 16x enlargements even at ISO 6400.

The biggest stumbling point is the price. At $3000 with a good aftermarket viewfinder this is a very costly camera indeed. That sort of money gets you a full frame Nikon D600 with a similar sensor and a fine lens or two. Admittedly, that’s comparing chalk and cheese, but the D600 can do street snaps at a pinch, if less unobtrusively, and can also do lots of things that the single purpose RX1 cannot. However, at $3,000, that’s still less than the Leica 35mm Summicron alone!


Pink Hair. When there’s no time for manual focus, AF is the ticket. Panny G3, kit lens, ISO 1600.

Nikkor 16-35mm AF-S f/4 ED N VR lens

An ideal ‘crossover’ lens.

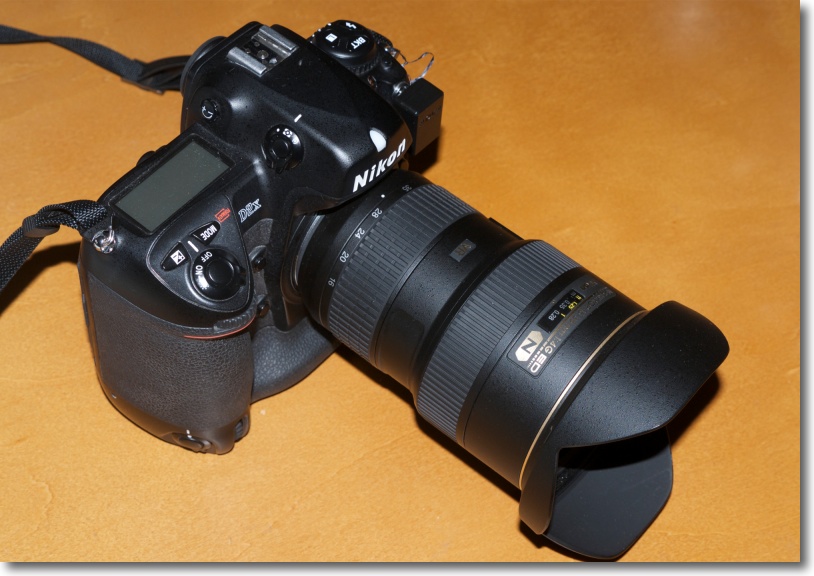
On the Nikon D2x.

By ‘crossover’ I mean that this current auto-everything lens provides a useful range of focal lengths for both full frame and APS-C frame Nikon bodies. On the cropped frame D2x it provides a full frame equivalent range of 24-52mm, ideal for street snapping.

I have been using mine for some nine months now and might as well start by saying what I do not like. It’s bulky, the gargantuan lens hood is needed to shade the exposed front element, it’s set in a yucky resin body and at 24 ounces it’s no featherweight. The maximum aperture of f/4 is relatively modest and you will struggle getting dramatic differential focus effects. Being a ‘G’ optic there is no traditional aperture ring, aperture control being solely possible from the control dial on the body. I prefer a ring on the lens. Finally, at just under $1300 it’s anything but cheap.

But there is a lot to like here. It’s a two-ring zoom, meaning zooming is done by rotating the rear ring rather than by push-pull. The focus ring does not rotate when the lens is used in AF mode. AF is stunningly fast on both the D2x and the D700, faster than with the older AFD lenses. AF is accomplished by a linear motor within the lens, rather than by the older ‘screwdriver’ mechanical coupling used in AFD optics. In AF mode you can simply override autofocus by turning the focus collar which is tolerably smooth, if nowhere near the quality you will find in the vast range of discontinued MF Nikkors. Into the sun the lens displays exceptionally low flare, maybe owing to Nikon’s new ‘Nano’ coating. VR is switchable and whatever Nikon’s claims may be I generally find it’s good for two shutter speeds – 1/60 without being much the same as 1/15th when VR is used. It’s not a panacea, but it helps to overcome some of the limitations of the slow f/4 maximum aperture.

The 16-19mm range shows strong barrel distortion on FF, and it’s still quite noticeable on APS-C. However, both PS and LR come with excellent lens correction profiles from Adobe which you can set to be invoked on import – and I recommend you do so – meaning that straight lines at the edges will once more be straight rather than significantly bowed. Essential correction for architecture snappers.

I have no hesitation in using this lens at its maximum aperture and probably do so half the time. The definition fully open is excellent, and any improvement with stopping down is barely noticeable. Best of all, paired with the older sensor in the D2x which does such a special job of rendering colors well, this lens really shines, even if the APS-C sensor is discarding a significant part of the image circle. Stated differently, if APS-C is your sole sensor use, you may be better off with a much smaller lens designed with this sensor in mind. Balance on both the D700 (with add-on battery grip) and the D2x (with integral grip) is outstanding.

Here’s a mix of recent images taken on both the D2x and D700 using the 16-35mm lens.


Pelicans line astern. D2x, at 35mm, f/6.7.


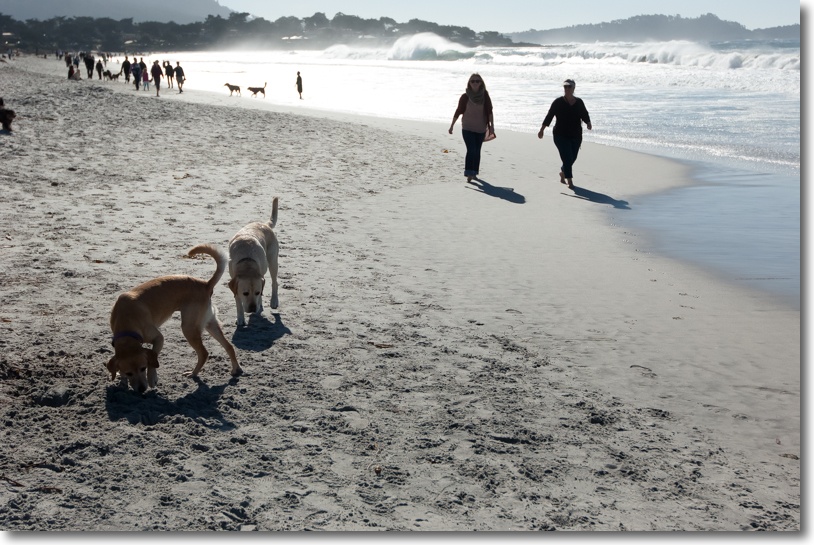
Doggie heaven on Carmel Beach. D2x, at 32mm, f/4.


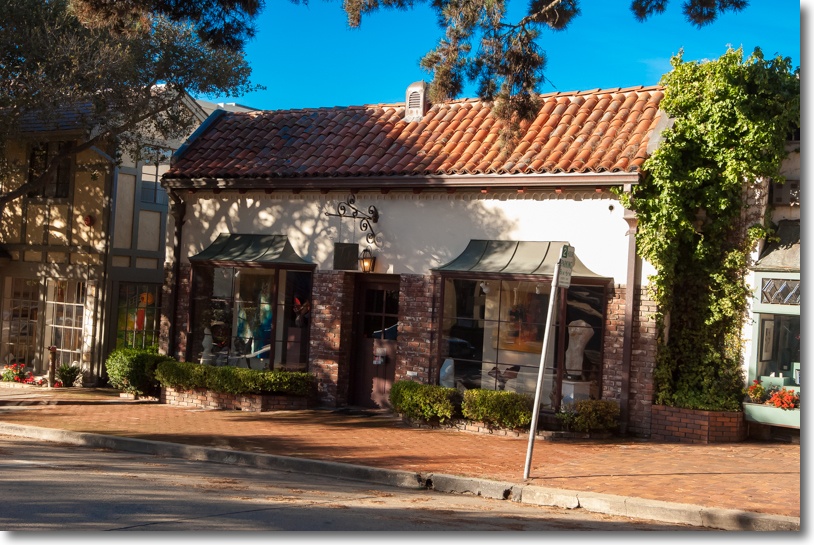
Carmel street scene. Rich, saturated color rendition. D2x, at 32mm, f/6.7.


Marching band. Vibrant colors on an overcast day. D700, at 18mm, f/11.


Gate to Alcatraz exercise yard. D700, at 29mm, f/8.


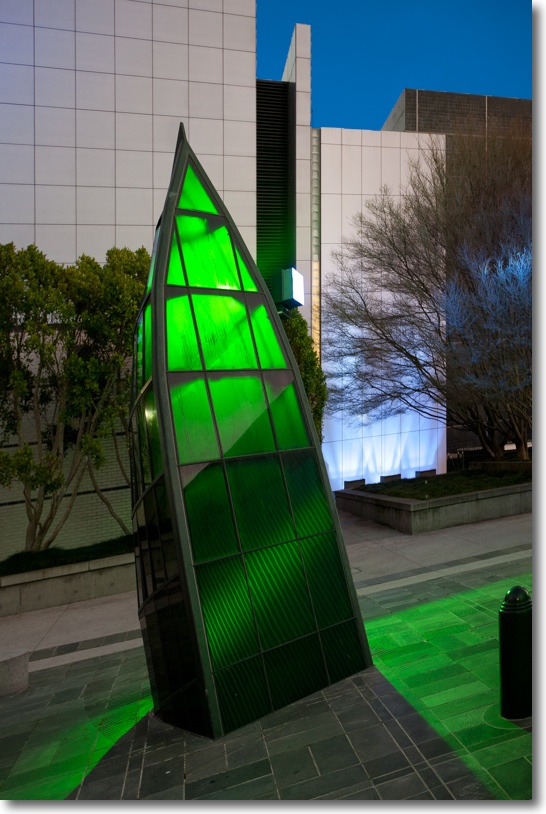
Kryptonite. Yerba Buena gardens, SF. D700, at 35mm, f/4. 1/30th with VR.

Improved Nikon GPS

A new integrated unit.

I have had great success with the Aoka GPS receivers attached to my two Nikons – the D2X and D700. You can read all about the technology here, where you will see that a separate data logger must be used. This goes in your pocket and receives GPS data from the satellite and passes it to the device on the camera’s body. The logger has a small rechargeable battery which can be recharged from any USB socket on your computer.

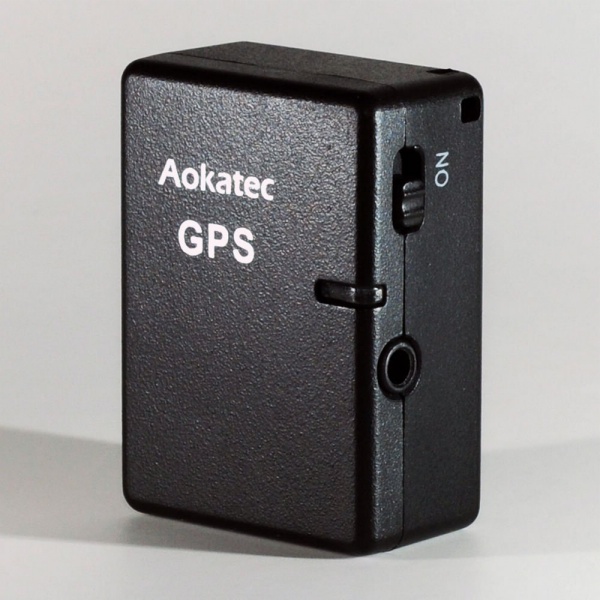
The new integrated Aoka GPS receiver.

The new receiver integrates the data logger and receiver which I use. It’s a little wider but has the advantage that it’s impossible to forget to take the logger along with you, something I have managed once or twice. The drawback is that it drains more power from the camera’s battery as there is no separate logger battery to recharge. While I have not used it, the price is attractive. eBay asks $80, Amazon has it for more. One Amazon review has some useful battery drain metrics.

The device (model AK-G1) fits the Nikon D4/3/2 in all their iterations, D800/800E, D200/300/300s, D700 and Fujifilm S5Pro. There are other models to fit the Nikon D3100, D5000, D5100, D3200, D600 (model AK-G2), and the AK-G7 for the Nikon D7000, both costing $80 on eBay. The AK-G9 for the Nikon D90 has no integrated data logger ($40 – eBay) so a separate logger would have to be used.

The only failures I have had with mine result from ‘canyons’ in the city shading the satellite or not giving the device the 2-3 seconds to wake from sleep after a period of inactivity. I have also found that the older D2X is far faster at re-displaying the ‘GPS’ flag on the top LCD display than is the D700. So much for progress. The new device looks like a better mousetrap, especially as my separate logger can only support one camera at a time. Switch the D2X and the D700 on simultaneously and the D2X grabs and hogs the signal every time. The one logger cannot simultaneously drive two camera receivers.

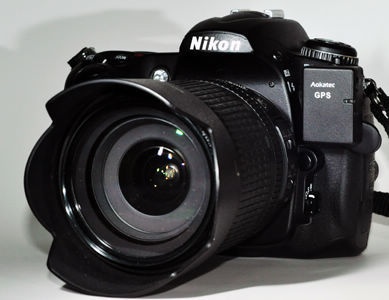
Here’s the device on a Nikon DSLR – stock photo from the maker; I’m guessing it’s a D300:

As a friend of the blog and GPS expert points out, as GPS technology improves the advantage of these devices is that they can be inexpensively upgraded rather than having to buy a new camera body.

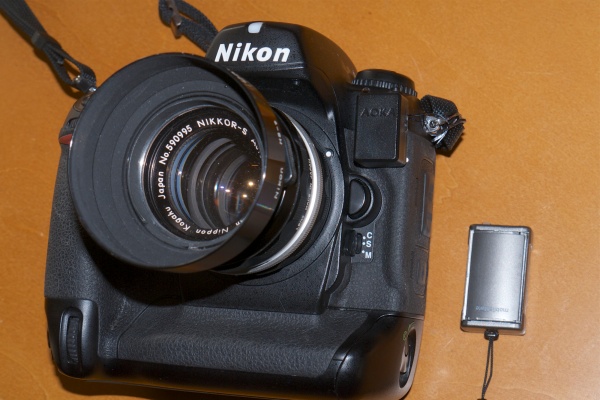
For comparison, here’s the earlier unit attached to the D2X, along with the small, separate data logger.

D2X with receiver and data logger.

I cannot find inexpensive aftermarket devices for Canon DSLRs. The factory units run $195 for a Nikon shoe-mounted unit with a clunky cord connection to the socket and $250-279 for the various Canon units. Both seem ridiculously over-priced to me.

EyeOne revisited with Mountain Lion

A great tool.

When FU Steve installed the latest nVidia GTX 660 graphics card in my HP100+ Hackintosh, he also did a fresh install of OS X Mountain Lion 10.8.2. When it came to printing from Lightroom yesterday, I found the driver for my HP DesignJet 90 was AWOL, so I quickly reinstalled it. At the same time, I re-profiled all three Dell displays using the EyeOne colorimeter and the (not so) current EyeOne DisplayOne Lion software, the makers at Xrite as usual taking their time with the upgrade to Mountain Lion. While the software reminds you to make monthly profile updates, I find that three or four times a year is fine as my three year old Dell 2209WA monitors are now very stable and exhibit minimal drift. The application logs and charts drift which is handy.

My Dells are set to a brightness of 120cd/m2, gamma=2.2 and color temperature of 6500K. That brightness setting is very low – something like a setting of 14 out of 100 on the Dell’s on-screen controls. If your prints are always coming out darker than you like, chances are you have the display set too bright, which is how Apple and just about every other display maker wants it, to show off their products. And Apple’s displays – built-in or separate – are some of the worst a photographer can use. In addition to having a far smaller color gamut (range) than your photographs and your (good) printer they are glossy, to add insult to injury. But boy, do they look ‘insanely great’ in the Apple Store or what?

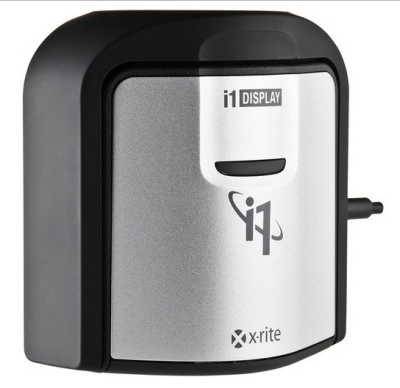
While the EyeOne DisplayOne I use appears to have been discontinued – I would encourage any photographer to pick up a used one ($75-100) as there are no moving parts to go wrong in the device – the current model is the EyeOne DisplayPro, retailing for the same price I paid a few years ago for my model:

Click the picture to go to B&H USA. I get no click-through payment.

I have no idea what software is included, but you can download the Lion version of the app from Xrite and it works fine with Mountain Lion. Profile creation takes 8 minutes per display and the profile is automatically saved in the right place. I generally know when I am due for re-profiling as with three adjacent displays any changes from one to another are immediately obvious. If you use one display, a monthly profile run might make sense in the first year of a new display’s life, with quarterly ones thereafter. I always make sure my displays have been on for at least 30 minutes before making a new profile, to make sure they have settled.

When I took our son to lunch in San Francisco the other day – he was off school for Veterans’ Day – I made sure to bring the Nikon D2X with the 50mm f/1.4 Nikkor-S MF lens along, and encouraged him to play with the camera on the trip. It’s too heavy for him to use, as he is only 10 years old, but it was a joy watching him experiment with the various buttons and levers which exist in abundance on this complex camera’s body. I chose the MF lens for two reasons. One to teach him manual focusing, a rarity in the world he inhabits, and the second to take a snap of him over lunch. On the APS-C sensor in the D2X the 50mm lens takes on an effective 75mm focal length which is ideal for head and shoulders portraits, and nicely isolates the subject from the background.

Winston at Sinbad’s, at the ferry landing, San Francisco.
Click the picture for the map. Nikon D2X, 50mm f/1.4 at f/5.6. ISO 400.

The GPS data comes courtesy of the Aoka receiver illustrated here. The same one which fits on the D700 works every bit as well on the D2X. Actually, the receiver works better on the D2X which is quicker to pick up the GPS signal from sleep than the D700. I use the i-Blue MobileMate GPS sender illustrated in that linked piece but any of a number of alternative senders works. Check Aoka’s instructions.

The old 50mm lens, made some 40 years ago, is as good as it gets. No, it’s better, as I have added a CPU for proper loading of a lens correction profile in Lightroom as well as proper recording of EXIF data. The CPU also allows matrix metering to work with old MF Nikkors. In fact, in the case of the above portrait, the old Nikkor lens is too good. Despite the gentle window natural lighting, every last blemish in Winston’s face, despite his tender age, is laid bare in the original print. So when processing the image in Lightroom, I moved the Clarity slider to minus 20, which nicely softens things up without losing too much detail. The sensor in the D2X may be dated by modern standards and may start creaking at anything over 400 ISO, but the rendering of color in the large wall print I just made, with color fidelity made perfect by the calibrated monitor, is stunning.

A good colorimeter is a must have for any photographer, but especially for one who regularly makes prints. I think there may be five of us left in that category in the United States.

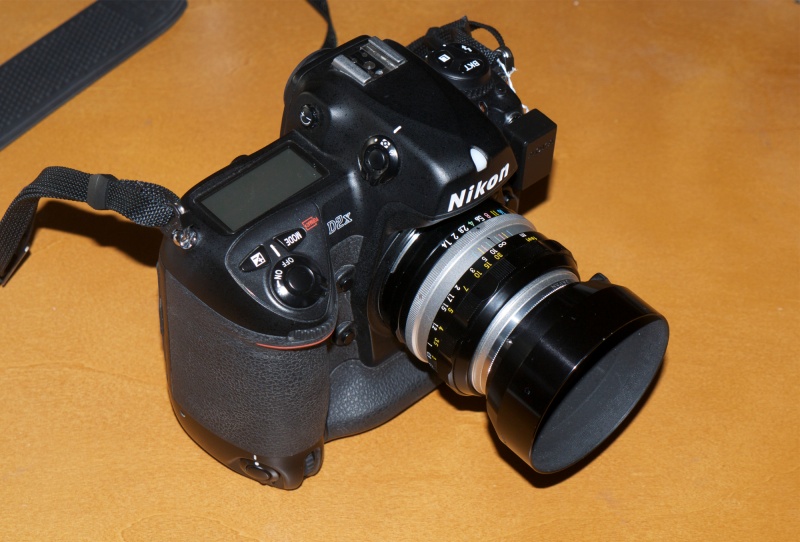
Perfectly balanced. The Nikon D2X with the 50mm f/1.4 Nikkor-S manual focus lens.
A dental floss (!) tether protects the GPS receiver against loss.

For more from the stellar 50mm f/1.4 Nikkor, click here.