Category Archives: Photography

More Helicon macros

Make your macros sing.

I wrote about Helicon Focus recently and for this new inductee to the macro world it’s fair to say that the software opens up new realms in macro photography. This application requires that you take several pictures of your subject, each focused slightly differently, after which it applies some serious processing to stitching together the sharp zones of each into one sharp whole. Magic!

Now your subject must be still and you need to use a tripod (unless you are very lucky doing this handheld, which I think is a long shot) to permit proper stitching of the sharp zones from your constituent images.

I import the originals into Lightroom in the normal way and stack them using the ‘time between pictures’ slider, which allows automatic stacking of pictures taken close together. I then export the stack in TIFF, making sure there are no export size constraints in the Image Sizing section of the export panel. The exported images are then dropped into Helicon Focus, I hit ‘Run’ and ‘Save’, then import the composite image back into Lightroom where it is added to the top of the stack, like so:
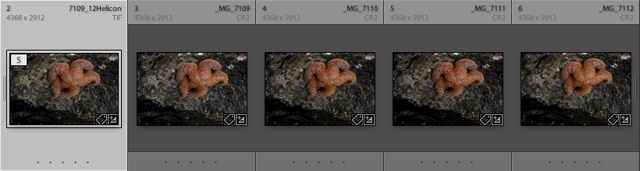
The deeper the required depth of focus the more images you need. For reasonably square on subjects with some depth I find 3-5 images works fine. For more drastically sloped ones, more may be needed. Digital film is cheap! Take too many rather than too few. The processing times in Helicon on my MacBook (C2D) are short – four uncompressed 72 mB TIFFs are combined into one new one in the space of thirty seconds. These are full frame TIFFs generated by Lightroom from the RAW originals taken on my Canon 5D.

Even though these images were taken at f/22, the close focus distance and the 100mm focal length of the Canon macro lens make for very shallow depth of field, so I simply set the lens to manual focus, focus on the nearest part of the image and take a picture, repeating with a small adjustment of the focus ring every 8 seconds, the time it takes for my ring flash to recycle to full power. That’s important – you really want your images identically exposed.

And here is the result – taken yesterday after more time spent wading in the tide pools at my top secret Highway One location on the Pacific coast, 22 miles west of home. This chap was hanging out on the underside of a big boulder waiting for high tide. If you do this sort of work, check the tide tables before you go – the best being revealed at low tide. He is maybe 3″ in diameter.
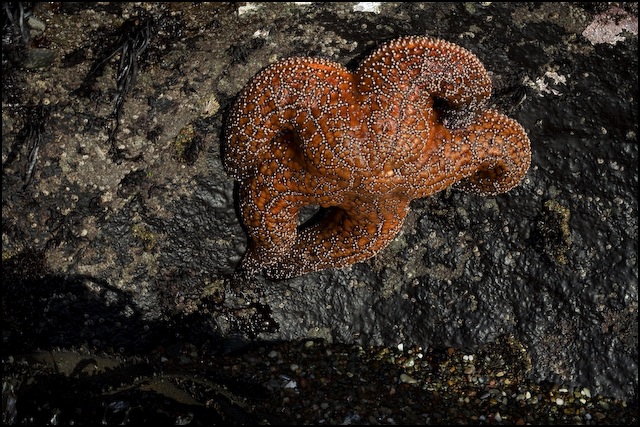

Starfish. 5D, 100mm macro and ring flash, 1/60, f/22, ISO 400, tripod. Four constituent images.

Do this sort of thing at sunset with glancing rays from the sun and add a touch of ring flash to reduce the contrast range and make all tones easily visible (much easier than doing HDR), and you get something like this:
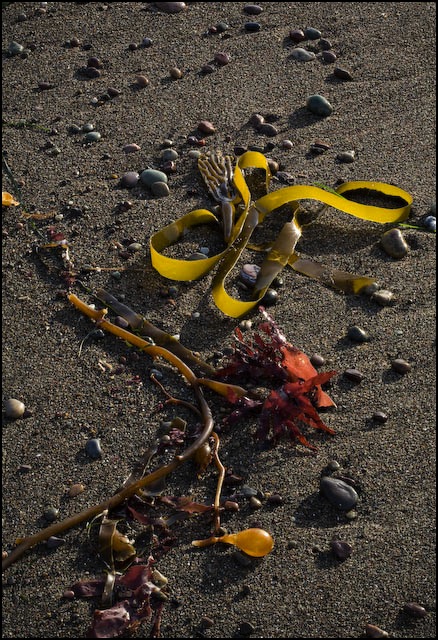

Kelp at sunset. 5D, 100mm macro and ring flash, 1/45, f/22, ISO 400, tripod. Five constituent images.

It’s no surprise if I tell you that the Canon Macro plus Helicon Focus are in the running for my Best Gear of 2008 award.

If you want to see Helicon Focus applied in the more traditional area of photomicrography, take a look at the beautiful images crafted by Charles Krebs.
Lightroom 2 Trial

Trying it out.

I continue to watch the excellent tutorials to be found here and have now downloaded the 30 day free trial of Lightroom 2.1 from the Adobe web site. I delayed doing this as the predicatble raft of bugs in 2.0 has now been largely resolved and discussion boards suggest the application is stable. Never buy Version 1 of anything ….

My first focus is on the graduated density filter and adjustment brush, which are new features of the localized adjustments added in Version 2 of Lightroom.

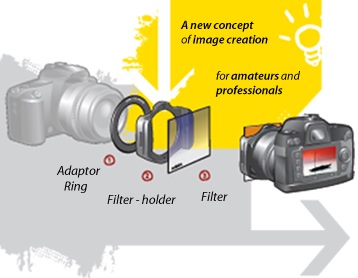
While I have for ever toyed with the idea of using those slip-on graduated density filters for landscape work, the whole thing has always seemed too clunky. Further, interposing yet another easily scratched surface between object and image has never much appealed to me and the thought of carrying dozens of those filters and all the related gadgetry to attach them to my lens has left me cold.

Well, with Lightroom 2 there is no more need for external filters. Not only can you add a graduated density filter of your choice to selected areas of an image, you can also tilt the horizon for these where necessary, elect the level of graduation and change color, brightness, clarity, contrast, saturation and sharpness in your area(s) of choice. Try that with mechanical attachments!

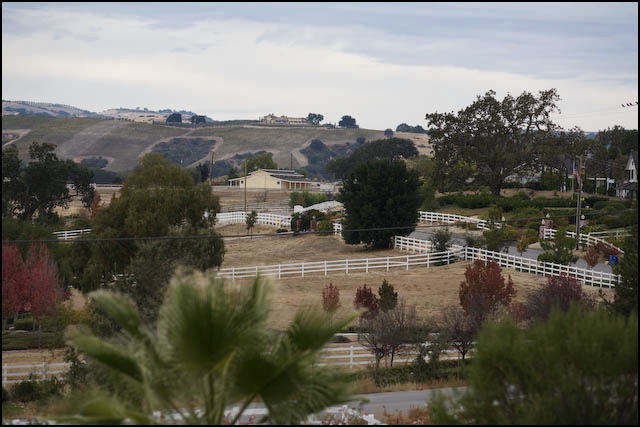
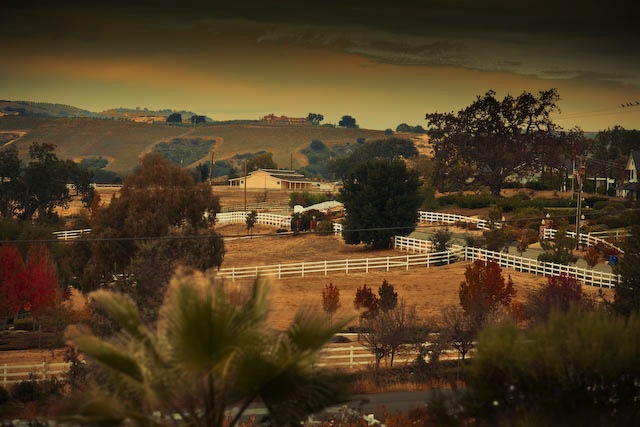
Here’s a case in point of a landscape with a sloping horizon taken from my front door yesterday. As the original discloses, the lighting was flat, the scene less than interesting and the sky horribly bland.

A few moments work, applying graduated sloping colored filtration to the sky area and selectively darkening the foreground using the new adjustment brush feature (look at the road at the bottom), plus an overall tweak for saturation and clarity, and upping the reds and oranges, and you get a nice Old Master look, like this:


From my front door – the beauty of central California. 5D, 200mm ‘L’, 1/1000, f/4, ISO 400

The ability to make localized graduated adjustments is powerful and Adobe’s implementation superb. It bears watching those videos as there are so few adjustment buttons that you have to learn how they work, but the engineering and user interface are remarkably elegant. Indeed, it was Lightroom’s far more intuitive user interface and logical work flow that made me abandon Aperture. Not to mention the general slugishness of the Apple application regardless, it seems, of how current or fast your computer is. Lightroom flies, the slowest step being localized adjustment brush operations which take a second or so to register on my MacBook (4gB RAM, 2.1gHz C2D CPU).

By the way, when you first fire up Lightroom 2 it will convert your Lightroom 1 catalog for use with the new version, but it also leaves the original Version 1 catalog untouched in the event you decide not to upgrade. (The on screen narrative does not make this clear, implying that your original files are lost). Nice – no need for yet another back-up, though I made one just in case. You should too.

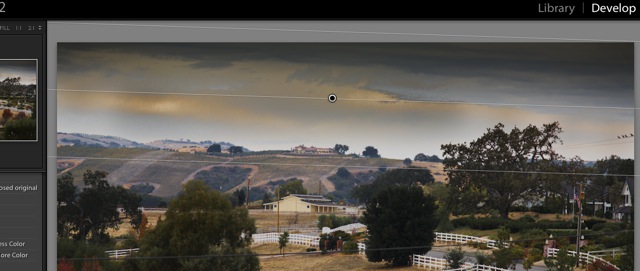
Finally, this screen snap shows the area to which I have applied the graduated effect – the dot is the center point above which things darken. You can also see that I have sloped the graduated density area to replicate the natural slope of the horizon – just drag up or down on one side to slope the area affected.

Lightroom 2 is beginning to look like a keeper.

As for these guys, well, I would be looking for a new day job in their place:


Yesterday’s hardware. Yesterday’s concept.

And if you have a big investment in these, well, sell them in a yard sale and the proceeds may just pay for the upgrade to Lightroom 2!

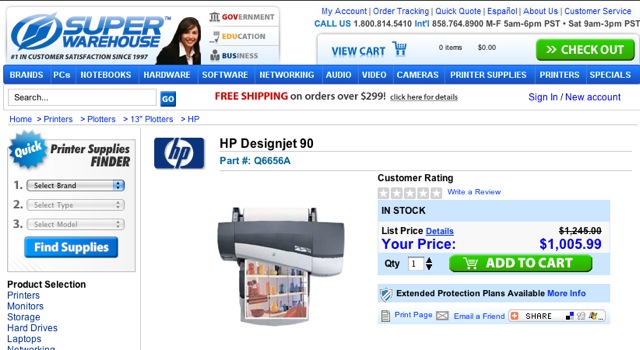
HP Designjet 90 still available!

A great bargain.

Click on ‘Printing’ in the left hand column and you will see that I am a huge fan of HP’s previous generation DesignJet 90 18″ wide printer. A small footprint, fade free inks, great reliability and …. cheap for what you get. HP’s current large format printers start well north of $2,000.

I thought that the HP DJ90 was no longer available, but a quick spot of Googling and it seems they are still available new.

The print quality is beyond reproach, not least owing to the use of dye inks which results in a really deep black. As for the fade free claim, I can attest to one print I have at a friend’s home, under plain glass, which is in bright sun 8 hours a day and has been for two years. It’s as good as new.

So if large prints are your thing, check out the HP DJ90 or 130 (which will print up to 24″ wide).

Update: Check the Comments to this piece for a discussion of paper and supplies availability. I have also added extensive details about HP’s newly released (2008) profiles for many non-HP papers.

Lightroom 2 tutorials

Assessing whether to upgrade.

Now that Lightroom 2.0 has come and gone, with the usual fixes for basic bugs which should never have left Adobe’s labs (Americans always prefer garbage today to quality tomorrow), Lightroom 2.1 is beginning to intrigue me. I’m still using 1.4.1 because it’s stable and does what I need, but one of the appeals of 2.1 is the ability to do localized adjustments without hopping over to Photoshop. That’s something I tend to avoid like the plague.

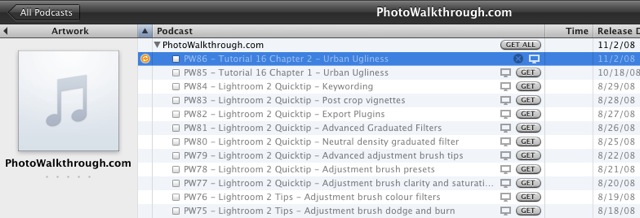
The other evening as I was flipping though photography podcasts on the Apple TV – you can do the same on your computer (Mac or the other kind) using iTunes – I came across a counterintuitively named one going by the title Photowalkthrough.

Here’s the download page in iTunes – just search in iTunes on ‘Photowalkthrough’.

The podcasts of interest are the ones on Lightroom 2. I have watched a couple and there are really nice on screen demos of the use of the local adjustment brush which seems to be the key feature added in LR2. I was especially impressed by the auto masking feature which restricts edits to, say, backgrounds or foregrounds, based on the outline of the object concerned. No need to outline the item in advance, as you might in Photoshop.

I seem to recall reading that the upgrade from LR 1 is some $100 and after watching a few more of these I may well spring for the cost. There’s a 30 day free trial version available, of which more here.

How many pixels?

Most of the time!

It never ceases to amaze me how photographers will splash out on the latest megapixel wonder camera. Point-and-shoots now often boast over 10 megapixels and DSLRs are now up to 22+ mps in full frame sensors. Yet where do all those pictures end up? Why, on a computer screen of course, likely 20″ diagonal in size or less.

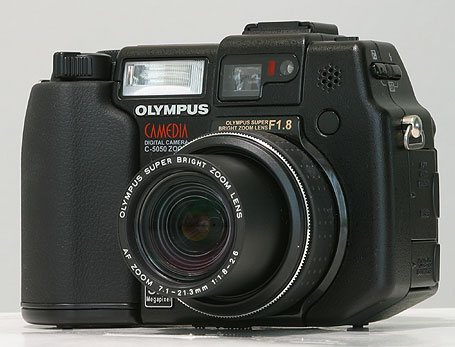
Scroll down a while and take a look at the many articles here where I include snaps to illustrate some hardware issue. Chances are that the picture was made with my ancient (5 years old) Olympus 5050Z – a 5 megapixel camera which I use at its lowest quality setting, generating 640 x 480 pixel images – 0.3 megapixels. That’s nice as I can upload them to this journal without any further compression. It probably sells used for well under $100.

Before they got caught up in the pixel race, Nikon’s professional DSLRs offered a relatively low pixel count, preferring to focus on sturdiness and speed of operation. The 3 or 4 mp originals were more than good enough for newspaper work, most of the time, and even then the quality of the original could not possibly be reflected in newsprint reproduction.

So my take on all of this is that the only photographers needing more than 640 x 480 are those making large prints (like me!) and pros working for large format glossy magazines where the difference matters (half a dozen other guys).

Of course, if you were to show up at a modeling session with Linda Evangelista, say, with my little Oly, I do suspect that you might be unceremoniously shown the door, but that’s not to say your pictures would have been any worse than the pro’s had you actually been allowed to take them