A fine, unobtrusive street snapper.
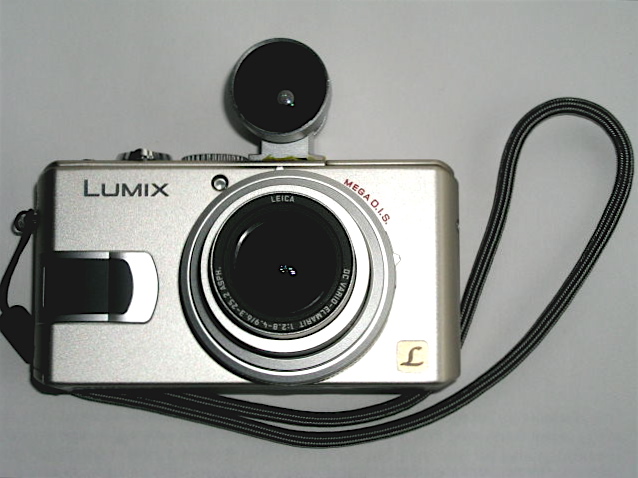
I bought the Panasonic LX-1 a couple of years ago with but one purpose in mind. It was to be an unobtrusive street snapper, both smaller and more capable than the Leica M2 it replaced.
You can see my various ramblings on the subject by clicking here.
Since then Panasonic has ‘upgraded’ the camera to the LX-2 adding a bigger LCD screen. Neat idea. The one on my LX-1 is miles ahead when it comes to use in bright sun over the horror in the Canon 5D. They also squeezed in more pixels on that miniscule sensor. Not so neat an idea, as the original is noisy enough and more pixels will not help in that department.
Most importantly, I glued a 28mm Voigtlander optical viewfinder on the top plate, and its field of view matches the widest (default) setting of the zoom lens in the LX-1 nicely. Because depth of field is huge (the lens is but 6.3mm in focal length at its widest) I switch off the auto-focus with the handy slider on the lens barrel and bang away merrily on the street. Response time? Almost as fast as that old M2 with its antiquated film and processing needs. Optical quality? Add a bit of sharpening and chromatic aberration correction and 13″ x 19″ prints are fine. At that size sensor noise starts to intrude, much as film grain did with the M2. You might think that the LX-1 lacks the M2’s low light capability as the lens is not fast but the built in IS is good for two shutter speeds, so the lens’s f/2.8 becomes an effective f/1.4. The whole experiment has been a resounding success. The auto-exposure adds immensely to speed of use. And I console myself that I’m still using a Leica lens when I suspend disbelief and buy in to the engraving on the lens rim.
I’m hoping that the Sigma DP1, with its large sensor and fixed focus lens, will further improve matters, but one thing it will not beat is the tiny size of the LX-1. I was reminded of this when wandering about San Francisco the other day. As usual, I was cradling the LX-1 in the palm of my hand, ready for instant action. Handled thus the camera is invisible until raised to the eye. It was amusing to see a few other snappers either using point-and-shoot digitals and squinting at the ridiculous LCD screens at arm’s length (hard to be more visible, really) or using giant DSLRs and big zoom lenses which simply scream for the subject to disappear.
Me? Happily unobtrusive, courtesy of the fine engineers at Panasonic, greatly enjoying the native widescreen format of the sensor.
The snaps from one day’s fun follow.
* * * * *
Quite what this lady was thinking of with a WASP mannequin selling Chinese clothing I don’t know, but it works for me.
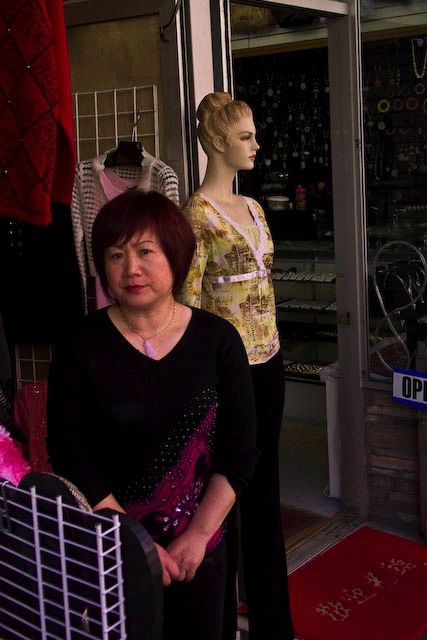
Chinatown vendor. Panasonic LX-1, 28mm, 1/200, f/3.6, ISO 100
This pipe bender was far too busy to worry about photographers:

Pipe bender. Panasonic LX-1, 105mm (LCD finder used), 1/800, f/4.5, ISO 100
The little pop-up flash unit in the LX-1 is not to be sneezed at – it adds that bit of contrast in a shady location, such as that where this beautiful gate was placed:
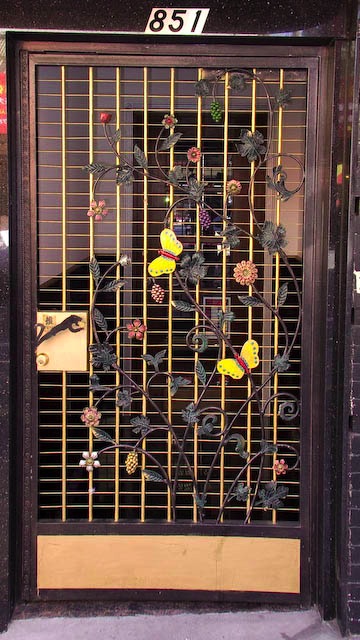
Beautiful gate. Panasonic LX-1, 28mm, 1/30, f/3.6, built-in flash, ISO 100, ImageAlign used to remove barrel distrotion
These workers were doing what white American labor specializes at, in the shade of the Transamerica pyramid:
American labor. Panasonic LX-1, 28mm, 1/200, f/3.6, ISO 100
There’s nothing wrong with the color rendition of this little gem.
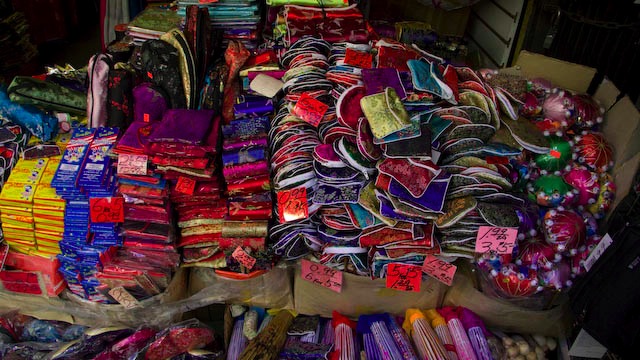
Chinatown silks. Panasonic LX-1, 28mm, 1/100, f/3.6, ISO 100
Throw a great Renaissance name at me and you have my interest. Suspend a pizza pie over a passer-by’s head and you have a picture. By the way, the menu at lower left is perfectly distinguishable in the original, so no excuses need be made for the lens once color fringing is removed in Lightroom.

Flying Pizza. Panasonic LX-1, 28mm, 1/125, f/3.6, ISO 100

Detail of the picture above.
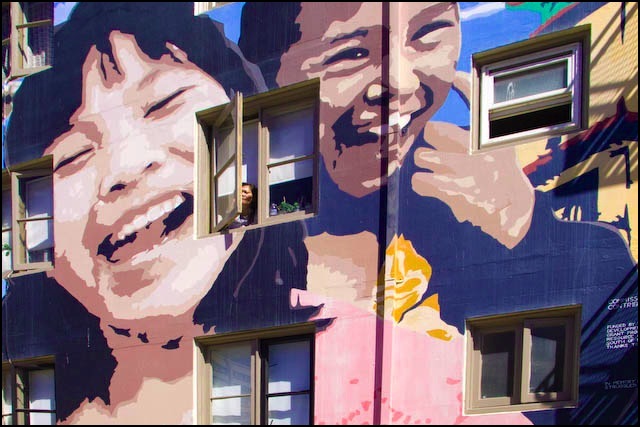
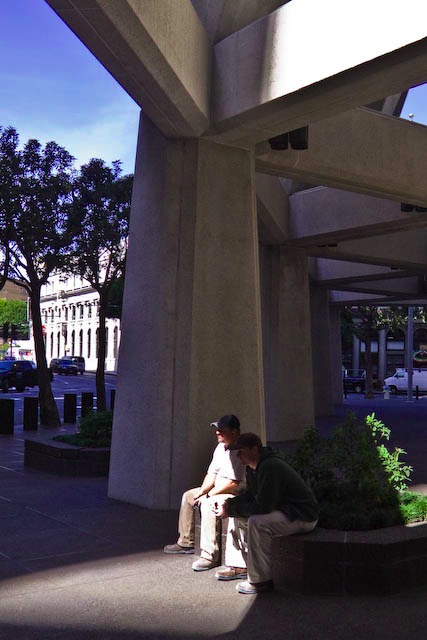
Finally, add one of life’s little incongruities and you have a perfect end to a perfect picture taking day in the gorgeous city of San Francisco.
Precarious perch. Panasonic LX-1, 28mm, 1/30, f/3.6, built-in flash, ISO 100
Because the shutter in the LX-1 is almost dead silent, I have the ‘clack’ sound switched on otherwise it’s hard to know when you have taken the picture on a noisy street. As is typical with modern cameras, there is no progressive resistance in the shutter release button to clue you in. No matter – you get used to what it takes after a few exposures. The wonderful shutter release ‘feel’ of the old rangefinder film Leica is just one more over-hyped piece of nonsense.
Needless to add, the built-in IS adds immeasurably to good definition in the original snaps and 54 RAW snaps on a 1gB SD card is just right for a day’s fun. Sure, you have to adjust for red color fringing and sharpening when processing, but as I can do that with a preset for automatic import into Lightroom, I have no problem with what I call the modern idiom of lens design – meaning poor lenses and great software.
Chinatown medley. Panasonic LX-1, RAW, ISO 100
All pictures taken on March 23, 2008, RAW, processed in Lightroom.