Finally, a QTVR HDR real life panorama

The whole megillah.

There are times of the year you really do not want to be driving on Highway One in central California. This is one of them. Make it a weekend and you would probably have more fun doing your taxes. You see, for reasons known only to the drafters of the Constitution, RVs and SUVs are allowed on this narrow winding road. As the selfish idiots who drive these vehicles (imagine doing 2 mpg in an RV and having to carry your waste with you) are also incapable of reading, ‘Turnout’ means nothing to them, leaving but three or four legal (and semi-suicidal) passing areas in the 40 miles between Hearst Castle and Limekiln State Park, a trip I took yesterday. This was not helped by the fact that the road was well and truly socked in, fog being par for the course at this time of the year. The only person having fun on this road was the guy who passed me on the double yellow on his Ducati. More power to him.

So my first words to the Forest Ranger on arriving at Limekiln and handing over my $6 were “Boy, there are some bad drivers out there”. “No kidding”, he replied, “two went off the road at night just north of here last night and fell 700 feet to the ocean floor. Both died.” Let’s hope they were driving an RV – nature’s little fix for the gene pool.

Having been to Limekiln many times, the fog left me untroubled, for I knew that some 500 yards from the Pacific all would be sweetness and light. A few seconds in the warming sun and a whiff or two of scented air, and the frustrations of the trip were forgotten.

The goal was simple. I have always been mightily frustrated with my pictures here, for two reasons. First, the insane dynamic range makes preserving of detail in both highlights and shadows very difficult. Second, there is simply no way a static picture can convey the sheer magnificence of a giant redwood forest.

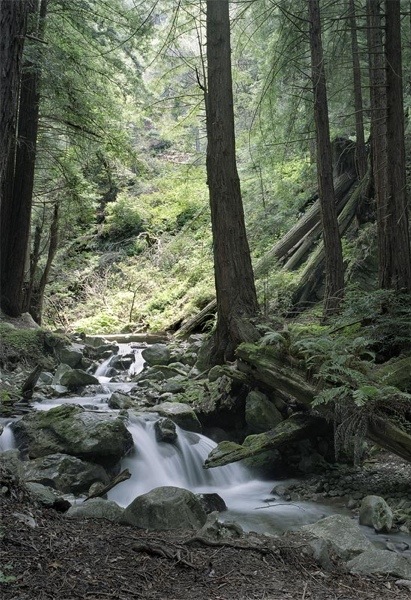
Here’s the sort of thing you get on 4″ x 5″ – at least the dynamic range is OK:

Limekiln. Crown Graphic 4×5, 210mm Sironar, Kodak Portra VC160

But, let’s face it, you are not there.

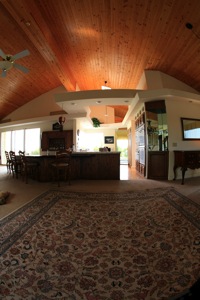
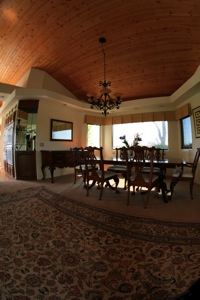
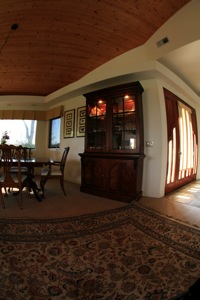
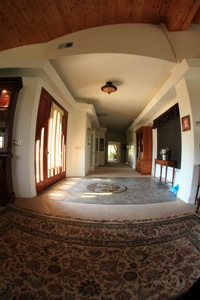
So after all that work to learn QTVR photography, and tons more to learn HDR, I put the whole thing together after all those tedious tests in the home I have documented here over the past few days.

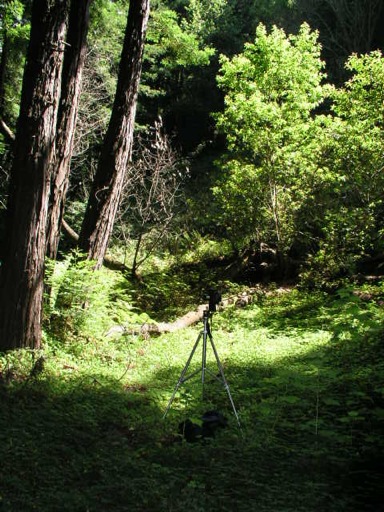
Canon EOS 5D and KingPano at Limekiln State Park, CA, July 17, 2006

I took no fewer than 24 pictures per image. 6 ‘circle’ views with the vertically mounted 5D + Canon fisheye rotated about a vertical axis on the KingPano head, each ‘view’ comprised of three pictures, properly exposed, + 2 stops (actually shutter speeds) and -2 stops. Two more views, each of three images, added the zenith and nadir images.

Back home (I had much fun on the drive back trying to run a pig on a Harley with open pipes – blasting his foul noise into unspoiled nature – off the road) each set of three images was merged in Photomatix into one HDR image which was then tone mapped in the same application. All eight resulting images were then dropped into PTMac, the previously determined lens parameters applied and auto control point generation was commenced. I didn’t even bother to delete the ‘bad’ (meaning big) control points. Saved the TIFF file, into Photoshop for final Levels and Curves fine tuning, a quick check of stitching using the Panagea plug-in, and then on to CubicConverter to save the panorama with the right starting point and zoom settings. This time I used the ‘M (high)’ JPG quality setting on the 5D, meaning each source image was between 3.4 mB and 5.1 mB. For some reason the underexposed ones are larger. Whatever. No need to use RAW – the files are too large for my purposes and I get better tone mapping through HDR than RAW can provide.

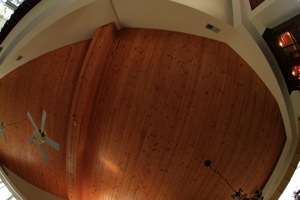
You can judge how much HDR adds to dynamic range from this non-HDR extract:

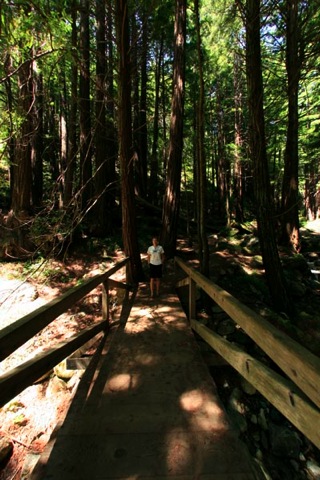
And here is the QTVR HDR result of the 24 constituent images:

Click Here

The young girl actually arrived on the scene when I had just finished the ‘circle’ images, so I asked her to stand as still as she could while I took three more to replace the original. As you can see, she moved slightly, but the effect is there. Photographer’s luck. You can’t have it if you don’t take pictures.

The file is some 2.5 mB in size, owing to the high quality of the JPGs used, and I have constrained the zoom range to the point where quality is not compromised on zooming in.

While taking 24 pictures to make one result sounds daunting, once you get the hang of it, assisted by auto over/under exposures and motor drive, and the click stops on the King Pano, things move along very fast. I didn’t even bother re-levelling the rig between shots, the subject being far less demanding for stitching purposes than the indoor scenes used to calibrate the equipment. A check of the time stamps on the files shows that the whole thing was done in two minutes. And do get QR heads for camera->King Pano and KingPano->tripod – the thought of all that screwing (I get enough from the IRS, thank you) in their absence is …. not good.

I hope you have enjoyed this learning exercise in QTVR HDR photography as much as I have.

QuickTime + High Dynamic Range photography

Some serious heaviosity, as Woody Allen once remarked.

Putting it all together calls for one more test; namely, combining High Dynamic Range photography (HDR) with QuickTime panoramic images. Not just a dry academic exercise as I propose to put this to work on my first field trip to the redwood forests where the dynamic range can be simply astonishing. From shadows to highlights can be as much as ten stops. It gets very dark on the forest floor.

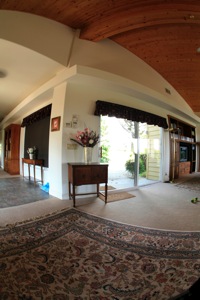
What better environment than the home theater with the drapes open to disclose a 100F day and brilliant sunshine outside? Thank God for the sunspot cycle.

I reprogrammed the Custom setting on the 5D’s mode dial to include three exposure bracketing for each picture, meaning normal, +2 stops and -2 stops and set the drive mode on Continuous. That way one press on the shutter fires of three shots in one second.

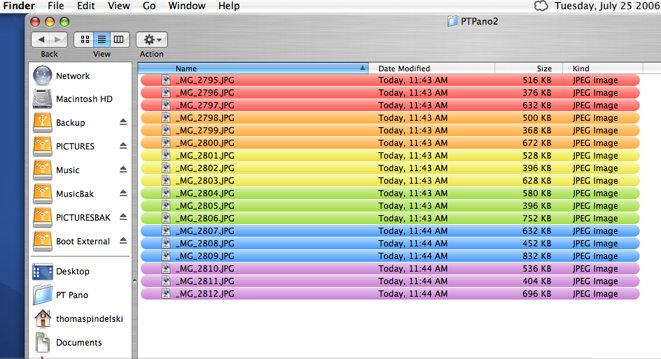
The eighteen constituent pictures (6 x 3 – I did not take zenith or nadir shots in this test) were then placed in their own folder in the Mac’s Finder and color coded to avoid mistakes (File->Color Label:>).

These are all at the lowest JPG quality setting on the 5D.

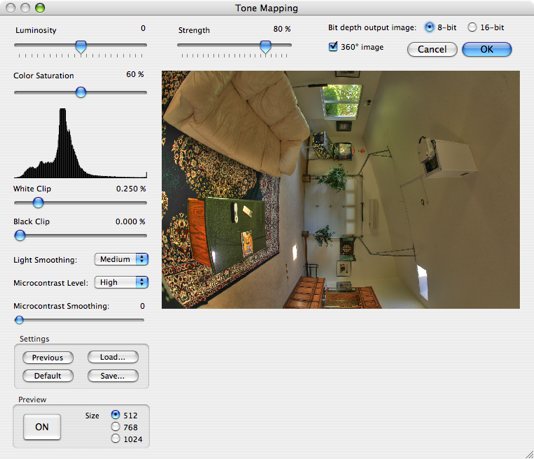
Here’s how the result of the HDR + tone mapping step in Photomatix looks:

I increased the default tone mapping saturation from 50% to 60% and checked the ‘360 degree image’ box – no idea what that does, but it seemed like a good idea. Photomatix lets you save settings to ensure repeatability between picture groups.

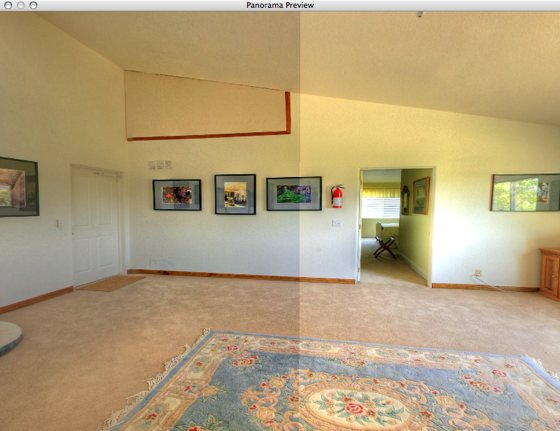
I ran the six HDR pictures through PTMac using the techniques set forth in my previous articles and, sure enough, the first pass was perfect as regards stitching. Except for one thing:

A thumping great big tone discontinuity as clearly visible above. Poking around it was obvious that this was at the junction of the first and last images.

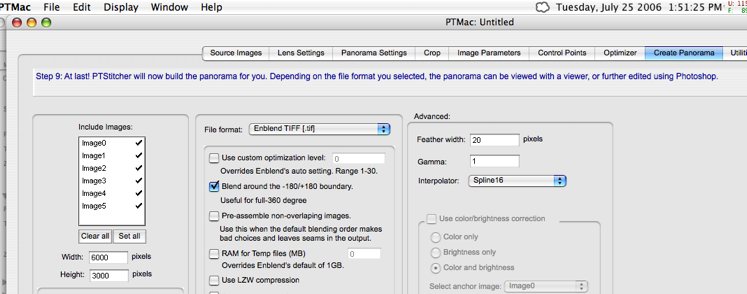
Back in PTMac, I checked the box marked ‘Blend around the -180/+180 boundary’. No stopping me now!

This process generates a lot of files, so orderly housekeeping is in….order. Here’s the result:

The first 18 JPGs are the source images, followed by 6 tone mapped HDRs.The ‘.xmp’ file records the settings made in Photomatix for processing each. The ‘.mov’ file is the QuickTime video, the ‘.ptm’ file is the result of saving all data in PTMac, the ‘.tif’ file is the Enblend TIFF file from PTMac and, finally, the ‘.txt’ file is something PTMac generates and I have no idea what it does!

If you check the times, it’s 108 minutes from taking the first snap to having the movie file completed. (I saved the ‘.ptm’ file later – must be better about that in future).

Before putting the TIFF file through CubicConverter, I adjusted tones a tad in Photoshop then let her rip.

And you can click here for the result. Does Enblend rock or what? Don’t waste your time on non-Enblend stitching.

The home theater doubles as Le Gallerie Pindelski (French gives it that touch of class, don’t you think?). The pictures on the wall are by yours truly, all taken over the past twelve months, and in case you are wondering where my assistant, Bert the Border Terrier is, would you be walking between buildings with a fur coat on when it’s 100F outside? We are talking one pretty smart animal here.

Do I think I am God or what? Or, to once more quote Mr. Allen, “Look, I have to model myself on someone”.

Enough of this testing. It’s time to put all of this into practice. A real live, in the field, photography trip follows. That will involve 360 x 180 HDR pictures in the local redwood forest.

Free Ruler

A great utility program to gauge your picture size.

Free Ruler is just that. A small OS X application that shows a ruler on your screen which can display inches, centimetres, pixels or picas.

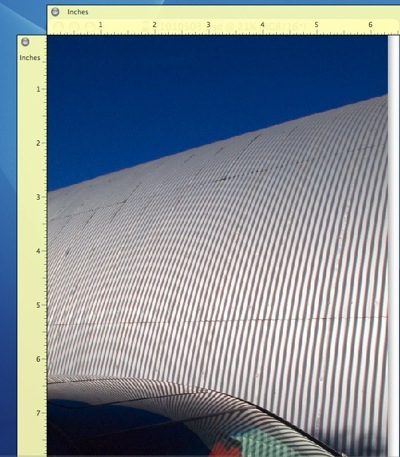
Here’s a screen shot in Photoshop S2 with FreeRuler set to show inches:

The ruler can be dragged around with the mouse and either vertical or horizontal rules can be stretched as required or hidden if you prefer.

A quick calculation, for example, in regard to this picture, which Photoshop reports at 21.02% of actual pxel size discloses that an actual pixel print would be 29.7″ x 58.8″ – the 9:16 format of the Panasonic LX1 used to make it.

King Pano head and PTMac – Part III

The acid test – a 360 x 180 QuickTime panorama.

In Part II I explained how to calibrate your lens/camera combination for use with PTMac, using just three heavily overlapped images.

While that article addressed use of the Canon EOS 5D and 15mm Fisheye, the approach is similar for any camera/lens combination. One caveat. If you are using a less wide lens, be sure to take the pictures so that you have sufficient overlap that a detail in the middle of the center picture appears in the left and right hand snaps also, and not too close to the edges of the outlying two images. This will make it possible to establish control points not just between adjacent images but between non-adjacent ones as well, heightening the accuracy of the calibration. Once calibrated this ‘large overlap’ approach is not needed with real life panoramas.

1 – Taking the pictures:

The deliverable is a 360 x 180 panorama, meaning a complete circle around the scene, with no breaks, and the ability to pan up to the sky and down to the ground with no ‘holes’ in the image.

For the 5D + Canon Fisheye, which has a horizontal angle of view of 91.7 degrees when mounted vertically, this dictates that six horizontal pictures be taken – theoretically you could get away with just four (4 x 91.7 > 360, if you get my drift) but that would result in such small overlap between images that the chances of a properly stitched panorama are zero. Likewise, five images might do, but control points would be too close to the edges of adjacent images, which PTMac does not like, so we go with six images. That gives a 53% overlap, if you must know, which falls under the description of ‘generous but not wasteful’ – everything your Government is not.

That means 8 clicks on the KingPano head between pictures, each click being 7.5 degrees. As the clicks are not very firm I double check my work by looking at the degree scale – starting at 0, the next five pictures are at 60, 120, 180, 240 and 300 degrees. All of this, of course, after very carefully aligning the first (or ‘anchor’) image with the accessory shoe mounted double bubble level. Now the bubbles do not stay perfectly centered as you rotate, as King Pano recognizes in its instruction sheet, but you can easily readjust the camera to dead level in each shot with the three thumb wheel adjusters in the KingPano’s base. It takes seconds to do.

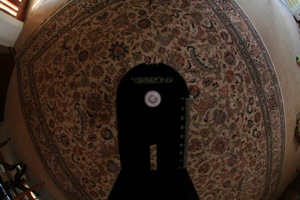
Those will complete the circle but will leave holes at the top and bottom. So after returning the KingPano head to its original position, the 0 setting, loosen the big knob on top of the vertical plate and rotate the camera 90 degrees so that the lens points up to the sky. Take a picture. Loosen the knob again and point the camera down to the ground – take another picture. This one will, of course, include the tripod and KingPano in the field of view. These are known as the ‘zenith’ and ‘nadir’ images and require special processing.

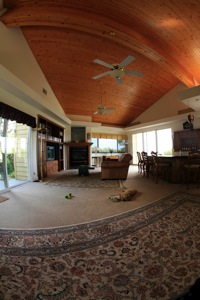
Here are the six ‘circle’ images:
And here are the nadir and zenith images:
2 – Process the images:

First load the images into PTMac – load only the six images constituting the horizontal circle. We will not be using PTMac for stitching of the zenith and nadir images as the program is simply too clunky to allow that to be easily done. We will plug them in later using Photoshop, ImageAlign and CubicConverter.

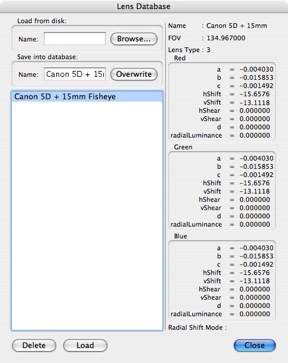
Then on the Lens Settings tab, load the file you created in the calibration process:
Go to the Image Parameters tab and click on Arrange, select (Shift-Click in the left hand column) Images 0-5 and make the entries shown below:
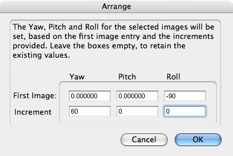
This table reflect the fact that the horizontal images have to be turned 90 degrees CCW and the angle between each is 60 degrees.

Unlike during the calibration process where Control Points were manually entered, we will tell PTMac to automate the process. Go to the Preferences->SIFT (what the hell does that mean?) ans set ‘Number of Control Points: to 5, as here:

Go to the Control Points tab and click on ‘Auto match’ at the bottom:
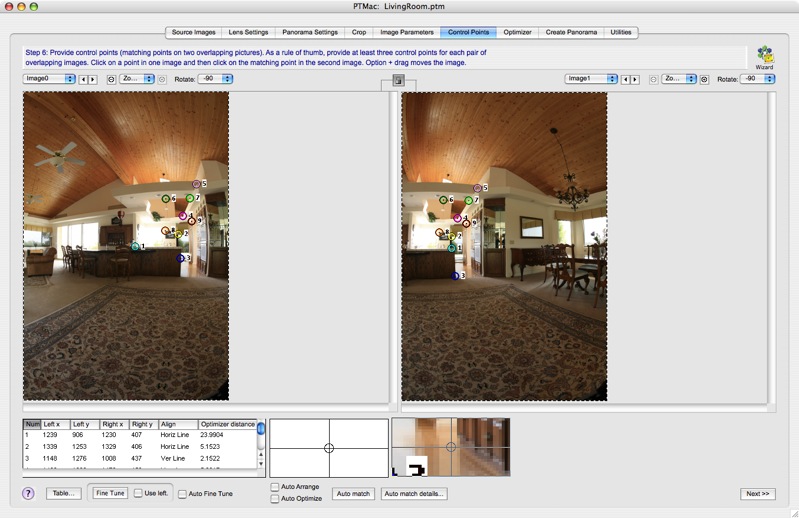
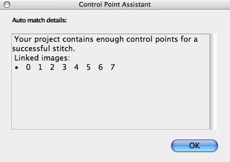
PTMac will generate 5 control points for each image pair and will report back with a message something like this when it’s done (the count will be zero through 5 in this case):
Go to the Optimizer tab and select images as shown:
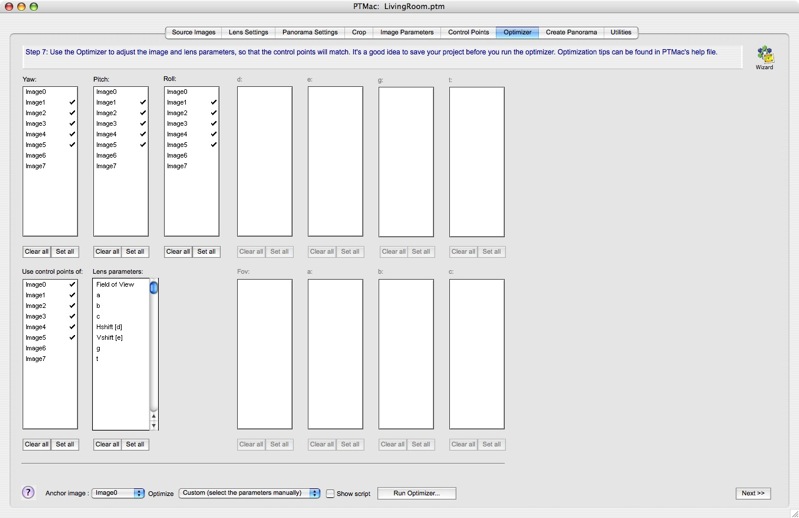
We are leaving the Yaw, Pitch and Roll of Image 0 unchanged – the camera was carefully levelled – allowing the keying of Images 1-5 off this anchor image.

Go back to the Control Points tab and click on Table at the lower left. You will see a table of all Control Points which you can sort in descending distance order by clicking on the ‘Distance’ column heading.
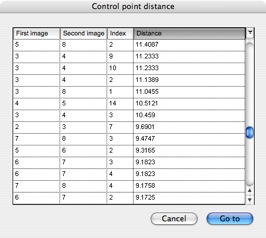
Delete the worst (biggest number) from each image pair, leaving four control points per image pair. Re run the Optimizer.

Now we need to confer the calibrated field of view and ‘b’ parameter on the optimization process. Click on FOV and run the optimization. Then click on ‘b’ and run the optimization again.

Go to the Create Panorama tab, select Enblend TIFF [.tif] for File format and click on ‘Create Panorama:’

3 – Photoshop check-up:

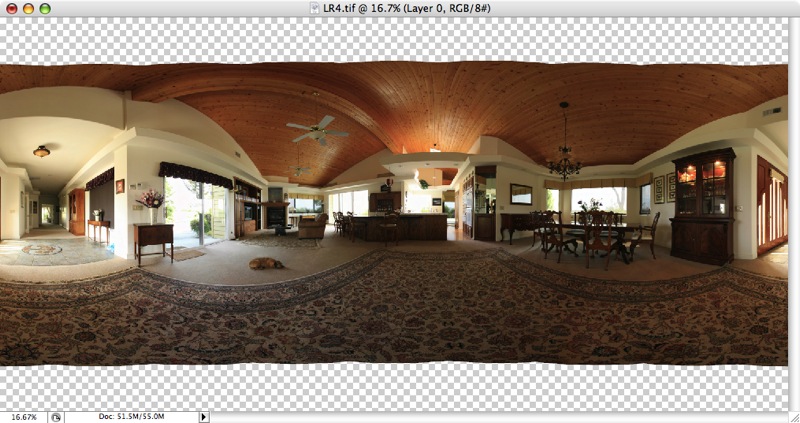
Load the image into Photoshop and it looks like this:
Now from the Filter menu load the Panagea plug-in and you can do a proper QuickTime preview of the image, like this:
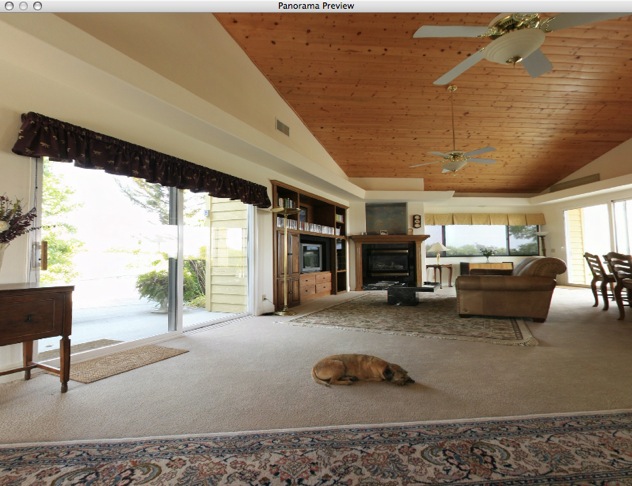
As you can see, I have once more involved Bertie the Border Terrier in the action, but I’m afraid you cannot buy him anywhere, even at B&H, and he’s not for sale.

This preview shows the image is almost perfect, but any troublesome areas can be fixed by alternating between the preview and PTMac (Command-Tab) and adding or fixing control points in troublesome areas. The panorama previewer in PTMac (Command-E) is simply not up to the task, I’m afraid, showing overlap errors where there are none.

4 – Adding the nadir and zenith images:

While PTMac can add zenith and nadir images, once you add them and regenerate control points your nice low control point distances for the circle images get shot, and there’s no way to just generate control points for the zenith and nadir images alone – PTMac insists on redoing all Control Points. I constantly got messed up circle image stitches using this approach. As the holes left at top and bottom with the fisheye lens are very small, it’s far easier to simply defish the zenith and nadir images using the ImageAlign plug-in (see my earlier pieces on this) and insert them via Cubic Converter and Photoshop. More about how to do this appears here.

6 – Adjusting the tonal range:

Reload the final panorama into Photoshop, check for alignment and, if all is well make adjustments to Levels, Curves, tonal range as you like. If stitching is still suspect, repeat the fine tuning process above. Save the TIFF file. Then save your work file in PTMac (File->Save As) – this creates a file with the .ptm extensionj which saves all references to your images and the optimization settings. Useful if you ever want to go back and fine tune things.

7 – The QuickTime conversion:

It now remains to convert the TIFF file into a QuickTime movie. I use Cubic Converter to do this – it’s far more flexible than the straightforward function in PTMac, allowing you to dictate the starting point of the panorama when it is first loaded (mine, of course, starts with Bertie in the middle of the picture) as well as permitting constraints to be placed on the (default) huge zoom range which otherwise allows zooming in well past the resolution limits of the original.

Here is the file loaded into Cubic Converter:
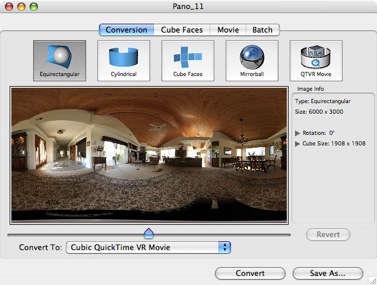
Before saving it in the default Cubic QuickTime VR Movie format, I adjusted the starting point to center on Bert by moving the slider below the image. Click on Convert and Cubic Converter commences asembling the six cube faces, graphically displaying each as it does so on the cube shown.
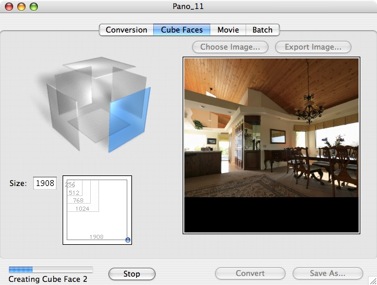
When it’s done the display gives you Save options as so:
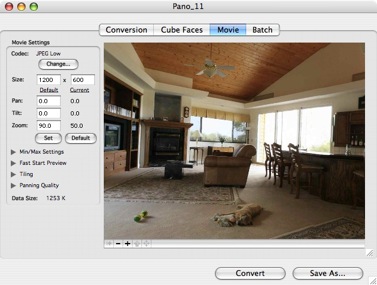
I elected Min/Max zoom settings of 35/70, Fast Start Grey preview (this displays grey in unloaded sections as the image loads) and the default size of 1200 x 600 pixels which is a nice fit for most screens.

If there are no zenith or naditr images present, I restrict the ‘Tilt’ setting to -65 to +65 degrees. that way the viewer will not be allowed to tilt so much that the ‘holes’ become visible.

The TIFF file is 46 mB in size, whereas the QuickTime movie is just 1.3 mB, and you can view it by clicking here. The aggregate size of the eight constituent images, each shot at the 5D’s lowest JPG setting to yield individual images sized 2496 x 1664 pixels, was some ten megabytes. Thus you can see that the QuickTime format is exceptionally economical, and the definition of the movie lacks nothing if you don’t go berserk zooming in – and I have prevented you from doing that with the Cubic Converter settings I chose.

And yes, feel free to zoom in on that all round dynamo and breed standard, Bertram the Border Terrier. He kept my morale high during the black dog days working my way through the labyrinthine software that is PTMac. As for the KingPano head, I have nothing but praise. It’s a third of the cost of the Manfrotto and it does the job, even with the heavy Canon 5D on board, thanks to the built in levellers. Well done Mr. King.

A note on processing time:

Now that everything is in order, I did a dry run to determine the processing time for a newly taken six picture 360 degree circular panorama, without zenith and nadir images. After taking the pictures, here’s how it went:

Load images into PTMac, auto-generate control points, run optimizer and generate panorama – first pass: 8 minutes.
Examine result in Photoshop using the Panagea plug-in and add control points as needed (6 added): 5 minutes
Regenrate control points and new panorama – second pass: 6 minutes.

The result is perfect.

Total processing time for six 1 mB files on a PPC 2 gHz, 2gB iMac: 19 minutes.

Now that’s what I call a good return on investment of time!

You think that’s long? Well, consider this. In 19 minutes Ansel Adams was still trying to remember where he left that bottle of pyro developer which he mistook for wine the other evening and when he did find it, what has he got three hours of dodging and burning later? Lung cancer and a lousy black and white print of some damned old rock in Yosemite. Gimme a break.
I like Leicas as much as the next man….

…but I know disinformation when I see it.

Can you believe this guy?

How many more people are going to buy into this ‘Freedom Train’ disinformation? This appalling apologia has now been around for some fifty years.

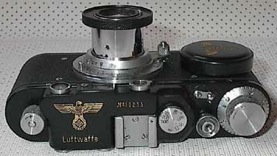
This is the same Leica company that gave us the Luftwaffe Leica, provided optics for Panzer tanks and most certainly did not depart Wetzlar for moral shores in 1939. Nor did it look to leave during the largest military build up the world has seen in the period 1933-39, being a major supplier of optics to their government. It’s not like they had no warning….

“Boy, oh boy, Ernst. Did you see the P&L this quarter? Are those Wehrmacht orders something, or what?”

I would have posted this comment in this writer’s web site but, predictably, comments are not possible. Why would they be when you write naïve nonsense like this?

Mr. ‘Conscientious’ should find his conscience and question what he reads before repeating it as fact. That’s the sort of ‘reporting’ you find in most of today’s newspapers. Until you learn to question what you read, Mr. C, please stick to photography.

But of course we know that the Leitz company did not collaborate with the Nazis, they were only following orders and they really love their country, etc., etc. As this advertisement from the November 1942 edition of Foto Beobachter confirms – a perfect match for that Luftwaffe Leica:

Look, Leicas are nice, but let’s not deny history.