King Pano head – Part I

Calibration for Quicktime 180×360 panoramas.

Having got the panorama bug a while back, I finally took delivery of the King Pano head yesterday. Orders are currently backlogged three weeks, testifying to the popularity of the product.

The King Pano camera base is screwed to the camera with the provided 1/4″ slotted screw and a screwdriver. Not good, as I want to keep the Manfrotto QR plate on the camera at all times, and the thought of messing about with a screwdriver in the woods is not something I wish to contemplate. So I left the QR plate on the Canon 5D and fitted a QR tripod base to the King Pano camera baseplate, which now looks like this:
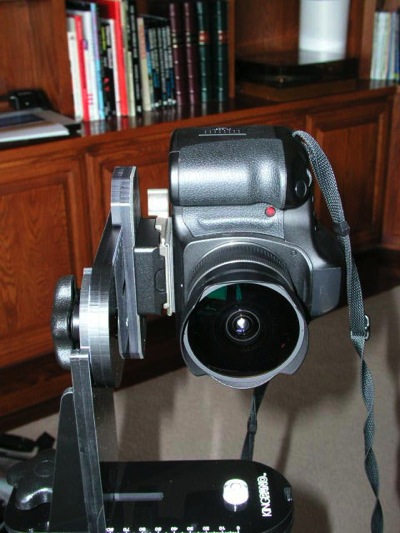
The Manfrotto QR tripod base fitted to the King Pano camera baseplate

A camera QR plate is then fitted to the base of the King Pano. This combination allows the camera to be fitted and removed to the King Pano in a second or two and the King Pano to likewise be attached or detached speedily to or from the tripod. In this way the King Pano can remain undisturbed between panorama projects.

When it came to centering the camera vertically over the bubble level, I had to rack the vertical plate all the way to the back to properly center the camera over the built-in bubble level; had I not used the QR plate the setting would have fallen nearer the center of the range of movement. As it is I just squeaked in!
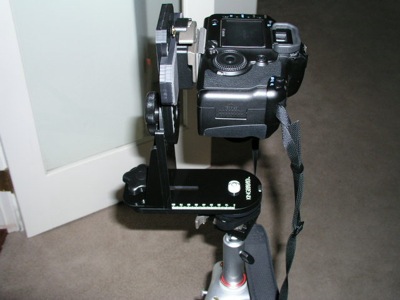

The plate is racked as far to the left as it will go

The next step is to set the nodal point – I only need to do this once and as my camera/lens combination will be the 5D/Canon 15mm fisheye. Different lenses have different nodal points. The idea is that, as the camera is rotated, the relative spacing of near and distant objects remains constant. This means the camera/lens combination is now rotating about the nodal point of the lens (the point where light rays invert en route to the film/sensor), thus eliminating parallax which plays havoc with subsequent image stitching attempts.

Here’s the correct setting for the 5D/15mm Fisheye:
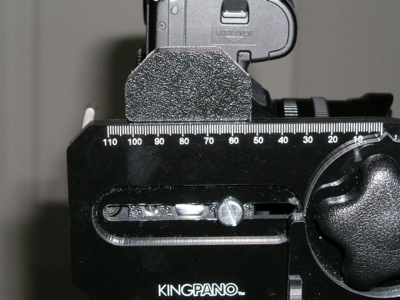
The left scale shows 102mm at the upright, the right 52 with the King Pano attached through the right hand threaded hole.

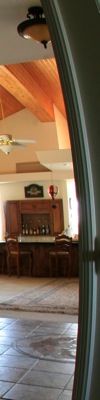
I set the camera on a tripod with the edge of the office door some three feet away. The ceiling lamp is 12 feet distant with the window some 75 feet away. Here are the results with the camera rotated to place the window edge to edge:
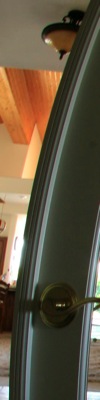
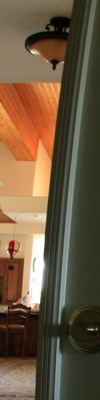
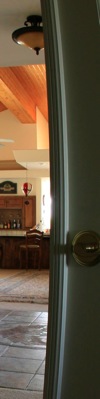
        

Four sections of pictures with the lamp at right and moving progressively left across the frame

Note the constant spacing between lamp and door edge and between the window and door edge. The nodal point is correctly set.

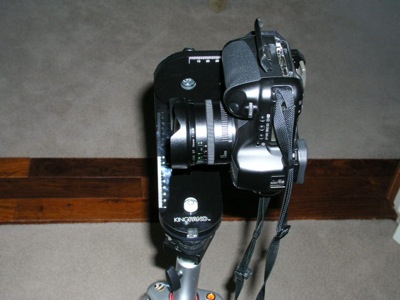
Here’s how it looks on the tripod – the nodal point with the fisheye is very close to the front of the lens; for more normal lenses you would expect the nodal point to be well within the body of the lens dictating that the lens be further forward.
Finally, when it comes to levelling I consider the built in bubble level to be the wrong way to go. You want the camera aligned to the ground, not the King Pano. The relatively heavy (compared with cropped sensor cameras) 5d causes the King Pano to flex a tad, meaning that the bubble level no longer reflects the alignment of the camera, and as I tend to believe that Canon’s hot shoe is exacty parallel to the base of the camera body, I bought a neat little double bubble level which can be shoe mounted. It comes from B&H for a few dollars:
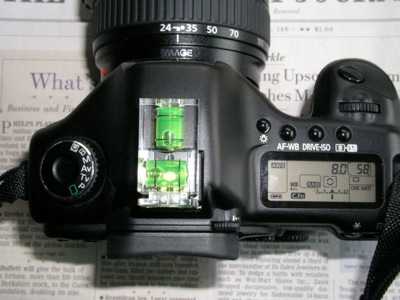
Bubble level ensures the camera is dead level. That’s what you want.

Here’s the part number:
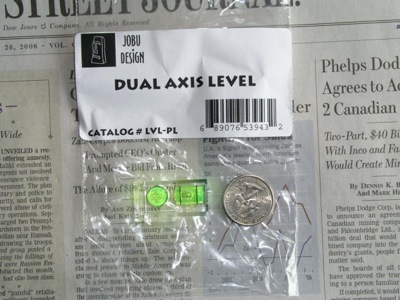
Lighter cameras probably do not need this as they will distort the King Pano far less than the heavy 5D.

By the way, the King Pano will not work with the big Canon DSLRs with the battery grip – the body is simply too tall to permit centering of the lens over the bubble level. To accomplish that the vertical plate would have to be quite a bit taller which would probably compromise stability too much in any case.

So now that things are set just so, Part II will address lens calibration for use with the PTMac software used to create QuickTime panoramas.

Some more thoughts on ImageAlign

You can have regular or widescreen flavors.

It’s no great secret that I am very excited after my early experiences with the Canon full frame fisheye lens and ImageAlign software. I discipline myself to think ‘hyper wide’ by venturing out with just the 5D and the fisheye. It’s not a rational step from 24mm to 12mm but rather a completely different way of thinking.

As I have been experimenting with that wonderfully sharp and flare free Canon lens, I have been learning how best to place the subject in the frame so as not to lose things once ImageAlign ‘de-fishing’ is applied. I rarely leave the image with its original fisheye look as it’s a gimmick which gets tiresome quickly. The fisheye + ImageAlign results in a lens with an effective focal length of some 12mm on the full frame 5D.

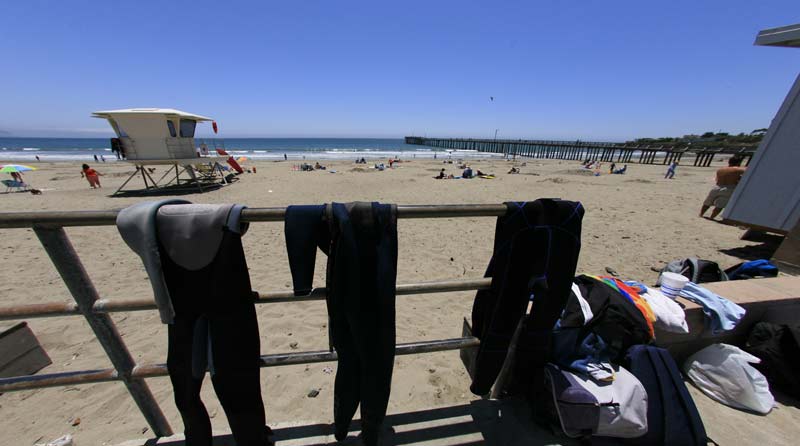
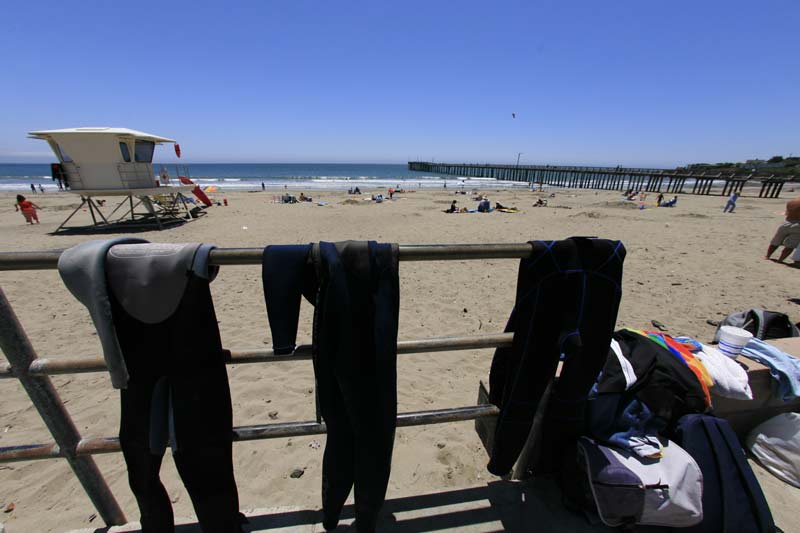
On a few occasions I have been frustrated with losing corner details using ImageAlign’s adjuster which retains the original aspect ratio of the image when removing the lozenges disclosed at the top and bottom of the frame once ImageAlign is used. Phew! That’s a mouthful. To make things clear, here’s an original fisheye image from my beach series:

Wet suits, Cayucos Beach. Canon EOS 5D, 15mm fisheye, ‘de-fished’ with ImageAlign.

I was just inches from the wet suits when taking this! Someone saw me taking the picture and, judging from their reaction, must have concluded that I was some sort of rubber fetishist, as a regular camera would have captured just part of one of the suits. What we do in the cause of photographs….

Now apply the ImageAlign slider to remove the white spaces (in this example I also had to apply 3.5 degrees of rotation to get the sea level, hence the strange shape of the white sections) and this is what you get:

Wet suits, Cayucos Beach. Canon EOS 5D, 15mm fisheye, white spaces removed.

The image remains in 3:2 format, like that of the 5D’s sensor. But lots of edge details have been lost.

So rather than use ImageAlign’s correction, I took the first image and cut out a rectangle to get rid of the white spaces, but preserving the full width of the image:

Wet suits, Cayucos Beach. Canon EOS 5D, 15mm fisheye, cropped in Aperture.

Quite a difference. And guess what? The proportions are roughly 1.79:1. Now widescreen is 16:9 or 1.78:1 (what you can get with the Panasonic Lumix LX1’s sensor) so you end up with a widescreen de-fished image which preserves far more edge detail – ‘wideness’ if you like – than the constant image ratio version from ImageAlign. Plus that wide look really goes well with beach and sea scenes! If you print to, say, 24″ wide, the image height will be 13.4″. Oh! and your 12mm ‘rectilinear’ fisheye just became a 10mm full frame wide angle lens.

The trouble with Flickr

Oddly named and a complete mess.

Occasionally I get picture references from friends who store their snaps on Flickr. I can see that it’s a nice, cheap place to keep your pictures online and hopefully someone at Flickr is backing up everything properly.

But that’s the only use I have ever found for Flickr or sites like it. The problem is that there is no editing of content, no quality control. So everyone can post there – and sometimes it seems that everyone does – but unless you are directed somewhere specific, it’s not the sort of destination you drop by hoping to find some good pictures to look at. Of course there’s a wonderful selection of great photographs on the site, but how do you go about finding them? Or finding new work of interest, for that matter? That’s the problem with freedom of speech. Everyone gets to say anything they want and, distribution curves being what they are, most of it is pure, unadulterated garbage.

Sorry, but the First Amendment just does not cut it when it comes to art quality.

Contrast the Flickr experience with the one at File Magazine which states:

“We publish images that treat subjects in unexpected ways. Alternate takes, unconventional observations, odd angles — the photographs in the collection reinterpret traditional genres”

And they are true to their credo. Images can be submitted by anyone but must be reviewed and approved. This is what accounts for the site’s great quality and I think you will enjoy much of the great photography there.

I realize that it’s unfair to compare a free storage medium (Flickr) with an edited magazine (File Magazine) but I like to look at good pictures and there’s no way to find them on Flickr without much time wasted on seemingly random searches.

By the way, I came across File Magazine during yet another enjoyable session Stumbling about and commend that approach to you. Every tenth site, and there now seem to be thousands, has something to offer. The service only works with Firefox.

Finally, a good HDR image

I think I’m getting the hang of the HDR technique.

After the indoor and hand-held tests documented in this journal over the past few days I ventured forth to the hinterlands with 5D loaded with Optimism, rated at 400 ISO. I have always found that to be a particularly effective film stock.

As before, I set the Canon to record three exposure bursts, with the second and third 2 stops over and under exposed compared to the first. A legacy of the street shooting school, I do not much care for tripods, but those great Manfrotto QR plates made everything go very smoothly, I must say.

I’m trying to learn how to maximize reproduced contrast range without stepping over the line to garish. Easily done with this technique.

So now I know the camera is stationary, but what I did not realize is that any movement in the subject is a matter for concern. As you are combining three or more images, things that move do not look so good. Witness the many translucent gulls shown in my pictures at the beach. Someone once asked Hitchcock how he managed to get all those birds to stand still in his movie to which he cryptically replied “I paid then well”. Seems like I have to get those birds on the payroll.

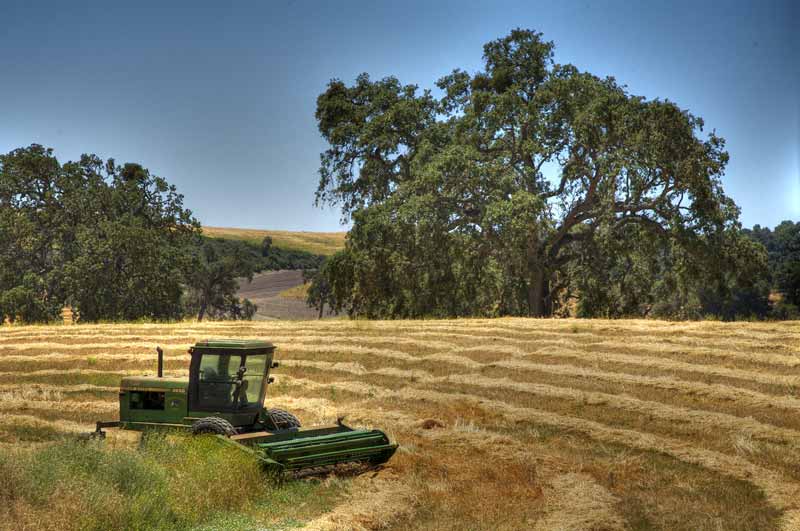
On the way to the beach I did come across this charming pastoral scene off Highway 46, near our home. The farmer had left the gate open so I shot in, Linhof tripod in one hand, the 5D in the other, and proceeded to bang away, hot footing it before the local pit bull made lunch of my backside. Let me assure you that a good QR head beats a pit bull any time.

Anyway, the clear appeal of this scene was the golden color of the freshly harvested land, contrasting with the trees, sky and that standby for us farmers, the John Deere tractor. God, America, apple pie and John Deere, because America and apple pie would be in short supply sans John Deere. As a wine grape grower I can attest to the discovery that a couple of hours on a Deere beats $250 to the local shrink any time. Lots more fun too. And the engine is made in Japan, so it starts first thing, too!

Taken at noon (bad time for landscape work) the contrast range was, predictably, extreme.

Making Hay. Canon EOS 5D, 24-105mm at 100mm. RAW converted to JPG in Aperture. HDR processed in Photomatix

The next step was to fire up the HP DesignJet 90 printer for the acid test. How sharp is this combined, processed picture when printed to a decent size? On a side note one of the unheralded features of the DJ 90 is the way it keeps the print heads warm even when nominally switched off. I assume this is to prevent ink clogging and, indeed, after some six weeks of non-use (like you, I spend 40% of my year working for the IRS) the first print out is perfect, with no need to run magical routines to clear the heads. The moral of the tale being that if you want to keep your DJ heads ready to go, by all means switch the printer off (the fan noise gets tiresome anyway) but do not pull the power plug.

The result is great. Definition equal to a traditional one negative print and dynamic range to blow your head off. All at 400 ISO.

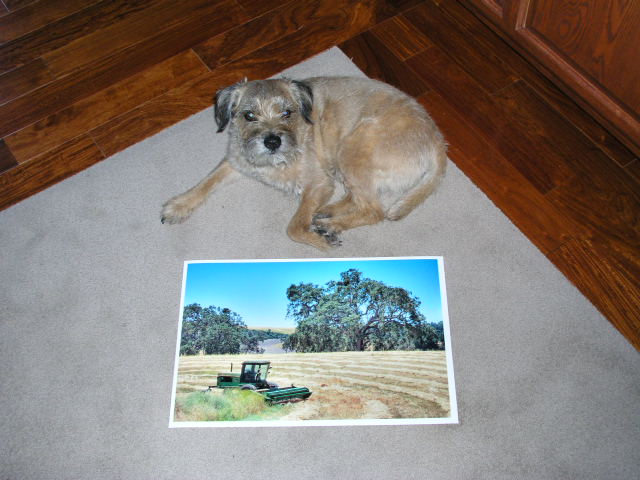
Bertie the Border terrier testifies to the size of the print:

Bertie guards Making Hay.

After all this banging away on the tripod, I couldn’t resist just one opportunity to take a real, live action shot, so apropos nothing, here it is:

What’s a guy got to do to get a drink around here? 5D, 24-105mm. 400ISO

When all else fails, change your logo

Fuji takes a page out of the Kodak playbook.

Here’s the business philosophy statement from Fuji’s web site:

“We will use leading-edge, proprietary technologies to provide top-quality products and services that contribute to the advancement of culture, science, technology and industry, as well as improved health and environmental protection in society. Our overarching aim is to help enhance the quality of life of people worldwide.”

Yet Fuji, when it’s not busy making the world a better place, continues to call itself Fujifilm and seems to think that changing its logo – like the folks at Kodak did recently – will cure all that ails it. Still, I suppose a 95% share of a dead market sounds good to some bean counter somewhere.


Fuji’s thrilling innovation – a new logo

Well at least they were honest. The red bit they added speaks to the results of their film division and looks about to fall off.

Where do businesses get these money wasting ideas?