Canon 15mm Fisheye lens – Part I

Not just a throwback to the sixties

Update November 2009: ImageAlign is out of business and the plugin described here is no longer available. However, something every bit as good is available. It’s called PTLens and you can read about it here. Lightroom3 also now includes ‘defishing’ controls.

The lengthy list of things best forgotten from the 1960s includes long hair, bad music, revolting students …. and done-to-death fisheye lens images. So you can imagine there was no way on earth I would ever contemplate buying one of these gimmicks.

Yet here was the latest addition to my little outfit yesterday:

Canon EOS 5D, 15mm Canon f/2.8 Fisheye lens

A while back I wrote of the stroke of luck I had when I bumped into a fellow Canon DSLR user at Hearst Castle; he was nice enough to let me take a couple of snaps with his super exotic 14mm f/2.8 ‘L’ lens on my 5D body. This was mightily impressive, the creative opportunities legion, but at some $1,800 for the occasional superwide snap I decided I preferred to keep bread on the table. But that super-duper wide angle view stuck in my mind.

With my standard lens on the 5D being the wonderful 24-105mm zoom, a 20mm, the next widest lens, made little sense. The difference between 20mm and 24mm is not all that great, and I felt pretty happy with the 24mm setting on the zoom. Plus I did not want the bulk of a wide zoom lens. Then I found myself thinking about image correction and how much more of this sort of thing is increasingly being done in processing rather than with the camera’s software. Sharpening, exposure, contrast even lens aberrations can be repaired in Photoshop CS2 and Aperture.

Wait a minute! Lens aberrations? Well, couldn’t you take a cheap fisheye and remove the native barrel distortion, giving you something seriously wide at modest cost? So I typed ‘lens distortion correction’ into Google and one of the first results was for a New Zealand (New Zealand?) company named Grasshopper. Turns out they sell a Photoshop Plug-in named ImageAlign so I did a spot of reading which disclosed that this was a natural match for any number of fisheye lenses out there, making straight that which would otherwise be curved. So I plonked down $650 for the Canon fisheye and took a couple of snaps. No way was Photoshop CS2 able to straighten the curves with its modest range of corrections, so I downloaded the trial version of ImageAlign and, hey presto!, straight lines. So another $79 saw me equipped with what is, in effect, a 12mm wide angle after corrections are applied.

Read that again. A 12mm wide angle full frame lens.

August 2008 update: Grasshopper seems to be out of business but the features of ImageAlign described here are now available in Photoshop CS3.

How does it all work? Well, first you have to overcome the bout of vertigo you get from using a fisheye – a new experience for me. (The fisheye, not the vertigo – I get that every tax day already). Then you have to watch out that you don’t photograph your toes or shadow. Easier said than done. The fisheye fills the frame with its image on the 5D and is very, very wide indeed. Don’t even think of using this lens on a non-full frame sensor camera as your fisheye becomes a 24mm wide, so you might as well buy the equivalent lens (a 15mm non-fish on a 1.6x body) to get straight lines in the first place. But you cannot get this wide with anything except a full frame camera. A 1.6x sensor needs a 7.5mm lens to get this wide and they do not exist.

You then load the picture into Photoshop CS2 where the Grasshopper plug-in appears under the ‘Filter’ menu. The interface is everything that Photoshop is not – simple, intuitive and fast. Here is what you see:
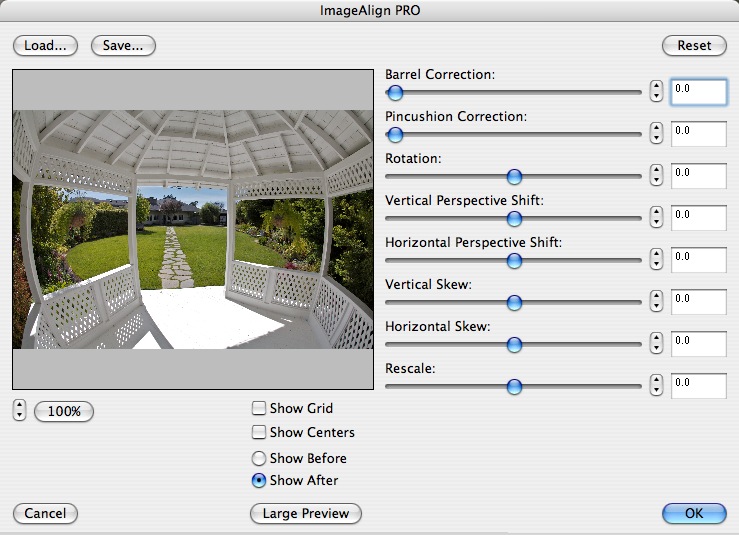
Now to get the curves dead straight, you crank in 180 (max) barrel correction:
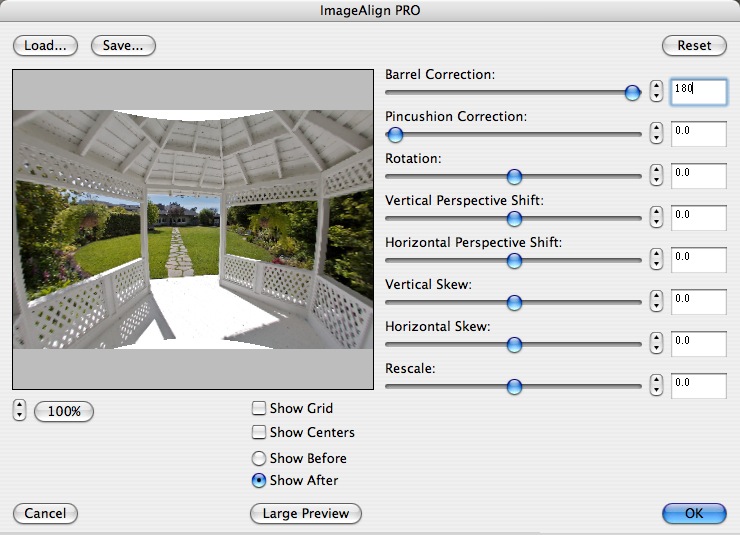
Almost straight, but not quite. Save this and crank in another 86 degrees of barrel correction:
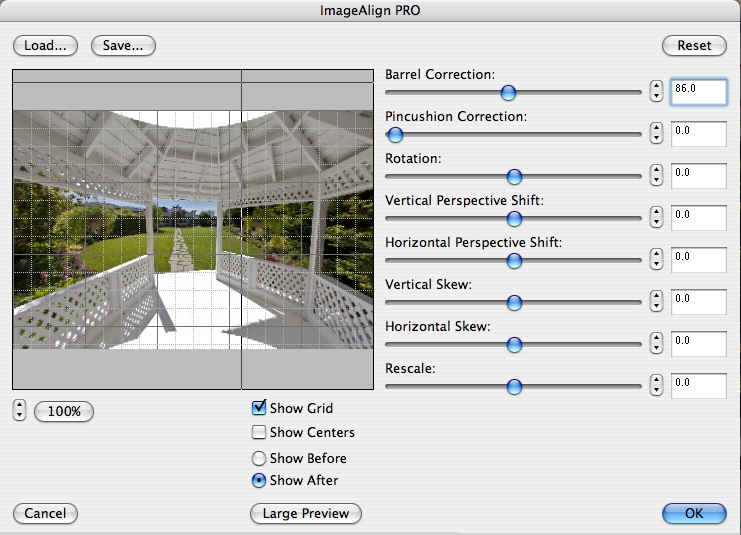
Now things are straight. It only remains to remove the half moons top and bottom by dialing the Rescale slider to 16 and you are done:
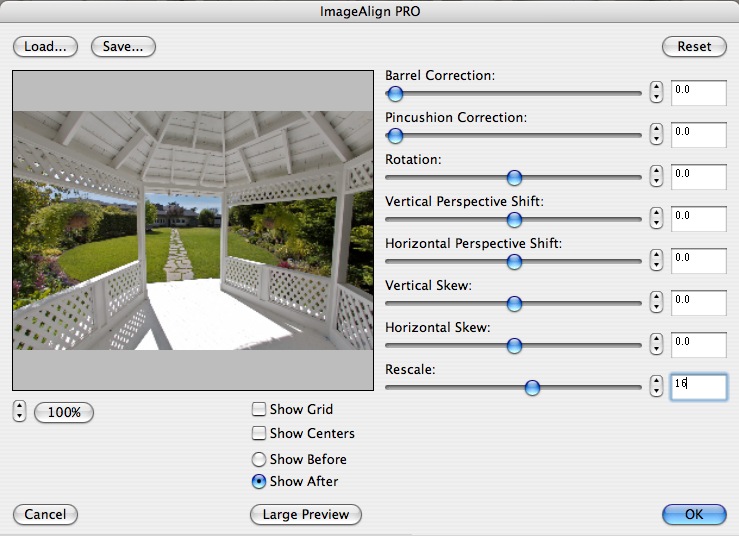
Note that in the conversion nothing is lost from the center top and base, but some corner details disappear. That’s distortion correction for you.

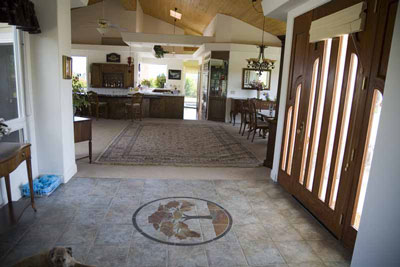
How wide exactly is this combination? Well, suffice it to say that every self-respecting realtor should own one of these. Here’s the main corridor in our home with the 24-105mm at 24mm and with the fisheye:
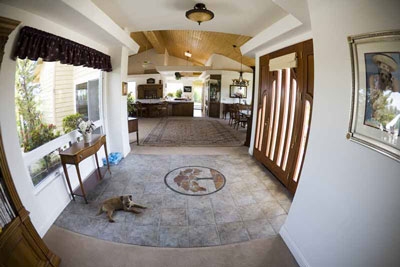
And here is the fisheye version after correction with ImageAlign:
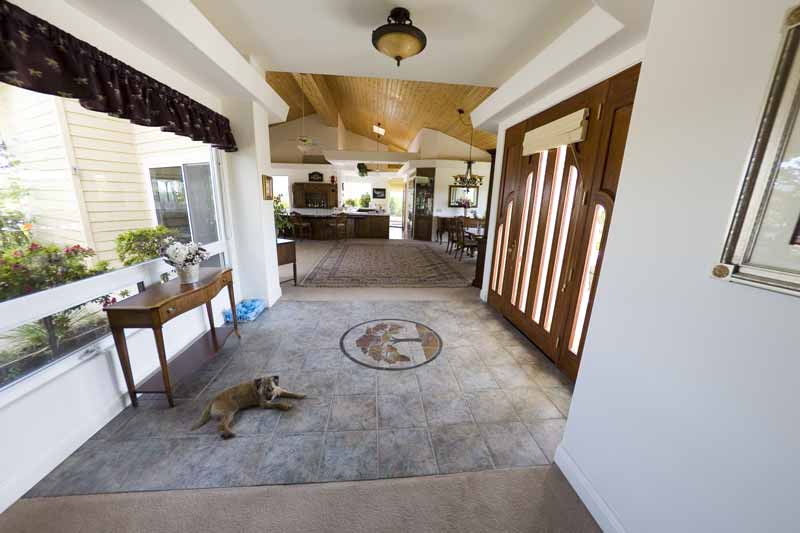
See what I mean? The price of the old estate just doubled.

It should be added that this lens is not easy to use. You don’t have to get close. You have to get intimate with your subject. Not for nothing does this lens focus down to a few inches. Rumor has it that Canon has not changed this lens in twenty years, and I can’t blame them. Edge definition is far superior to the 14mm that I used and while the little focus motor makes a whirring sound, the focus throw is so short that this is simply not an issue. The 14mm ‘L’ lens is silent, by comparison, and weighs twice as much. It also costs three times as much. No one ever said that silence was cheap.

Canon provides a metal lens cap, which is a shame. Plastic, as supplied with the 14mm, resists scratches and knocks far better. And, for once, you have to keep the stupid lens cap with you as there’s no way to protect the front element with a filter.

In practice, I kept feeling that I was looking at Van Gogh’s Yellow Chair or any one of a number of Bonnard paintings, so tilted is the perspective. You can get some sense of this from a few snaps I took down the road at the Cambria Pines Lodge, whose grounds include a beautiful garden, by clicking here. Some of these snaps are corrected with ImageAlign, some are left native where the distortion does not detract.

One other thing to note is that it makes sense to bracket exposure if in doubt. Digital sensors really seem to hate overexposure, reminiscent of slide film, so you want to preserve detail in the highlights and adjust the shadows later when processing. And chances are that you will have a huge contrast range outdoors owing to the enormous field of view of the fisheye. The last picture in the attached slide show, which is the interior of the Lodge’s Lounge, was taken at the fisheye’s full aperture at 1/20th second, with ISO dialled up to 1600, hand held. The glass of wine I had just enjoyed, visible in the foreground, served in lieu of a tripod. Is it sharp? The 13″ x 19″ print lying on my desk would make your eyes pop.

So there you have it – the widest rectilinear DSLR wide angle lens in the world, with absoutely no discernible vignetting, for some $650. Try it. You might like it. Yes, I know there’s a 12mm Voigtlander lens for film cameras, but before you spring for it and its extreme vignetting and poor resolution, let me remind you that Film is Dead.

Cambria Pines Lodge garden. Canon EOS 5D, 15mm Canon Fisheye, sepia toned in Aperture

Part II of this review appears here.
Facades

Behind each facade lies a story

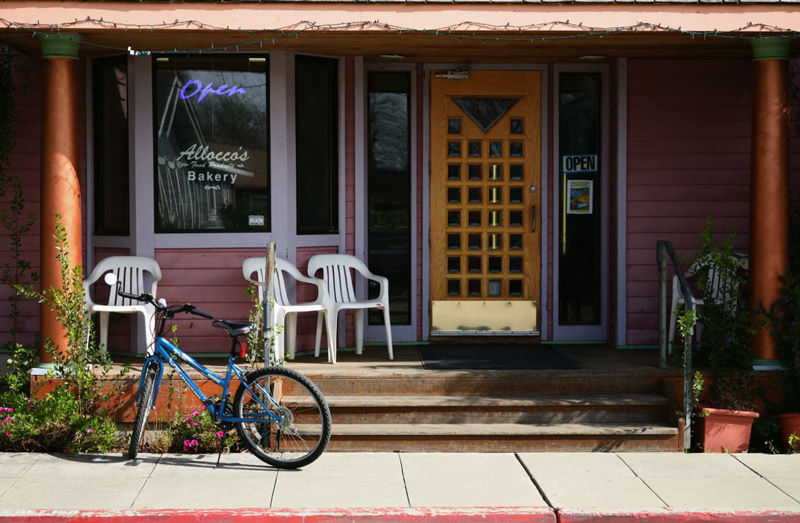
My catalog seems to include more than its fair share of facades. Walls. Fronts. Facades. Each speaks of a time and place and brings back memories. Each has its own story behind the front.

I can still smell the bread baking in this one.


Cambria, CA. EOS 5D, 24-105mm.

A few more of this sort of thing, taken over the past year as I was transitioning from film to digital, can be found here. Exactly half were on film. No, you can’t tell which half….only big prints will disclose the superiority of the digital originals.

In the studio

Controlled lighting makes things much simpler

Over the years I have consistently taken controlled pictures of friends in what, for lack of a better word, would be best described as a studio environment. That may take the guise of soft northern window light at one extreme, or strictly controlled studio flash with umbrella reflectors and drop backgrounds at the other. For the latter I have long owned a small three head Novatron electronic flash outfit which has been superbly reliable and is easily (OK, so you have to lift the heavy storage case) transported to any location. Add Photek’s compact ‘Background in a Bag’, a support system for a 6 foot by 7 foot backdrop, and you are set for most eventualities.


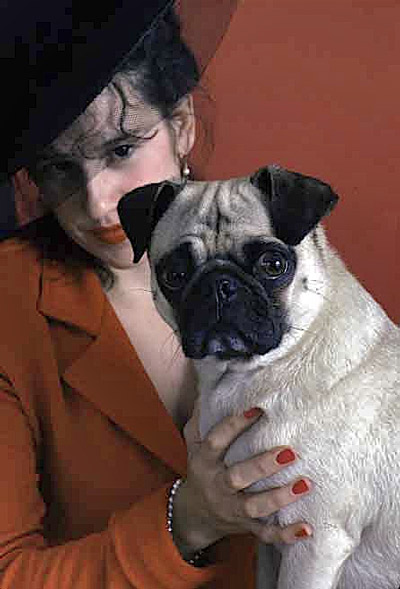
Ollie the Pug. Leica M3, 90mm Elmarit-M, Novatron.

You can see a few of these by clicking here.

The pictures span a thirty year time frame, mostly taken with a Leica rangefinder (ideal for critical focus) with 90mm lenses ranging from the economical Elmar, made some fifty years ago and discontinued long ago, to the exotic Apo Summicron Aspherical which is current and ridiculously expensive.

Canon 200mm f/2.8 ‘L’ lens

Finally, a replacement for the magnificent Leica Apo-Telyt-R

Mention of the fabulous Leica Apo-Telyt-R lens in my column on the Leicaflex SL the other day prompts mention of its replacement which I have been using for a few weeks now on the Canon EOS 5D.

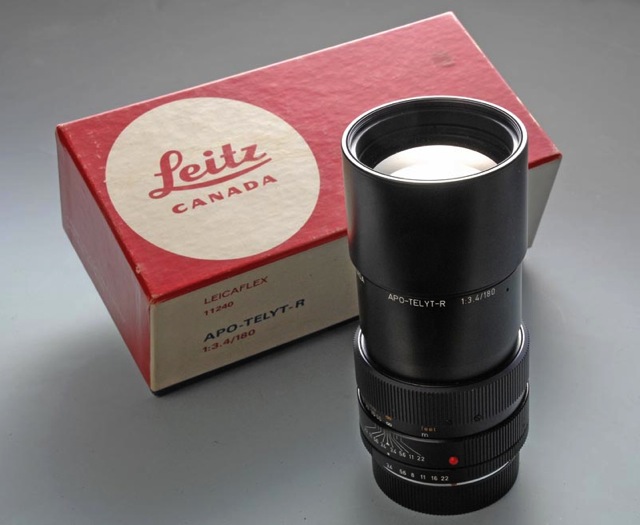
Available during the period 1975-98, the 180mm f/3.4 Apo-Telyt was one of the first Apochromatic lenses available for 35mm cameras, meaning there was no color fringing to be seen no matter how big the enlarged print. It was a surprisingly compact lens, weighing in at 1.65 lbs with its built in lens hood. Full aperture definition was as good as that at any other aperture, meaning superb, or as good as your ability to hold it steady.


The fabulous Leitz 180mm Apo-Telyt R

While cursed with yet another clunky lens hood (why on earth did Canon abandon the earlier sliding lens hood? Another Canon lens hood in the garbage can), the Apo’s replacement on the EOS 5D is Canon’s superb 200mm f/2.8 ‘L’ lens. The ‘L’ lens adds the benefit of automatic focus, to boot. As I sold the Apo-Telyt in a moment of foolishness a few years back, I have been using the fully manual Leitz 200mm f/4 Telyt on the 5D where it works well, but you have to stop down and focus manually. A legacy of my Leica M/Visoflex housing days. Closest focus with the Canon is down to 4.9 feet (compared to a rather poor 8.2 feet for the Apo-Telyt) and can be limited to 8.2 feet in the interest of faster performance when the close-up range is not needed. Weights of the two lenses are 1.65 lbs for the Apo and 1.68 lbs for the Canon, meaning the latter uses plastics where possible as it has automatic diaphragm and focus motors to conceal in its somewhat bulkier body.

Automatic focus speed on the 5D is simply startling. So fast you don’t even think of it, though I have taken the precaution of limiting auto focus area selection to the center focus rectangle in the interests of accuracy. There’s not much depth of field at 200mm and f/2.8! The only thing missing is vibration reduction. Now that would be nice to have!

Consistent with my commitment not to get loaded down with gear, I purchased a small cylindrical soft case for the lens which attaches to my belt and, because its overall dimensions are similar to the 24-105mm f/4 ‘L’ , when one lens is on the camera the other makes its home in the belt case. Each is fitted with a clear UV filter, so only a rear cap need be used – I would dispense with that also, but the rear lens element on the zoom is too exposed to take that risk, given my proclivity to thumbprint everything.


The Canon 200mm f/2.8 and 24-105mm f/4 lenses. The zoom (right) is at its longest setting.

Why a prime lens rather than another zoom? Two reasons – weight and maximum aperture. Performance is less of a concern given the high optical standards of Canon’s ‘L’ lenses. I really do not need focal lengths between 105mm and 200mm and the 5D’s sensor allows image enlargement in this intermediate range without compromising definition. Further, any lens with a half-decent maximum aperture that zooms beyond 200mm is impossibly bulky. On the very rare occasions I need something longer I have my 400mm f/6.8 Leitz Telyt to fall back on.

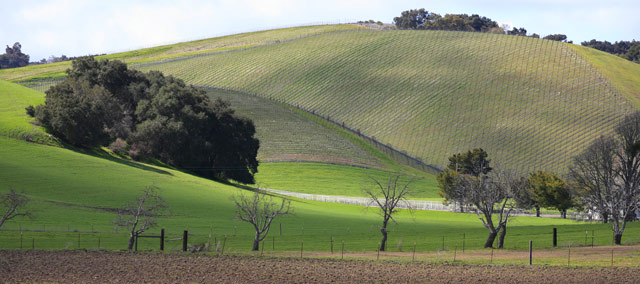
The 200mm is a fine landscape lens, compressing perspective and focusing on essentials.


Canon EOS 5D, 200mm f/2.8 ‘L’, probably at f/5.6.

Best of all, as ‘L’ glass goes it’s positively a bargain, and chump change compared to the Leitz lens which it so ably replaces.


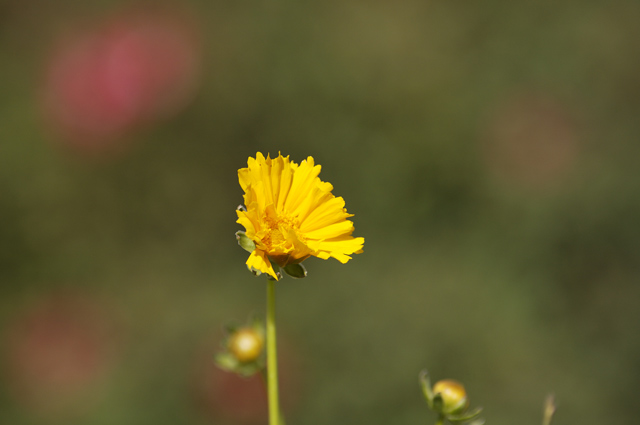
Canon EOS 5D, 200mm f/2.8 ‘L’, at f/3.5. No problem with background clutter!

Looking at pictures

You can’t beat natural light

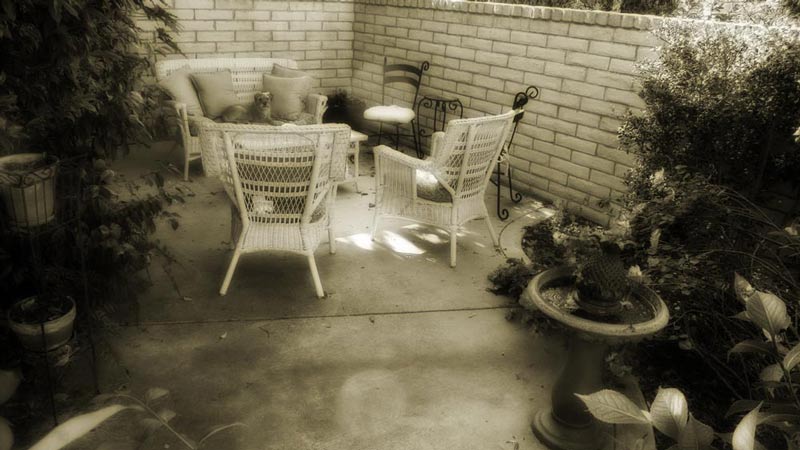
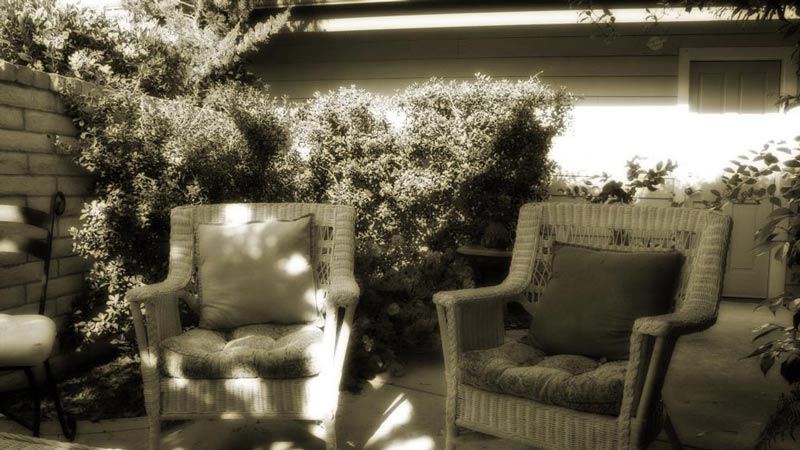
As we look forward to six dry months in central Caliornia, it’s nice to have a sheltered outdoor spot to look at pictures on those long, warm summer evenings.

This little walled patio on the north side of our home was a complete mess when we moved here a couple of years ago. As the US Government has yet to craft a method of taxing sweat equity, I set about fixing it up to make a pleasant enviroment to better enjoy the occasional book of pictures. The only taxes involved were iniquitous sales taxes which, wherever they may go rest assured it’s not to fix the local roads and freeways, which resemble those of a third world nation.

No matter. Get rid of the horrible hot tub that so spoiled this lovely spot, add a few rose bushes and magnolias, some mulch, a small fountain to set the tone and a few pieces of wicker furniture from the far east and you have the makings of a fine outdoor reading room. The tub was sold to a neighbor and the proceeds invested in what you see here. Throw in a Border Terrier and things are nigh perfect.

Yesterday evening I was leafing through Michael Kenna’s work in the beautifully printed ‘A Twenty Year Retrospective’ and couldn’t help but remark on how the prints looked so much better in the warm outdoor light. His photographs are reproduced in a gentle sepia which adds greatly to the overall feel. Kenna has a strong, consistent style and while the book credits him with works in many US public gallery collections, you would probably expect to find it on the wood panelled walls of classier business institutions like private banks and financial advisors.

Anyway, with all that sepia going on, I grabbed that little jewel, the Leica DP, and took a couple of snaps to illustrate this piece. A few seconds with Photoshop saw the RAW images converted to TIF files whence two more clicks saw monochrome conversion and sepia toning.