A Gorgeous Bit o’ Bottle

Just mind you don’t fall in the water.

Hearst Castle is the most popular tourist destination in central California so I took the precaution of booking a ticket in advance rather than be faced with a long wait for the tour bus which takes you some two thousand feet above sea level to Hearst’s opulent home. While I may have trashed Hearst for his part in dragging down the quality of journalism, a visit to his Castle on the central coast makes me feel a lot better about how he spent his money. As one of the tour guides pointed out, this magpie of a man expended some 78 of his 81 years collecting, starting with a trip to Europe aged three when he asked his mother why they couldn’t simply buy all the the things he liked. Got to like that!

While waiting for the bus – I chose Tour 2 which takes in the upper levels with all the living quarters, the kitchen and the two pools – I chanced on a fellow photographer using a pretty exotic looking Canon L lens finished in white enamel. Now I had seen these things at televised sports events but had never actually encountered someone actually using one, so my curiosity was piqued.

I confess to being in two minds about that red stripe that Canon places on its best glass. On the one hand it tells fellow photographers that you are serious (or maybe just seriously rich) about your images. On the other, it smacks vaguely of driving around in a Rolls Royce or Mercedes. Rather ostentatious and an invitation to thieves everywhere. Short of resorting to brush and paint, there’s really no simple way of blacking out the offending red stripe, unlike the ease with which electrician’s tape can be used to take out the obnoxious markings on the camera’s body.

Mick M. responded that the lens was a 70-200mm f/2.8 L zoom, and an impressive piece it is. Hard not to be noticed with all that white paint which, I suppose, must leave the nature photographer for ever seeking camouflage. Mick then opened his camera bag to disclose a veritable cornucopia of Canon L glass. Let’s see, there was a 24-70mm zoom, an 85mm f/1.2 portrait lens (yes, f/1.2!), an extender for the zoom and a strange looking duck with an enormous, bulbous front element. Proferring it, Mick explained this was a 14mm f/2.8 ultra wide angle. Not a fish eye. A genuine wide angle. This, I confess, had me greatly intrigued, and when Mick explained that his cameras were a 20D and 10D, the fact that these have small image sensors led me to pounce.

“Why not stick that wide on my 5D and see what 14mm really feels like?”. It was the only trump card I held, what with the one body and just the 24-105 L on it.

What ensued was that the loudest sound to be heard in Hearst Castle’s parking lot was that of jaws dropping. Mick’s, when he held the camera up to his eye, and mine shortly after. Now I had used a 21mm Asph Elmarit on my Leica for many years, to the extent that in some ways it had become my standard lens. Despite the cheesy, distorting, plastic viewfinder it came with, the lens itself was seemingly perfect in every way. Sharp at all apertures, compact and distortion free, it left nothing to be desired optically. Point it into the sun and flare was noticeable by its absence. The Leica 21mm has moved on once I concluded that 24mm at the short end of the Canon’s zoom range was fine for my purposes, but not without a twang or two on the heartstrings. We had become firm friends.

I can only guess that there is some sort of macho rivalry between lens makers – maybe I should refer to them as programmers – when it comes to making the widest lenses. I checked B&H and Leica has a 15mm for their reflex camera (costing about as much as a new car, needless to add), Nikon has a 14mm, and the various after-market manufacturers have 14s and 15s aplenty. Given that all of these run $1000 or more, they can hardly be mass market items and about the only use I can envisage on a daily basis is for unscrupulous realtors looking to make interiors larger. “Here is the bathroom” instantly become “Here is the palatial bathroom”.

Nonetheless, the impact of the lens in the viewfinder was overwhelming, and framing with it, walking towards a subject, gave this user a distinct feeling of unsteadiness owing to the width of the field of view, far in excess of what the human eye perceives. To cut a long story short, Mick very generously offered me the use of the 14mm and I reciprocated with the use of my 5D into which he needed only place one of his digital film cards to have a go. I got first go and on arriving at Hearst’s home in the sky one of the first sights was the outdoor pool. The weather was just so, a wisp of a cloud or two in the sky and a pleasant mild day in California. How do people in the mid-west get through the winter?

Having a fair amount of experience with ultra-wide lenses I knew enough to avoid the bane of all these optics which is boring, extraneous foreground. You really have to get in close, so I proceeded to attack the pool with aplomb, forced to sight through the finder, never having used something this wide before. I can ‘think’ 21mm, but 14mm is like a scene from Hitchcock’s ‘Vertigo’ by comparison. And vertigo was the order of the day as I teetered on the edge of Hearst’s ten foot deep outdoor pool! Now you absolutely have to use the hood with this lens, if for no other reason than there is no way to protect the cyclopean front element with a filter. It is simply too bulbous. And here’s a snap of the pool taken with Mick’s lens.
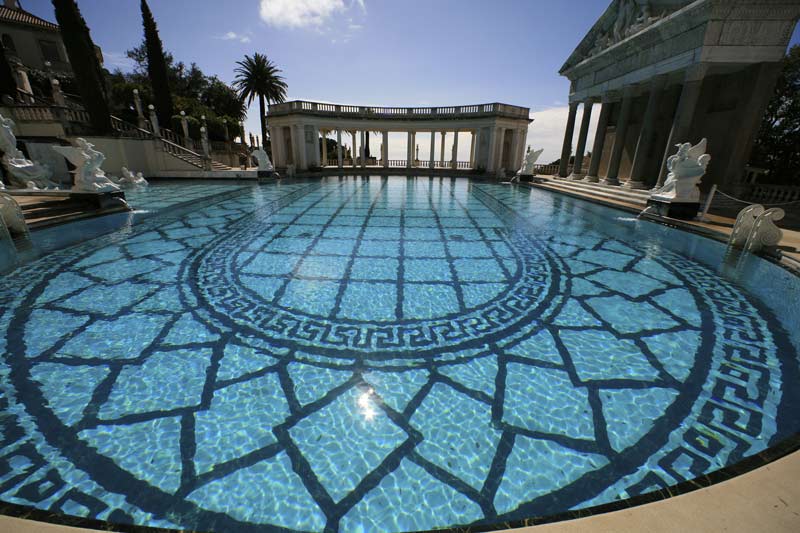
Though taken directly into the light, the lens seems flare free with just one small internal reflection visible in the picture. An extraordinary piece of design and execution. Will I be rushing out to buy one? No way. It’s the sort of thing I would use once a year and is inconsistent with my desire to minimize equipment, but thank you, Mick, for your generosity in allowing me to take a few pictures with this gorgeous bit o’ bottle.

If you would like to see a travelogue of a few more snaps from Hearst Castle, please click here.

And for a cheaper, wider, better lens than the 14mm, just click here.
Fixing distortions

A tweak in Photoshop CS2

I’m finding the definition of the Canon 24-105mm IS L lens to be equal to anything on medium format or from Leica on 35mm. What is not so good, however, is that at 24mm you get noticeable barrel distortion (the sides bow outwards) and darkening in the corners.

Sometimes these aberrations do not matter but if you have strong horizontals or verticals or large smooth tone areas, they can be irritating to put it mildly.

I had thought that the only way to correct these was to take RAW images and make the adjustments in the very nice Adobe Camera Raw (ACR) interface. As I have written earlier, proper exposure technique results in little added benefit with the EOS 5D’s full frame sensor using RAW compared with JPG Fine, at least for this user. Plus I’m getting comfortable with the in-camera processing of JPGs offered through the Picture Styles option. JPGs have the great benefit that file duplication is avoided and, of course, file sizes are smaller meaning import to your computer and loading in image processing software are both much faster.

Stated differently, I’m of the growing opinion that RAW is overrated. I do not see better definition or tonal range in any large prints I care to make. I have no need for an unprocessed original. Once I have processed it I like it as it is and cannot see changing it again. And the thought of having to catalog two images of each picture is complexity in search of confusion.

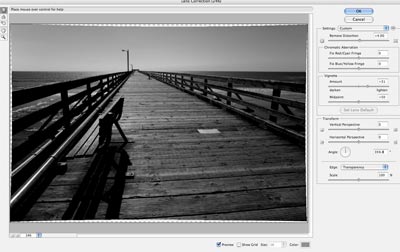
Well, looking through the myriad menus of Photoshop CS2 the other day, I chanced upon Filter->Distort->Lens Correction which offers the same ability to correct lens aberrations in JPGs as ACR does in RAW.

Here’s how it looks corrected on a screen shot:

Both barrel distrortion and vignetting are quickly corrected.

I’ll experiment some more with RAW but JPG Fine is just, well, fine for me.

Image processing

That’s digital workflow to you.

I did a fair bit of corresponding with people much more experienced with digital photography than I am, which is to say just about every photographer I know, asking how they manage the work flow for an efficient, low risk result.

Not surprisingly, the range of responses was about as broad as the styles of the photographers I spoke with. As with any mechanical process, workers will cast around empirically until something that feels right comes along.

My picture throughput is, I suppose, of two types. There are family pictures sent to me by one and all for eventual publication on the family web site. These arrive in hard copy, as film or slides, on CDs or by email. Generally of low resolution, and not much is needed for web publication, they get dropped into a current quarter album in iPhoto ‘06, are culled and sorted at quarter’s end, then crafted into web pages using the File->Export->Better HTML plug-in for iPhoto, all of it taking less time to do than to explain. After adding titles and dates, upload to the ISP using Transmit takes no time at all. A few seconds more and the menus on the site are updated for the latest quarter. This efficient routine has taken the drudgery out of the process and makes sharing the family site with all and sundry a lot of fun.

The other type of picture I have to process is my own ‘serious’ work. Stated differently, these are the snaps whose primary goal is large, framed, wall hanging prints, anywhere from 8” x 10” up. These fill up the walls at the old manse as well as making nice gifts for friends. The originals are scans from 35mm, medium format or 4” x 5” negatives or, increasingly, RAW or JPG images from the Canon EOS 5D. With all of the medium format gear sold and most of the 35mm equipment now gracing collectors’ cabinets in Japan, that leaves 200 mB large format scans and 4-12 mB JPG or RAW digital files to contend with. As iPhoto is immensely capable, handling even the recent CR2 Canon RAW format with aplomb, these get dumped into thematic directories therein (landscapes, forests, etc.) and, once culled, a double click opens the images in Photoshop CS2 as a native file or, in the case of RAW, in Adobe Camera Raw. Whatever processing is required is performed and the images are then saved to the iMac’s desktop and printed.

These desktop high quality files are then dropped into Extensis Portfolio 7 (now 8, but I have not bothered to upgrade), keywords are added to each, and the whole thing is backed up automatically overnight. Given the amount of time and effort expended through this point, a comprehensive back-up strategy is vital. The cost in light of the risk of loss is negligible. My back-up approach is three pronged. First, duplicates of the good personal pictures appear in iPhoto and Extensis libraries, albeit on the same disk drive. Second, at midnight the iMac’s internal hard disk is incrementally backed-up to an external LaCie Firewire hard drive. This is a bootable back-up with the full OS X Tiger operating system resident on the external drive, allowing me to boot from that drive in the event the internal disc in the iMac fails. The iPhoto and Extensis libraries do not reside on the iMac’s internal drive. Rather, they are stored on a second external LaCie Firewire drive, this a 250 gB monster, which in turn backs up incrementally to a third external 250 gB LaCie.

As backing up is even less exciting than doing your tax return and certainly easier to forget, an application named SuperDuper! takes care of the chore daily and automatically. It’s the first back-up application for the Mac that speaks to you in English rather than Geek and works perfectly. Ever the Doubting Thomas, I check the ‘bootability’ of the external drive monthly and compare the files sizes on the two 250 gB Lacies weekly to see that they remain identical.

Now my iPhoto ‘06/Portfolio 7 strategy may not be suitable for those taking a lot of pictures. but for the 500 or so family snaps and 200 or so personal pictures I reckon on saving annually, it’s fine for me. I confess I was tempted by Apple’s Aperture as a Swiss Army Knife solution for everything, but my research suggests that the application is far from debugged in its first version and needs a top of the line Mac computer to make it run at acceptable speed. As I have no intention of blowing five grand on the latter, Aperture can wait. I still think Photoshop has one of the worst interfaces known to Man (if not Geek), but Adobe Camera Raw for RAW files goes a long way to simplifying things. The folks at Adobe really need to take a look at iPhoto for user interface design.

I tried Adobe’s free beta release of Lightroom (I challenge you to find it on Adobe’s web site) which has a nice look and feel stolen from Aperture. However, it is so slow in loading larger files on my iMac G5 as to be unusable. I would dearly love to drop the duplication resulting from using Portfolio 7, but as Apple has had some complaints about stability in iPhoto (though I have had no issues) I remain committed to the belt and (two sets of) suspenders approach until I can be convinced otherwise.

There seems to be a growing number of external RAW processors and sharpeners out there which plug-in to Photoshop, as if that application needed any more menu items. While I let others do my testing for me, everything I have read (after discounting the fact that 90% of what’s out there is nothing more than a paid endorsement) suggests that the native code in Photoshop CS2 is as good or better than the after-market variants. For me that means RAW conversion, curves, levels and unsharp masking, which is about all I ever use in CS2. Dust removal? A thing of the past with digital images.

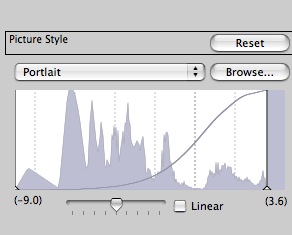
Excuse me while I examine my Portlait setting through the Glid

Either someone at Canon has a great sense of humor or they need better English-speaking programmers

I checked out the Canon software that came with the 5D; it’s not bad but doesn’t seem to add much to my preferred working method which is to drop all the files into an iPhoto ’06 album (RAW included), preview them in iPhoto, then fix the best ones in Photoshop for saving in Extensis Portfolio 7 in PSD format – the industrial strength, bulletproof cataloging application I use.

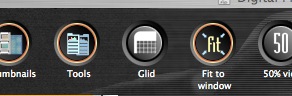
Here’s what I saw in a couple of menus in Digital Photo Professional, a Canon application far less competent than iPhoto for quick image manipulation, and very slow in converting from RAW:

Now do these guys at Canon have a sense of humor or what?

By the way, a RAW file saves as 8.4 mB in JPG, 36.4 mB in 8-bit TIFF and a whopping 72.8 mB in 16-bit TIFF.

Joe’s NYC

A Photoblog to satisfy your need for a daily fix

When I left Manhattan’s West Side in 1987 for Los Angeles, the two closest friends I had in the world were the limo driver who would take me home from the southern tip of the island at ridiculous hours and my doorman. The driver was a whole lot more fun than the methadone case who held the door open, palm expertly proferred, once a year at Christmas. You see, Dimitri was a Russian emigre and we used to argue about Tchaikovsky and Chopin and Mussorgsky during the 30 minute trip home. Music and dance, whether in the streets or in more formal settings, were the artistic highlights of my many years in New York, but it was time to go.

Fulfilling the American business belief that motion beats action any day, I found myself revisiting the city on many needless cross country trips over the next few years and gradually fell out of love with it. Too dirty, too crooked, too everything.

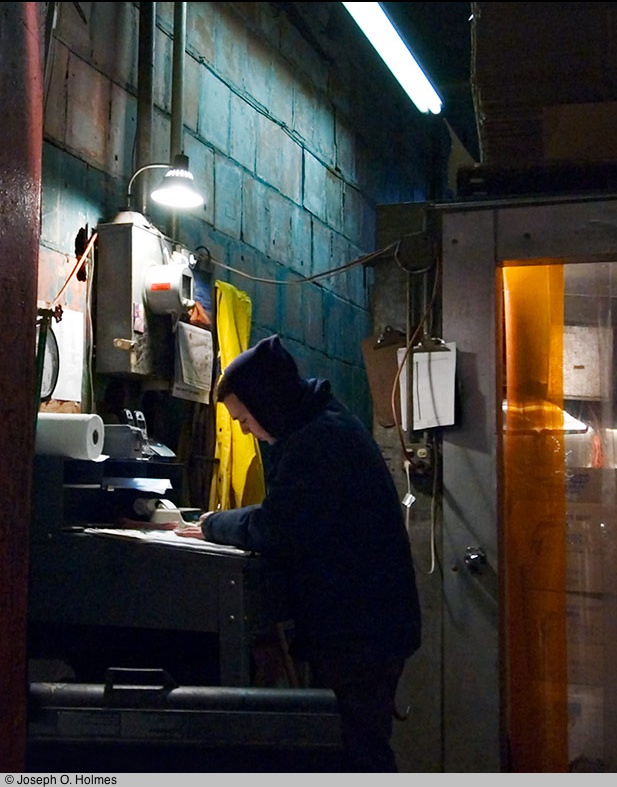
However, every now and then I need a quick fix. Whether to confirm the wisdom of my decision or to see how wrong I was, I’m not exactly sure. And the best way to do this is to visit Joe Holmes’s photoblog Joe’s NYC where, without fail, you will find a new picture every day taken, as often as not, in Brooklyn or Manhattan. The work is fresh and vital, clearly done by one who loves his environment and captures the best and worst of the city I recall so well. Some of Holmes’s best work was done in early 2005 when he and some friends set about documenting Fulton Fish Market on the lower East Side before some developer converted it to high rises.

Click the picture to see Joe’s fabulous documentary photography. Ten months after he took these, the market was relocated to the Bronx, a victim of rising real estate values in lower Manhattan.

Click the picture for the slideshow.

Take a peek. It beats flying to New York and getting ripped off on the cab fare into town any day.