Category Archives: Photography

Migrating to Lightroom from Aperture

What a shame and what a waste of time.

This article is very long, very detailed and very important if you want to migrate from Apple’s Aperture (any version) to Adobe’s Lightroom. Oh! boy, does that sound pompous or what? As far as I know these are the only two applications which integrate all the aspects of managing, editing and printing/outputting digital picture files in RAW or other common formats. That level of integration saw me as one of the earliest users of Aperture 1.0 and although that experience was worthwhile, it is time to move on.

Thus, I have commenced the process of exporting (File->Export->Master) my master images from Aperture 2.0 to Lightroom.

Life’s too short to live with Aperture’s fragility, slowness, constant costly hardware upgrade needs and sheer unreliability.

Further, the biggest issues for photographers with regard to Apple’s and Aperture’s future are:

  • No visible sign of succession planning for the ‘rock star’ CEO. What happens to the ‘vision’ at Apple when Jobs moves on/gets run over by a bus/whatever? Remember the cancer scare? How about politics of envy rearing its ugly head upon the forthcoming change of administrations in Washington? Remember the option cheating scandal at Apple? Easy for a ‘soak the rich’ populist politician to revive, no? What happens to product enhancements and upgrades when the rock star is no more? What about that 175 foot yacht Jobs has commissioned? Early retirement?
  • The economics of Aperture to Apple compare very unfavorably with the complaint rate. Read the chat boards. Why continue increasing your reputational risk when the path of least resistance is to simply drop Aperture? Apple probably sells more iPods in a day than they sell Aperture packages in a year. So Aperture may well not survive.
  • Apple has had a famously testy relationship with Adobe for many years. Recall that at one time Adobe ceased to write Mac software because of disputes. Now the relationship issue is coming to a head once more over the possible use of Flash on the iPhone. So let’s assume that Adobe gets miffed, again, if Apple develops its own version of Flash. What then? No more Lightroom or Photoshop enhancements for the Mac?
  • Check Apple’s discussion forum on Aperture. More horror stories of lost photos than you can shake a stick at. I can pretty much tolerate most faults, but not the risk of permanent loss of my images. That pretty much put me over the top.

Here’s one of the beauties of Lightroom – you can run the application, with all your edits, on either a Mac or on Windows. Now hell will have to freeze over before I revert to Windows, but if it becomes the only game in town, migrating my files to work with the Windows version of Lightroom (both Win and Mac versions come on the installation disk) is a trivial matter. My pictures mean more to me than my dislike of Windows. Roy Hammans has confirmed that the Lightroom database works with both Mac OS X and Windows operating systems. The Aperture user, of course, is dead in the water as Aperture is Mac-only.

Following up on Roy’s thinking, I see no reason why you shouldn’t keep both the Windows and Mac versions of Lightroom on your external disk drive, together with your Lightroom library and related files. That makes for a portable and executable library which you can run on most computers out there – very useful if there’s not a Mac in sight. I do not know if Windows PCs have Firewire connectors but a portable drive like this, which has USB2, FW400 and FW800 connections, would seem to be the answer.

After trying out the Lightroom trial I have decided to import all my images and bang away at it for a month to see if matters improve. The current version of Lightroom offers greatly improved functionality over the Beta 1.0 test version I tried before Adobe released the product. And credit is due to Aperture here – the two competing products push one another to excellence. In much the same way as the elegant user interface in Aperture (now some 3 years old) pushed Adobe to develop Lightroom, the wonderful image editing sliders in Lightroom (which is just one year old) for highlight and shadow recovery have been added to Aperture 2.0. My previous reluctance to try Lightroom reflects a dislike of having to learn yet another application as well as my general disgust with the user interface of Photoshop. Enough carping – on with the conversion.

The migration process is laborious and must not be rushed. It is made no easier by the fact that Aperture’s export function is unreliable.

Lightroom can emulate the directory structure of Aperture so I can mirror the file layout in Lightroom, but there is a lot of manual work involved. Many files never make it and have to be re-exported. Of course all edits are lost though IPTC metadata and XMP sidecar data can be optionally exported from Aperture 2.0 – I elected to do so by checking the relevant boxes in the Aperture 2.0 export dialog. These functions are not available in 1.5.6 so it actually makes sense to convert to Aperture 2.0 before moving on to Lightroom if these things matter to you.

The Lightroom file structure is dead simple – you can see all your files in their native format in the database, to which Lightroom adds a set of separate compact reference files. I keep the database in an external Lacie Firewire drive and by moving the ‘Lightroom Catalog.lrcat’ and ‘Lightroom Catalog Previews.lrdata’ reference files from their default internal disk drive location (the ‘Pictures’ directory on a Mac) to the external drive I can have all Lightroom files on the one external drive.

The first time you start Lightroom after this move, do so by dropping the ‘Lightroom Catalog.lrcat’ file from the external drive onto the Lightroom application and, thereafter, Lightroom will save all its reference and preview files on the external drive, together with the photo database. The preview file can get quite large, so this makes sense. More about previews later.

I decided to bite the bullet and do this now while Aperture is still manufactured and while the number of pictures in it is manageable. All told Aperture reports 4,056 images (which includes stacked copies so it’s not a meaningful number). Because this is a tiring process I am doing a few projects each day – there’s much to be said for breaking up your work into manageable chunks in this manner.

Before going further, just look at how bloated the Aperture application is becoming:

Aperture 1.5.6 – 193.5 mB
Aperture 2.0.0 – 305.5 mB
Aperture 2.1.4 – 315.1mB

Lightroom 1.3.1 – 69.4 mB
Lightroom 2.5 – 87.2mB
Lightroom 3 Beta – 91.1mB

Little wonder it’s not getting any faster. There is an incentive for writing tight code – things run faster – unless you are in the business of selling hardware, I suppose. And let us never forget that is the business Apple is in.

Now let’s compare the library structures.

Here’s Lightroom’s – the files are in their native format and could not be easier to find if that is ever needed:

Now here’s Aperture – all the overlay data thoroughly mixed in with the files in hundreds of sub- and sub-sub-directories – fancy finding your file here?

That, dear reader, is what is known as locking in the customer into your product. Reprehensible, not to mention lousy database design. Note that you can separate image files from previews and edit data in later versions of Aperture by using referenced files but that is not the default so who would know?

Here is the conversion routine to move files from Aperture to Lightroom:

In general, I find most of the writing on both Aperture and Lightroom seriously commercially conflicted, often being little more than hype for the photographer’s latest book or services. Accordingly, I have written the following instructions. As this routine worked fine with a ~3,000 picture database you may even conclude that it is solid.

1 – Make sure you have a good, working, current copy of your Aperture database on a separate drive. In Aperture, open all your projects. You want to do this project by project as Aperture’s Export function is unreliable and you want to be able to take bite-sized chunks to permit verification of the export.

2 – Close all stacks in the project. (Update: refer to the second comment by Nikos Bournas, below, on electing stack picks)

3 – Take a screen picture (Command-Shift-3) and print it from Preview. Select all the pictures (shift-click on the first and last picture) in one project. The purpose of the printout is to allow you to check off each project as it is exported.

4 – Click on File->Export->Masters and direct the export to your location of choice. If you are using Aperture 2.0 you will be asked whether you want to export IPTC and XMP data (camera,lens, etc) – do so. Make sure that destination for your exported files has sufficient room. If your Aperture library is 50 gB you will need an additional 50gB to store the Lightroom library – the database sizes are very similar.

5 – In Lightroom go to Library-Folders and create a new folder (+ sign) and name it the same as the exported project.

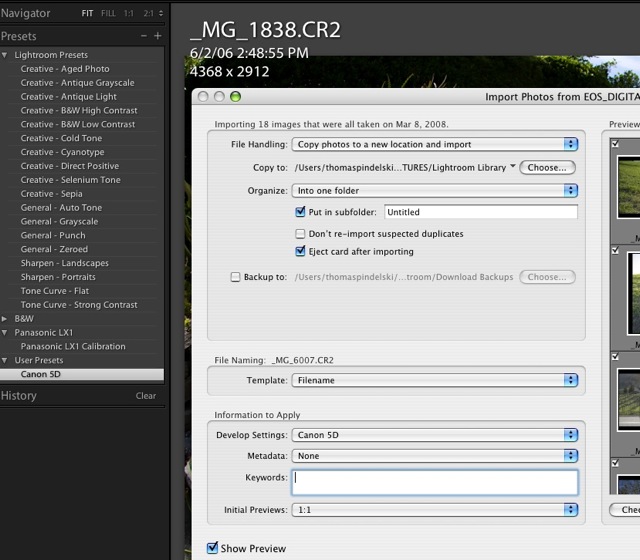
6 – In Lightroom click File->Import Photos from Disk, point to the exported Aperture masters and hit Enter. If Lightroom asks you to elect Preview size, elect ‘Initial’ for now. You can set Lightroom’s Preferences to alert you with a tone when an import is finished. Handy.

7 – If your Aperture project contains sub-folders, create sub-folders in Lightroom by highlighting the new Project folder you just created, then hit + to create each nested folder, naming it accordingly. Multiple layers of nesting are permitted but I would discourage this approach as locating files gets geometrically more difficult. Keep it simple. One enclosing folder for multiple sub-folders works best for me and largely reduces the need to enter lots of metadata for each picture in the hope of making it easier to find.

8 – In Lightroom drag and drop (shift-click for a contiguous range, Command-click(s) for non-adjacent files) the relevant files from the Aperture export to each nested folder. Lightroom will issue a warning message that moving files may take a while. With a speedy external Firewire drive the process takes no time at all, and I urge you to opt for Firewire over USB. Despite claims to the contrary, FW tests faster than USB2 every time. USB1 is a complete dog. Click to proceed. Once the import is done, check your files against those in Aperture visually and, if OK, mark off the project on the page you printed in #3, above. I actually ran Aperture and Lightroom simultaneously on my 1.83gHz, 2 gB MacBook (Intel Core2Duo CPU) and did get some spinning beach balls when switching between applications – hardly surprising when you look at the sheer computer horse power needed to run these things. However, the time spent is worthwhile in the interest of maintaining database integrity for Lightroom. I found that Lightroom’s import was approximately twice as fast as Aperture’s export.

9 – If your Aperture project has many folders, export masters from each folder in turn to make cataloging/rearranging easier, but do make sure that all the files in the Project have been distributed to subordinate folders. This is one of the biggest design errors in Aperture. You can have a master in the Project, or in the Folder or in both. Lightroom will automatically place any file in a folder to the containing project, which is the right way to do it.

10 – Files over 10,000 pixels on either dimension will NOT be imported and Lightroom will alert you how many exist in the directory you are importing from. This is very well implemented by Adobe – normally the source directory from which you are importing is deleted on completion of the import. However, files which are too large will be left behind with their directory. I have a few like this, all of them scans from medium or large format film, 175-225mB in size. I simply roundtrip these files through Photoshop (Image->Image Size) and reduce the file size to manageable proportions (100mB) – the original enormous size adds no functionality in any case and Aperture chokes if you try to print them. The reduced files are then imported into Lightroom.

11 – When you are done, make sure all the files I illustrate are on your disk drive (move them over if needed) and immediately back-up your Lightoom database and related files to a separate drive. These are the files you need to back-up:

I would advise against using Apple’s Time Machine for the back-up. The storage format is proprietary to Apple. Do a proper clone back-up using something like SuperDuper! or Carbon Copy Cloner – you will then be able to see the backed-up files just as in the original. If your primary drive goes down all you have to do is repoint Lightroom to the back-up – no restoration of files is required.

My 50gB Lightroom Library resulted in a 1.5gB Lightroom Catalog Previews.lrdata file. That’s where the Initial previews I elected reside. The Lightroom Catalog.lrcat file is a scant 38mB but will likely grow as I create more edits to my pictures. All the versions in Aperture will be lost unless you go back and export them – I did not as it’s simply quicker to re-edit pictures than to go through the agony of yet another buggy export. There is one exception – if you roundtripped an Aperture file through Photoshop, Aperture erroneously thinks it is a master so ‘Export Masters’ will export the PS version – that’s actually a nice bug in this case, as most of my round trips were to use Photoshop’s stamp and clone tool to remove dust, given the near useless tool in Aperture 1.5.6. To Apple’s credit, the stamp and clone tool has been improved and speeded up in 2.0, but too late for this user. Within Aperture the bug is serious – go to delete the PS version and Aperture will warn you that you are about to delete a master – completely wrong and not at all consonant with breeding trust in the product. This bug persists in Aperture 2.0.

Previews:

An understanding of Previews in Lightroom is key to smooth processing operation and avoidance of delay and irritation.

By electing ‘Initial’ previews when importing your files from Aperture you are telling Lightroom to create small thumbnail previews. These average 50kB in size (surprisingly large for their intended purpose) and are used to present the Grid view in Lightroom, thus:

You can see my nested directory structure in the left pane – it is identical to the structure in Aperture. Numbers like 10/12 indicate 10 masters with 2 additional versions – Aperture only reports the higher number. The snag with the Initial previews is that if you click on a thumbnail for a full screen or a 1:1 (actual pixels) view, Lightroom will pause (several seconds on my MacBook) as it generates the full size preview. Thus it makes sense to generate 1:1 previews for the whole database if you access your pictures often and have the disk space to store these. You need full size previews to edit a picture, check sharpness, etc. Stacked files are denoted by the white rectangles in the top left corner of the previews. Lightroom has the same stacking feature as Aperture, which is nice for aggregating versions when these are created. Shift-click to select, then Command-G to stack.

You can decide whether you want to generate full size previews for the whole library or just for selected folders or even for selected images. That’s nice. Highlight the library at the appropriate level. In the following illustration I have highlighted the whole library and executed the key strokes shown:

Note that if file bloat becomes an issue you can delete 1:1 Previews – all, some projects or just for individual images by choosing the delete level appropriately before executing the command.

Now my library includes a mix of Canon 5D and Lumix LX1 RAW files (10 to 15mB each) and a bunch of TIFF and PSD files (30-90mB each – mostly from film/scanner days of yore) with the scans outnumbering the digital originals by a factor of 2:1, so I cannot give you a rule of thumb for how long this process will take, but it is not fast. For my library, stored on an external Lacie 250gB Firewire drive the process took 198 minutes or 3.7 seconds per image. As the process is very CPU intensive, I exited all other applications and left the MacBook to cook while this was going on. Adobe thoughtfully provides a progress bar to let you know what is happening, together with a small thumbnail picture of the file currently being processed:

One great advantage of doing preview generation on a laptop computer, in contrast to a desktop, is that if the power goes down your machine will continue working (assuming you are connected to mains power and that your battery is charged). A strong argument for a back-up battery power supply for a desktop machine. I have no idea whether the preview file would be corrupted in the event of a power failure but something tells me the results would not be pretty and you really only want to do this once.

Your Lightroom Catalog Previews.lrdat file will swell, reflecting the increased size of the preview files – here are my statistics:

With Initial Previews only: 1.5gB
With 1:1 Previews added: 6.3gB

The main catalog file does not change in size as it contains original picture files only.

I say ‘added’ as the original Initial previews will be retained, as they are required to service the Grid view.

As I get very irate when the spinning beach ball shows up – a major driver in my decision to dump Aperture where version 2.0 is significantly worse than 1.5.6 – I will elect 1:1 previews with future file uploads to the Lightroom library. The last thing I want during a processing blitzkrieg is any pauses or delays. When you choose 1:1 previews on import you will see that Lightroom displays two progress bars at top left. The first reports picture import, the second preview generation. The latter takes some four times as long, but you can work on imported pictures right away as the grid view previews will already have been generated and a 1:1 zoom will force immediate generation of a large preview for the picture in question, albeit with an attendant delay if such preview has not yet been generated.

Suffice it to say that Lightroom has crafted this background processing in an elegant manner and Aperture 2.0 has emulated this approach – which probably explains why Aperture 2.0 file uploads are so much slower than in 1.5.6. Anyone telling you that Aperture 2.0 is faster in this regard is not comparing like with like as they almost certainly have preview generation switched off while doing the file upload. Doing an apples-to-apples comparison I have found that Lightroom 1.3.1 and Aperture 2.0 take the same amount of time to upload files from your camera’s card. For Lightroom that works out to 2 minutes for importing RAW files and another 4 minutes to generate 1:1 previews, using a 2gB Sandisk Extreme III card with 140 images on it.

Phew! Enough about previews.

Lightroom in use:

Whatever you say about Aperture it has one of the most elegant user interfaces in the software world. So objective comparisons are hard, especially as I have some three years with Aperture and just a few days with Lightroom.

I will comment further on Lightroom in use in subsequent articles, but my first efforts with Lightroom, which included a four hour heavy processing session with lots of retouching, use of sliders, printing, roundtrips to PS CS2 (for lens distortion correction mostly as Lightroom does not yet offer a plug-in to do this natively), disclosed none of the bugaboos that continue to haunt Aperture:

  • Lightroom did not slow down after a period of use. This happens in Aperture and dictates a reboot of the application – the bug has been there since version 1.0
  • No spinning beachballs – not a one! Try that in Aperture where’s it’s even worse in 2.0 than in 1.5.6.
  • No jerky, hesitant sliders in the processing controls. A worthwhile change for this aspect alone – not to mention a great deal of money saved on not having to buy Apple’s latest and greatest computer. I have read that Lightroom runs nicely even on G4 PPC Macs, and I’m inclined to believe it. So I tried it – read this. Don’t even think of doing that with Aperture.

And that’s just with the trial version with occasional reference to the on line (and quite horrid) instruction book. If anyone out there knows of a good aftermarket book which addresses Lightroom version 1.3 and which you have used please drop me a line (see my profile for the email address) or post a Comment to this piece. (Update September, 2009: Check out Martin Evening’s excellent book on Lightroom 2).

On the downside:

  • You cannot properly use dual monitors with Lightroom. No matter to me as I do fine with one big one. (This has been fixed in Lightroom 2).
  • The workflow approach is much more structured in Lightroom (Catalog-Process-Output), compared to the more free form approach adopted by Aperture. Engineers will like this and artists will not. Then again, how does a struggling artist afford a $5k 8-core Mac tower to make Aperture run half decently?

RAW conversion quality? Lightroom uses Adobe Camera Raw so it’s state of the art. Aperture 2.0 is great too. No complaints on either count though their respective track records suggest that Adobe will release RAW conversion support for new cameras far faster than Apple.

And now, finally, for some photography.


WW2 fighter. Speed Graphic 4″ x 5″, Vericolor, 135 mm Schneider Xenar. Processed in Lightroom

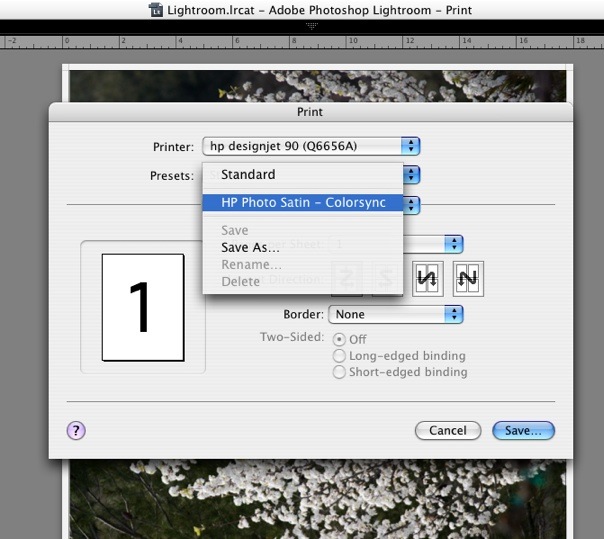
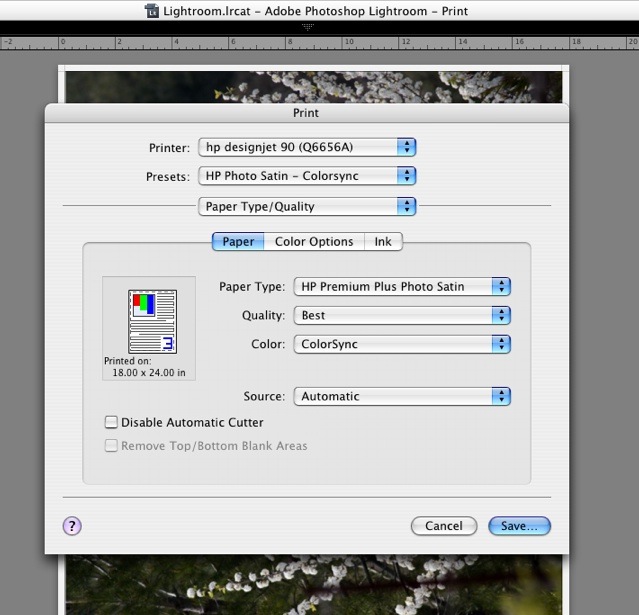
The original is a 100mB TIFF file – JPG Export took just three seconds. Spooling this enormous file to make an 18″ x 24″ print to the HP DesignJet printer took exactly 20 seconds. Try either of those in Aperture ….

Finally a bit of fun, because after going through this hell I need it.

For the digital snaps in my library (about one third of the total – the scans from film obviously have no data) here’s how my lens use breaks down (the 17-85mm is on a Digital Rebel and it looks like data for the Lumix LX1 are missing, so your are mostly seeing 5D data which exclude deleted files):

Neat, huh? Numbers testify louder than words to the quality – or lack thereof – of the Canon 20mm.

Snow Leopard update – November 2009:

You think things are getting better with Snow Leopard for Aperture? Think again:

One of the most read and commented Aperture posts on the Apple Discussions board

A cheap remote for the Canon 5D

Guess from where!

A wireless remote shutter release is a handy thing to have. I use one with an ancient Olympus 5050 for the Christmas family snap. That Olympus has more shutter delay than you want to know about, so it’s an exercise in frustration. Further, I would guess the much used Oly’s years are numbered (the plastic focus and zoom racks are the first to go in these P&S digitals) and whenever I want to include myself in a landscape picture it means resorting to the delayed action on the 5D (hell to find with all those buttons) and run for it to try and get my Olympian physique placed just so in the frame.

I ruminated about a Canon 5D remote but once I saw the price ….

And that one is wired! OK, so it has a timer and will probably make your breakfast, but at that price I’ll eat at MacDonald’s, thanks. I seem to remember they listed a wireless version for some $500 and if you read on you will cease wondering why it’s no longer available.

I remember thinking about the interminable delay of the Olympus when taking this year’s family snap (it’s been bugging me for years), and checked ePrey shortly after. Well for $10.99 and $11.99 shipping from Hong Kong I decided the risk was acceptable and as I have had nothing but success with the incredible studio flash remote I bought a while back, so I pressed the ‘Buy It Now’ button and forgot about the whole thing.

Well, it arrived today and I must say the gadget is totally awesome! It’s radio frequency, not line of sight, which translates to tremendous, non-directional range. And if interference is an issue (your brand new BMW starts itself and goes off the road, say) you have sixteen radio channels (16!) to choose from.

A CR-2 Lithium battery (provided) goes in the remote and the camera-end receiver comes with a 23A battery installed.

With the antenna extended the range is quoted at 320 feet! I gave up at 105 feet which is the length of my hallway (it’s raining outside so a longer distance was … out of range). With the antenna retracted, which makes the transmitter easily pocketable, I got 75 feet.


A couple of small pieces of Velcro keep the receiver attached to the LCD shade on the back of the 5D.

So if you need a wireless remote for your DSLR because you want to avoid shutter lag or you don’t want to risk a coronary while running into your landscape snap, blow $22.98 on one of these. I have not checked but I would bet that this device is made for most DSLRs out there. Heck, the DSLRs are made in China anyway, no? The picture on the box shows the receiver attached to a Nikon D200 and, if it helps, the inventory check-off tab on the box provides options for five different connectors, though I must disappoint you by disclosing that my Chinese is not up to snuff to make sense of these.

When you press the button on the transmitter, the first pressure gets you a green LED on the transmitter. That means the transmitter and its battery are working. This changes to red to on further pressure to indicate activation but be warned that it changes to red whether you are in range or not. To make the camera end functional, you do have to press the button on the receiver, one of whose LEDs will glow red when you do that. Fear not. The instructions state that the stand-by life of the receiver’s battery is 1,000 hours if you forget to switch it off. Based on my experience with the strobe remote, I tend to believe what they write. Further pressure on the transmitter button will make the second LED on the receiver glow red, indicating it has received the signal to fire the shutter.

Further, by pressing the button on the transmitter for 3 seconds with the camera set to bulb, the camera’s shutter will open and remain open until you press the transmitter’s button again. Use mirror lock-up and we are talking minimal vibration here.

There’s more. Set your camera for continuous shooting, hold the transmitter button for 3 seconds and the 5D (or whatever) will bang away until you press the transmitter button again. Maybe there is an option for making your breakfast after all?

It’s OK, you are not taking a job from an American by buying Chinese – the American can (and does) make more on unemployment.

And yes, every time you try to open that wretched rubber flap on the 5D you will wonder how long it will take Messrs. Canon to Fix That Flap.

One final thought and a word of advice from the instruction sheet, and I quote: “When monitor light glitters, the battery will be vanished, change new battery”. You have been warned.

Sharp and unsharp

A little glow can make the day

My piece on some of Irving Penn’s early work with a small negative got me thinking about how to emulate the effect using an all digital approach.

Aperture does not have the horespower to do these things, as we forever wait for plug-ins that do more than import and export files. So you have to resort to Photoshop, into which I roundtripped the file from my Aperture database. Thereafter, I applied Dave Beaman’s Ethereal Glow action. Download it, click on the downloaded file (this is for Mac users; Windows users will probably need some arcane incantations to make things work) and the action will become available in Photoshop’s Action menu which you can display from the Window menu. Click on the action, click the right arrow at the bottom of the Actions palette, wait a minute and you get the original transformed to the ethereal glow effect. Back into Aperture with the file and add sepia toning and you are done. Sure, you can mess with doing the glow effect in PS manually, but why bother when it has been done for you?

I did not add noise/grain as it did not work well in this example, but you get the idea. The effect is actually quite a bit more dramatic on a large print. Some parts of the resulting image are etched, some are glowing – not too far from Penn’s effort applyying re-photographing of the original and use of the point-focus enlarger, and a lot less work of course.


A corner of the estate. 5D, 50mm, 1/350, f/5.6, ISO 250


With glow and sepia toning added, plus a light crop

I’m not that keen on picture manipulation, but if that’s your thing there are dozens of actions to be found on that click-through page above.

Leitz Trinovid binoculars

A useful accessory for outdoorsmen

A good pair of binoculars is a useful tool to have along in the countryside – a fine discovery tool for those photographers enamored of long lenses.

I struggled along with any number of numbingly awful ones as a kid until, some twenty years ago, I finally acquired the ne plus ultra of binoculars, the Leitz Trinovid 7 x 42B. These remain the only piece of Leitz equipment in the family unless you count the lens on the Lumix LX1, allegedly made by Leica (their involvement was probably limited to design only).

These are distinguished in several aspects of their design. First, as is always the case with products of Leitz Wetzlar (those made through 1965 or so, that is), are the optics. Raise these to your eyes and Wow! You will never look through another binocular again. Second, the large inlet glass, 42mm in diameter, is a boon in poor light. Third, the field of view is exceptionally wide making finding subjects that much easier. Fourth, the 7x magnification is just right – not too high (shakes!) not too low (useless). And finally the construction is like they used to make them. Leatherette covers a light alloy chassis, special prisms constrain the bulk and the feel is like nothing since that 1960 Leica M2 I used for many years in film days of yore. A sensual delight. The ‘B’ designation means that the exit pupil is very large. Stated in English, if you wear glasses, as I do, you will be delighted.

Leica makes binoculars to this day. For all I know they even focus automatically – yeccch! They are ugly to look at, with all that fake machismo effect created by ridiculous rubber casings serving only to cheapen the aesthetics. I haven’t tried a pair nor will I. I already have the best. If you are in the market for a pair of binoculars, try and search out a good used set of these. Mine are not for sale!

Frescos and photography

The modern professional photographer is at a huge disdvantage

A recent email from a reader, a professional photographer, bemoaned the growing difficulty of making money in the profession.

Now while the Renaisasance is a period of great interest to me and I have oft exhorted photographers to study the great works of that greatest period of western art, it doesn’t merit extensive mention here simply because the subject is too far removed from the world of photography.

But the book I am reading, Michelangelo and the Pope’s Ceiling, is not just compelling reading, maybe the finest art book I have yet read, but it also goes to the heart of the pro’s complaint.

Look at the skill set Michelangelo had to bring to the equation. When Pope Julius II retained him to paint the vault of the Sistine Chapel (Julius was busy tearing down old St. Peter’s at the time – we are talking c.1508 here) Michelangelo had several problems.

First was the small matter of several tons of Carrara marble he had procured to sculpt the Pope’s tomb. They were sitting in a square around the corner from St. Peter’s when Julius decided to pour capital into the new cathedral, and hang the tomb. And hang paying Michelangelo for the useless marble. So Michelangelo was broke.

Second was the problem that Michelangelo was a sculptor, not a painter. He had created the two greatest sculptures ever, the Pietà, (though adherents of Donatello’s Mercury might differ) and followed up with the David, also not too shabby.


Michelangelo’s Pietà, St. Peter’s Basilica, Rome. 1499

Third, the Pope was a true believer in having only the best – Bramante was retained to design the cathedral, Raphael to do the walls in the papal apartments and when it came to the ceiling, it had to be on fresco, meaning a layer of wet cement that had to be painted within 12 hours if the pigments were to be absorbed by the cement. Michelangelo had never painted on fresco.

Now the painters and sculptors of the day, the same we now adulate, were regarded as little more than tradesmen at that time. Sure, highly paid tradesmen (just like the public school educated plumber today who, when he deigns to show up, does so in a brand new SUV), but they took their orders from their employers. If the Pope said I want the Virgin Mary right here, that’s what you did.

Unlike the more politically astute Raphael – I consider him the greatest painter of his age – Michelangelo cared not one whit for his employer’s preferences and proceeded to craft a large canvas sheet (the invoice still exists!) to screen his work from visitors to the chapel. My way or no way. Indeed, so confident was he of his skill that the book relates how he got in a physical fight with his patron who had tried to sneak in to look at the work. Luckily for posterity, Julius repented and the threatened death sentence for his painter was soon forgotten.

Michelangelo’s contract provided for a payment up front, one half way through, then a final payment on completion. ‘Half way through’ meant two years, after many false starts as the sculptor learned just how hard fresco painting was. In other words, he had serious technical problems with the composition of the concrete, its absorption rate, etc., etc. Like photo processing in the dark ages of the darkroom. But the artisan in him triumphed and two years later he and his team unveiled the first half of the ceiling, to universal approval. God alone knows what Julius would have done had it gone down poorly. Mercifully his syphilis was not playing up at the time.

So look at the skills Michelangelo had to bring to the equation. Negotiation, procurement, relearning how to paint, mastering a new medium, man management (it takes lots of people to build scaffolds and make concrete), a psychotic, driven employer, mastery of the latest in pigments and colors, composition, cartooning, transfer of the cartoons to the wet fresco. The list is endless. And the one essential skill, which cannot be learned, was the fact that he was a great artist.

Now think of the modern photographer. Let’s assume he knows how to take good pictures. Unlike Michelangelo and Rapahel and Bramante, he has enormous competition. After all, is it not true that anyone can take a photograph? The barriers to entry are non-existent. There is no trade school or years of apprenticeship to foster development of technical skills. Why bother when it’s largely done for you by the people at Nikon or Epson or whatever? Sure he has to have marketing skill to find a client but unfortunately for him his client can get most of what he wants at very low cost on the web. His art, in other words, has been commoditized. The premium for skill has been drastically discounted.

Step back and look what has happened to western hemisphere people. Maybe it’s best illustrated in the story of the two American tourists (one imagines they must have been Texans) who, presented with yet another priceless Renaissance church on their trip to Italy, yet keenly aware that their flight back home is but two hours away, are posed with a quandary. How to take it all in during the time available? “Simple”, says the hubby. “You take the outside honey, and I’ll do the inside”. Cameras clicking, videos whirring.

So in a world increasingly suffering from short attention spans who has the time, let alone the interest, to absorb a beautifully composed, perfectly lit, artistically printed photograph? Who cares when you can see something even better in video on the truly ghastly YouTube?

So the professional photographer’s lament of how it’s getting harder to make a living at his art is not hard to understand. Anyone can push a button. Few can paint a fresco ceiling.