Category Archives: Photography

A ten year digital device

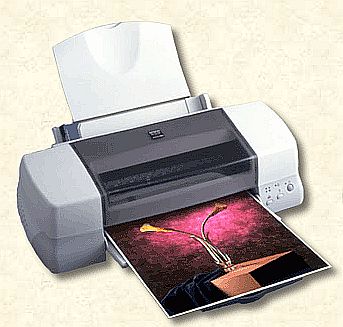
The Epson 1270 printer

When it first appeared on the market six years ago, the Epson 1270 color dye ink jet printer was the first consumer priced printer which could make large – meaning 13” wide and up to 44” long – prints with high quality and repeatability. I bought mine new in March, 2000 for $539.05 and proceeded to produce hundreds of color and monochrome prints with it. First in 8” x 10”, later in 13” x 19” sizes, which makes for a nice 22” x 28” wall sized matted, framed result.

I’m not writing this because the Epson has given up the ghost. Far from it. The only reason that I know exactly when I bought it and how much I paid is that I just resurrected the original shipping box from the attic and found the sales invoice in there. You see, the Epson will soon be making its way east to my nerdy friend whose current printer is limited to 8” x 10”, and he know and loves the quality this machine is capable of, reliably producing at 13” x 19” prints.

Ink remains easily available, even if all the colors are in one cartridge and the Epson’s software is about as good at predicting the ink levels as the Federal Reserve is at predicting inflation. Which is to say it gets it in the ball park but don’t stake your life (or next print) on it. Epson sold a lot of these wonderful printers and given the profit margins on ink sales you can bet fresh ink cartridges will be available for a long time.

Conservatively, I’m guessing that the 1270 has at least another four good years left in it, which makes for a ten year life in a digital age where products are seemingly obsolete days after hitting the market. Epson made the 1270 obsolete soon after I bought mine and eventually switched to pigment based inks with claims of great longevity. Didn’t worry me one bit. I have framed originals which are six years old and they look as fresh as the day they were made. I simply do not display them in full daylight eight hours a day.

One of the great appeals of the Epson 1270 was that its use of dye based inks, despite their reputation for fading, resulted in a color print quality very similar to that obtained with the old Cibachrome process. This was, for most, not something to be undertaken at home, as the temperature margins of the chemicals were narrow to put it mildly and their toxicity comparable to the effluent from Chernobyl. What Cibachrome gave you was a wonderful depth of color albeit at the expense of high contrast, so it matched up nicely with milder emulsions like Kodachrome II and, later, Kodachrome 25 and 64, provided your exposure was spot on. Paired with that old grain hound GAF/Ansco 500, Cibachrome was a dream. It was a strict teacher, but get the exposure right and the dynamic range was there for all to see.

The only reason the 1270 is moving on is that I find I want to make 16” x 20” and 18” x 24” prints more often, and if that does not sound like much of a change the latter size is almost twice the area of 13” x 19”. That’s a lot bigger when it comes to visual impact.

So B&H Photo has an order from me for a Hewlett Packard DesignJet 90 (they are backlogged, suggesting the secret is out) offering dye based inks which, miracle of miracles, are allegedly fade resistant. I toyed with the idea of the Design Jet 130 model which goes up to 24” wide, but concluded that prints that large were pretty much the exception rather than the rule for me, so common sense prevailed over machismo.

Truth be told, I am a tad apprehensive about the new printer. Not that installing the thing worries me – heck, with an Apple iMac it’s just one more ‘Plug and Play’ exercise. No, as a long time user of HP’s 12C calculator (a device now some 25 years old!) my wariness results from my all too great familiarity with HP’s instruction manuals. Hewlett Packard was always an engineer’s company, run by and for engineers, with the brief exception of a disastrous, mercifully brief, time under a chief executive who confused her posterior with her elbow daily, while spending far too much time on the former in the corporate jet. Now that the company has returned as an engineering powerhouse, I’m afraid that the same people who wrote the manual for my 12C calculator will have been involved in the book for the DesignJet. They or their kids.

On the other hand, like all good engineers, they probably believe that instructions are for losers, so the first thing I propose to do when the machine finally arrives is to pitch the instruction book. Worked with the HP 12C and Reverse Polish Notation was never an issue for this Pole. Any descendant of a proud nation that can charge Panzers on horseback needs no instruction book. And it doesn’t hurt that I have an honors degree in Engineering earned before the days of ‘open book’ exams.

Goodbye Epson. You delivered beyond any rational expectations.

A break in the storm

More than just a rainbow

Name any of the world’s great democracies and the chances are that you will find its happy residents indulging in the cocktail hour before dinner. America, Britain, France, German, Australia, Brazil – all favor this pastime which many regard, myself included, as the very touchstone of civilization.

Then look at those dour nations who struggle with the very idea of ‘one man, one vote’; God forbid ‘one woman, one vote’ for many do not even allow women the freedom of the ballot box. The Saudis? They don’t drink. The Russians? They do nothing but drink. The North Koreans? Please….

So after a day of truly wretched weather which saw thunder showers every few minutes interspersed with brief rays of sunshine, the thought of the daily libation was very much on my mind as I made my way to the freezer with its gin every bit as cold as the glass next to the bottle. Just before opening the refrigerator I glanced to my left and there it was. A superb rainbow gracing the old estate – clear sky to its left and threatening clouds on the right. Now you should know I’m pretty much blind without my glasses but that didn’t stop me from rushing to the office to grab the 5D, nearly damaging myself on that insouciant boulevardier Bertie the Border Terrier en route, and exiting stage left at a rate of knots that would have given pause to the staunchest of Olympic competitors.

Forget the old wives’ tale that landscapes are a stationary subject. Not a bit of it. Give the elements five seconds and, likely as not, the effect is gone. So throwing caution to the winds I banged off a couple of snaps even though what I saw through the viewfinder was mostly a ghastly blur, trusting to the gods and the Canon’s automation to get things more or less right.

I rushed back in at scarcely lower a pace and placed the card in the reader. Locating my glasses gave confirmation that all was right with the technology from Canon HQ, but when I loaded the picture into Photoshop and snapped it up to 100% original size (that’s some 30″ x 45″ on a print with the 5D’s full frame sensor) it became clear that the otherwise denuded tree on the right was replete with more birds than you could shake a stick at. The small picture here scarcely does it justice but a few moments later as I sipped the soothing elixir, the magic lighting long gone, I could not but help reflect on this wonderful bit of serendipity.

After the Purge

Equipment then and now.

I took a few moments to take stock of how my equipment has changed over the past quarter as a result of the move to full frame digital.

Before:
3 Leicas (IIIG, M2, M3)
1 Leicaflex SL for long lenses
1 Bessa T for the 21mm Elmarit
21, 35, 50 (3), 90 (2) and 135mm Leica M lenses
200 and 400mm Leica Telyt lenses
Rollei 3.5F
Rollei 6003
40, 80, 150 and 350mm Rollei lenses
Rollei extension tubes
Mamiya 6MF when I didn’t want to drag the Rollei about
50, 75 and 150mm Mamiya lenses
Crown Graphic 4” x 5” with 90, 150 and 210mm lenses
Canon 4000 35mm scanner
Nikon 8000 medium format scanner
Epson 2450 large format scanner
HP DJ90 large format printer

After:
Canon EOS5D
24-105mm Canon lens
1 Leica M3
35, 50 and 90mm Leica M lenses
200 and 400mm Leica Telyt lenses adapted to the Canon
Crown Graphic 4” x 5” with 90, 150 and 210mm lenses
Epson 2450 large format scanner
HP DJ90 large format printer

Quite a reduction in clutter! The original goal, recall, was to get medium format quality without the bulk and complexity. The 5D came though with flying colors on that front, equalling or exceeding medium format quality at 30″ print sizes, while making pictures possible that would never have been taken on film, thanks to Image Stabilization and a sensor which renders grain free ISO 400 images.

Now I’m keeping the Leica M3. Not rational, I know, but it has been a dear friend for more than thirty years and we are not ready to part company. Yet. However, it seems appropriate to focus on the need for the 4″ x 5″ gear. If you can actually expose the film in this beast, large sharp prints are trivial, owing to the enormous size of the negative.

So I compared 30” prints from both and, interestingly, there was little to choose. It seems easier to get a broad dynamic range from negative film than from digital, the latter needing more attention to exposure. Like using slide film. My large format Kodak VC160 negatives are scanned at 2400 dpi on a well tuned Epson 2450 flat bed scanner, using Silverfast Ai software. Doubtless drum scans would be even better but after waiting for two weeks for the film to be processed, I’m not about to wait two more for the scans.

For what are very similar scenes, the technical details could hardly be more different. Here’s the 4″ x 5″ picture:

This was taken using a 210mm Rodenstock Sironar lens, probably 4-8 seconds at f/22. A massive Linhof tripod was used for stability. That lens is similar to a 75mm on 35mm. Setup time to take the picture was some five minutes. Processing was by Calypso Labs in California – an outfit that literally needs to clean up its act, judging from the amount of dust on the negative. The scan on the Epson took approximately 20 minutes. The file is 250 mB (!). Unsharp masking in Photoshop was 45/1/0 – in other words not a lot.

Now compare this with the Canon EOS 5D snap taken a week later.

Here I can disclose the technical details with certainty – they are part and parcel of the file. The shutter speed was 1/15th with the camera hand held on a monopod. ISO was set to 400 to allow a faster shutter speed. That’s a nice attribute of the Canon – ISO is used to control shutter speed. Up to ISO 800 grain is simply not an issue. The lens was fully opened at f/4 at a focal length of 40mm. Setup time was maybe 10 seconds. So the lighting was identical – 1/15 @ f/4 @ ISO 400 is nearly the same as 4 seconds @f/22 @ ISO 160. The original most certainly did not need any dust retouched, and I did not have to wait weeks for the negative to come back. The file size is 73 mB. USM in Photoshop was 250/3.2/0 – much more than with film and reflecting Canon’s own recommendation that the user starts at 300/0.3/0 to overcome the softening effect of the anti-aliasing filter in the camera.

So as a landscape camera the 5D excels. Meanwhile the Crown Graphic is on probation. There will be rare occasions where something larger than 30″ x 40″ may be called for (I cannot immediately recall ever having made a larger print) in which case a drum scan and a professional printing house would be required, with goodness knows how long a lead time. That is, of course, if color film in this size is still made when the need arises.

A Gorgeous Bit o’ Bottle

Just mind you don’t fall in the water.

Hearst Castle is the most popular tourist destination in central California so I took the precaution of booking a ticket in advance rather than be faced with a long wait for the tour bus which takes you some two thousand feet above sea level to Hearst’s opulent home. While I may have trashed Hearst for his part in dragging down the quality of journalism, a visit to his Castle on the central coast makes me feel a lot better about how he spent his money. As one of the tour guides pointed out, this magpie of a man expended some 78 of his 81 years collecting, starting with a trip to Europe aged three when he asked his mother why they couldn’t simply buy all the the things he liked. Got to like that!

While waiting for the bus – I chose Tour 2 which takes in the upper levels with all the living quarters, the kitchen and the two pools – I chanced on a fellow photographer using a pretty exotic looking Canon L lens finished in white enamel. Now I had seen these things at televised sports events but had never actually encountered someone actually using one, so my curiosity was piqued.

I confess to being in two minds about that red stripe that Canon places on its best glass. On the one hand it tells fellow photographers that you are serious (or maybe just seriously rich) about your images. On the other, it smacks vaguely of driving around in a Rolls Royce or Mercedes. Rather ostentatious and an invitation to thieves everywhere. Short of resorting to brush and paint, there’s really no simple way of blacking out the offending red stripe, unlike the ease with which electrician’s tape can be used to take out the obnoxious markings on the camera’s body.

Mick M. responded that the lens was a 70-200mm f/2.8 L zoom, and an impressive piece it is. Hard not to be noticed with all that white paint which, I suppose, must leave the nature photographer for ever seeking camouflage. Mick then opened his camera bag to disclose a veritable cornucopia of Canon L glass. Let’s see, there was a 24-70mm zoom, an 85mm f/1.2 portrait lens (yes, f/1.2!), an extender for the zoom and a strange looking duck with an enormous, bulbous front element. Proferring it, Mick explained this was a 14mm f/2.8 ultra wide angle. Not a fish eye. A genuine wide angle. This, I confess, had me greatly intrigued, and when Mick explained that his cameras were a 20D and 10D, the fact that these have small image sensors led me to pounce.

“Why not stick that wide on my 5D and see what 14mm really feels like?”. It was the only trump card I held, what with the one body and just the 24-105 L on it.

What ensued was that the loudest sound to be heard in Hearst Castle’s parking lot was that of jaws dropping. Mick’s, when he held the camera up to his eye, and mine shortly after. Now I had used a 21mm Asph Elmarit on my Leica for many years, to the extent that in some ways it had become my standard lens. Despite the cheesy, distorting, plastic viewfinder it came with, the lens itself was seemingly perfect in every way. Sharp at all apertures, compact and distortion free, it left nothing to be desired optically. Point it into the sun and flare was noticeable by its absence. The Leica 21mm has moved on once I concluded that 24mm at the short end of the Canon’s zoom range was fine for my purposes, but not without a twang or two on the heartstrings. We had become firm friends.

I can only guess that there is some sort of macho rivalry between lens makers – maybe I should refer to them as programmers – when it comes to making the widest lenses. I checked B&H and Leica has a 15mm for their reflex camera (costing about as much as a new car, needless to add), Nikon has a 14mm, and the various after-market manufacturers have 14s and 15s aplenty. Given that all of these run $1000 or more, they can hardly be mass market items and about the only use I can envisage on a daily basis is for unscrupulous realtors looking to make interiors larger. “Here is the bathroom” instantly become “Here is the palatial bathroom”.

Nonetheless, the impact of the lens in the viewfinder was overwhelming, and framing with it, walking towards a subject, gave this user a distinct feeling of unsteadiness owing to the width of the field of view, far in excess of what the human eye perceives. To cut a long story short, Mick very generously offered me the use of the 14mm and I reciprocated with the use of my 5D into which he needed only place one of his digital film cards to have a go. I got first go and on arriving at Hearst’s home in the sky one of the first sights was the outdoor pool. The weather was just so, a wisp of a cloud or two in the sky and a pleasant mild day in California. How do people in the mid-west get through the winter?

Having a fair amount of experience with ultra-wide lenses I knew enough to avoid the bane of all these optics which is boring, extraneous foreground. You really have to get in close, so I proceeded to attack the pool with aplomb, forced to sight through the finder, never having used something this wide before. I can ‘think’ 21mm, but 14mm is like a scene from Hitchcock’s ‘Vertigo’ by comparison. And vertigo was the order of the day as I teetered on the edge of Hearst’s ten foot deep outdoor pool! Now you absolutely have to use the hood with this lens, if for no other reason than there is no way to protect the cyclopean front element with a filter. It is simply too bulbous. And here’s a snap of the pool taken with Mick’s lens.

Though taken directly into the light, the lens seems flare free with just one small internal reflection visible in the picture. An extraordinary piece of design and execution. Will I be rushing out to buy one? No way. It’s the sort of thing I would use once a year and is inconsistent with my desire to minimize equipment, but thank you, Mick, for your generosity in allowing me to take a few pictures with this gorgeous bit o’ bottle.

If you would like to see a travelogue of a few more snaps from Hearst Castle, please click here.

And for a cheaper, wider, better lens than the 14mm, just click here.

Fixing distortions

A tweak in Photoshop CS2

I’m finding the definition of the Canon 24-105mm IS L lens to be equal to anything on medium format or from Leica on 35mm. What is not so good, however, is that at 24mm you get noticeable barrel distortion (the sides bow outwards) and darkening in the corners.

Sometimes these aberrations do not matter but if you have strong horizontals or verticals or large smooth tone areas, they can be irritating to put it mildly.

I had thought that the only way to correct these was to take RAW images and make the adjustments in the very nice Adobe Camera Raw (ACR) interface. As I have written earlier, proper exposure technique results in little added benefit with the EOS 5D’s full frame sensor using RAW compared with JPG Fine, at least for this user. Plus I’m getting comfortable with the in-camera processing of JPGs offered through the Picture Styles option. JPGs have the great benefit that file duplication is avoided and, of course, file sizes are smaller meaning import to your computer and loading in image processing software are both much faster.

Stated differently, I’m of the growing opinion that RAW is overrated. I do not see better definition or tonal range in any large prints I care to make. I have no need for an unprocessed original. Once I have processed it I like it as it is and cannot see changing it again. And the thought of having to catalog two images of each picture is complexity in search of confusion.

Well, looking through the myriad menus of Photoshop CS2 the other day, I chanced upon Filter->Distort->Lens Correction which offers the same ability to correct lens aberrations in JPGs as ACR does in RAW.

Here’s how it looks corrected on a screen shot:

Both barrel distrortion and vignetting are quickly corrected.

I’ll experiment some more with RAW but JPG Fine is just, well, fine for me.