Category Archives: Photography

Rotating your artwork display

Mirror retainers do the trick.

As any art museum creator what fraction of his inventory is on display at any time and you will learn that most of the catalog is in the basement. Museums rotate displays all the time, thus exposing new works from their basement for all to see and making the viewer’s repeat visit always fresh, without overloading the visual senses.

For large prints I have long standardized my mounts at a 22″ x 28″ size. This allows the use of like-sized mats with varying apertures, be they 8″ x 10″, 13″ x 19″ or 18″ x 24″. Traditionally I have glassed and framed these into what is a pretty costly ‘per print’ assembly, and a labor intensive one at that. At $70+ a framed, glassed original, two-thirds of the cost is comprised of the frame and glass.

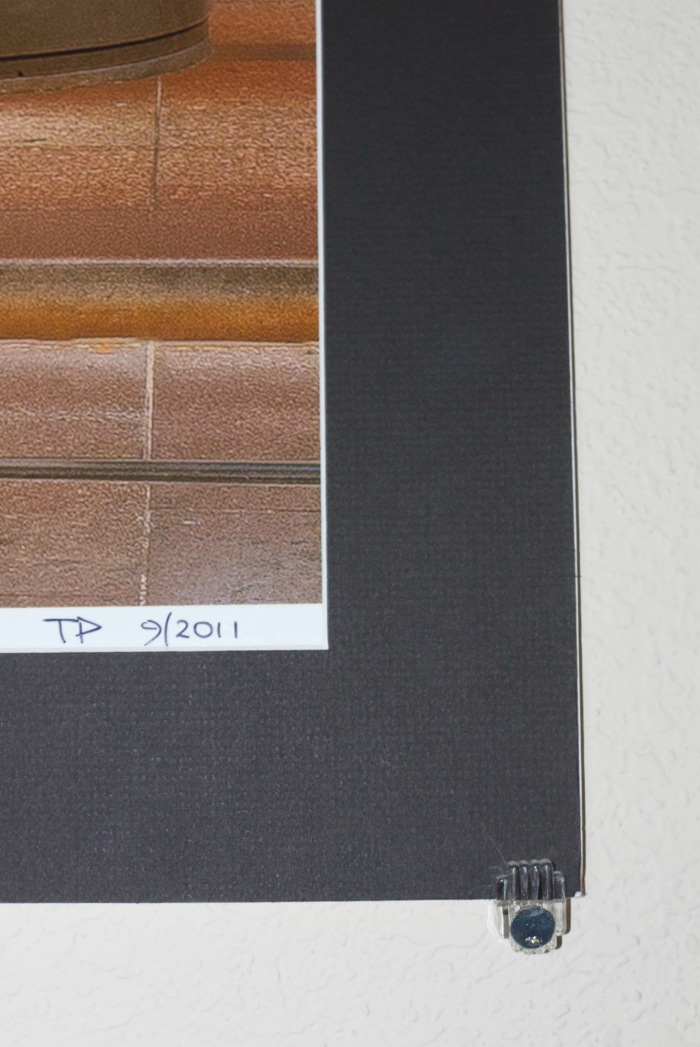
I am moving away from this semi-permanent approach by using mirror mounts to hold prints on the wall. The prints are not glassed or framed. The mirror mounts run $2 a packet of four at the hardware store and the provided, ugly, drywall screws are replaced with 1″ roofing nails. These have a large, flat, shiny top and can be hammered into place in seconds, needing only a spirit level to get things aligned just so.

Mirror mount and roofing nail in place.

Using a 3/16″ mount and standard thickness mat, the mat + print + mount ‘sandwich’ can be replaced with another like-sized print in seconds, simply slid into place using the existing mirror retainers. The thickness of the sandwich is just right to allow the mirror mounts to gently hold things in place, the rest being done by gravity. The mat is glued to the mount using 3M Double Sided tape.

The finished display is simple and elegant, with the mirror fasteners sporting a pleasant Art Deco retro look. And, like that museum curator, you can switch what is on display with ease.

Redimat sells archival mounting board in 22″ x 28″ for $7.10 with mats running some $22.05 plus shipping. So call it $26 a print if bought in quantities of more than ten. That’s a lot less than a glassed, framed print will run you. It’s also a great presentation for those interesting in selling their work, requiring just the addition of a glassine envelope ($0.50) for protection when displayed in a sawhorse at an art show.

Want to distinguish a photographer from an equipment fetishist? Simply ask what percentage of his annual outlay is on gear compared to prints. The higher the percentage, the lower the quality of the work, for the most part.

Nova

A no nonsense place which supports the arts.

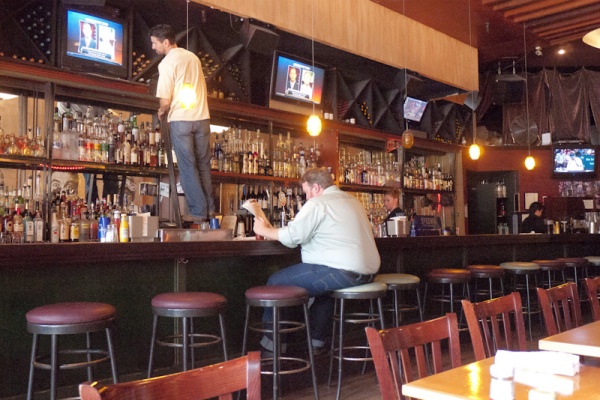
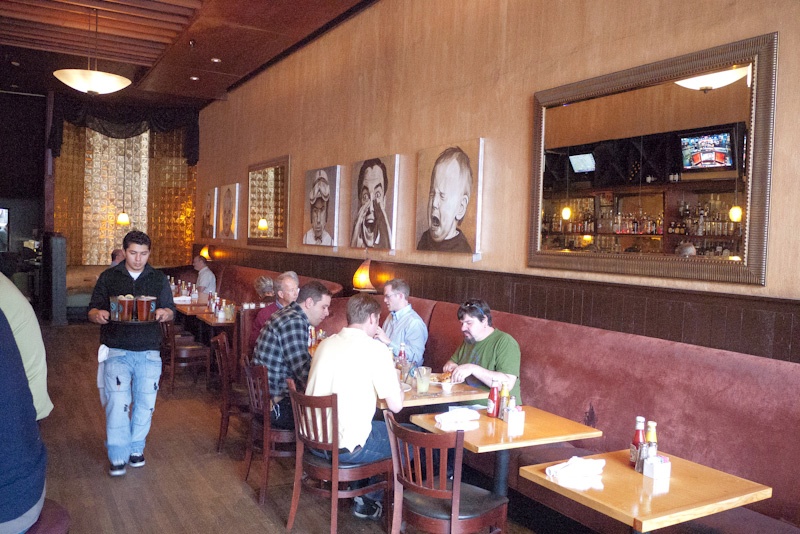
Nova Bar on Second Street between Bryant and Brannan in San Francisco is your regular, no nonsense bar and restaurant. Good food, a relaxed unpretentious atmosphere and when I was there the other day for a snack, a great display of art by Paul Morin.

Nova Bar and Restaurant. G1, kit lens @14mm, 1/60, f/3.5, ISO1600.

The crowd here is strictly from the arts world – banksters need not apply. The music volume is just right. Morin writes about his work, examples of which you can see above:

Paul Morin paints portraits that emphasize character. By capturing a look of amusement, bewilderment or other quirky expression, often accompanied by some kind of prop, Paul delves into the personality of his subjects much like a candid snapshot reveals the moment-specific projection of a person’s inner thoughts. Painted with silverleaf backgrounds, these large scale portraits capture all available light in their environment, emphasizing the dimensional qualities of Paul’s realist style.

“In my exploration of the human figure, I try to bring movement, expression, and impact to the physical boundaries of the canvas. ‘Scale’ is a very important concept for me — not only the size of the canvas, but how the elements fit within the canvas. I strive for immediacy and monumentality in my work. A moment caught in time but also a timeless sense of grandeur.

My use of color relies on nature but is never a slave to it. My technique is based on the old master techniques of 17th century Italian and Flemish painters. Though rooted in tradition, my work has the impact of contemporary painting. The figures confront — they meet the viewer half way (sometimes more than half way). Through layers of under-painting, I am able to bring a sense of movement caught, which brings life to the image — an impression that the expression will change suddenly, or a muscle will ripple. ” ~ P. Morin

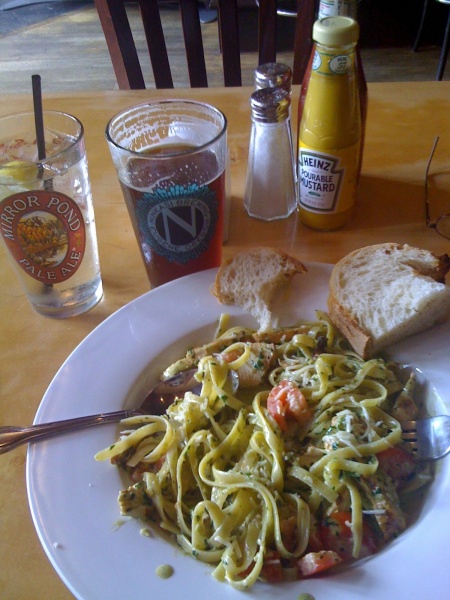
The location is just across from South Park and I enjoyed a fine pesto linguine with chicken washed down with a Ninkasi draft red.

Snapped on an iPhone 3G.

As you can see, there’s no escaping the obligatory jumbo, who has consumed more in his pathetic excuse of a life than would feed a third world nation.

Glutton. G1, kit lens, same data as above.

MacMini – just say No.

Horribly overpriced.

Let me preface this piece by saying that I own the previous generation MacMini with the Core2Duo CPU. It does service as a movie file server and has attached to it, using USB, 10 tB of HDDs containing movies. It’s small, quiet and fits in easily with the other electronics required for decent pictures and sound with a modern TV, though the poorly engineered slot loading DVD drive needs constant cleaning. However, as a stock computer for photo processing I can’t think of a worse choice. (OK, I can, but this writer does not use Windows).

This piece was prompted by a friend who asked whether the MacMini is a good choice for photo and video processing. The short answer? Not remotely.

The Mini fails on many fronts. The heat management is awful. The very last thing I would ever do with mine is use it to rip DVDs or compress movies using Handbrake for the iPad, having tried it just once. Try it on a Mini or any iMac, for that matter. Fire up the (free) Temperature Monitor from Bresink Software, invoke the history chart window and watch the CPU temperature go ballistic from some 105F (ambient) to 160F+ when ripping or compressing. That’s very close to the temperature limit of the CPU used. Even to get the ambient down to 105F I use a fan utility to spool up the pathetic single fan – there’s no room in the box for more – over the inadequately low stock setting.

Try and add more memory (easier in the latest Mini) or a larger HDD, and I have done both, and you have to be pretty smart with tools not to damage something when you crack the case open. It’s obviously the last thing Apple wants you to do given their default ‘form over function’ design philosophy.

The latest Mini addresses only the ease of RAM replacement (now easy, through a cover in the base) and use with SDHC cards. It has a reader, albeit inaccessibly placed in the rear. It now uses an Intel Core i5 (or i7 for another $100) CPU but both are significantly detuned, likely owing to heat management problems. The Mini’s i5 runs at 2.5gHz (3.3gHz is stock if you buy the CPU in a box) and the i7 manages a poor 2.7gHz (3.6gHz stock). The stock, boxed CPUs can be overclocked to 3.6gHz and 3.8gHz without voiding the warranty, if you buy the ‘K’ unlocked models for a $20 premium.

Not that you even need to overclock the i5/i7 if you make a Hackintosh. The i3 built for me by buddy FU Steve runs as fast as the i5 in the Mini.

Short of buying a MacPro ($$$$$) your only choice for robustness, ease of maintenance, proper cooling and reliability is a DIY Hackintosh. The iMac is not an alternative. It comes with a glossy screen which cannot be properly profiled for photographic use, owing to the restricted gamut. Both features help the machine pop when displayed in the Apple Store but neither does anything for photo processing veracity. Further, the iMac is every bit as heat challenged as the Mini (I have lost three iMacs from overheated GPUs so it’s not like I am making this up). But unless your time is worth so much that you don’t care (in which case you should buy a MacPro) just compare prices.

Here’s the Mini with 8gB of RAM and a 500gB HDD. You need the external DVD drive as the new Mini has none – go figure. You need the DVI adapter to actually make a regular monitor work.
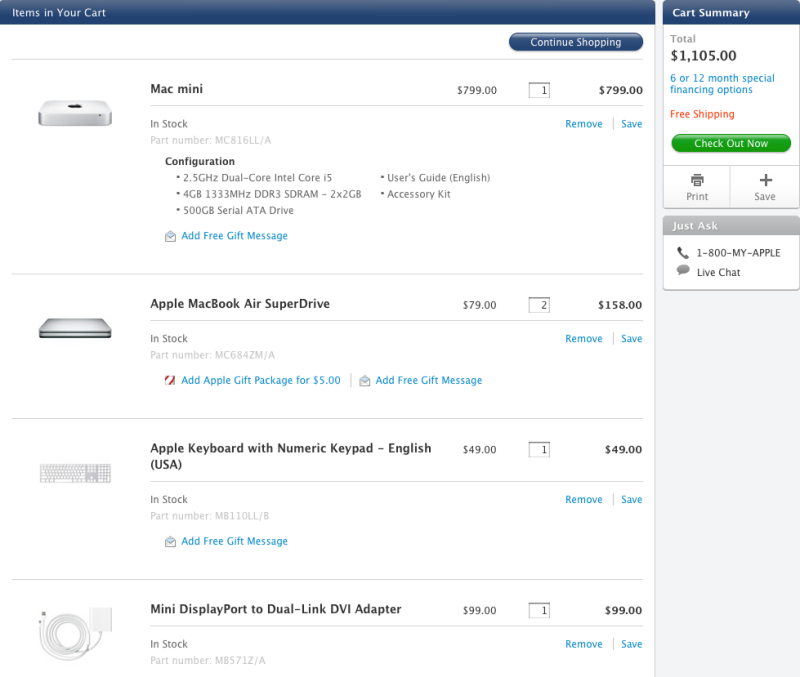
That’s a whopping $1,105 and you still have to add a mouse.

Now compare that to my HP10 Hackintosh. This runs an i3 CPU (as fast as the de-clocked i5 in the Mini), comes with a way superior dual-DVI Nvidia 430 graphics card (compared with the poor integrated one used in the Mini which shares its space and heat output with the CPU with which it is integrated) and has enough cooling for a small block V8:

  • Intel i3 CPU – $124
  • Coolermaster 212 Plus CPU cooler – $28
  • Gigabyte H67M-D2-B3 motherboard – $100
  • 8gB Corsair 1333mHz DDR3 RAM (same spec as the Mini) – $60
  • EVGA Nvidia GT430 graphics card with discrete fan – $64
  • Coolermaster 371 case with case fan – $40
  • Thermaltake 430 watt power supply – $41
  • Kensington wired keyboard – $38
  • 500gB 7200rpm 6gb/s HDD – $40
  • Sony DVD reader/writer – $40 (two @ $20)
  • IOGear Bluetooth dongle – $12
  • Broadcomm wireless card and PCIe-MiniPCIe adapter – $40
  • OS Pussy, err Lion – $30
  • SDHC card reader – free with many SDHC cards -$0

Total for that little lot? $657.

Expandability – any number of internal SSDs or HDDs can be added in minutes. The i5 or i7 CPU is a drop in replacement for the i3 used. The graphics card supports two DVI-D single link or dual link monitors (meaning you can use two 27″ or 30″ whoppers with any dual-link DVI cable). Heat rise when ripping or compressing a DVD? From 84F ambient to 115F – compare that to the 160F+ in a Mini or iMac.

Assembly time – 1 hour. 2 hours if this is your first Hackintosh. Lion installation – 1-2 hrs with the free modern tools now broadly available and easy to use. And this will not only last you, if anything breaks a replacement is 24hrs away by mail order, with no part costing over $124.
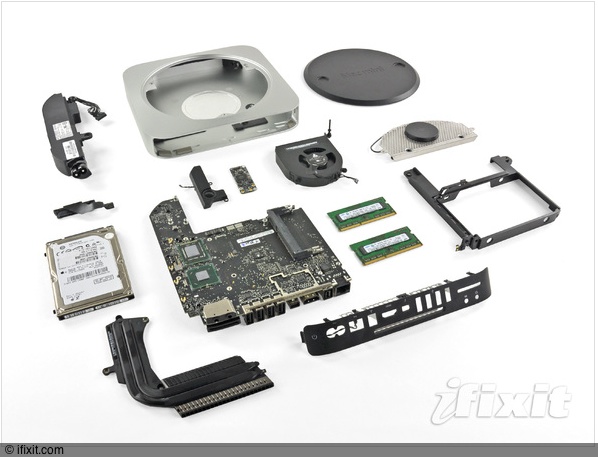
Impossible to cool properly under stress. The latest MacMini, dismantled by iFixit.

Here, by contrast, is a CPU temperature chart from my i3 Hackintosh, ripping and compressing a full length DVD – a real stress test:
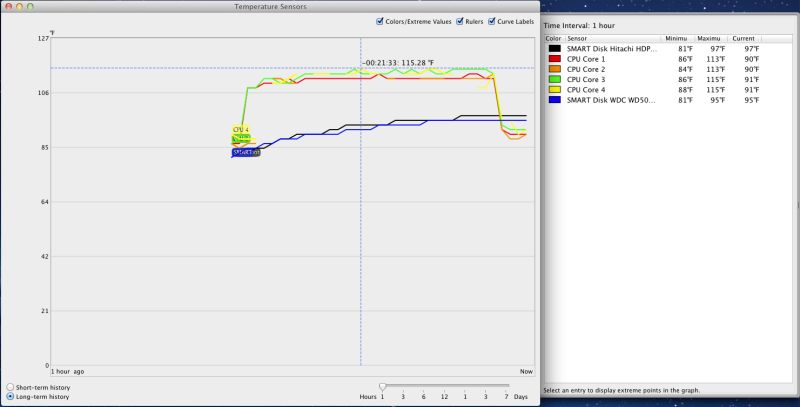
Stress test – Coolermaster 212+ CPU radiator used.

If you want to save $28 and use the stock Intel CPU fan shipped with the i3 CPU, your CPU temperature will rise to 149F, which has to be a false economy. $28 for the large and efficient Coolermaster 212+ radiator to keep it really cool? I can’t think of a better way to buy reliability and longevity.

The Mini is the worst possible choice for a hard working photographer who stresses his gear. Buy a MacPro or build your own. And if you need to do heavy movie compression, this is the machine for the job. Yes, the Hackintosh comes in a big box, enough to hold many Minis, but why would you care? Do you want looks or function?

If you really want to try and spend as much as Apple will charge you for its compromised MacMini, you will end up with a rig sporting an overclocked i7 CPU, a better motherboard (the one I use above does not support overclocking), a sexier box and performance 50% better. But you will fail on the spending front as you will still have $200 left over. Hey, it’s your money.

What is your time worth? The true comparison is between the $657 Hackintosh here and a like-spec’d MacPro which runs $2,973. Assuming it takes four hours to build the Hackintosh for a saving of $2,316, that figures to $579/hr, or an annual income of $1.2mm. So if you are making $1.2mm or more annually from your labor after tax, buy a MacPro as your time is worth too much to waste it on computer building. And congratulations – you are in the top 1% of US plutocrats who control 50% of the country’s wealth – a statistic last reached in 1929 ….

What use is the Mini? For light processing, web surfing and the like, it’s fine. None of these stress the Mini’s poor thermal dynamics. For use as a movie server or for accessing services like Amazon VOD which are not available on the AppleTV, it’s fine, especially as the latest model adds an HDMI socket, making connection to a big screen TV easy. But as a desktop, even for light use, it’s a poor choice. By the time you add a half decent display and a DVD player to the $600 base model you are getting close to the $1,000 base iMac in price, with inferior performance.
Perfect Resize 7

Smoke and mirrors.

You see them all the time in the Bay Area of San Francisco. Little Hondas with a gigantic and noisy tailpipe, invariably driven by someone about five feet tall, almost hidden behind the wheel. Lots of chrome, lots of noise, not all that much ooomph to show for it.

It’s an image which kept coming to mind as I tested Perfect Resize 7 which, in a past life, was better known as Genuine Fractals. The product’s stated aim is to allow you to make monster prints from small files, with the best possible quality, better than your regular processing application can achieve.

PR7 claims to get a quart out of a pint pot, just like that Honda driver, and it can’t be done. As the old car guy saying has it, there’s no substitute for cubic inches or, in the case of digital imaging, large sensor sizes.

PR7 retails at a costly $70-100 and installs as a Photoshop, Lightroom 2 or 3 or Aperture 2.1 or later plugin, accessible from within each application. Alternatively, you can open your file in the stand-alone variant which comes with the download. The download is 38.5mB and there’s a useful base tutorial; the others refuse to open (and they want how much?) owing to carelessness by the makers, but use is intuitive ebough. I tried PR7 in LR3.

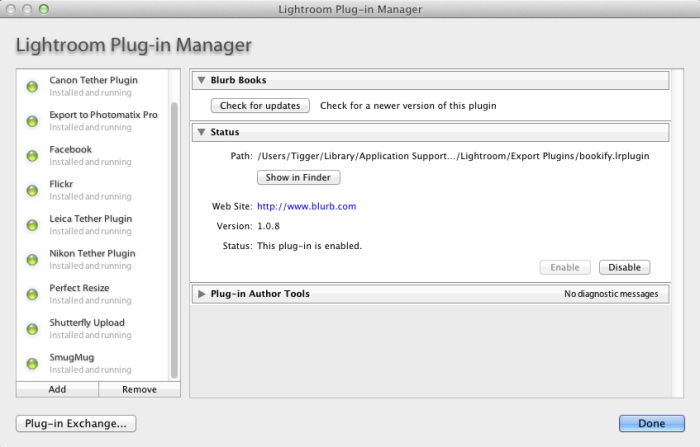
After checking that it’s correctly installed as a plugin in LR3 –

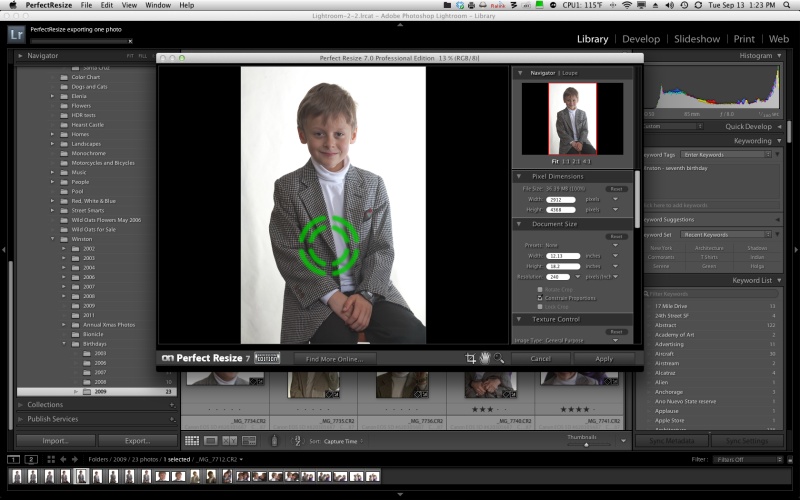
– I invoked it using a favorite Canon 5D file of our son. The app opens within LR3 thus –

– and the controls are self-explanatory. I took the image from its (approx) 13″ x 19″ native size and enlarged it 4 times to 26″ x 38″, saving it back into LR3. The difference in the 5D RAW file size and the PR7 file size is startling –

– fully 19.4 times the size! Generation of the PR7 file took 45 seconds on my speedy Core4Quad 3.6gHz Hackintosh – a very fast machine. Do this a lot and you will be buying more hard drive storage fast. And if your computer is slow, be prepared to wait while PR7 does its non-magic. Is it worth it?

In a word, no.

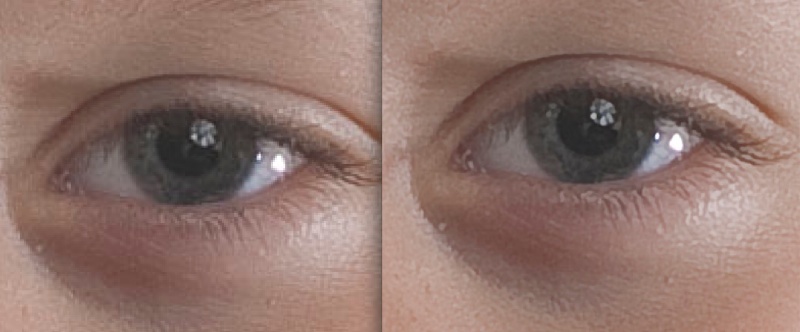
Here are side by side screen shots of the 5d original and the PR7 versions:

5D original RAW image on the left; 4x PR7 on the right.

In addition to tweaking the micro-contrast (something LR3 can do with the Clarity slider), color balance changes slightly, as visible above – not good – and noise is reduced.

The original, taken on the superb 85mm f/1.8 Canon EF lens with my Novatron studio flash clearly shows the flash umbrella reflected in the eye. So does the PR7 version but the details are fuzzed in exchange for reduced noise and pixelation. It’s far clearer with full screen display of the original images than in the reduced size here. Frankly, you can get as good or better results using LR3’s native noise reduction tools with a touch of sharpening, without the nasty color shift PR7 introduces. You profiled that monitor for a reason, no?

So if you want wall sized prints – and PR7 does offer a nice tiling option but not something I would blow $70 on – and don’t want to be buying ever larger hard drives for the ridiculous file sizes created by (not so) Perfect Resize 7, save your money and use LR3 as is. Further, the tiling option does not work properly with LR3 – I told PR7 to make a tiled print with two constituent images of 18″ x 24″ each for a 24″ x 36″ original on two prints. When reimporting back and trying to stack the modified file into LR3, a single image is saved even though I told PR7 to ‘stack with original’. Save it to your desktop and you get the two images required which then have to be reimported into LR3 – a royal pain. It’s simply faster to tell LR3 to print a 24″ x 36″ original and do it in two passes.

The Mirrorless Revolution

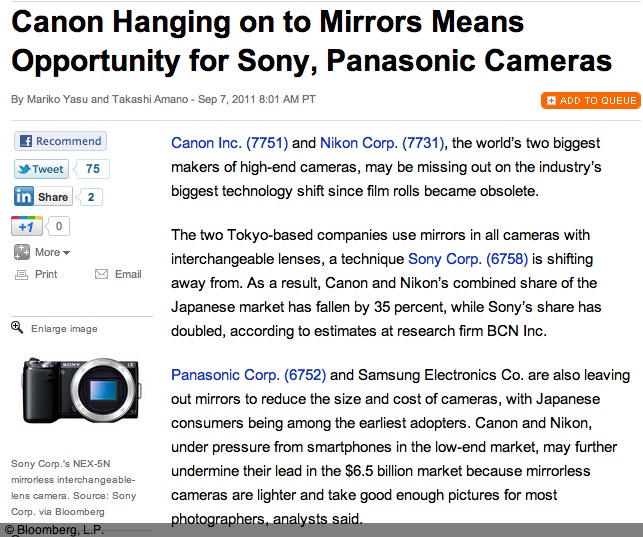
Bloomberg nails it.

Bloomberg has an interesting piece on how Nikon and Canon are missing the boat by not offering a mirrorless DSLR.


Click the picture to read the article.

As an early adopter and buyer of the first EVF interchangeable lens MFT DSLR, the Panasonic G1, I tend to agree that it’s the future. The EVF will only get better, it’s cheaper to make than the prism/mirror combination used in old tech, and there are no moving parts and no need for complex retrofocus lens designs to clear flapping mirrors.

While I tend to take this quote – “Mirrorless cameras accounted for 40.5 percent of SLR sales in the country in July, surging from 5 percent in early 2009, according to BCN.” – with a bushel of salt, there’s reason to believe that mirrorless DSLRs are gaining market share. Apochryphal data are mostly useless (just because your local bookstore is full does not tell you whether it’s booming or having a going-out-of-business sale), yet I constantly read that big DSLR owners are dumping their heavy gear for something they actually will take along on the next trip. I know, having done likewise with my (quite superb, I hasten to add) Canon 5D outfit with no fewer than eight lenses, in preference for the Panny G1 with but three compact zooms. Yes, it almost always goes along with me, not something that could be said of the 5D.

Still, I keep hoping that someone at these two dominant gear makers is working on an APS-C or full frame EVF design with a silent shutter and fast focus – things now found in several models in the Panasonic range. The disappointing Fuji X10, with its miniscule sensor almost got it right. What’s needed is a fast lens with a 28-90mm zoom range, compactness, silence, no shutter or focus lag and a proper sensor, not some nail clipping. The lens doesn’t even have to be removable. Price it at $750 and you will be rich. Canon and Nikon – are you listening?