Category Archives: Photography

A Fantasy

The Sixties relived.

By way of introduction let me say that, as a boy of 15, I was already fascinated with the hobby of taking pictures. So when I saw Michelangelo Antonioni’s Blow-up in 1966 on its theatrical debut, it was a matter of moments to write to the star and ask for an interview. To my amazement, a neat, handwritten note came back from David Hemmings, the star of the movie, not two weeks later, granting me my wish.

Quite what an interview entailed I had no idea, but when I arrived at his mews home in Kensington, Hemmings greeted me with great warmth and, within moments of our handshake, proffered a nice tape recorder the better with which to take notes. Cleaning out a closet the other day I came across the tape, which I had all but forgotten about, and set to transcribing it for this journal.

Hemmings had just finished filming and was, in modern parlance, still ‘channeling’ the character of Thomas, the photographer-protagonist in the picture, so he insisted on conducting the interview in the character of the photographer he portrayed, and further requested that I address him as ‘Thomas’ rather than as ‘David’.

TP: Thomas, the movie opens with you looking a bit, shall I say, worn. What was all that about?
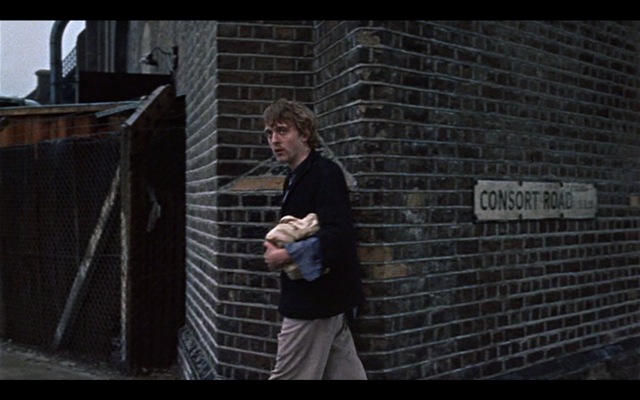

Looking a bit worn. Click the picture for the map.

DH: Yeah well, you know, Britain was going through one of its interminable labour disputes at the time so I was down the Consort Road in Southwark taking pictures for my new book on the working class. These laid off workers would be collecting their money at the dole office and I got into the whole thing. Thought it would be better to look like one of them. Not too hard given the night I had just had with those birds. Talk of insatiable!

TP: And the car?

DH: Well, no effing way I was going to drive the Rolls down Southwark way. They would have pinched my tires and mascot in seconds. Anyway, let me tell you, that car is a piece of crap. Constantly in the garage. New water pump, constant tuning and 10 miles to the gallon. I’m thinking of getting one of those Minis, actually.
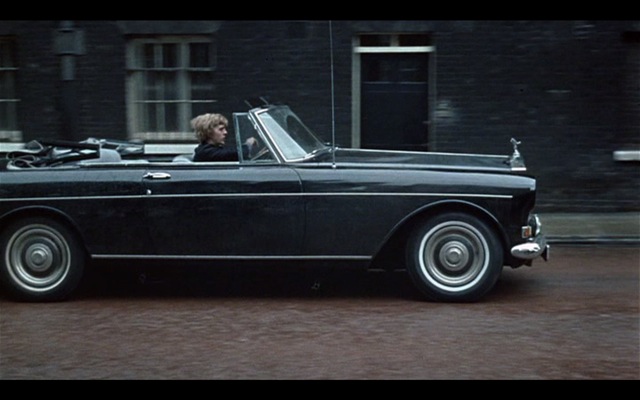

Piece of crap

TP: Who’s your favorite model, Thomas?

DH: There are so many it’s hard to choose, but I would have to say it’s Veruschka. A real pro, always on time. She’s some sort of Russian countess or something. Great legs, too. God, this woman is fit.
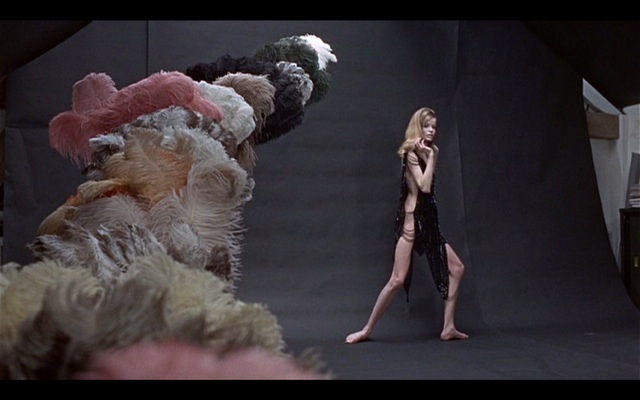

Some sort of Russian countess

TP: How did the picture in all the ads come about?

DH: Well, after that Veruschka session, I was pretty shagged out and in need of a drink, but she insisted on just one more roll of film. So I had David, my assistant, load up the Nikon and had at it. And it just happened, you know? That bum of an assistant took the snap of me making out with her.
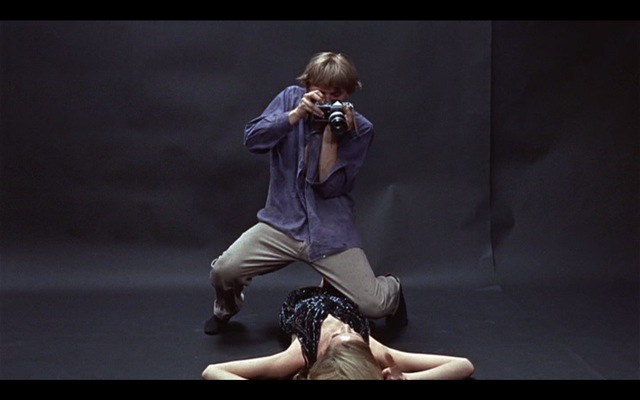

It just sort of happened

TP: So you favor the Nikon?

DH: Nah! Look, I’ll use whatever the latest publicity roll-out gives me. It’s all free, as long as I flash it about a bit, you know? Like they gave me this Hasselblad for studio work and it’s OK, I suppose. When it’s not in the shop with the Rolls, getting something fixed. Last week the magazine jammed, this week it’s the shutter. God, if only people knew how bad these things are.
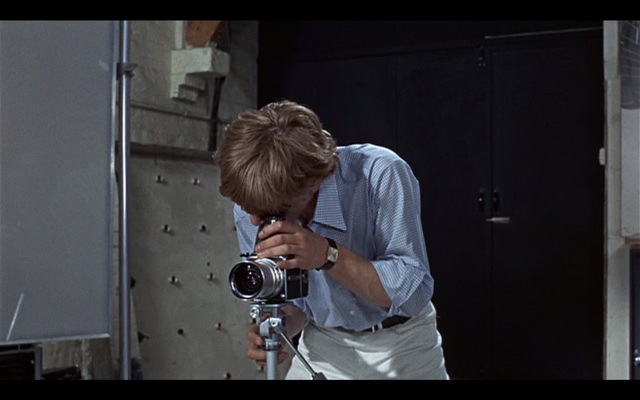

I’ll use whatever they give me

But I do like the Nikon, I must admit. I almost feel like I’m armed with it. I keep one in the glove compartment of the Rolls for street snaps. Like, the other day I was down at this antique place in Woolwich picking up a big wooden propeller for the studio (cost me eight quid, I can tell you) and wandered over to Maryon Park nearby. Grabbed the Nikon, of course. It was a windy day and I thought what with the trees and all, something good might come of it. That’s when that bloody Antonioni wasn’t using the crew to spray the grass green. Jesus! Italian wanker.
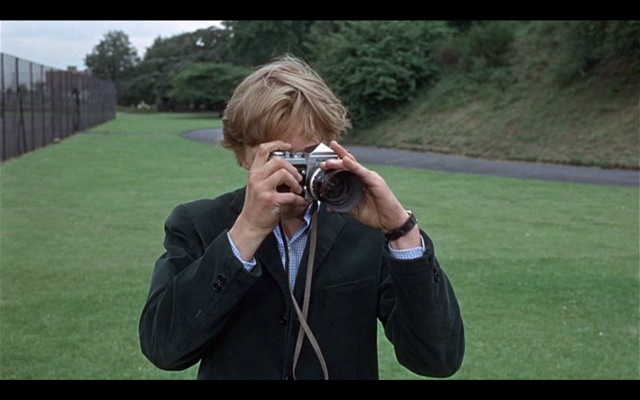

Grabbed the Nikon, of course. Click the picture for the map.

TP: So that’s when you latched on to the whole mystery thing? I mean, the body and all?

DH: Yeah. Let me tell you enlarging those snaps was sheer hell. Bloody Kodak and their TriX. When the (deleted) are they going to make this film with grain smaller than a piece of dead, cold porridge? Sure, I could use PanX or PlusX for less grain but then everything comes out kinda blurred, if you get my drift. And as for faster, have you ever used HPS? Basically every picture is the same – one big blob of grain.

Anyway, I had the 50mm on the Nikon that day and, boy, did I find myself wishing for something longer. I mean, I was miles from Vanessa when I snapped those images. Let me tell you, mate, one of these days Kodak will fix their film and you will get 36 wall sized enlargements from a roll one quarter the size and none of that poncing about with wet chemicals. Have you seen my carpets recently? Talk of hypo stains.
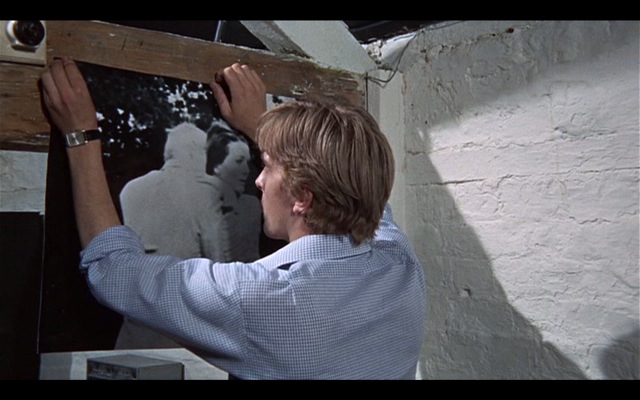

Poncing about

TP: So you found the body. Why no camera?

DH: Yeah, I found the geezer. Some sort of Italian judging by the suit. You know how these foreigners like to overdress. Hell, I could still make out his scent. Imagine, a man wearing scent. Christ! Let me ask you, have you ever touched a dead man?
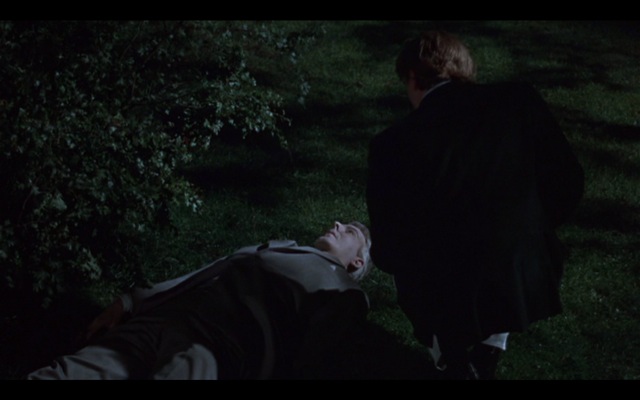

Have you ever touched a dead man?

TP: Well, my old man when he died a few years back.

DH: Pretty yucky, huh? Let me tell you, this guy was COLD! To answer your question I had no camera as there’s no way you can take pictures at night. We’re talking 400 ASA here, mate, not some 21st century technology. Nah, I reckoned I had to come back in the day to get a snap and, of course, by the time I did, the stiff was gone.

TP: So nothing ever happened? No one was caught?

DH: Yeah, that’s about it. Bloody cops, what do they know? My assistant – he’s an East End lad – says all the cops are in cahoots with the Krays. Still, the park is kinda neat and I went back the other day to take some more pictures. Not hoping for another body, or anything, just street snapping.

TP: My favorite thing.

DH: Well, what do I come across but these kids with white faces playing tennis in the park. No bloody racquet or balls, though. Kinda fun once I got into it. Even retrieved a ball for them.
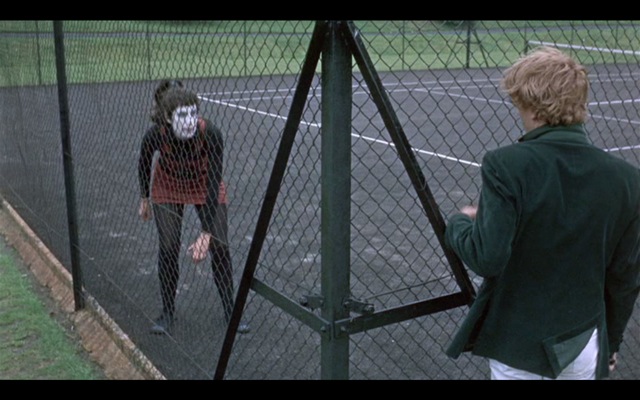

No racquets. No balls

Transcribed from the original tape of December 21, 1966.

At this point the tape ran out. Hemmings took it off the recorder and tossed it to me.

DH: Well, that’s it chum. Gotta run. By the way, once yer balls drop, come back and see me. I think that my assistant, that Bailey fellow, is pretty much on the way out. Keeps trying to rip my work off, know what I mean? And I’ll need someone to load my cameras.

* * * * *

Hemmings and Antonioni are gone, sadly, but their great film monument to the Sixties lives on.
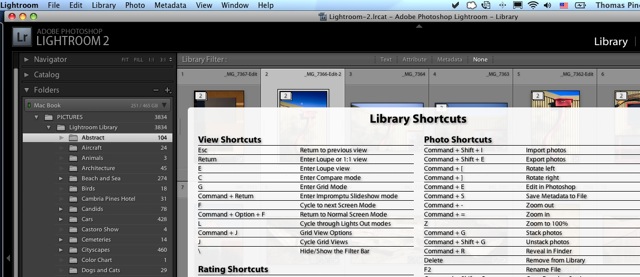
Lightroom 2 keyboard shortcuts

LR2 displays few of these

When you want an on-screen reminder of the many keyboard shortcuts in Lightroom 2, you press the ‘Command – /’ key pair for a heads-up display on your screen, thus:

Click on the pop-up display to dismiss it.

The snag is that this display only shows a small fraction of what is available. You can download a PDF of all LR2 or LR1 shortcuts here. Surprisingly,I can find no such LR2 guide on Adobe’s web site.

Dense as it is, it repays study.

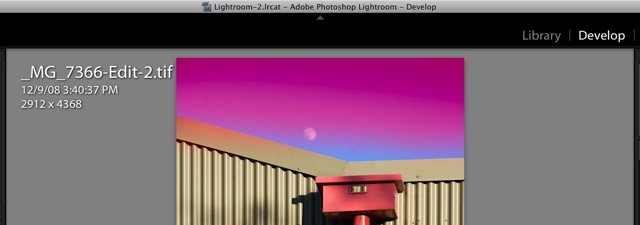
For example, I have found use of the adjustment brush frustrating in that one has to view the red mask to see the area which has been brushed. You do this by hovering the mouse cursor over the mask pin (the little blob which appears on your screen). If you want the red mask to show continuously when using the adjustment brush you can toggle full time display while the adjustment brush is in effect by hitting ‘O’ on your keyboard. This makes masking very easy and allows you to adjust exposure/brightness etc. after you have delineated the area of choice for adjustment.

In the above example, after switching on the adjustment brush in the Develop module I hit ‘O’ and, thereafter, could see the red mask as I applied it by brushing areas of the image. Once satisfied that the right parts had been brushed, I switched the red mask off (hit ‘O’ again – it’s a toggle) and then applied adjustments as required.

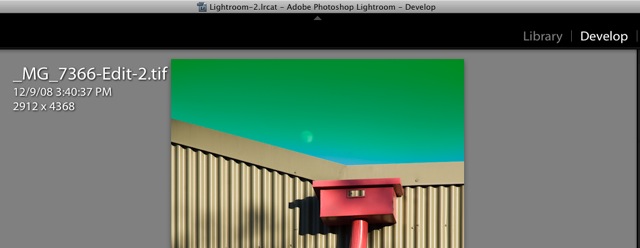
If the default red color interferes with the image and your assessment of the masking you have applied, you can cycle through mask color options using the Shift – O key combination while the adjustment brush is live. In the following example I have changed the mask color to green using the ‘Shift – O’ key combination.

Very handy. There are many more gems in this long list and a few are even worth learning! Now if only Adobe could add all their keyboard shortcuts to their ‘Command – /’ key on screen display.

Follow-up: A reader has kindly pointed out that Adobe’s version of the short cuts is to be found here and the presentation, which is by module rather than in aggregate, is far more useable.

Tethered photography with Lightroom 2

A bit tricky.

The idea of tethered photography with a digital camera is that what you snap appears shortly thereafter in Lightroom on a screen size of your choice.

Practically, this translates into controlled conditions where the camera and a computer can remain close together, so think studio photography. No matter whether your subject is a flower or a person.

The opportunity of immediately seeing your pictures in Lightroom, with default import processing (camera profile, sharpness, etc.) applied, all viewed on a large, properly profiled screen will take you as close to visualizing the finished thing as you can get. Indeed, if computer display is your goal you will see what you are getting; those who print and have a properly profiled screen/printer will be just as happy.

In a perfect world you should be able to attach your camera to your computer, open Lightroom and bang away. In real life the process is two stage. First, you have to tell Canon’s software (ugh!) to deposit pictures in a named location. Second, you then tell LR2 the name of this folder which it will monitor, transferring any new content to a different folder seen by LR2. Thus the first folder is emptied by LR2 and the second is transferred by you, the user, within LR, with contents either moved to your LR catalog or bad snaps moved to Trash. So you start and finish with these two empty ‘transit’ folders but they must not be removed for everything to work. That’s for the neatniks amongst us!

What follows applies to Canon DSLRs but doubtless similar steps apply with others.

With most modern Canon DSLRs (5D, 40D, whatever) you will need current versions of Canon’s Digital Photo Professional (I am using DPP 3.5.1) and Canon’s EOS Utility (2.40). You tether your camera to a USB connection on your computer (laptops are ideal for this) and the camera end is connected with a miniature USB plug. As the one supplied with the camera is short, you can either buy a USB-A to USB-A extension cable, or simply get a longer USB-A to USB-Mini cable. Radio Shack or whatever. There’s no brand value here.

Plug in your camera, switch it on and fire up DPP, then click on Tools->Start EOS Utility. Go to EOS Utility->Preferences and check the box shown below:

This makes sure that what is transmitted to your laptop is also saved on the card in the camera. A useful safety precaution.

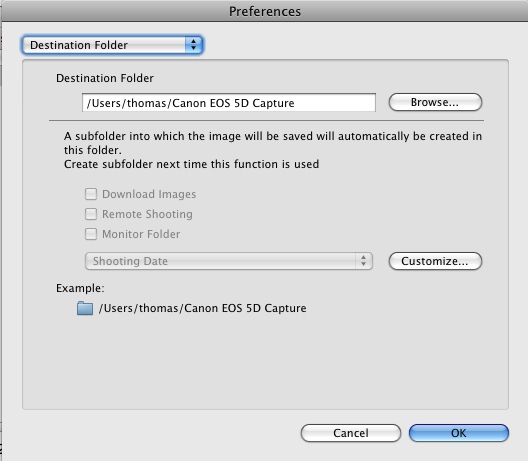
Now using Finder, create a unique folder you want monitored. I call mine ‘Canon EOS 5D Capture’ in my user directory.

Back in EOS Utility, go to the Destination drop-down box and enter that destination:

Before even getting into Lightroom 2, check this setup. Take a test picture and it should appear in a few seconds in DPP. With my 5D on a MacBook it pops up in DPP in 4 seconds – that’s for a RAW original.

Now Lightroom 2 has to be told where to look for the picture you have just taken.

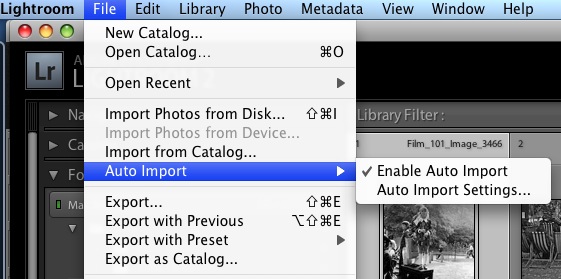
Go to File->Auto Import and check ‘Enable Auto Import’ thus:

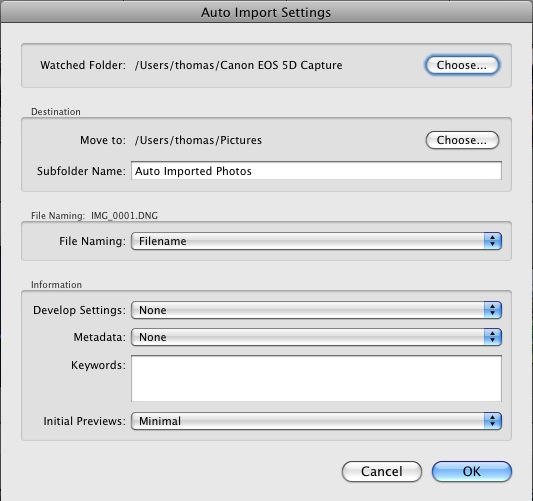
The click on ‘Auto Import Settings’ and enter the exact folder name under ‘Watched Folder:’ you just created in EOS Capture as shown:

Any typos here and nothing will work.

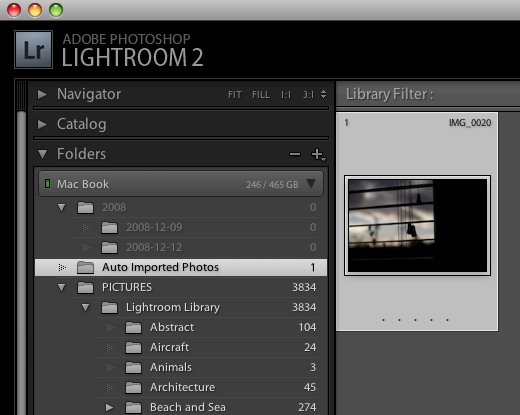
Back in Finder, create a new folder for the destination of your pictures as seen by LR. I have used the default name of ‘Auto Imported Photos’ which LR2 suggests, above.

Now take a test snap and the left panel of LR2 will show the following:

The new folder you designated appears in LR2. Click on it, hit F5, F6, F7, F8 and L and you will see this and all future pictures presented in their full glory, filling the screen. It takes 7 seconds from click to view with my 5D and modest MacBook (2.1 gHz C2D CPU, 4 gB RAM) with RAW originals. Doubtless JPG would be faster as less processing is involved, but JPG so compromises quality I do not bother with it.

If you like what you see, remember to drag-and-drop (move) the keepers to your permanent Lightroom catalog. Then, still in LR, delete the losers.

If you power down your camera or the battery fails or you disconnect the cord, you will need to go back into DPP and reload EOS Utility from the Tools menu. Other than that, it’s plain sailing. I’m using OS 10.5.5 Leopard and LR 2.1; earlier versions of Leopard seem to have had issues with the Canon software but now all is well. You can check Canon’s site for free upgrades to the latest DPP and EOS Utility software. (The older Capture application refuses to work with Leopard on my MacBook, so don’t bother with it if you are using like tools).

If you read that tethered photography was only fixed by Canon in the 5D Mark II, save yourself the upgrade money. My 5D Mark I works fine with this technique.

There’s no better way to preview studio snaps even if they involve moving subjects. You can check light and color balance from just a few test snaps. Very handy when you are using studio flash where its virtually impossible to ‘see’ how your lighting has turned out on the camera’s miniscule LCD screen.

Once you have made the settings above, tethered photography involves the following simple steps:

  • Switch on camera
  • Connect to computer
  • Load Canon DPP and EOS Utility
  • Load Lightroom
  • Take a test snap
  • Navigate to the folder in LR and expand the test snap to full screen
  • Bang away

Your camera will use up its battery faster this way as it’s saving both a card image and transmitting a copy to your computer, so come prepared with spares!

Come to think of it, a battery powered netbook computer and a tethered camera would be more than useable in the field. An ideal combination, perhaps, for those who like to take their studio with portable strobes with them. Of course, you would have to convert the netbook to running OS X to use your time effectively ….

Speed

We all need it.

Faster lenses. Faster films. Faster sensors. Faster CPUs. Faster prints. Faster publishing. Faster access. Faster retrieval.

In all areas of human effort, speed is seen as a good thing. Time is money. The exception, of course, is government which is not playing with its own money. But we are talking of good things here, so let’s move on.

In most areas of my life I very consciously focus on doing mundane tasks – those which confer no great added value to my world but must be done – as speedily as possible.

In the world of photography that means using digital, not film (plus the results are far superior in any case). Delegating printing of all but the largest photographs to professional labs that do this sort of thing all day. And using snappy processing and data management software like Lightroom to keep all those pictures in easily accessible form. For the most part I see little purpose in spending time at a screen processing images and aim for the best in-camera original to keep back-end efforts at a minimum. Anyone can process and print. These are purely mechanical tasks, despite what those, seeking to protect what little knowledge they have, would tell you. Face it. The ‘great printers’ were, as often as not, lousy photographers. Can you say Ansel Adams?

One of the nicest things about modern computers is that most come with built-in webcams allowing you to make video calls to like-equipped colleagues anywhere in the world. I suppose I should make that “…. Mac-equipped colleagues….” because, for the life of me, I have never succeeded in getting a webcam to work reliably with Windows for any sustainable period and do not know anyone who has. Mine, in various Macs, has yet to fail in four years of solid use. What else is new?

The other day, enjoying one of these calls, I began to grow increasingly irate at the latency and image smearing I was getting on the video side of the call. Now it’s no great secret that America has some of the world’s worst broadband capabilities and, yes, you can blame a government which would rather regulate than free technology. As a result our internet connections are generally 10-25% the speed of those enjoyed by Europeans and Asians. Criminal. This from a country which claims a lead in all things technological.

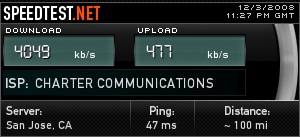
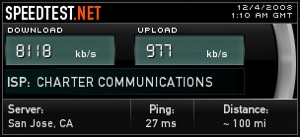
Living in a rural area – to put this in perspective, most of my neighbors use dial-up – I didn’t hold out much hope of significantly increasing my internet connection speed but decided to call the cable company on a whim and learned that I could double my speed by simply upgrading to a newer modem (which they supplied at no up front cost) and paying an additional $10 monthly. So two hours later I had the new modem on line and could measure the difference. The standard for this is Speedtest.net and here are my before and after readings:


Before


After

Exactly in line with the cable provider’s sales pitch. Amazing. Best money I have spent this year.

Now before you start thinking that 8 mbps/1 mbps download/upload is fast, take a look at the statistics available at Speedtest.net. These are averages for the cities concerned:

Tokyo: 25/15
Sydney: 30/20
London: 35/30
Paris: 21/13

In other words, the best I can get here is still far slower than the worst in these great cities. And these places are run by foreigners, for goodness’ sake!

Nonetheless, the next time I go to upload snaps to any one of my web sites, I am at least consoled that the time wasted will be half of what it was yesterday.

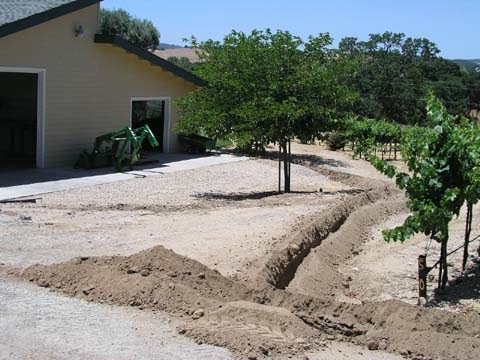
You think it was easy getting broadband here in the boonies? How about a 405 foot ditch and like amounts of broadband coaxial cable and PVC piping? We did this 5 years ago when buying the place and, despite many teething troubles, the whole thing is now very reliable. And newly fast!


Getting broadband in the boonies is no simple thing

Have you checked your connection speed? Do so. My carrier makes contractual promises about speeds and I hold their feet to the fire on those. Too bad no such speed guarantee is offered by the ISPs I use, whose service and speed vary from poor to execrable.

For the record, this site is hosted at BlueHost.com, whose owner is forever blogging on how great his crappy service is. My photo web site (click on the right) is at Readyhosting.com (I like to spread the pain) and all you need know is that they use Windows server technology. The less said the better.

Too bad it’s so difficult to change ISPs. If you are looking for an ISP, avoid these two stinkers who have the bedside manner of the IRS and the efficiency of General Motors. Remember that 99% up time means an ISP is down over 3 days a year. Just say no to such poor statistics and keep shopping until you find 99.999%.

Lens of the Year

No contest.

It’s not so much ‘Lens of the Year’ as it is ‘Outfit of the Year’ and the choice will surprise none who have been visiting here recently.


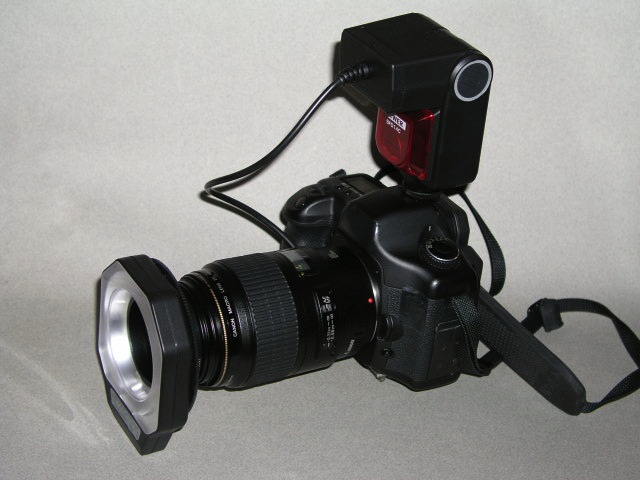
Canon 5D, Canon 100mm EF Macro and Bower ring flash

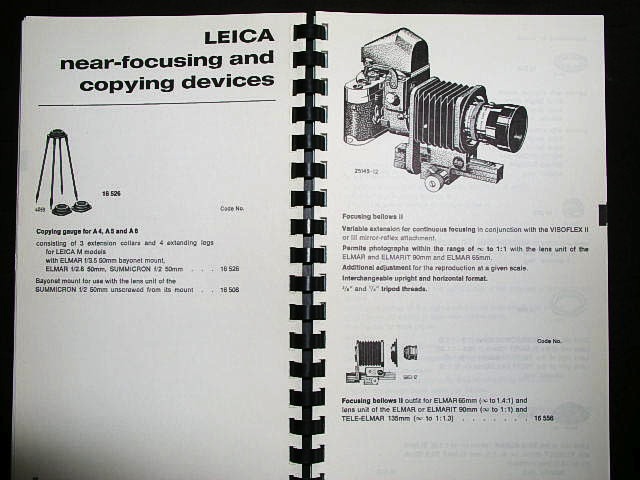
While none of this gear is ‘new’ – the 100mm macro has been around for ages, the 5D is no spring chicken and ring flashes are as old as politicians’ lies – what is so very special about this outfit is how simple the technical side becomes. Back when, in the bad old film days, you used a lens head on a bellows, constantly messed with focus and depth of field, tried to remember the right exposure compensation when the bellows were racked out and then suffered agonies trying to light your subject. Then, when you snapped the picture, you realized that you had forgotten to stop the lens down and were five stops over-exposed.

But Canon obsoleted all of that with a few strokes of genius, doubtless available from other makers also. First, they made the lens fixed length. It does not change in size as you focus. Second, the focus range is continuous from infinity to life size on a full frame sensor body. Third, focus is automatic and blisteringly fast. And, finally, E-TTL makes sure that all those arcane calculations are a thing of the past, computing the optimal blend of natural and flash light on the fly. A nice 100mm length also allows the photographer to step back from the subject, leaving more working room, and throw in the Software of the Year and you have the most perfect macro kit yet.

Thanks to all this magic 100% of your attention can be devoted to the subject and the technology takes care of the back end. This compares well with the automatic gearbox in cars which leaves more brain cycles available for the job of driving rather than shifting gears. Sure, there are people who like to use a clutch. (None of them drive in Formula One, by the way). There are also people who will tell you that film beats digital and good sound ended with the LP era. Have pity on them, while they do their calculations and make incantations to the analog gods of yore. The world will always have its technophobes, most so over-invested in yesterday that they have to defend antiquity.

And it’s not like this wonder lens is wildly expensive, compared to the mess of adapters, bellows, racks etc. in olden days. The lens retails for under $500 and works every bit as well on Canon’s cropped sensor bodies as it does on full frame. The optical and mechanical quality is right up there with Canon’s exalted ‘L’ offerings – I know as I own some. In fact, there’s not a sharper lens in my kit. So add an inexpensive digital Rebel body, splash out another $150 on the ring flash (no need to get Canon’s costly version), and you have the best macro kit out there for under $1,000. What’s that, you say? You want the ability to switch off one side of the ring flash tube for better modeling effects like the Canon one does? Well, dear reader, I have two words for you. Black tape. You stick it over one half of the flash tube in the same way you stick it on your camera to obliterate all those gauche manufacturer’s markings. Now that’s what I call a bargain.


The good old days were …. really bad.

The Canon EF 100mm f/2.8 USM Macro autofocus lens is the Lens of the Year.