Category Archives: Photography

Two years with the Canon 5D

What’s good and what rankles.

It’s been some two years since I bought my Canon 5D, an appropriate milestone from which to reconsider what is good and bad about the decision.

Since then the price has come down significantly, meaning almost a 30% drop yet, amazingly, with other market segments seeing many model changes since, the 5D remains available and has not been upgraded. I have no idea how sales of this model compare with Canon’s other offerings, and I suppose you could argue that they haven’t made a replacement because sales are very high …. or very low.

I don’t care. It remains a quantum leap in making the picture taking process an easier one. Forget all the mind numbing choices in all those menus, the reality is that the chances of making a technically solid picture, sharp, properly focused and grain free have risen manyfold owing to this superb machine. Plus you can make a perfect print of any size you want from just about any frame. More time for seeing, less for worrying.

Things I like:

  • The 3:2 aspect ratio of the frame. I grew up with Leicas. It would be even nicer at 16:9 widescreen.
  • The large, uncluttered, near life-size, viewfinder.
  • The fact that the depth of field and coverage of a 50mm lens …. remain the depth of field and image coverage of a 50mm lens on a film camera.
  • The grain free sensor – the ISO adjustment is just another way of controlling aperture and shutter speed. I never worry about grain. If I need grain, something like this works.
  • The great selection of inexpensive Canon lenses – the non-zooms I own are mostly wonderful.
  • The lack of shutter lag – as good as a Leica M2 or M3.
  • Autofocus. With mediocre eyesight like mine the fabulous rangefinder in the Leicas is improved upon by modern technology. And it’s faster.
  • Spot focus/lock/recompose. Never another unsharp studio picture.
  • Auto exposure. Another impediment removed.
  • Spot exposure measurement for those difficult occasions.
  • The reliability. The 5D’s OS makes a Mac look like a dog. You never have to reboot.
  • The battery life. Simply incredible. Carrying a spare hardly seems necessary.
  • The 85mm f/1.8 EF Canon lens. The Leica Apo-Summicron Asph at a fraction of the cost.
  • How all that automation makes use with a 400mm Canon ‘L’ lens so easy.

Things I dislike:

  • The bulk. Bigger than my Leica Ms, it’s no joy to tramp around with.
  • The noise. Not bad, but silence would be nicer.
  • An LCD screen which is unusable outdoors.
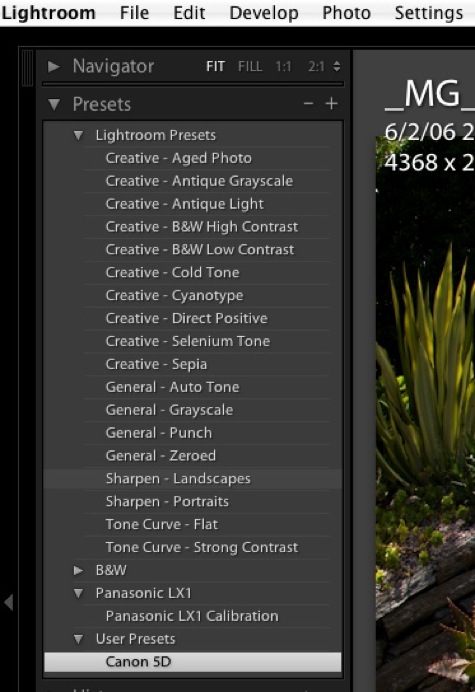
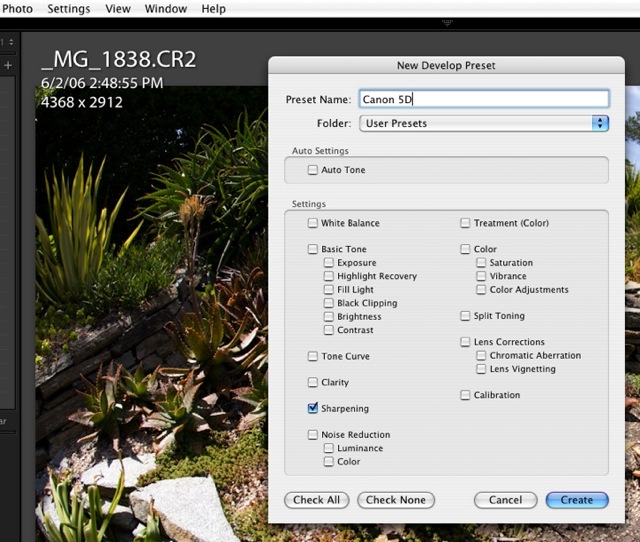
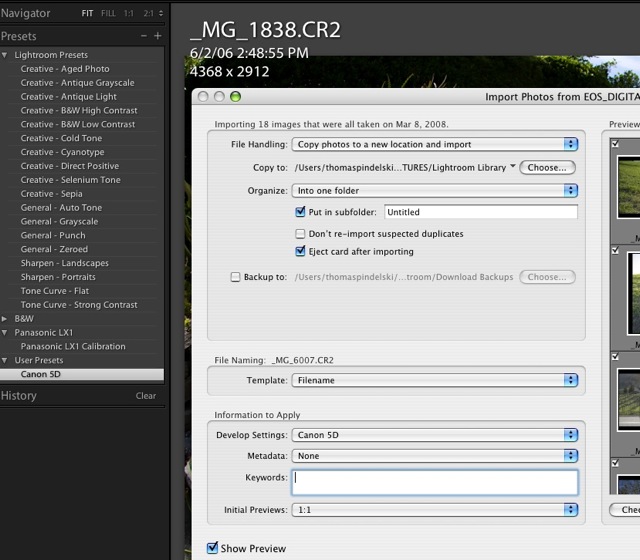
  • Poor auto white balance indoors but easily fixed with one click in Lightroom.
  • The attraction the sensor has for dust. I mitigate that by using (superior) non-zoom lenses, but that’s not the answer. Actually, it’s more the pump design of Canon’s 24-105mm zoom and poor dust sealing in the lens that seems to be to blame here.
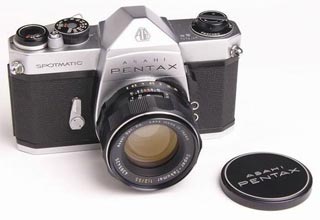
  • The advertising – that big white ‘Canon’ logo and crass ‘5D’ sticker – both easily fixed with some black tape. You want me to advertise your goods you pay me, OK?
  • That criminally inept stock strap. Criminal, as the first thing it will do is make sure your camera falls off your shoulder.


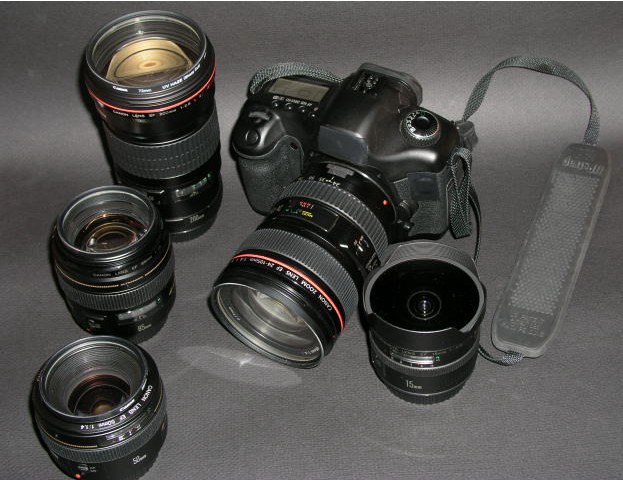
    5D and friends. Not a worthless lens hood in sight.

  • The fact that I take too many pictures. Digital makes you lazy, less selective. Good digital management in the likes of Lightroom helps. But nothing beats the Delete button.
  • That horrid flap.

But, taken as a whole, these really are minor gripes in exchange for the wonderful image quality.

The 5D will likely be updated/obsoleted any day now, but for this photographer it remains the bees’ knees. Would I buy it today in preference to anything else? Absolutely. The improvements in Mark II – sensor dust removal apart – will be visible to academics only. But the 5D (Mk. I or II) only makes sense if you like to make Really Large Prints. For web display even a 2 megapixel P&S is fine.


The Canon 5D. A new era in equipment.

Innovation is not invention

Those brilliant Japanese.

Talk of warranties requires that I point out that Joseph Juran died the other day at the grand age of 103. With W. Edwards Deming he taught the gospel of quality control to Japanese management and workers after World War II. Why the Japanese? Because when he tried to teach Americans he invariably found the bosses stayed away and sent only low level workers to his lectures. To this day Detroit has not learned the lesson that quality starts at the top.

Today ‘Made in Japan’ is a touchstone of quality whereas ‘Made in Detroit’ is what ‘Made in Japan’ was in 1945.

But it isn’t just quality that distinguishes Japanese products.

It is also innovation.

Yet you still hear that old saw that the Japanese are mere copyists and incapable of innovating.

Never mind that while GM’s CEO just stated that he is going to devote more time to lobbying (read – going to Washington with his right hand out, the other in the taxpayers’ pocket), Honda is test marketing a hydrogen powered car in Los Angeles. It comes complete with a device that plugs into the natural gas line at home and makes hydrogen for the car. Washington will doubtless try to quash this innovation as there go all those gasoline taxes. Much the way in which Detroit destroyed rail travel in the US. For all its talk of free competition America still loves monopolies and cartels. Can you say Microsoft? A company which never learned the meaning of quality and which could learn a lot from the likes of Juran and his followers.

Look at camera gear. The last innovation out of Germany was the wonderful view/rangefinder in the Leica M3 -1954, though designed in 1938 or so. No need to dwell on the reasons for the delay. No, it had nothing to do with quality.

The Japanese? Look at some of the functions in cameras which they have perfected. The SLR instant return mirror, auto diaphragms, auto-focus, matrix metering, all sorts of viewfinder displays, linear focusing motors, affordable aspherical lenses, miniscule motor drives, eye controlled focus (beats me why Canon ceased offering that – the camera would focus where the eye was looking – sheer genius), image stabilization, face detection, smile detection, tiny mass storage devices, LCD screens. Amazing stuff. Great innovation.


The elegant and affordable Pentax Spotmatic – the camera whose maker made the instant return mirror a reality.

Innovation is not invention. Innovation is bringing the invention to market in quantity at an affordable price with a guarantee of quality. Juran knew that. Anyone can invent.

So next time your neighbor tells you the Japanese are copycats, just purr away in your hydrogen powered car, your magical Japanese DSLR in the glove compartment, leaving a trail of water droplets in his driveway while he ponders the challenge of a refill at $10 a gallon to drive his Detroit steel to the repair shop.

But there is hope. It seems that NASA gets it.

Importing into Lightroom

Automating sharpening on import.

One of the first things I have to do when processing images imported from my Canon 5D (or the Lumix LX1 for that matter) is to sharpen the RAW image. This is standard operating procedure for digital cameras and has nothing to do with poor native image quality. The process simply negates the effect of the anti-aliasing filter, used in nearly every digital camera. Apple’s Aperture is really smart about this and does it automatically, detecting the camera used and applying Apple’s pre-set adjustments. Lightroom is less smart but can be taught to make the adjustment automatically on import.

Here’s the process – I have enlarged the screen shots for legibility, hence the poor definition – if you want to see aliasing take a look at the ‘jaggies’ in the pointers!

Here are the Lightroom defaults for sharpening in the Develop module.

Leave them like this and you will have to sharpen every picture once imported. A waste of time.

Here are the settings that work best for me – and I have large prints made on an HP Designjet 90 printer as my goal. For the small images used for the web it really does not matter what you do. A large print, on the other hand, is the most demanding output there is.

Having made those adjustments in the Develop panel I then create a new User Preset by clicking on the ‘+’ sign in the Preset area in the left panel and naming the current settings Canon 5D. No other defaults have been changed in the Develop module at this time nor do you want to make any changes:

Then when prompted which settings to save with this new User Preset, I choose ‘Check None’ then check only the Sharpening box. This will limited changes made whenever this User Preset is chosen to Sharpening only. Were I importing from a small sensor camera with inherent image noise (not an issue with the 5D) I would consider including Noise Reduction when creating the User Preset and would check the related box, below.

Next I insert a CF card containing images to be imported into the card reader and the import Dialog pops up. Under information to Apply: Develop Settings I click the drop down box and point to the Canon 5D preset just created:

Now my preferred sharpening settings will be applied as the pictures are imported and 1:1 Previews are generated. As is always the case with RAW files, the original file is never changed – it’s just the Previews that are managed.

You can make User Presets which are specific to a camera serial number, if you want, but as Your Truly owns just one 5D (a status unlikely to change) and one Lumix LX1, that’s a luxury I do not need.

One size does not fit all:

Now the above approach is camera specific, not lens specific.

It doesn’t mean that you just merrily import every image without the need for any additional sharpening adjustments.

Even in my small set of Canon lenses there are noticeable variations. The 85mm, 200mm’L’ and 400mm ‘L’ optics are pretty constant when it comes to sharpness at all apertures. Indeed, the 200mm generally needs a small reduction, it’s that good. On the other hand, the 24-105mm ‘L’ and the 50mm f/1.4 at full aperture both need a little more and the 20mm needs more all the time. It’s a mediocre piece of glass at best.

And it’s not just sharpening you have to worry about. There are other lens aberrations.

It would be pretty neat to be able to automatically adjust for Chromatic Aberration (color fringing), Distortion based on the lens used and Vignetting, but that feature is not available, yet. CA and Vignetting would be especially tricky as they vary with aperture. Distortion is no walk in the park either as the distortion levels in zooms vary with focal length. That’s not to say that Adobe couldn’t do it (we are talking simple look-up tables here, although a lot of them, and a presumption of low sample variation) and I, for one, would love to be able to have the fairly pronounced barrel distortion in the 24-105mm ‘L’ zoom automatically removed when this otherwise fine optic is used at its wide end.

DxO Optics adopts this exact approach in a plug-in for Lightroom. They should be applauded for their efforts. The list of cameras and lenses they automatically adjust for is set forth here. I have not tried the product and, at $300, I’m not about too, but it may make sense to some. It looks like the latest Mac version is not yet available so I could not try it even if I wanted to blow the coin. Their video suggests the product is bog slow (a couple of minutes to adjust just five images), and you can bet they are using the fastest possible hardware to put a gloss on things, so a pinch of salt is recommended before you lay out your hard earned cash.

Does any of this really matter with small images – like those reproduced on the web or in snapshot prints? No. But once your prints sizes get large, it can make a significant difference to the appearance of the picture. And a little bit of automation to reduce the drudge of processing is always a good thing.

More on Lightroom printing

Some convenient enhancements.

Since publishing my first piece on how to profile monitors and printers for use with Lightroom, I have made a couple of interesting discoveries.

First, I listened to Adobe Podcast#1 (with Mark Hamburg, Kevin Tieskoetter and Jeff Schewe) from Apple’s iTunes store (search podcasts on “Lightroom”) which speaks to profiling (they are speaking about Lightroom Beta Release #4 for the Mac) and was intrigued to note that that we shared the same approach. The development team (a lot of very smart, well informed, outspoken engineers – highly recommended listening) does exactly what I published with regard to the use of Colorsync, letting the printer manage colors, not Lightroom. This philospohy is printer agnostic. Epson, HP, Canon, you name it.

My approach requires making Lightroom use Apple’s Colorsync utility to manage colors. You need a properly profiled screen and I describe in that earlier piece a very accurate way of doing that which does not even require a colorimeter, provided you follow certain disciplines regarding ambient lighting.

I suggest you give this method a try. Your maximum cost is a few minutes, a couple of pieces of paper and some ink. And the money saved on a Colorimeter (wish I had been that smart when I bought mine) will pay for a lot of paper and ink. It does not matter who makes your printer for this screen profiling approach to work.

The other thing I discovered is that it is possible to save the Colorsync setting in the Printer Profile – something I stated frustration at not being able to do.

I had forgotten that there is a ‘Save’ setting in the print dialog box. So elect Colorsync in Print Settings->PaperType/Quality then Save the setting with a meaningful name. I have named my saved file “HP Photo Satin – Colorsync” which states the paper type I chose before saving and obviously uses the Colorsync utility. Note that this named setting is independent of Lightroom’s Print templates – you choose it at print time after selecting a Print template. The printer dialog box dictates color management, the Lightroom Print template controls the paper size, margins and picture layout on the page.

Then, when it’s time to Print, I simple choose this drop down menu option in the Print dialog box (I have not yet figured out how to make it the default, something I would like to do as that’s what I use nearly all the time – what I need to do is work out how to delete the ‘Standard’ setting, I’m guessing, at the OS file level). A quick check – see the following screen picture – confirms that the Colorsync setting has, indeed, been saved and will be used when printing.

Now I am assured that both the right paper profile and the correct Colorsync setting is made without having to check yet another layer of menus in the print dialog box. So printing really is a breeze. I have created three templates – for three different paper sizes. That’s all I need, as I always use the same HP paper.

* * * * *

I learned an interesting thing from this podcast – what do you think Adobe did for the Lightroom development team for Christmas of 2005? They gave each member a digital camera and encouraged them to take lots of pictures. Maybe the resulting stress testing has something to do with the application’s speed? I wonder whether Apple ever considered doing that for its Aperture developers? Or do they simply get a $7,000 Mac Pro and 30″ screen which will run anything well ….

Tracking warranties

iCal to the fore!

I explained – and quantified – why the arithmetic of extended warranties on consumer gee-gaws made it a slam dunk for the writers of the insurance and a losing proposition for the buyers here. So photographers should know when the warranty expires on their latest camera or lens.

Machines fail when very new or very old/very used. No secret there. Look at light bulbs. Cars. Cameras.

Which brings me to tracking warranties.

As I have recently written, my trust in Apple quality control has been severely shaken over the past year when my new MacBook, Extreme router and wireless keyboard all broke down during the (measly) one year warranty period. In each case I had to scratch around to determine whether the first year of ownership had passed. Apple is a key photographic tool vendor for this user.

Then it struck me. Might as well use Apple’s own tools to track their failures and warranties, so now any time I buy a new toy, the warranty expiration date goes right into iCal with an email reminder to me. And if I do want to check, I simply search iCal for the name of the gadget.

So, Toshiba, I’m not about to forget about the three year warranty on that new hard drive. No way.

To make matters easy, all the receipts go in a three ring binder in chronological order. Easy.

And if I do want to check if something fails, or find the date of the invoice for a warranty claim, I simply search iCal for the name of the gadget – Apple-F in iCal.

So watch out, Apple, Toshiba, Canon, Panasonic, big screen TV maker, et al. You are being watched. Though, in fairness to all but Apple in that list, these manufacturers’ products have been failure free.

There is one far more important reason however, and it is a life saver.

This technique has saved half my net worth on more occasions than I can name. Now that I no longer have a secretary charged with reminding me of these things. To be safe, I put in vital dates twice, with two week and one day reminders. Who said computers don’t save you money?