Category Archives: Hardware

Stuff

Beating the burn

In overexposed highlights, that is

I have written before of the tendency of digital sensors to burn out highlight details. While highlights can be recovered using the Highlights slider in the Aperture Adjustments HUD, this is limited to one stop using RAW, in my experience. Thereafter, not all highlight details can be recovered.

Accordingly, in high contrast situations like outdoor sun, it’s far better to underexpose and use the Shadows slider to bring up shadow detail, rather than trying to recover highlights. The technique is illustrated here. A low noise sensor, like in the 5D, can sustain a lot of shadow enhancement before noise rears its ugly head.

Strangely, I find the large sensor in the Canon 5D more susceptible to highlight burn than the miniscule one in the Lumix LX1. Tfhe 5D’s sensor is some 1/2 stop more sensitive than the indicated ISO, compared with the Lumix. Given that HDR cannot be used with dynamic subjects (the three or five images required dictate the use of a tripod on a stationary subject) I simply underexpose by 1-2 stops in high contrast situations. Single image tone mapping can help, but it adds maybe half a stop at best; any more and the effect is garish. Canon provides exposure compensation on the 5D but is is horribly documented in the miserable book with a miniscule typeface that passes for instructions that comes with this camera. For $3,000 for a body only, this has to be the height of cynicism. Canon, please exclude accountants from the design of your machines and instruction books.
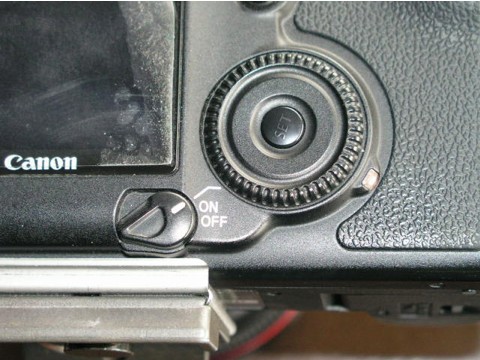
The 5D has a two position power switch, illustrated above. (The peeling on the screen is my stick on protector, not delamination of the LCD!). Normally, the switch is clicked up one notch to ‘On’ when using aperture priority – Av on the top left dial. Click it up one more notch to the line and the rear wheel activates exposure compensation, visible on the bottom of the viewfinder. It’s also displayed on the top LCD screen which is much easier to see than the viewfinder readout. By the way, a Manfrotto QR tripod plate is visible in this snap, permanently attached to the 5D’s base. Highly recommended – this is the ‘Architectural’ version with an alignment lip to preserve its position on the relatively heavy 5D body.

Click the on-off switch to the line, take a first pressure on the shutter release button, and rotate the wheel while looking though the viewfinder or at the top LCD screen. You can elect 1/2 or 1/3 stop intervals using the custom functions in the camera’s software. 1/3 is confusing precision with accuracy in my book, so I have it set to 1/2 stop intervals. I dial in the camera to, say, -1.5 stops, then immediately move the switch back to the regular On position to preclude accidental adjustment – the compensation setting wheel is disabled in this way, although the setting you dialed in is preserved. Better still (or not, if you forget), the setting survives switching the camera off. Power up and there is your setting, preserved.

I prefer to use average exposure metering in fast paced outdoor settings (Canon’s matrix metering leave me unimpressed) as there’s rarely time to take a proper exposure reading in the interest of capturing the moment. With this approach, you gain a stop of highlight adjustment while preserving some three stops of shadow recovery. Now that’s what I call dynamic range.

Here’s an example taken in bright sun yesterday:
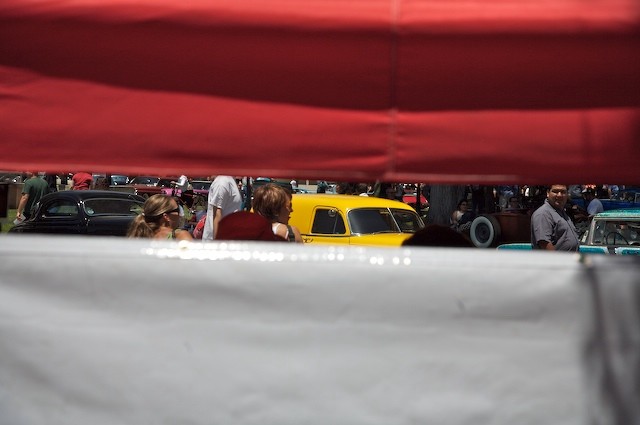

5D, 24-105mm at 70mm, ISO 250, 1/3000, f/5.6, one stop underexposed

Without the underexposure, the white sheet would have been comprehensively burned out. Here, detail is preserved.

A Wii lesson for camera makers

Simple is good – when will camera makers learn that?

After stentorian efforts to actually buy one, our experience with the Wii game console from Nintendo is nothing short of a revelation.

You open the box, plug it in, disregard the 500 warning messages to keep scum tort lawyers in their place, and play. Wave the controller about and the player on the screen moves in sync. The graphics are simple, verging on crude, the big instruction book can be disregarded and the result is insane fun!

Now I have to add that I do not play video games. Our son does, now. The above paragraph should have been written by him, except he is just five and his typing needs work. Come to think of it, he can’t read either. But just ask him if he enjoys his Wii.

Nintendo, like Apple, Thinks Different. Where Sony and Microsoft make game consoles of increasing complexity, with their sleazy back door attempt at taking control of your home computing, Nintendo focused on just a few things – ease of use, price and fun. Result? The competition is scrambling to emulate Nintendo’s wireless controller with its built in accelerometers and speakers. It will take them a year. The results won’t be pretty, thanks to Nintendo’s patents. First three month sales of the Wii exceed those of any other game console ever made. The stock has doubled in the past year. Get my drift?

So unless Nintendo or Apple decide to make a camera (I wish!), there’s a huge opening here for manufacturers looking to make a profitable entry into the market. Scrap all those silly buttons, LCD screens, largely useless zoom lenses, slow response times and poor ergonomics. Make the lens fixed. Add an optical viewfinder. Give it just one button – the one you click to snap the picture. Abolish shutter lag. So far that’s all like the Box Brownie of one hundred years ago on which, believe me here, the patents have expired. Put in a big sensor to ban image noise. Make it wireless to upload pictures to your computer. And, like the Wii, sell it for $299. Or $199. Or $99.

Happy users and profits follow. What am I missing here?

The problem with P&S cameras

Bottom line is, they all suck

Having just read another thoroughly depressing review of yet another Point & Shoot offering from a major manufacturer on the estimable DPReview.com, I have to wonder.

This one claims to be a top of the line offering. DPReview begs to differ, concluding that the camera has slow focusing and poor image sharpness, not to mention no RAW mode, a clunky interface and useless zoom range. It’s priced at some $350.

So why do these major manufacturers, and they are all guilty – Nikon, Canon, Olympus, Pentax, etc. – persist in turning out such execrable equipment?

A recent move by Canon to drop RAW from its P&S cameras may be a clue. The few of these cameras that have half decent lenses would likely embarass the costlier DSLRs from these same makers for half the price. So the consumer gets to suffer on the altar of product differentiation.

That’s a shame, so I suppose it’s little wonder that the much anticipated Sigma DP1 P&S will likely cost closer to $1000 than $300; on the other hand, you get a half decent sensor for your money. If the camera focuses fast, has low shutter lag and a decent lens – not something Sigma’s history of truly frightful lenses makes me too positive about – my $800 is waiting.

That’s if we will ever see this icon – it was last announced that the camera would be available 5 months ago.

Mirror slap in the 5D revisited

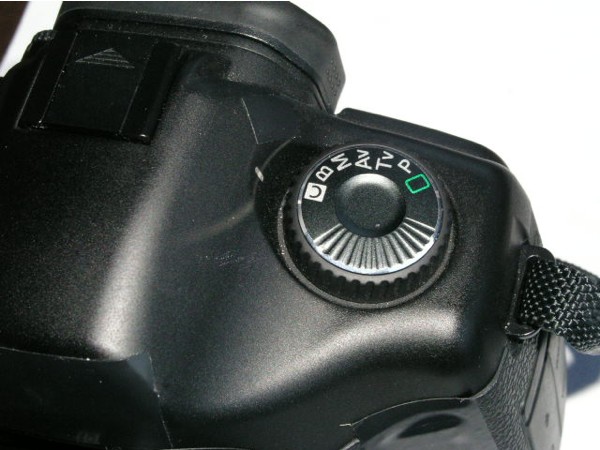
The Custom setting on the mode dial fixes things

In my little experiment to determine the seriousness of mirror slap-induced blur, I concluded that locking up the mirror before taking long exposures on a tripod made sense. Sharpness was improved – not something that would make any diffference for regular prints or web images, but clearly an improvement with big prints.

At the same time I grumbled about the difficulty of finding the right setting on the LCD panel on the rear of the 5D when it came to actually locking up the mirror, a problem compounded by the poor visibility of the LCD screen outdoors. Well, until someone comes up with a neat software fix to reprogram the little used ‘Print’ button on the back of the camera to lock up the mirror, here’s the next best thing.

Set up your camera for your preferred mode of use, go the the LCD screen and set the mirror to lock-up on the first pressure on the shutter release, using Custom Function 12. Now set the mode dial to ‘C’ (the dial to the left of the prism atop the body), go back to the LCD screen and click on ‘Register Camera Settings’. In this way, anytime you set the mode dial to ‘C’ you will have mirror lock-up available.

In my case, the preferred settings are Aperture Priority (meaning I set the camera up with the Mode Dial at ‘Av’), ISO at 250, center area average metering and the RAW file format.

So next time the camera goes on a tripod I will simply move the mode dial to ‘C’ and off we go.


The 5D’s Mode Dial set to ‘C’

Mirror slap in the Canon 5D

Does it matter

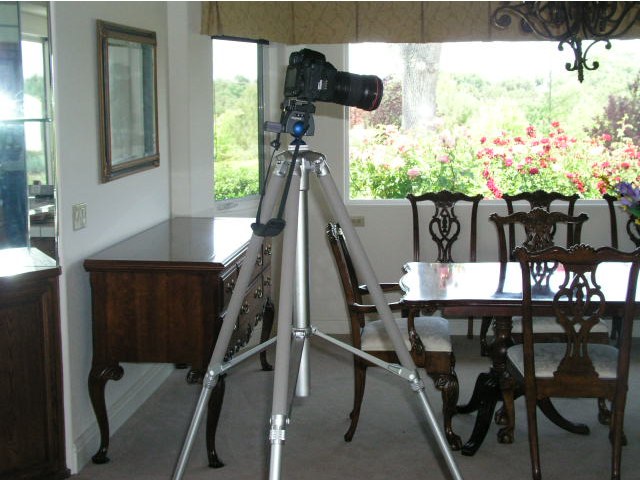
Hot on the tail of yesterday’s gripping piece extolling the virtues of camera supports, whether monopods or tripods, it ocurred to me to make one more experiment to see if the slapping rise of the mirror in the 5D has any effects at longer shutter speeds. To magnify things further, I placed the 200mm f/2.8 Canon L lens on the camera and mounted the latter on my super sturdy Linhop S168 tripod. You can see the cantilever braces between the legs and center column here – note the latter is retracted for maximum stability.

My mechanics professor would be pleased with those cantilevers and I, as a photographer, think it’s the only way to make a tripod sturdy without excessive weight. He used to lecture extensively on Euler struts and how light and strong could live together with proper design – someone at Linhof was listening. Leonhard Euler, who died in 1783, got it right first time around and his math is taught to all budding mechanical and civil engineers to this day.

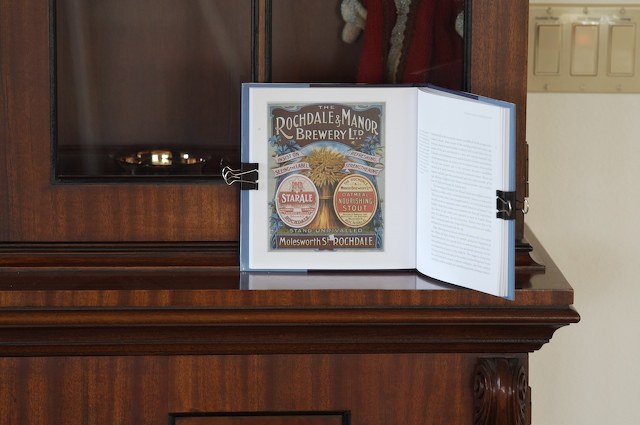
I chose a different picture in the book, just for fun, as no benefit accrues from using the same one. To take human shake out of the equation I released the shutter using Canon’s plug-in and wildly overpriced RS-80N3 wired remote control. Cable Release to you and me.

All pictures of the target were processed in Aperture.

I once more used 1/8th at f/5.6; 1/8th is very slow (like 1/2 second with a 50mm lens) but not so slow that any vibration from mirror slap becomes too low a percentage of the exposure time, if you get my drift. In other words, any camera vibration will be a significant component of the total exposure time.

Here’s the full frame snap – once focus was set I switched to manual focus to prevent any changes:

The enlargement ratio in the following snaps would yield a 40″ x 27″ print. No sharpening has been added.

Here’s the result with normal mirror operation:

While the difference is not great, the picture taken with mirror lock-up is a tad sharper – look at the contrast of the lettering.

And here’s the one with the mirror locked up using Custom Function #12 in the Canon’s menu system:

By the way, the anti-aliasing of the image in the 5D dictates that sharpening be used for best results. In the following rendition of the ‘no mirror’ snap, above, I have used Aperture’s Edge Sharpen with the variables for Intensity/Edges/Falloff at 0.70/0.22/0.57 – slightly more modest than the defaults of 0.81/0.22/0.69 suggested by Apple’s settings. As you can see, the absence of grain (at ISO 160, as before) and high resolution from the superb Canon 200mm lens makes 40″ prints from the 5D a piece of cake. You are looking at a JPG conversion from Aperture. In reality, a print from the RAW file will be sharper with no artifacts.

Maybe a ‘Medium Format is Dead’ piece is required to go along with ‘Black and White is Dead’ and ‘Film is Dead’?

Now Canon, when the 5D Mark II is released, can you please assign the mirror lock-up feature to a mechanical button, the sort humans like, rather than to a blasted choice in the myriad selection of Custom Functions on that silly little LCD screen? The fact that the latter is unreadable by landscape photographers outdoors does little to help, in addition to the insane complexity of actually finding the function.